You've got your starter bubbling away, and you're ready to embark on your first sourdough baking adventure. But before you get carried away with the anticipation of that first, perfectly crusty loaf, there's one crucial aspect you need to master: baking time.
Baking time for sourdough is a bit of a wild card. It's not a set number that you can find in a recipe and blindly follow. It's a dynamic variable, influenced by a whole host of factors, including the size and shape of your loaf, the temperature of your oven, the humidity in the air, and even the type of flour you use.
This guide will equip you with the knowledge and techniques you need to conquer sourdough baking time. We'll delve into the science behind it, explore the different stages of baking, and provide practical tips for getting your loaf just right. We'll also address some common baking issues and troubleshoot them, so you can feel confident in your sourdough journey.
(Part 1) Understanding The Basics

Before we delve into the specifics of baking times, let's get a handle on the fundamentals. Sourdough baking, while rewarding, does require a bit of understanding about the science behind it.
The Magic of Yeast and Bacteria
The heart of sourdough lies in the interplay of yeast and bacteria in your starter. These microscopic organisms work together to transform flour and water into a delicious, airy bread. The yeast, like a tiny chef, consumes the sugars in the flour, releasing carbon dioxide gas in the process. This gas gets trapped within the dough, creating those delightful air pockets that give sourdough its signature texture.
But here's the real kicker – the bacteria in your starter are not just along for the ride. They produce lactic acid and acetic acid, which give sourdough its unique tangy flavor. These acids also break down the gluten in the dough, contributing to that open, crumbly texture we adore.
Proofing: A Crucial Step
Proofing is like a crucial pause in the sourdough baking process. It's the time your dough spends resting after shaping, allowing the yeast to do its thing and create those all-important air pockets.
Proofing time is heavily influenced by the temperature of your environment. A warmer room speeds up the process, while a cooler room slows it down. The key is to learn to read your dough, to feel for its readiness, to know when it's perfectly proofed. It takes time, and it takes practice, but the reward is well worth it.
(Part 2) Factors Affecting Baking Time

So, we've established that sourdough baking time isn't a fixed number. It's a moving target, influenced by a host of variables. Here are some key factors to keep in mind:
1. Oven Temperature: The Heat Factor
The temperature of your oven plays a significant role in how quickly your bread bakes. A hotter oven will bake your bread more rapidly, while a cooler oven will require a longer baking time.
For sourdough, you generally want to bake at temperatures between 450°F (232°C) and 500°F (260°C). This high heat creates a beautiful crust and allows the bread to rise quickly in the oven.
2. Size and Shape of Loaf: The Geometry of Bread
The size and shape of your loaf will also influence baking time. A smaller loaf will bake faster than a larger one, and a loaf with a thinner shape will bake more quickly than a thick one.
Think of it like this: a thinner loaf has more surface area exposed to the heat, so it bakes faster. A thicker loaf takes longer to bake through, as the heat needs to penetrate deeper into the dough.
3. Flour Type: The Power of Protein
Different flours have different protein levels, which affect the gluten development in your dough. A flour with a higher protein content will create a stronger, more elastic dough, which will require a longer baking time.
Think about your flour like you would your ingredients in any other recipe - the right kind is essential to getting the right result. A high-protein flour will hold its shape better during baking, which means it will take a bit longer to cook through.
4. Hydration Level: The Wetness Factor
The hydration level of your dough refers to the ratio of water to flour. A higher hydration dough will be wetter and more difficult to shape, but it will also have a more open, airy crumb.
A wetter dough will take longer to bake through, as the heat needs to evaporate more moisture. You'll need to adjust your baking time accordingly. A lower hydration dough will bake faster, as there is less water to evaporate.
5. Room Temperature: The Ambient Influence
The temperature of your room can affect the rate at which your dough rises during proofing. A warmer room will lead to faster rising, while a cooler room will slow it down.
You'll find that, as a baker, you become quite sensitive to these little changes. You learn to read the dough, and to make adjustments based on the environment you're baking in. A warmer room might require a shorter proofing time, while a cooler room might require a longer proofing time.
6. Oven's internal temperature: Calibration is Key
Not all ovens are created equal. Some ovens run hotter or colder than others. This is where a good oven thermometer comes in handy.
A thermometer allows you to verify the actual temperature of your oven, ensuring that you're baking at the correct temperature for the best results. You don't want to rely on the oven's internal thermostat, as it can often be inaccurate.
7. Humidity: The Moisture Factor
The humidity in the air can also affect baking time. Higher humidity will make your dough more prone to sticking, which can lead to longer baking times.
Humidity is something you can't control, but it's something to keep in mind. If you're baking in a humid environment, you might need to adjust your baking time slightly. You might want to consider using parchment paper or a silicone baking mat to prevent sticking.
(Part 3) Mastering the Stages of Sourdough Baking

Now, let's break down the baking process into distinct stages, each requiring different attention and timing.
Stage 1: The Initial Rise (Bulk Fermentation)
This stage is about building flavor and structure. It's the time your dough spends after mixing and before shaping. You'll want to give your dough at least 8-12 hours to rise, preferably overnight, in a cool environment.
The cool environment allows for a slower rise, promoting the development of complex flavors and a more open crumb structure. Think of it as a slow dance for your yeast and bacteria, creating a symphony of deliciousness.
Stage 2: Shaping and Proofing
This is the stage where you shape your dough into your desired loaf, then let it proof until it's doubled in size. You'll want to give your dough about 2-4 hours to proof, depending on the temperature of your room and the hydration level of your dough.
This stage is all about patience. Your dough is doing its work, getting ready to rise in the oven. You'll notice the dough becoming more relaxed and airy, ready to transform into a beautiful loaf.
Stage 3: Baking: The Heat Transformation
Finally, we reach the baking stage! You'll preheat your oven to a high temperature (450°F - 500°F) and bake your loaf for about 20-30 minutes, or until the crust is golden brown and the internal temperature reaches 205°F (96°C).
This is the part that can feel a bit stressful, as you're waiting to see what your masterpiece looks like. But don't worry, you'll get the hang of it. The high heat will help to create a crisp crust and a well-risen loaf.
Stage 4: Cooling: Patience is a Virtue
Once your loaf is baked, you'll want to cool it on a wire rack for at least an hour before slicing and enjoying. This allows the bread to cool evenly and develop its signature crust.
This is the stage where you can really appreciate the results of your hard work. The smell of freshly baked sourdough is intoxicating. Take your time and let the bread cool completely before slicing. This will ensure that the bread is properly set and will prevent it from becoming gummy or dense.
(Part 4) Techniques for Monitoring Baking Time
Alright, let's get practical. Here are some techniques for monitoring your sourdough's baking progress and ensuring it bakes perfectly:
1. The Thermometer Test: Science to the Rescue
The most reliable way to determine if your bread is done is by using an instant-read thermometer. Insert the thermometer into the thickest part of the loaf, making sure not to touch the bottom of the pan. Your bread is done when the internal temperature reaches 205°F (96°C).
It's amazing how accurate a thermometer can be. I used to rely on the sound of the crust, but now I rely on the thermometer. It takes the guesswork out of baking and ensures that your bread is cooked through.
2. The Sound Test: Listening to the Loaf
As your bread bakes, you'll hear a hollow sound when you tap on the bottom of the loaf. This indicates that the bread is cooked through and the air pockets within are expanding.
It's a bit like a drum, if you think about it. You tap the crust, and you listen for that satisfyingly hollow sound. If the sound is still dull, it means that the bread needs to bake a bit longer.
3. The Visual Test: The Power of Observation
The crust of your bread should be a beautiful golden brown color, and the loaf should be slightly springy when you gently press it. The top of the bread should also be well-risen and have some nice cracking.
It's all about using your senses. You use your eyes to see the crust, your fingers to feel for its springiness, and your ears to hear that hollow sound. These visual cues can give you an indication of the bread's doneness.
4. The "Crumb Shot": Peeking Inside
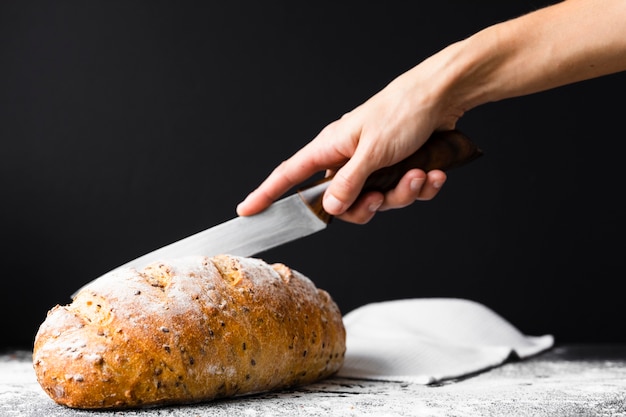
Once your bread is baked, you can take a "crumb shot" by slicing a thin piece from the center of the loaf. This will give you a good indication of the crumb structure and will help you assess if the bread has baked evenly.
Taking a crumb shot is a little ritual I do with every loaf. It's like a little peek into what's inside. A well-baked sourdough loaf will have a beautiful open crumb structure with lots of air pockets.
(Part 5) Troubleshooting Common Baking Issues
Now, let's face it - things don't always go according to plan. Even seasoned sourdough bakers experience setbacks now and then. Here are some common baking issues and how to troubleshoot them:
1. The Loaf Sinks in the Middle: The Case of the Sunken Center
This is a common problem that can be caused by a few factors:
- Over-proofing: Your dough was proofed for too long, resulting in a weak structure.
- Insufficient baking time: The bread didn't bake long enough to set the gluten and support the structure.
- Oven temperature too low: The bread didn't rise enough in the oven because the temperature wasn't hot enough. The dough wasn't able to expand properly.
Here are some tips to avoid a sunken center:
- Proof carefully: Watch your dough closely during proofing and ensure it's not over-proofed. Use the poke test – if the indent springs back slowly, it's ready to bake. If it doesn't spring back at all, it's likely over-proofed.
- Bake at a high temperature: Preheat your oven to a high temperature (450°F-500°F) and bake your loaf for the appropriate time. This will help the bread to rise quickly and develop a strong structure.
- Score deeply: Score your loaf deeply before baking, allowing for expansion and preventing a sunken center. This will help the dough to release steam and expand evenly.
2. The Crust is Too Thick: The Case of the Hard Crust
A thick, hard crust can be a bit of a bummer, especially if you prefer a softer crust. Here's what might be going on:
- Too much flour: You used too much flour during shaping, creating a thicker crust. This excess flour can create a barrier on the surface, making the crust harder.
- Oven temperature too high: A very hot oven can create a thick crust quickly.
- Baking time too long: Baking your loaf for too long can also result in a thick, hard crust. The crust will become over-baked and dry.
Here's how you can avoid this:
- Use less flour: Be gentle when shaping your loaf and avoid using too much flour. Use only enough to prevent the dough from sticking to your hands or the work surface.
- Reduce oven temperature: If you notice your crust getting too thick, you can lower the oven temperature slightly. This will help to slow down the browning process.
- Monitor baking time: Keep a close eye on your bread and adjust the baking time as needed. Check the crust for browning and the sound of the loaf to determine doneness.
3. The Loaf is Too Dense: The Case of the Tight Crumb
A dense loaf might indicate a few things:
- Under-proofing: The dough didn't rise enough during proofing, resulting in a dense crumb.
- Insufficient gluten development: The gluten in your dough wasn't developed enough, leading to a tight, dense texture.
- Over-mixing: Over-mixing your dough can develop too much gluten, resulting in a tough, dense texture. The gluten becomes overworked and tight, preventing the dough from rising properly.
Here's what you can do to avoid this:
- Proof properly: Proof your dough according to the recipe's instructions, allowing it to rise sufficiently. Make sure the dough is doubled in size and has a light, airy texture.
- Develop gluten: Use an autolyse method or knead your dough properly to develop gluten. Autolyse involves letting the flour and water sit together for a period of time, allowing the gluten to develop naturally. Kneading helps to strengthen the gluten network, creating a more elastic dough.
- Avoid over-mixing: Mix your dough until it comes together and forms a smooth ball, but don't over-mix. Over-mixing can lead to a tough, dense loaf, so be gentle with your dough.
(Part 6) Experimenting with Different Baking Times
The beauty of sourdough is that it's a truly artisanal craft. Every loaf is unique, influenced by the variables we've discussed.
Don't be afraid to experiment with baking times, to adjust based on your preferences and the specific characteristics of your loaf. You'll develop a feel for your dough, and learn to read its signals.
Over time, you'll find that your baking times become more consistent, based on your experience and your understanding of your sourdough's personality. Each sourdough starter is unique, with its own characteristics and preferences.
(Part 7) Tips for Achieving Consistent Baking Times
Consistency is key to any baking, but with sourdough, it can seem like a moving target. Here are some tips for achieving more consistent baking times:
- Use a reliable oven thermometer: Check the temperature of your oven regularly to ensure it's accurate. An accurate thermometer will help you to bake your bread at the correct temperature, leading to more consistent results.
- Use the same flour: Sticking to the same brand and type of flour will help you achieve more consistent results. Different flours can have different protein levels and hydration levels, which can affect baking times.
- Maintain a consistent room temperature: If possible, try to maintain a consistent room temperature for proofing your dough. Variations in room temperature can affect the rate of proofing, leading to inconsistent baking times.
- Keep track of your baking times: Record your baking times for each loaf so you can refer to them in the future. This will help you to establish a baseline for your baking times and make adjustments as needed.
- Practice, practice, practice: The more you bake sourdough, the better you'll become at understanding the nuances of baking time. Experience is the best teacher.
(Part 8) FAQs
Here are some frequently asked questions about sourdough baking time:
1. How long should I proof my sourdough?
Proofing time varies depending on the temperature of your room and the hydration level of your dough. Generally, you'll want to proof your dough for about 2-4 hours, or until it's doubled in size.
Use the poke test: gently press your finger into the dough. If the indent springs back slowly, it's ready to bake. If it doesn't spring back at all, it's likely over-proofed.
2. What happens if I proof my sourdough too long?
If you proof your sourdough too long, it will become over-proofed and will likely collapse during baking. You may also end up with a loaf that's too airy and lacks structure.
Over-proofing can also lead to a sour taste, as the bacteria have more time to produce acids.
3. What happens if I proof my sourdough too short?
If you proof your sourdough too short, it won't have enough time to rise properly and will likely be dense and under-baked.
The bread might not have the desired airy texture, and it might not be cooked through.
4. How can I tell if my sourdough is done baking?
You can use a thermometer to check the internal temperature of the loaf. It should reach 205°F (96°C) when it's done. You can also listen for a hollow sound when you tap on the bottom of the loaf, or look for a golden brown crust and a slightly springy texture.
Trust your senses, and don't be afraid to experiment. Each loaf is unique, and you'll learn to recognize the signs of doneness.
5. What should I do if my sourdough isn't done baking?
If your sourdough isn't done baking, simply continue baking it for a few more minutes. Check the internal temperature every few minutes to ensure it reaches 205°F (96°C).
If you're worried about the crust becoming too dark, you can cover the bread with foil for the remainder of the baking time.
Remember, baking sourdough is a journey. It's a process of learning, experimenting, and refining your techniques. Don't get discouraged if your first loaf isn't perfect. Keep practicing, keep exploring, and you'll become a master sourdough baker in no time.
Everyone is watching

Perfect Rice Every Time: The Ultimate Guide to Cooking Rice
Cooking TipsAs a self-proclaimed foodie, I've always been a bit obsessed with rice. It's the foundation of countless cuisi...

Ultimate Guide to Cooking the Perfect Thanksgiving Turkey
Cooking TipsThanksgiving. Just the word conjures up images of overflowing tables laden with delicious food, the scent of r...

The Ultimate Guide to Cooking Asparagus: Tips, Techniques, and Recipes
Cooking TipsAsparagus. The mere mention of this spring delicacy conjures up images of vibrant green spears, crisp and burs...

Can You Cook Spaghetti with Gasoline? (The Shocking Truth)
Cooking TipsWe've all seen those crazy internet trends. You know, the ones that make you wonder, "Did someone actually try...

Chorizo and Eggs Recipe: The Ultimate Guide
Cooking TipsRight, let’s talk about chorizo and eggs. You know, that classic Spanish dish that's always a winner. It's th...
