There's something magical about smoked neck bones. The smoky aroma that fills the air as they cook is intoxicating, and the tender, fall-off-the-bone meat is a true delight. But let's be honest, smoking neck bones can seem intimidating, especially if you're new to the world of barbecue. There are so many different techniques, rubs, and sauces, and it all feels a bit overwhelming. Don't worry though, because I'm here to break it all down for you. I've spent countless hours perfecting my smoking methods, and I'm excited to share my knowledge and passion with you.
Over the years, I've tried just about every smoking method imaginable, from the classic Southern slow-smoking technique to more experimental approaches. I've learned from seasoned pitmasters and experimented with different woods and rubs, always striving for that perfect combination of smoky flavor and tender, juicy meat. Through trial and error, I've developed a foolproof recipe that consistently delivers amazing results, and I can't wait to share it with you.
So, grab your apron, fire up your smoker, and let's embark on this culinary adventure together. We'll cover everything from choosing the perfect neck bones to creating a mouthwatering rub and finishing with a delicious sauce. We'll explore different smoking methods, including charcoal, gas, electric, and pellet smokers. We'll address common mistakes to help you avoid disappointment, and I'll give you tips and tricks to ensure your neck bones turn out perfect every time. Get ready to elevate your barbecue game and become the master of smoked neck bones!
(Part 1) Choosing the Perfect Neck Bones

The Anatomy of a Neck Bone
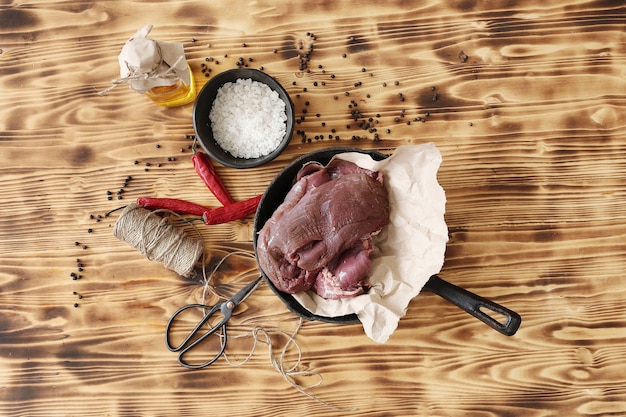
Before we dive into the smoking process, let's talk about the star of the show: the neck bone. Neck bones, also known as "neck bones" or "spareribs," come from the underside of the pig's neck. They're typically cut into 2-3 inch pieces, and what makes them so special is the abundance of cartilage and connective tissue. This tissue breaks down during smoking, yielding a rich, gelatinous broth that adds an incredible depth of flavor and tenderness to the meat.
Choosing Quality Neck Bones
When selecting neck bones, fresh is best. Look for bones that have a pale pink to reddish hue. Avoid any that have a grayish or discolored appearance, as this can indicate that they're not as fresh. The bones should feel firm and springy, not slimy or mushy. If you're buying your neck bones from a butcher, don't be afraid to ask about their source and how long they've been in the shop.
Understanding Different Cuts
You'll often find different cuts of meat labeled as "neck bones." It's important to understand the differences to ensure you're getting what you want. Here's a quick rundown:
- Neck Bones: These are the actual bones from the neck. They're generally considered the most tender and flavorful, offering a good balance of lean and fatty meat.
- Spareribs: These are cut from the belly of the pig and contain more bone and less meat than neck bones. They can be delicious when smoked but require a longer cooking time due to the increased amount of bone.
- pork shoulder: This is a larger cut that includes the shoulder blade and collar bone. It's incredibly versatile and can be used for pulled pork, smoked in chunks, or even braised for a flavorful meal.
If you're unsure about the specific cut you're buying, don't hesitate to ask your butcher. They're experts and can help you choose the perfect cut for your needs and preferences.
(Part 2) Preparing the Neck Bones
Trimming and Cleaning
Once you've got your neck bones, it's time to give them a little TLC. First, rinse them thoroughly under cold running water to remove any debris or loose particles. Next, use a sharp knife or kitchen shears to trim off any excess fat or cartilage. You can leave a thin layer of fat for added flavor, but avoid large chunks of fat, as they can render excessively during smoking, making the meat greasy.
Salting the Bones
Salting the neck bones before smoking is a crucial step that enhances their flavor and tenderness. This process, known as "dry brining," draws out moisture from the meat, creating a more flavorful and juicy result. Simply sprinkle a generous amount of salt evenly over all sides of the neck bones and let them sit uncovered in the refrigerator for 2-4 hours. The longer you salt them, the more tender they'll become. The salt also helps to season the meat and create a beautiful bark on the outside during smoking.
Making the dry rub
Now it's time to create a dry rub that will transform your neck bones into a taste sensation. The key to a good rub is a balance of sweet, salty, and savory flavors. Here's a basic recipe that you can customize to your liking:
| Ingredient | Quantity |
|---|---|
| Brown Sugar | 2 tablespoons |
| Paprika | 2 tablespoons |
| Garlic Powder | 1 tablespoon |
| Onion Powder | 1 tablespoon |
| Black Pepper | 1 tablespoon |
| Chili Powder (optional) | 1 teaspoon |
| Cayenne Pepper (optional) | 1/2 teaspoon |
To make the rub, simply combine all the ingredients in a small bowl and stir until well blended. You can adjust the quantities of each ingredient to your taste. For a spicier rub, add more chili powder or cayenne pepper. For a sweeter rub, add more brown sugar. You can also experiment with other spices like cumin, smoked paprika, or even a touch of ginger for a more complex flavor profile.
Rubbing the Bones
After salting the neck bones, remove them from the refrigerator and pat them dry with paper towels. This ensures that the rub adheres properly. Apply a generous amount of dry rub to all sides of the bones, making sure to coat them evenly. Gently massage the rub into the meat so it adheres properly. Remember to rub between the bones and into any crevices, as these areas are often overlooked. You can leave the rubbed bones uncovered in the refrigerator for another 30-60 minutes to let the flavors meld and the rub to penetrate the meat.
(Part 3) Choosing a Smoker
The type of smoker you choose will significantly impact your smoking experience. There are many different types available, each with its own advantages and disadvantages. Here's a guide to help you choose the best smoker for your needs:
charcoal smokers
Charcoal smokers are the quintessential barbecue smoker. They're known for their traditional smoky flavor and versatility. Typically made of metal, they have a water pan below the cooking grate to help regulate temperature and add moisture. Charcoal smokers are relatively inexpensive, but they require a bit more hands-on experience to maintain a consistent temperature. You'll need to add charcoal throughout the smoking process and carefully manage the vents to control the heat and airflow.
Gas Smokers
Gas smokers offer a more convenient and controlled smoking experience. They use propane or natural gas to generate heat, which can be easily adjusted with knobs or dials. Gas smokers often have multiple burners and side shelves for additional cooking space. They're generally easier to maintain than charcoal smokers, but some may argue that they lack the authentic smoky flavor of charcoal. However, newer gas smokers are becoming more sophisticated, allowing you to add wood chips to infuse a smoky flavor.
electric smokers
Electric smokers are the most convenient option, requiring no charcoal or propane. They're typically smaller and more compact, making them ideal for smaller kitchens or patios. Electric smokers often have digital temperature controls and timers, making them incredibly user-friendly. However, they may not produce as much smoke or intense flavor as charcoal or gas smokers. The smoke produced by electric smokers is also often less dense and less flavorful.
Pellet Smokers
Pellet smokers are a newer addition to the smoking scene, quickly gaining popularity. They use wood pellets to generate heat and smoke, offering a consistent and controlled smoking experience. Pellet smokers are known for their versatility and ease of use. They typically have digital temperature controls and automatic feed systems, eliminating the need to constantly monitor the temperature and add pellets. They also offer a wide range of wood pellet flavors, allowing you to experiment with different smoke profiles.
(Part 4) Setting Up Your Smoker
Preheating the Smoker
Once you've chosen your smoker, it's time to preheat it. This is an essential step to ensure that the smoker reaches the desired temperature before adding the neck bones. Preheat your smoker to your desired smoking temperature, which typically ranges from 225°F to 250°F (107°C to 121°C). Allow the smoker to reach the desired temperature before adding the neck bones. The preheating time will vary depending on the type of smoker you're using.
Adding Wood Chips
For that irresistible smoky flavor, add wood chips to your smoker. The type of wood chips you choose will impact the flavor of your neck bones. For a mild smoke, use apple, cherry, or pecan. For a more robust smoke, use hickory, oak, or mesquite. You can even mix different woods to create your own unique blend. Soak the wood chips in water for at least 30 minutes before adding them to your smoker. This will help them smolder evenly and produce a steady stream of smoke. The amount of wood chips you'll need will depend on the size of your smoker and the duration of the cook. Start with a small handful and add more as needed throughout the smoking process.
Positioning the Neck Bones
Once your smoker is preheated and the wood chips are smoldering, carefully place the neck bones in the smoker. Don't overcrowd the cooking grate, as this can impede airflow and affect the cooking process. Leave a small space between each bone to ensure even cooking. If necessary, you can use a meat thermometer to monitor the temperature of the neck bones throughout the smoking process. Remember, smoking is a slow and steady process, so be patient and enjoy the aroma of the smoky goodness filling the air.
(Part 5) Smoking the Neck Bones
Maintaining the Temperature
Maintaining a consistent temperature is crucial for achieving tender, flavorful neck bones. Use a meat thermometer to monitor the temperature of your smoker throughout the cooking process. Adjust the heat source as needed to maintain a temperature between 225°F and 250°F (107°C to 121°C). Keep in mind that the temperature will fluctuate slightly, but try to avoid large swings in temperature, which can result in uneven cooking. Consistent temperature is key to breaking down the connective tissue in the neck bones, resulting in tender and juicy meat.
Adding Smoke
To enhance the smoky flavor of your neck bones, continue to add wood chips to your smoker as needed. The amount of smoke will vary depending on the type of smoker you're using and the wood you're burning. For a lighter smoke, add a small handful of wood chips every 30-60 minutes. For a heavier smoke, add more wood chips or use a smoker that produces more smoke. Keep in mind that the more smoke you add, the more intense the smoky flavor will be.
Monitoring the Neck Bones
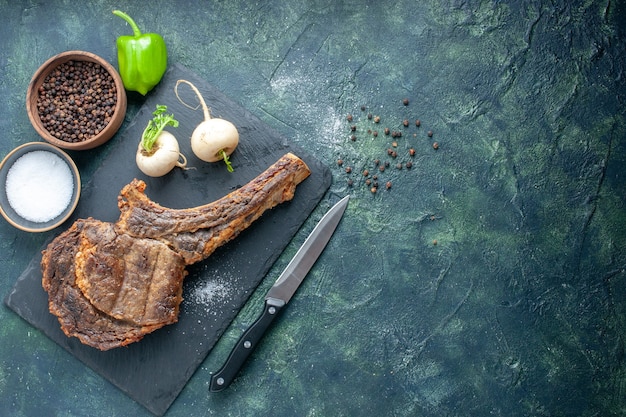
Keep a close eye on the neck bones as they smoke. They should gradually turn a deep mahogany brown, and the fat should render down to a crispy texture. Resist the urge to open the smoker door frequently, as this can cause a drop in temperature and affect the cooking process. You can typically monitor the progress of the neck bones through the smoker's window or by using a meat thermometer. The aroma of the smoking neck bones is a good indicator of how the cooking is progressing.
(Part 6) Checking for Doneness
The "Pull Back" Test
One of the best ways to check for doneness is by using the "pull back" test. Gently pull back on a piece of meat near the bone. If the meat easily pulls back, revealing tender, juicy flesh, the neck bones are done. This test is a great way to assess the tenderness of the meat. If the meat doesn't pull back easily, the neck bones need more time to cook.
The "Fork Tender" Test
Another common method for checking for doneness is the "fork tender" test. Insert a fork into a piece of meat. If the fork slides in easily and the meat falls off the bone, the neck bones are done. This test is particularly useful for checking the tenderness of the meat, which is essential for achieving the desired melt-in-your-mouth texture.
Using a Meat Thermometer
For a more precise measurement of doneness, use a meat thermometer. The neck bones are done when they reach an internal temperature of 190°F (88°C). This ensures that the meat is cooked through and safe to eat. Using a meat thermometer is especially important if you're new to smoking, as it can help you avoid overcooking or undercooking the neck bones.
(Part 7) Making the Sauce
Choosing the Right Sauce
Once the neck bones are cooked, it's time to add a delicious sauce that will elevate the flavor to new heights. There are countless sauce recipes available, ranging from classic barbecue sauces to more creative blends. Choose a sauce that complements the smoky flavor of the neck bones and your personal taste preferences. A classic barbecue sauce with a blend of sweet, smoky, and tangy flavors is a popular choice. However, you can also experiment with sauces that have a spicy kick or a more subtle flavor profile. You can even create your own sauce by combining different ingredients to achieve the perfect balance of flavors.
Applying the Sauce
To apply the sauce, you can use a brush or a baster. Start by applying a thin layer of sauce to the neck bones about 30 minutes before the end of the cooking time. This will give the sauce time to caramelize and develop a rich, glossy finish. You can continue to baste the neck bones with sauce as needed throughout the remaining cooking time. The sauce will help to keep the neck bones moist and add a burst of flavor.
(Part 8) Serving the Neck Bones
Adding side dishes
Smoked neck bones are a versatile dish that can be enjoyed with a variety of side dishes. Classic pairings include mashed potatoes, collard greens, cornbread, and macaroni and cheese. These side dishes complement the smoky flavor of the neck bones and create a complete and satisfying meal. You can also get creative with other side dishes like potato salad, baked beans, or fruit salad. Let your imagination run wild and create a meal that suits your taste buds.
Enjoy!
Once the neck bones are cooked and the sauce is applied, it's time to enjoy your culinary creation! Serve the neck bones hot and fresh, and don't forget to ladle some of the delicious broth over them. The tender, flavorful meat, the smoky aroma, and the rich broth will make for a truly satisfying meal. So, gather your friends and family, pour yourself a glass of your favorite beverage, and enjoy the fruits of your labor.
FAQs
Q1: What is the best way to store leftover smoked neck bones?
Store leftover smoked neck bones in an airtight container in the refrigerator for up to 3 days. You can reheat them in the oven or microwave. For a more flavorful reheating experience, try simmering the neck bones in the broth they were cooked in. The broth will help to keep the meat moist and flavorful.
Q2: Can I freeze smoked neck bones?
Yes, you can freeze smoked neck bones for up to 3 months. Wrap them tightly in plastic wrap or aluminum foil and place them in a freezer-safe bag. When ready to use, thaw the neck bones in the refrigerator overnight or in a cold water bath. Frozen neck bones can be reheated in the oven, microwave, or slow cooker. They may not be as tender as fresh-cooked neck bones, but they can still be a delicious and convenient meal.
Q3: What are some tips for keeping the smoke consistent?
To keep the smoke consistent, make sure you're using enough wood chips and that the wood chips are soaking properly. Also, avoid opening the smoker door too often, as this can cause a drop in temperature and affect the smoking process. Finally, make sure the smoker is properly ventilated to allow for optimal airflow. Consistent smoke is essential for developing that deep, rich smoky flavor.
Q4: What happens if the neck bones are overcooked?
Overcooked neck bones will become dry and tough. If the neck bones are starting to dry out, you can try wrapping them in foil with a little bit of broth or water to help retain moisture. However, it's best to avoid overcooking the neck bones altogether by monitoring the cooking process closely and using the "pull back" or "fork tender" test to check for doneness. If you're unsure, err on the side of caution and undercook them slightly. You can always cook them a little longer if they need it.
Q5: What if I don't have a smoker?
If you don't have a smoker, you can still enjoy delicious, flavorful neck bones. You can roast them in the oven or slow cook them in a crock pot. For the oven method, preheat the oven to 325°F (163°C), place the neck bones on a baking sheet, and roast for 3-4 hours, or until tender. For the slow cooker method, combine the neck bones with a little bit of broth or water in the slow cooker and cook on low for 6-8 hours, or until tender. While these methods won't produce the same smoky flavor as smoking, they will still result in tender, flavorful neck bones. You can also add a few drops of liquid smoke to the cooking liquid to enhance the smoky flavor.
Everyone is watching

Prime Rib Roast Cooking Time Chart: Per Pound Guide
Cooking TipsPrime rib roast. Just the name conjures images of lavish dinners, crackling fires, and hearty laughter. It’s ...

How Long to Bake Potatoes in the Oven (Perfect Every Time)
Cooking TipsBaked potatoes are a staple in my kitchen. They're incredibly versatile, delicious, and surprisingly easy to m...

Perfect Rice Every Time: The Ultimate Guide to Cooking Rice
Cooking TipsAs a self-proclaimed foodie, I've always been a bit obsessed with rice. It's the foundation of countless cuisi...

The Ultimate Guide to Cooking Asparagus: Tips, Techniques, and Recipes
Cooking TipsAsparagus. The mere mention of this spring delicacy conjures up images of vibrant green spears, crisp and burs...

Ultimate Guide to Cooking the Perfect Thanksgiving Turkey
Cooking TipsThanksgiving. Just the word conjures up images of overflowing tables laden with delicious food, the scent of r...