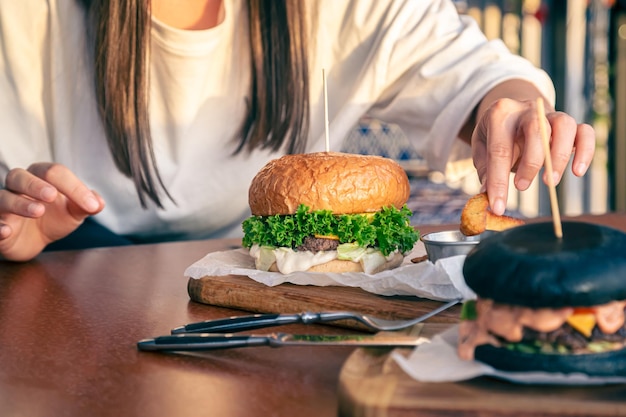
Let's talk smash burgers – those glorious, crispy, juicy beauties that have taken the culinary world by storm. I'm a bit of a burger fanatic myself, and countless hours have been dedicated to perfecting my smash burger technique. And let me tell you, it's all about that cooking time. Get it right, and you'll have a burger that'll have you licking your plate clean. Get it wrong, and you'll be left with something that's a bit of a letdown.
So, buckle up, because we're about to delve into the world of smash burger cooking times. We'll cover everything from the basics of smash cooking to the different factors that influence cook time. And of course, we'll be sharing tips and tricks to help you create the perfect smash burger at home.
(Part 1) The Smashing Process: Unveiling the Art of the Perfect Patty

Before we dive into the nitty-gritty of cooking times, let's talk about the smashing process itself. It's not just about throwing a patty on the griddle and calling it a day. There's a bit of an art to it, and believe me, it makes all the difference.
Smashing 101: Technique is Key
First things first, you need a good griddle or cast iron pan. And you need it hot, like really hot – think 450°F (232°C). This high heat is essential for achieving that perfect sear, that crispy crust that elevates the entire smash burger experience. Now, about the patty. You can use pre-made patties, but I find that making them yourself gives you more control over the ingredients and flavor. A mixture of beef chuck and brisket is a classic choice, or you can even add a little bit of bacon fat for extra flavor. Personally, I prefer to use a 4 oz patty, but it's all about personal preference.
The Smash: Transforming a Patty into a Burger Sensation
Now, here's the fun part: the smashing. You want to use a sturdy metal spatula, ideally with a flat surface, to press the patty down firmly. The goal is to create a thin, even patty with a large surface area. This is what will give you that crispy exterior and juicy interior. Don't worry about the patty sticking, the hot griddle will ensure it releases easily.
Think of it like this: you're not just cooking a patty, you're transforming it into a burger sensation. This process is what creates the magic that makes a smash burger so special.
The Crust: Where Flavor and Texture Collide
The smashing creates a lovely, crispy crust on the outside of the patty. This isn't just about aesthetics; it's a symphony of flavors and textures. The crispy crust adds a satisfying crunch that contrasts beautifully with the juicy, tender interior. It's this interplay between the crispy exterior and the juicy interior that makes a smash burger so unique.
(Part 2) Cooking Time: The Golden Rule and Its Nuances

Now, we're getting to the heart of the matter: the cooking time. I've found that the golden rule for smash burgers is to cook them for 2-3 minutes per side. This might seem like a short time, but trust me, it's all you need. Remember, we're dealing with thin patties, so they cook quickly.
Factors Affecting Cook Time: Mastering the Variables
However, there are a few factors that can affect this golden rule. Let's talk about them.
1. Griddle Temperature: The Power of Heat
The temperature of your griddle will play a big role. A hotter griddle will result in a faster cook time. If your griddle isn't hot enough, the patties will take longer to cook and might end up soggy. Always strive for that blazing hot griddle. It's the key to achieving the perfect sear and preventing a soggy patty.
2. Patty Thickness: Adjusting for Size
The thickness of your patty will also influence cooking time. Thicker patties will naturally take a bit longer to cook through. Always be mindful of the patty thickness, and adjust the cooking time accordingly.
3. Doneness Preference: Your Personal Touch
Your preferred level of doneness will also affect the cooking time. If you like your burger well done, you'll need to cook it for a little longer. But remember, the goal is to avoid overcooking, which can result in a dry, tough patty. Don't be afraid to experiment with different levels of doneness to find what you prefer.
4. Patty Size: Scaling Up or Down
The size of your patty will also influence the cooking time. Larger patties will take a bit longer to cook through. Adjust your cooking time based on the size of your patty.
(Part 3) Signs of a Perfectly Cooked Smash Burger: Spotting the Clues

So how do you know when your smash burger is ready? Here are a few tell-tale signs:
1. Patty Firmness: A Test of Doneness
When you press the patty with your spatula, it should be firm to the touch. This means it's cooked through and ready to be flipped. This firmness is a sign that the patty is no longer raw and is ready to be enjoyed.
2. Crispy Edges: A Hallmark of Perfection
The edges of the patty should be beautifully crispy and browned. This is a sign that the sear is perfect and the patty has cooked evenly. This crispy edge is what sets a smash burger apart, offering that delightful contrast in texture.
3. Patty Release: A Sign of Even Cooking
As the patty cooks, it will start to pull away from the griddle. This is a good sign that it’s releasing easily and not sticking. This is a sign of even cooking and indicates that the patty is ready to be flipped.
4. internal temperature: Ensuring Safety
While a meat thermometer isn't strictly necessary, if you're unsure, you can use one to make sure your patty has reached an internal temperature of 160°F (71°C) for safe consumption. This ensures that the patty is cooked through and safe to eat.
(Part 4) The Rest and Recovery: Allowing the Burger to Settle In
Now, once you've cooked your smash burger, don't just throw it on a bun and call it a day. It needs a little time to rest and recover. This will allow the juices to redistribute throughout the patty, resulting in a more tender and juicy burger.
The Importance of Resting: Releasing the Juices
Just like a good steak, a smash burger needs to rest for about 5-10 minutes before you assemble it. This allows the juices to settle back in, making the patty juicier and more flavorful. This resting period is crucial for enhancing the overall texture and flavor of your burger.
The Importance of Recovery: Letting the Burger Cool
You've worked hard to create that perfect smash burger, and now it's time to let it recover. This means letting it cool down slightly before you add any toppings. If you add toppings too soon, the patty will steam and become soggy. Let the burger cool down slightly to prevent it from steaming and becoming soggy when you add toppings.
(Part 5) Toppings: The Finishing Touches that Define Your Burger
Now, the fun part: the toppings. This is where you can really get creative and personalize your smash burger.
The Classics: Tried and True Favorites
There are some classic smash burger toppings that are always a good idea:
- Cheddar Cheese: A melted slice of cheddar cheese is a must-have for any smash burger. It adds a rich, creamy element that complements the savory patty beautifully.
- Lettuce and Tomato: For a fresh and crunchy bite, add some lettuce and tomato. These fresh ingredients provide a delightful contrast to the richness of the patty.
- Pickles: A tangy pickle adds a delightful contrast to the richness of the patty. The tangy flavor of the pickles cuts through the richness of the patty, creating a more balanced flavor profile.
- Onion: Sliced or caramelized onions bring a sweetness that complements the patty. The sweetness of the onions adds another layer of complexity to the flavor profile.
Beyond the Classics: Embracing Creativity
Of course, you can always get creative with your toppings:
- Bacon: For an extra dose of flavor and crunch, add some crispy bacon. The crispy bacon adds a savory, smoky element to the burger.
- Avocado: A ripe avocado adds creaminess and healthy fats. The creamy avocado adds a touch of luxury and healthy fats to the burger.
- Mushrooms: Sautéed mushrooms add a savory and earthy element. The savory and earthy mushrooms add a depth of flavor that elevates the burger.
- Spicy Mayo: A spicy mayo sauce adds a kick of heat. The spicy mayo adds a touch of heat and complexity to the burger.
(Part 6) The Art of the Bun: The Foundation of Your Burger Masterpiece
Okay, so you've got the perfect smash patty, your toppings are ready, but what about the bun? This isn't just any old burger bun, this is the foundation of your masterpiece.
Choosing the Right Bun: Finding the Perfect Base
The bun is an important part of the smash burger experience. You want a bun that's soft and fluffy, but also sturdy enough to hold the juicy patty and toppings. I personally prefer brioche buns. They’re soft, buttery, and slightly sweet, which complements the savory patty perfectly. The bun should enhance, not detract from, the overall burger experience.
Toasting is Key: Adding Crunch and Texture
Toasting the bun is crucial. It adds a nice crispness and helps to absorb any excess juices from the patty. I use a little bit of butter or olive oil to toast my buns, but you can also use mayo or even a bit of the patty’s rendered fat. Toasting the bun elevates the overall texture and helps prevent a soggy burger.
Assembling Your Burger: Bringing It All Together
Now that you've got your perfectly cooked patty and toasted bun, it's time to assemble your burger. Here's how I do it:
1. Place the patty on the bottom bun.
2. Add your toppings. I start with the cheese, followed by the lettuce, tomato, onion, and pickles.
3. Place the top bun on top.
(Part 7) Troubleshooting Common Smash Burger Mistakes: Avoiding the Pitfalls
Alright, so you've gone through all the steps, but your smash burger isn't quite turning out the way you envisioned. Don't worry, we've all been there. Here are some common smash burger mistakes and how to fix them:
1. Soggy Patty: The Heat Is On
The patty is soggy and not crispy. This usually happens when the griddle isn’t hot enough. The patty doesn’t sear properly, resulting in a soggy patty.
Solution:
Get that griddle screaming hot. Make sure it’s at least 450°F (232°C) before you start smashing.
2. Burned Patty: Finding the Balance
The patty is burnt on the outside and raw on the inside. This can happen if you’re cooking it over too high a heat or if you’re not flipping it often enough.
Solution:
Lower the heat slightly or flip the patty more often. Remember, we’re aiming for a 2-3-minute cook time per side.
3. Dry Patty: A Case of Overcooking
The patty is dry and tough. This is usually a sign of overcooking.
Solution:
Cook the patty for a shorter amount of time or use a meat thermometer to ensure it doesn’t reach an internal temperature of more than 160°F (71°C).
(Part 8) Smash burger variations: Beyond the Basic
Let’s face it, a smash burger is a pretty versatile thing. You can create all sorts of variations, from different patties to unique toppings. Here are a few ideas to get you started:
1. The Cheeseburger: A Classic Reimagined
The classic cheeseburger is a must-try for any smash burger enthusiast. Use a blend of beef chuck and brisket, smash it flat, and top it with a slice of cheddar cheese.
2. The Bacon Cheeseburger: A Decadent Treat
For a more decadent burger, add some crispy bacon to your cheeseburger. The smoky, savory bacon adds a layer of richness and indulgence.
3. The Mushroom and Swiss Burger: Earthy and Savory
For a more earthy and savory burger, top your patty with sautéed mushrooms and a slice of Swiss cheese. The earthy mushrooms and nutty Swiss cheese create a unique flavor combination.
4. The Spicy Burger: A Kick of Heat
For a burger with a kick, add some jalape??os, sriracha mayo, or a spicy chili sauce. The spicy toppings add a touch of heat and excitement.
5. The Veggie Burger: A Vegetarian Delight
For a vegetarian option, use a veggie patty made from black beans, quinoa, or lentils. Top it with your favorite veggie toppings. The veggie patty offers a meat-free alternative that is just as satisfying.
(Part 9) Smash Burgers: The Perfect Weekend Meal
Smash burgers aren’t just for special occasions. They’re perfect for a casual weekend meal. In fact, they’re one of my go-to meals for a lazy Sunday afternoon.
Simplicity is Key: Effortless Enjoyment
The beauty of smash burgers is their simplicity. They don't require a lot of fancy ingredients or techniques. You can throw them together in a matter of minutes.
Perfect for Sharing: A Social Gathering
Smash burgers are also perfect for sharing with friends and family. It's a fun and interactive way to enjoy a meal together.
Easy to Customize: Everyone's perfect burger
And of course, smash burgers are easy to customize. Everyone can create their own perfect burger with their favorite toppings.
(Part 10) FAQs: Answering Your Burning Questions
Now, you’ve got all the smash burger know-how. But just in case you have any lingering questions, let’s tackle some FAQs.
1. Can I use ground turkey or chicken for smash burgers?
Absolutely! Smash burgers are a versatile creation. You can certainly use ground turkey or chicken for a lighter, leaner option. Just remember to adjust the cooking time, as these meats cook faster than beef.
2. What’s the best way to store leftover smash burgers?
To keep your leftover smash burgers fresh and flavorful, store them in an airtight container in the refrigerator for up to 3 days.
3. Can I freeze smash burgers?
Yes, you can freeze smash burgers. To freeze them, wrap them individually in plastic wrap or aluminum foil, then place them in a freezer-safe bag. You can freeze them for up to 3 months.
4. Is it okay to use pre-made burger patties?
Of course! Pre-made burger patties can be a convenient option for busy weeknights. But if you have the time, making your own patties from scratch gives you more control over the ingredients and flavor.
5. What are some good side dishes for smash burgers?
Smash burgers pair well with a variety of side dishes, including fries, onion rings, coleslaw, potato salad, or even a simple green salad.
Everyone is watching

Perfect Rice Every Time: The Ultimate Guide to Cooking Rice
Cooking TipsAs a self-proclaimed foodie, I've always been a bit obsessed with rice. It's the foundation of countless cuisi...

Prime Rib Roast Cooking Time Chart: Per Pound Guide
Cooking TipsPrime rib roast. Just the name conjures images of lavish dinners, crackling fires, and hearty laughter. It’s ...

The Ultimate Guide to Cooking Asparagus: Tips, Techniques, and Recipes
Cooking TipsAsparagus. The mere mention of this spring delicacy conjures up images of vibrant green spears, crisp and burs...

Ultimate Guide to Cooking the Perfect Thanksgiving Turkey
Cooking TipsThanksgiving. Just the word conjures up images of overflowing tables laden with delicious food, the scent of r...

How Long to Bake Potatoes in the Oven (Perfect Every Time)
Cooking TipsBaked potatoes are a staple in my kitchen. They're incredibly versatile, delicious, and surprisingly easy to m...
