There's something incredibly satisfying about a perfectly cooked roast. But let's be honest, we've all had those moments where the roast comes out a bit dry, maybe even a little tough. That's the beauty of a sirloin tip roast, though - it's a forgiving cut, perfect for a beginner. It's lean and cooks relatively quickly, but with the right technique, you can achieve juicy, tender perfection. And today, I'm sharing my tried-and-tested method for a perfect 2lb sirloin tip roast, guaranteed to impress even the most discerning dinner guest.
(Part 1) Understanding the Beast: A Deep Dive into Sirloin Tip Roast
First things first, let's talk about the sirloin tip roast itself. It's a cut of meat that comes from the bottom sirloin, which is a smaller muscle that's used less by the animal. This makes it leaner and, as a result, tends to be more tender than other cuts. Now, while this makes it a popular choice for roasts, that leanness also means it's prone to drying out if you're not careful.
The Unique Qualities of Sirloin Tip Roast
The beauty of sirloin tip roast lies in its versatility. It's perfect for a variety of cooking methods, from roasting and grilling to slow-cooking and even stir-frying. However, we'll be focusing on roasting today, as it's the classic way to bring out the best in this cut. It's also a great option for meal prep, as leftovers can be easily sliced and used for sandwiches, salads, or even a delicious shepherd's pie.
Why 2lb?
A 2lb roast is the perfect size for a family meal. It's generous enough to serve 4-6 people, with plenty of leftovers for those tasty lunchtime sandwiches. It's also a manageable size for a beginner, allowing you to learn the ropes of roast cooking without being overwhelmed.
(Part 2) Setting the Stage: Gathering Your Tools and Ingredients
Before we dive into the cooking, let's gather our tools and ingredients. Think of it as preparing the stage for a culinary masterpiece.
The Essential Arsenal:
- Sharp knife: A good, sharp knife is essential for trimming any excess fat and making neat, little slits for the seasoning. We'll be making friends with this knife throughout the whole process.
- Cutting board: A sturdy cutting board will protect your counter and ensure a clean workspace for prepping the roast.
- roasting pan: You'll want a roasting pan with a lid, to allow the roast to bathe in its own juices. We're aiming for that moist, tender roast.
- meat thermometer: This is crucial for knowing when your roast is perfectly cooked. It's the only way to guarantee a juicy, flavorful result.
- Wire rack: A wire rack is ideal for lifting the roast out of the pan and allowing it to rest. This helps retain the moisture and ensures a more even cooking process.
The Flavorful Lineup:
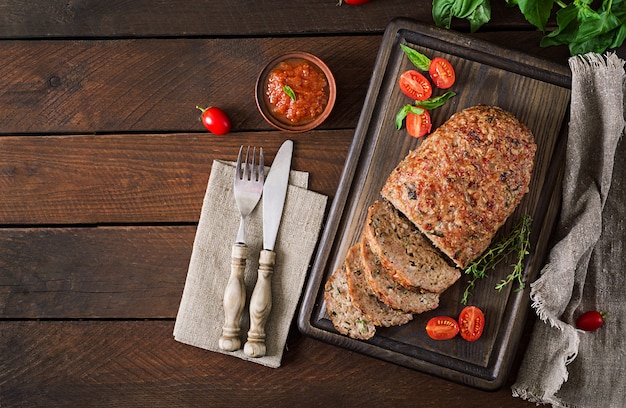
- 2lb sirloin tip roast: The star of the show.
- Olive oil: This will help your roast get that nice, crispy golden brown on the outside. It's a flavor enhancer and makes for a more visually appealing roast.
- Salt and pepper: Classic seasoning. You can never go wrong with the classics.
- Garlic powder: It adds a lovely depth of flavor. Garlic is a true hero in the culinary world.
- Onion powder: Another flavor boost, goes great with garlic. A winning combination.
- Paprika: For a touch of color and a bit of a smoky flavor. A subtle but effective touch.
- Dried thyme: A classic herb for roasts. It adds a beautiful earthy flavour and pairs perfectly with the sirloin tip roast.
- Onions, carrots, and celery: We'll be creating a bed of these veggies in the bottom of the roasting pan. Not only do they add a touch of sweetness and earthiness to the roast, but they also help to create a nice, moist environment for cooking.
(Part 3) Preparing the Roast: Unveiling the Flavors
Now, here comes the fun part. This is where we transform our humble sirloin tip roast into a flavor-packed culinary masterpiece.
Trimming and Seasoning:
First, we'll be trimming any excess fat. Now, don't go overboard. A little bit of fat is actually good, but we want a nice clean surface for our seasoning to adhere to. Pat the roast dry with paper towels. This helps the seasoning to adhere better and promotes a nice golden brown crust.
Now for the fun part: seasoning. You can use a store-bought rub, but I find that making my own is a great way to personalize the flavor profile. It's just a simple mix of salt, pepper, garlic powder, onion powder, paprika, and dried thyme. Now, rub it all over the roast, making sure to get into all those nooks and crannies. Let the seasoning sit on the roast for at least 30 minutes, allowing the flavors to really penetrate the meat.
Creating a Bed of Flavor:
Now, let's create a bed of vegetables in the bottom of the roasting pan. This not only adds flavor to the roasting juices but also helps to create a moist environment for cooking. Chop up some onions, carrots, and celery into roughly 1-inch pieces. Arrange these veggies in the bottom of the roasting pan, forming a base for our roast.
(Part 4) The Grand Entrance: The Roast's Journey to Perfection
The moment you've been waiting for - the grand entrance of our star into the oven. Now, the key to a successful roast is patience and precision.
Preheat and Roasting:
Preheat your oven to 350°F (175°C). Give the oven a good 15-20 minutes to reach the right temperature. This will ensure even cooking. Now, carefully place your roasting pan with the roast and vegetables in the oven.
Here's where the magic happens. The general rule of thumb for cooking time is 15-20 minutes per pound. However, for a lean cut like sirloin tip, it's best to use a meat thermometer. It's going to be your trusty guide, telling you when the roast is perfectly done.
Resting is Key:
Once your roast reaches an internal temperature of 145°F (63°C) for medium-rare, it's time to take it out of the oven. But we're not done yet. Now comes a crucial step – resting. Let the roast rest for at least 15 minutes before carving. This allows the juices to redistribute, making for a much more tender and juicy roast.
(Part 5) Checking for Doneness: A Thermometer's Insight
It's not just about how long you cook the roast, it's also about the internal temperature. And that's where our trusty meat thermometer comes in. It's a vital tool in achieving the perfect roast.
Internal Temperature Guide:
Here's a handy guide for different levels of doneness, but remember, everyone has their own preference.
| Doneness Level | Internal Temperature (°F) | Description |
|---|---|---|
| Rare | 125-130 | The center of the meat will be red and cool to the touch. |
| Medium Rare | 130-135 | The center of the meat will be pink and slightly warm. |
| Medium | 140-145 | The center of the meat will be mostly brown, but still slightly pink. |
| Medium Well | 150-155 | The center of the meat will be mostly brown, with just a hint of pink. |
| Well Done | 160 | The center of the meat will be completely brown and firm to the touch. |
Using the Meat Thermometer:
Now, when you're checking the temperature, make sure to insert the thermometer into the thickest part of the roast. Avoid hitting any bones. The thermometer should be inserted horizontally and left in place for about 30 seconds to get an accurate reading.
(Part 6) The Finishing Touches: Elevating Your Masterpiece
Your roast is done, now it's time to give it that final touch. We've got a beautifully cooked roast, but we want to make it truly shine.
Carving and Serving:
Give the roast a few minutes to rest, then you're ready to carve it. Use a sharp knife, carving against the grain of the meat. This will help make the meat tender and easy to chew.
Serve it up with your favourite sides. Roasted vegetables, mashed potatoes, or a nice salad all complement the roast perfectly.
Gravy: A Flavorful Accent
Don't forget the gravy! The pan juices from the roast are a perfect base for a delicious gravy. Here's a simple method:
- Remove the roast from the pan and set aside to rest.
- Pour the pan juices into a fat separator or a saucepan.
- Skim off any excess fat from the top of the pan juices.
- Add a tablespoon of butter or oil to the saucepan.
- Add a tablespoon of flour to the pan and whisk constantly over medium heat for a minute or two.
- Slowly whisk in the pan juices, bringing the mixture to a simmer.
- Add a splash of water or broth, if needed, to thin the gravy to your desired consistency.
- Season with salt and pepper to taste.
- Simmer for a few minutes to thicken the gravy.
Pour the gravy over your carved roast and serve with your favourite sides.
(Part 7) Tips for Success: Avoiding Common Pitfalls
We've all had those roast moments where we've learned a valuable lesson. But fear not, I'm sharing some of my hard-earned wisdom to help you avoid those pitfalls.
Overcooking:
Sirloin tip roast is a lean cut, so it can easily dry out if you overcook it. Trust your meat thermometer, and take the roast out when it reaches your desired temperature. If you're unsure, it's always better to err on the side of undercooked, as you can always pop it back in the oven for a few more minutes.
Not Letting it Rest:
Resting the roast is essential. It allows the juices to redistribute, making for a much more tender and juicy roast. Don't skip this step!
Ignoring the Veggies:
Those vegetables in the bottom of the roasting pan are not just for show. They add flavor and moisture to the roast. Don't forget to add them.
Under-seasoning:
Don't be afraid to season generously. Salt and pepper are essential, but you can also experiment with other herbs and spices to add depth and complexity.
Skipping the Fat Trimming:
While some fat is good, too much can make the roast greasy and can lead to uneven cooking. Trimming the excess fat ensures a more even browning and a crispier exterior.
(Part 8) Beyond the Recipe: Experimentation and Innovation
Now, I'm all for sticking to the basics, but that doesn't mean you can't get creative.
Spice It Up:
Experiment with different seasonings. You can add other herbs like rosemary, sage, or oregano. You can even try a blend of different spices like cumin, coriander, or chili powder.
Go for a Glaze:
Add a glaze during the last 30 minutes of cooking. This adds a beautiful shine and a burst of flavour to your roast. You can try a honey glaze, a mustard glaze, or even a balsamic glaze.
Elevate the Sides:
Get creative with your sides. Instead of traditional mashed potatoes, try roasted sweet potatoes with a drizzle of maple syrup. Instead of green beans, try asparagus roasted with garlic and lemon.
Embrace Leftovers:
Leftover roast is a treat in itself. You can use it for sandwiches, salads, or even a hearty soup.
FAQs:
1. What if I don’t have a meat thermometer?
While I highly recommend using a meat thermometer, if you don’t have one, you can use the "finger test." Press the center of the roast. If it feels firm but gives slightly, it's likely medium-rare. If it feels firmer, it's likely medium. But, I can’t stress enough how important a meat thermometer is for accurate results.
2. Can I use a different size roast?
Yes, you can certainly use a different size roast. Just adjust the cooking time accordingly. For a larger roast, you'll need to cook it for longer. You can always use the meat thermometer to check for doneness.
3. Can I use frozen sirloin tip roast?
It's not ideal, but you can use a frozen roast. Just make sure it's completely thawed before you start cooking. You might need to increase the cooking time by a few minutes to ensure it's cooked through.
4. What if the roast is dry?
If your roast is a bit dry, you can try adding a little bit of broth or water to the roasting pan during the last 30 minutes of cooking. This will help add moisture back to the roast.
5. What are some good side dishes to serve with sirloin tip roast?
There are tons of great side dishes that pair well with sirloin tip roast. Some of my favourites include roasted vegetables, mashed potatoes, green beans, and a simple salad. You can also serve it with a delicious gravy made from the pan juices.
So there you have it, my friends. A 2lb sirloin tip roast that’s guaranteed to impress. It's not just about the recipe; it's about the love and care you put into cooking. So enjoy the process, and happy roasting!
Everyone is watching

Prime Rib Roast Cooking Time Chart: Per Pound Guide
Cooking TipsPrime rib roast. Just the name conjures images of lavish dinners, crackling fires, and hearty laughter. It’s ...

How Long to Bake Potatoes in the Oven (Perfect Every Time)
Cooking TipsBaked potatoes are a staple in my kitchen. They're incredibly versatile, delicious, and surprisingly easy to m...

Perfect Rice Every Time: The Ultimate Guide to Cooking Rice
Cooking TipsAs a self-proclaimed foodie, I've always been a bit obsessed with rice. It's the foundation of countless cuisi...

The Ultimate Guide to Cooking Asparagus: Tips, Techniques, and Recipes
Cooking TipsAsparagus. The mere mention of this spring delicacy conjures up images of vibrant green spears, crisp and burs...

Ultimate Guide to Cooking the Perfect Thanksgiving Turkey
Cooking TipsThanksgiving. Just the word conjures up images of overflowing tables laden with delicious food, the scent of r...