Ah, roast beef. The quintessential centerpiece of a Sunday dinner, a classic for a reason, isn't it? Just picture it: a beautifully browned, succulent joint, sitting proudly at the centre of the table, ready to be carved and devoured. It’s a dish that evokes memories of family gatherings, hearty laughter, and the warm feeling of home.
But let’s be honest, nailing a perfect roast beef isn’t always easy. I remember my first attempt. I was a teenager, eager to impress my mates with my culinary skills (let's just say, they weren't exactly Michelin-star worthy). The result? Well, let's just say it wasn't exactly the tender, juicy masterpiece I'd hoped for. But it taught me a valuable lesson: patience, timing, and a bit of know-how are key to crafting a truly delicious roast.
This guide is my attempt to share everything I've learned about mastering the art of roast beef, from choosing the perfect cut to mastering the carving, and everything in between. I’ll delve into the science behind getting that perfect, even cook, and give you my top tips for making sure your roast beef is a triumph, not a disaster. So grab your carving knife, sharpen your culinary skills, and let's get started!
(Part 1) Choosing Your Weapon: The Cut of Beef

The Foundation of Flavor
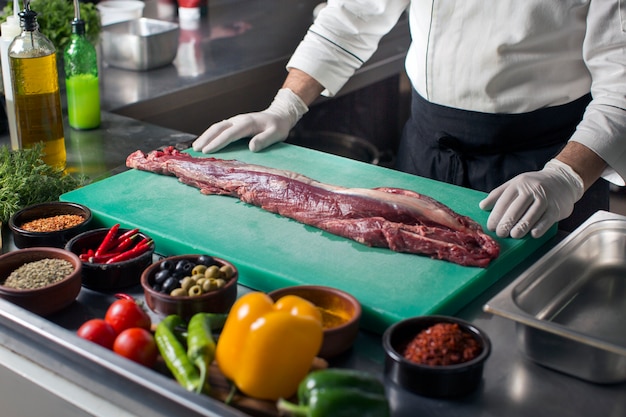
The first step in crafting a great roast beef is choosing the right cut of meat. It’s not a one-size-fits-all situation. Some cuts are simply better suited to roasting than others, and they’ll determine the final texture and flavor of your dish. You’re looking for a piece with a good amount of marbling – those little streaks of fat that keep the meat moist and flavorful.
Let’s take a closer look at some of my favourite cuts for roasting:
The Classics
rib roast: This is the classic choice for a reason. It's got fantastic flavour, good marbling, and it’s ideal for carving into thick slices, perfect for a satisfying bite. It’s typically taken from the rib section, often referred to as “prime rib,” and is known for its rich, buttery flavour.
sirloin roast: This is a leaner cut, so it might be a bit drier than the rib roast. However, it's still very tasty and a great option if you're looking for a more budget-friendly choice. It's often considered a bit more delicate in flavor than rib roast, but still offers a good deal of satisfaction.
Alternatives
Topside Roast: This cut comes from the top of the hind leg, making it a leaner cut that's great for producing thin slices. It's ideal for serving with gravy and Yorkshire pudding, classic British comfort food, you know! It’s a bit more economical than rib roast, but with proper preparation, it can be just as delicious.
chuck roast: This tough cut, taken from the shoulder, can be incredibly flavorful if cooked properly. It’s best for slower cooking methods, like braising, to make it tender. This is a more budget-friendly option, but it’ll require a bit more time and effort to achieve that melt-in-your-mouth tenderness.
Beef Grades: A Deeper Dive
The grade of your beef can have a significant impact on the final taste and texture. The grade is a measure of quality, based on factors like marbling and age.
Prime: This is the highest grade, with the most marbling. It's the most tender and flavorful beef you can get. prime beef is a real treat, offering an unparalleled level of tenderness and a rich, complex flavour.
Choice: This is a good quality grade, with a good balance of marbling and tenderness. choice beef is a good middle ground, offering decent marbling and a solid flavour profile without the hefty price tag of prime.
Select: This is the leanest grade, with the least marbling. It's still good quality, but it can be a bit drier than the other grades. Select beef is a more economical choice, but you might need to consider additional techniques to keep it moist during cooking.
Buying Your Beef: Fresh or Frozen?
I’m a firm believer in fresh meat, but frozen beef can be a convenient option, especially for those who don’t have the luxury of a butcher shop nearby. If you're going the frozen route, make sure to defrost the beef thoroughly in the fridge before cooking. Never defrost at room temperature – that's a recipe for bacteria growth. It's best to plan ahead and give your beef ample time to thaw in the fridge, as this ensures even thawing and minimizes the risk of foodborne illnesses.
(Part 2) Seasoning Like a Pro: Unveiling the Flavor

Okay, you’ve got your chosen cut of beef. Now it’s time to give it some love with some seasoning. This is where you can really bring your roast to life and make it truly your own.
The Basics: Salt and Pepper
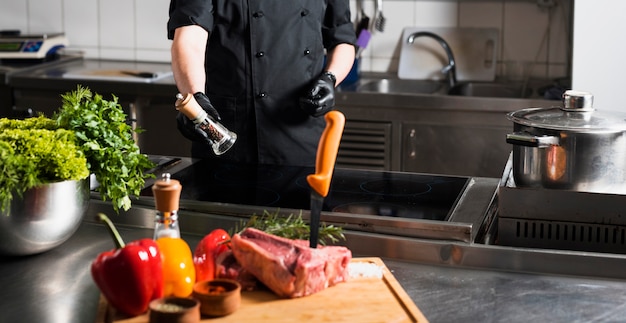
Let's be honest, you can’t go wrong with good ol’ salt and pepper. It’s the foundation for all flavour, adding depth and enhancing the natural sweetness of the beef. I like to use coarse sea salt and freshly ground black pepper, as they provide a more nuanced flavour and texture than finer varieties.
Spice It Up: Herbs and More
Now, don't be afraid to get creative. This is where you can add your personal touch to the roast. I love using a mixture of fresh rosemary and thyme for a classic flavour profile, but you could also go for something a bit bolder, like a blend of paprika, cumin, and chilli flakes.
The Magic of Herbs
Let’s explore some of my favourite herbs for roast beef in more detail:
Rosemary: This aromatic herb adds a fragrant depth of flavour, bringing a warm, almost woodsy note to the roast.
Thyme: This subtle herb adds a slightly earthy aroma that pairs beautifully with beef. Its flavour is delicate, but it complements the roast’s richness without overwhelming it.
Oregano: This versatile herb provides a warm, slightly spicy flavour, adding a comforting touch to the roast.
Sage: This strong, distinctive herb has a complex flavour profile that complements beef perfectly, lending a slightly earthy and peppery note.
A Little Fat Helps
And here’s a little secret: Rubbing a bit of butter or olive oil on the beef before seasoning helps to seal in the moisture and add a beautiful, rich flavour. The fat acts as a barrier, preventing the moisture from escaping during cooking and helping to create a crispy, flavorful crust.
(Part 3) The Art of Roasting: A Step-by-Step Guide

Right, the anticipation is building, and you’re ready to roast! Let’s walk through the steps to achieving a beautifully cooked roast beef.
Pre-heating Your Oven: Setting the Stage
Before you even think about putting the beef in the oven, make sure you pre-heat it to the right temperature. I usually pre-heat my oven to about 450°F (230°C) for the first 15-20 minutes to get a nice sear on the surface of the beef. After that, I lower the temperature to about 325°F (160°C) to ensure even cooking. This two-step process allows you to create a delicious crust while ensuring that the interior of the roast cooks evenly without drying out.
Searing: The Secret to a Crispy Crust
Searing the beef before roasting is essential. It creates a beautifully caramelized crust and seals in the juices, adding a layer of flavor and texture that’s simply irresistible. I like to sear the beef in a hot pan with a bit of oil, making sure to brown all sides. You can also use a grill pan for this step, which can create those lovely grill marks that elevate the visual appeal of the roast.
roasting time: A Matter of Weight and Preference
The roasting time depends on the size of the roast and how well-done you want it. As a general rule, you’ll need about 15-20 minutes per pound of beef for a medium-rare roast. But remember, everyone has their own preference. I like my roast medium-rare, but if you prefer it more well-done, you’ll need to cook it for a bit longer.
The Thermometer Tells The Tale: The Key to Perfection
Here’s the secret weapon for achieving the perfect roast: a meat thermometer. It's a game-changer. You want to cook the beef to an internal temperature of 135°F (57°C) for medium-rare, 145°F (63°C) for medium, and 160°F (71°C) for well-done. Don't overcook it. You'll end up with a tough, dry roast, and nobody wants that.
Resting: The Key to Juicy Perfection
Once the roast is cooked, don't be tempted to carve it right away. Let it rest for about 15-20 minutes before carving. This allows the juices to redistribute throughout the meat, making it incredibly tender and juicy. The juices will reabsorb into the meat, resulting in a more flavorful and succulent final product.
(Part 4) Carving Like a Pro: The Final Touch
Now that your roast is perfectly cooked and rested, it's time to show off your carving skills.
The Tools of The Trade
You'll need a good carving knife, preferably one with a long, serrated blade. It should be sharp, but not so sharp that it slices through the meat too easily. A carving fork is also a handy tool for holding the roast steady while you carve.
The Technique
Start by carving the roast against the grain. This means slicing the meat perpendicular to the muscle fibres. This will help to make the slices tender and easy to chew. It's like cutting a piece of bread: you cut against the grain for the best texture.
Thin Slices: A Matter of Presentation
I like to carve my roast into thin slices, about 1/4 inch thick. This makes it easier to serve and allows guests to enjoy the full flavour of the meat.
Carving Tips:
Start at the thickest end: It's easier to carve slices from the thickest part of the roast, working your way towards the thinner end. This helps ensure you get consistent slices throughout the entire roast.
Cut with a sawing motion: Don't press down on the knife. Use a gentle sawing motion to slice through the meat. This prevents tearing or shredding the meat.
Be patient: It's not a race. Take your time and enjoy the process.
(Part 5) Gravy: The Perfect Accompaniment
Roast beef is just not the same without a good gravy. It adds richness and depth of flavour, making the entire meal feel complete.
Making a Basic Gravy: Simple and Delicious
You can make a simple gravy from the pan juices, capturing the essence of the roast in a delightful sauce. Here's what you need to do:
1. Deglaze the pan: After you've removed the roast, pour off any excess fat from the roasting pan. Then, add a cup or two of broth or water to the pan and scrape up all the delicious bits stuck to the bottom. This is what gives your gravy flavour.
2. Thicken the gravy: Bring the pan juices to a boil and whisk in a few tablespoons of cornstarch or flour mixed with a little bit of water. Simmer until the gravy thickens.
3. Season to taste: Add salt and pepper to taste.
The Flavour Factor: Adding Complexity
For an extra flavour boost, try adding a teaspoon of red wine vinegar, a sprig of rosemary, or a pinch of thyme to the gravy while it’s simmering. It’s a simple step, but it adds complexity and richness to the gravy, creating a truly delightful accompaniment.
(Part 6) The Perfect roast beef sides: Rounding Out the Meal
Roast beef deserves some fantastic accompaniments. Here are a few of my favourites:
Yorkshire Pudding: A British Classic
Of course, it's got to be Yorkshire pudding. It's a fluffy, golden-brown pudding, traditionally made from batter and cooked in the pan drippings from the roast beef. It’s a perfect pairing for roast beef, absorbing the gravy and adding a delightful textural contrast.
Roasted Vegetables: A Rainbow of Flavour
Roasted vegetables are a simple and delicious side dish for roast beef. I love roasting a mix of root vegetables like carrots, potatoes, and parsnips. They’ll get beautifully caramelized and have a lovely roasted flavour, adding a sweet and savory complement to the richness of the roast.
green beans: A Classic Side
Green beans are a simple and versatile side dish that goes well with roast beef. I like to steam them or roast them with a little bit of salt and pepper. They provide a refreshing contrast to the richness of the roast.
potato gratin: Creamy and Delicious
If you want to add a touch of elegance to your meal, try a potato gratin. It’s a creamy, cheesy potato dish that's both comforting and indulgent, adding a luxurious element to your roast beef dinner.
Salad: A Light and Refreshing Contrast
A fresh salad adds a light and refreshing element to the meal. Try a mixed green salad with a vinaigrette dressing, or a simple tomato and cucumber salad.
(Part 7) Leftovers: The Best Part?
Let’s be honest, the best part of a roast beef is the leftovers. They’re just as delicious the next day, even more so.
Beef Sandwiches: A Classic
Use the leftover roast beef to make delicious sandwiches. I love a classic roast beef sandwich with horseradish sauce and mustard. You can also add cheese, lettuce, and tomato, for a flavorful and satisfying meal.
Beef Hash: A Hearty Meal
Chop up the leftover roast beef and fry it with potatoes and onions for a hearty and comforting meal. You can also add in other vegetables like carrots, celery, or green peppers, creating a flavorful and textured dish.
Beef Soup: A Warm and Comforting Option
Use the leftover roast beef to make a hearty beef soup. You can add in vegetables like carrots, potatoes, and onions. Add in some barley or noodles to make it even more filling, providing a warm and satisfying meal.
(Part 8) FAQs: Your Roast Beef Questions Answered
1. How Long Does Roast Beef Last in the Fridge?
Roast beef will last in the fridge for 3-4 days. Keep it wrapped tightly in plastic wrap or foil.
2. Can I Freeze Roast Beef?
You can freeze roast beef for up to 3 months. Wrap it tightly in plastic wrap and foil, then place it in a freezer bag. Thaw the roast beef in the fridge overnight before cooking.
3. How Can I Make My Roast Beef More Tender?
To make your roast beef extra tender, try cooking it at a lower temperature for a longer period of time. You can also use a meat tenderizer to break down the tough muscle fibres.
4. What Are the Best Ways to Serve Roast Beef?
Roast beef is delicious served hot, but it’s also fantastic cold. It can be sliced thinly and served on sandwiches, salads, or in wraps, adding a protein punch and a delicious flavour to various dishes.
5. What Wines Pair Well With Roast Beef?
Roast beef goes well with a variety of wines, including Cabernet Sauvignon, Merlot, Zinfandel, and Shiraz. These wines have a good balance of tannins and fruit flavours that complement the rich flavour of the beef.
(Part 9) Conclusion: A Roast Beef Journey
So there you have it, my ultimate guide to creating a perfect roast beef. It’s a journey, a process, but it’s worth it. From choosing the right cut of beef to mastering the carving techniques, there are so many nuances that can make the difference between a good roast and a truly incredible one. Remember, it’s not just about the recipe, it’s about the love and care you put into it. So next time you’re feeling adventurous in the kitchen, give this a go. You might just surprise yourself! Now go on, get your carving knife ready, and have a go! Let me know how you get on!
Everyone is watching

Prime Rib Roast Cooking Time Chart: Per Pound Guide
Cooking TipsPrime rib roast. Just the name conjures images of lavish dinners, crackling fires, and hearty laughter. It’s ...

How Long to Bake Potatoes in the Oven (Perfect Every Time)
Cooking TipsBaked potatoes are a staple in my kitchen. They're incredibly versatile, delicious, and surprisingly easy to m...

Perfect Rice Every Time: The Ultimate Guide to Cooking Rice
Cooking TipsAs a self-proclaimed foodie, I've always been a bit obsessed with rice. It's the foundation of countless cuisi...

The Ultimate Guide to Cooking Asparagus: Tips, Techniques, and Recipes
Cooking TipsAsparagus. The mere mention of this spring delicacy conjures up images of vibrant green spears, crisp and burs...

Ultimate Guide to Cooking the Perfect Thanksgiving Turkey
Cooking TipsThanksgiving. Just the word conjures up images of overflowing tables laden with delicious food, the scent of r...
