There's something undeniably satisfying about a perfectly cooked roast beef. It's the heart of a Sunday roast, the star of a celebratory dinner, and the ultimate comfort food. But achieving that perfect level of doneness, that sweet spot between juicy and pink, can feel like a culinary tightrope walk. For years, I struggled with inconsistent results, ending up with dry, overcooked meat or, worse, raw centers. It wasn't until I really dove into the science and art of roast beef cooking that I finally cracked the code. And believe me, it's a game-changer.
This article is a culmination of my roast beef journey, a guide that will empower you to confidently serve up a delicious and impressive roast every time. We'll explore everything from choosing the right cut to understanding different cooking methods, mastering the art of temperature checking, and even tackling those pesky FAQs. So, grab your favorite apron, let's get cooking!
(Part 1) Choosing the Right Cut: A Beefy Adventure Begins
The first step to a phenomenal roast beef is choosing the right cut. This is the foundation of your culinary masterpiece, so it's important to select wisely. Each cut has its own unique characteristics, influencing the final flavor, tenderness, and even the cooking time.
Top Sirloin: A Reliable Classic
Think of top sirloin as the dependable friend you always rely on. It's a classic choice that offers a good balance of flavor and tenderness. It's a lean cut, so it's best to cook it to medium or medium-well to prevent dryness. You can expect a flavorful roast with a slightly firmer texture, perfect for carving into even slices.
Tenderloin (filet mignon): Indulge in Tenderness
If you're seeking an ultimate indulgence, the tenderloin, also known as filet mignon, is your best bet. It's the most tender cut, boasting a delicate texture that melts in your mouth. However, it's also a lean cut, so it's crucial to cook it to medium-rare or rare to avoid dryness. Be prepared, though, this is typically the most expensive option.
rib roast (standing rib roast): A Show-Stopping Choice
For those who like to make a grand statement, the rib roast is the perfect choice. It's a large, impressive cut with beautiful marbling, contributing to a rich, flavorful roast. The bone-in nature adds a unique dimension to the flavor, while also promoting even cooking. Imagine the impressive presentation as you carve it at the table, a true showstopper!
chuck roast: A budget-friendly Gem
If you're looking for a budget-friendly option, chuck roast is your friend. It's a tougher cut, requiring longer cooking times, but with slow roasting or braising, it transforms into a tender and flavorful dish. Embrace the challenge, as it offers a more intense, beefy flavor that will please the most discerning palates.
tri-tip roast: An Uncommon Treat
This cut might be less familiar, but it deserves a place on your culinary radar. Tri-tip roast is a triangular-shaped cut with a flavorful, lean profile. It's a favorite for grilling, but it also makes a delicious roast with a slightly chewy texture, a wonderful contrast to the tender cuts.
(Part 2) Preparing Your Roast Beef: The Art of Seasoning and Crusting
Now that you've chosen your cut, it's time to prepare it for its starring role. This stage is about enhancing the natural flavors and creating a beautiful crust that will make your roast irresistible.
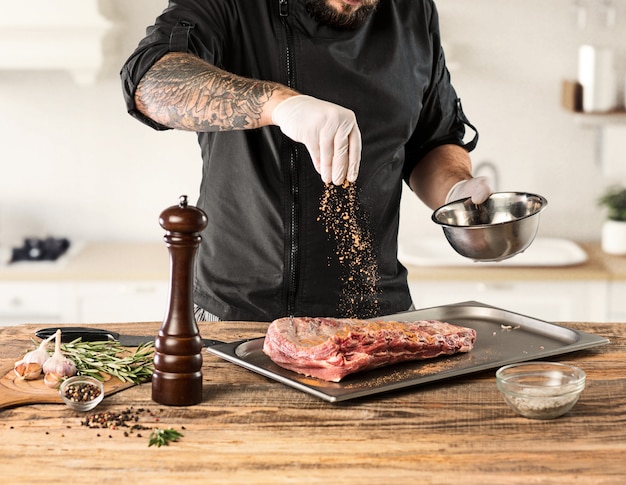
Seasoning with Savour: A Symphony of Flavors
Salt and pepper are the quintessential duo, the foundation of any good seasoning. But don't stop there! Get creative and experiment with other flavors to create a unique roast.
- Garlic powder: Adds a pungent, earthy aroma and flavor.
- Onion powder: Provides a subtle sweetness and savory depth.
- Dried herbs: Rosemary, thyme, and oregano are classic choices that complement the beef beautifully.
- Paprika: Adds a touch of sweetness and a vibrant color.
- A sprinkle of brown sugar: Offers a hint of sweetness that balances the savory flavors.
Remember, seasoning is a personal preference, so feel free to customize your blend to your liking.
Building a Crust: A Delightful Crunch
A crispy crust is more than just a visual delight. It acts like a protective layer, sealing in the juices and creating a delicious, textural contrast. Here are some methods to achieve that coveted crust:
- Dry Brining: This method involves rubbing the roast generously with salt and letting it sit uncovered in the fridge for several hours, ideally overnight. The salt draws out moisture, creating a slightly drier surface, then reabsorbs it, resulting in a flavorful crust. It's a simple, yet effective, technique that maximizes flavor.
- Searing: A hot pan or grill is your weapon of choice here. Searing the roast on all sides at high heat creates a beautiful, caramelized crust that locks in the juices and enhances the flavor.
- Roasting with Herbs and Vegetables: Place the roast on a bed of herbs and vegetables for added flavor and a crispy crust. The vegetables absorb the drippings, creating a delicious sauce, while the herbs infuse the roast with their fragrant aromas.
(Part 3) Cooking Methods: Choosing Your Weapon
Now that your roast is prepped, it's time to choose your cooking method. There are several options, each with its own advantages, allowing you to tailor the cooking process to your preferences and desired outcome.
oven roasting: The Classic Approach
This is the most common and reliable method, allowing for consistent results and ease of use. The key to oven roasting is to start with a high temperature, then lower it for the rest of the cooking process. Here's the breakdown:
- Preheat your oven: Set your oven to a high temperature, around 450°F (230°C), to create that beautiful crust.
- Sear the roast: If you haven't already, sear the roast on all sides in a hot pan or grill before transferring it to the oven.
- Start high, then lower: Place the roast in the preheated oven and cook for 15 minutes to create a crispy crust. Then, reduce the temperature to 325°F (160°C) and continue cooking until the roast reaches the desired internal temperature.
This method is simple, yet effective, and allows for a balance of crispy crust and juicy interior.
Slow Roasting: Time for Tenderness
Imagine a roast so tender it practically melts in your mouth. That's the magic of slow roasting. It involves cooking the roast at a lower temperature for a longer period, allowing the connective tissues to break down, resulting in melt-in-your-mouth tenderness. It's especially effective for tougher cuts, transforming them into a culinary delight.
- Low and Slow: Preheat your oven to a low temperature, around 250°F (120°C).
- Patience is key: Place the roast in the oven and cook for several hours, checking the internal temperature regularly. Cooking times will vary depending on the size and type of roast.
- Rest and Revel: Once the roast reaches the desired internal temperature, let it rest for at least 30 minutes before carving. This allows the juices to redistribute, resulting in an incredibly tender and flavorful roast.
Slow roasting is a testament to the power of patience, and the results are well worth the wait.
reverse searing: A Two-Step Approach
Reverse searing is a popular method for steak, but it also works wonders for roast beef. It combines the benefits of low-and-slow cooking with the deliciousness of a crispy crust.
- Low and Slow: Cook the roast at a low temperature, around 250°F (120°C), until it reaches the desired internal temperature. This ensures even cooking throughout.
- Searing Finale: Once the roast is cooked through, sear it on all sides in a hot pan or grill to achieve a beautiful, crispy crust.
Reverse searing gives you complete control over the doneness of the meat, while ensuring a satisfyingly crispy crust.
Sous Vide: Precision Cooking for Perfection
If you're looking for the ultimate precision in cooking, sous vide is your answer. This method involves sealing the roast in a vacuum bag and immersing it in a water bath set to a precise temperature for a specific time. The result is incredibly tender and evenly cooked meat, with no risk of overcooking.
- Vacuum Seal: Season the roast and place it in a vacuum bag.
- Water Bath Precision: Fill a large pot with water and set the temperature to the desired internal temperature for your roast.
- Immersion and Patience: Submerge the vacuum-sealed roast in the water bath and cook for the recommended time.
- Searing for Flavor: Once cooked, remove the roast from the water bath and sear it in a hot pan or grill to create a crispy crust.
Sous vide is a powerful tool for achieving consistent results, and the precision control makes it perfect for those who want to master the art of roast beef cooking.
(Part 4) Temperature Guide: The Key to Perfect Doneness
The key to achieving perfect roast beef lies in hitting the right internal temperature. This ensures that your roast is cooked to your desired level of doneness, from a juicy rare to a well-done masterpiece.
| Doneness | Internal Temperature (°F) | Internal Temperature (°C) | Description |
|---|---|---|---|
| Rare | 125-130°F | 52-54°C | Center is cool, red, and very soft. |
| Medium-Rare | 130-135°F | 54-57°C | Center is warm, pink, and tender. |
| Medium | 140-145°F | 60-63°C | Center is warm, slightly pink, and firm. |
| Medium-Well | 150-155°F | 65-68°C | Center is warm, a hint of pink, and firmer. |
| Well Done | 160°F and above | 71°C and above | Center is hot, brown, and firm. |
Note: These temperatures are general guidelines, but it's always a good practice to consult the USDA's recommendations for safe cooking temperatures. Different cuts of meat might also require slightly different temperatures.
Understanding the internal temperature is essential, as it helps you monitor the progress of your roast and avoid overcooking or undercooking.
(Part 5) Checking the Temperature: Mastering the Tools
To ensure your roast reaches the perfect internal temperature, you need the right tools. This isn't about gadgets; it's about precision and accuracy. A meat thermometer is an absolute must-have for any serious cook.
Instant-Read Thermometer: Speed and Accuracy
This type of thermometer provides quick and accurate readings within seconds. Simply insert it into the thickest part of the roast, avoiding any bones, and you'll have an immediate reading. It's perfect for checking the internal temperature throughout the cooking process, ensuring you're on track for perfect doneness.
Leave-In Thermometer: Constant Monitoring
Leave-in thermometers are inserted into the roast and left in place during cooking. They provide continuous monitoring and an audible alarm when the desired temperature is reached. This takes the guesswork out of cooking and allows you to focus on other tasks, knowing you'll be alerted when your roast is ready.
Choose the thermometer that best suits your cooking style and preferences, but remember, the key is to use one and monitor the internal temperature closely to achieve perfection.
(Part 6) Resting: Letting It Relax
Once your roast reaches the desired internal temperature, it's time for a crucial step that many overlook: resting. This allows the juices to redistribute throughout the meat, resulting in a more tender and flavorful roast. Think of it as a final act of culinary generosity, rewarding your patience with enhanced flavor and texture.
Wrap the roast loosely in foil and place it in a warm place to rest for at least 15-20 minutes, preferably 30 minutes. Don't let it cool down completely, as this can make it less tender. The goal is to allow the juices to settle back into the meat, resulting in a juicy and flavorful slice.
(Part 7) Carving: The Final Touch
After resting, it's time to reveal your masterpiece, to unleash the aromas and flavors you've patiently cultivated. This is where a sharp carving knife comes in handy, allowing you to slice through the roast with precision and finesse.
Here's how to carve a roast beef like a pro:
- Slice Against the Grain: This ensures tender, manageable slices. Identify the direction of the muscle fibers (grain) and slice perpendicular to it.
- Work in Sections: Carve the roast in sections, starting with the larger, thicker parts. This makes the process more manageable and allows for even slicing.
- Remove Fat and Gristle: Trim away any excess fat or gristle as you carve. This not only improves the presentation but also ensures a cleaner and more enjoyable eating experience.
- Arrange Beautifully: Arrange the slices neatly on a platter or serving dish.
Carving is more than just slicing; it's an art form, a final act of presentation that showcases your culinary skills.
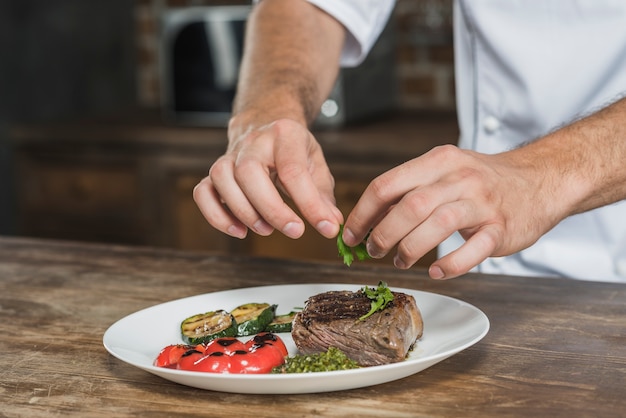
(Part 8) Serving: The Grand Finale
The moment has arrived: serving your beautifully cooked roast beef, a culmination of all your efforts, a testament to your culinary prowess. But a roast beef isn't just about the meat; it's about the symphony of flavors and textures that accompany it.
Here are some ideas for accompanying your roast:
- Yorkshire Pudding: A classic British pairing, Yorkshire pudding is light and fluffy, soaks up the delicious roast juices, and adds a delightful contrast to the rich and savory beef.
- Roasted Vegetables: Roasted root vegetables like carrots, potatoes, and parsnips provide a sweet and earthy counterpoint to the beef, while also adding a healthy dose of vitamins and minerals.
- Gravy: A rich, savory gravy made from the pan drippings is a must-have, adding a layer of richness and moisture to the meat and vegetables.
- Horseradish Cream: A tangy and creamy condiment, horseradish cream adds a delicious kick to the beef, balancing the richness and enhancing the flavor profile.
Serve your roast beef with pride, knowing that you've created a culinary masterpiece, a symphony of flavors that will leave your guests wanting more.
FAQs: Your Roast Beef Questions Answered
Let's address some frequently asked questions about roast beef cooking to ensure you have all the information you need to create a culinary triumph.
- How do I know if my roast is cooked through? The best way to determine doneness is to use a meat thermometer. Insert the thermometer into the thickest part of the roast, avoiding any bones. The internal temperature should reach the desired level for your chosen doneness.
- What if my roast is overcooked? If your roast is overcooked, there's not much you can do to fix it. However, you can try slicing it thinly and serving it with a rich sauce to compensate for the dryness.
- Can I cook a roast beef from frozen? It's not recommended to cook a roast beef from frozen. Thawing the meat in the refrigerator overnight is the safest and best way to ensure even cooking.
- How long can I keep cooked roast beef in the fridge? Cooked roast beef can be stored in the refrigerator for up to 4 days. Make sure to store it properly in an airtight container or wrap it tightly in plastic wrap.
- What can I do with leftover roast beef? Leftover roast beef is a culinary treasure trove. It can be used in a variety of dishes, such as sandwiches, salads, and soups. It's also delicious cold, sliced thinly and served with mustard or horseradish.
Now you're equipped with the knowledge to confidently conquer the art of roast beef cooking, to create a culinary masterpiece that will impress your guests and delight your palate. So, go forth, experiment, and enjoy the delicious journey of perfect roast beef!
Everyone is watching

Perfect Rice Every Time: The Ultimate Guide to Cooking Rice
Cooking TipsAs a self-proclaimed foodie, I've always been a bit obsessed with rice. It's the foundation of countless cuisi...

Ultimate Guide to Cooking the Perfect Thanksgiving Turkey
Cooking TipsThanksgiving. Just the word conjures up images of overflowing tables laden with delicious food, the scent of r...

The Ultimate Guide to Cooking Asparagus: Tips, Techniques, and Recipes
Cooking TipsAsparagus. The mere mention of this spring delicacy conjures up images of vibrant green spears, crisp and burs...

Can You Cook Spaghetti with Gasoline? (The Shocking Truth)
Cooking TipsWe've all seen those crazy internet trends. You know, the ones that make you wonder, "Did someone actually try...

Chorizo and Eggs Recipe: The Ultimate Guide
Cooking TipsRight, let’s talk about chorizo and eggs. You know, that classic Spanish dish that's always a winner. It's th...