Ah, the rib roast. A dish that evokes images of festive gatherings, crackling fireplaces, and the aroma of perfectly roasted beef filling the air. It's a centerpiece that demands respect, a culinary challenge that promises immense satisfaction when executed correctly. But let's be honest, the pressure's on when you're tasked with cooking the star of the show. You don't want it to be dry, you don't want it to be undercooked, and you definitely don't want to spend all day slaving over the oven.
Fear not, my fellow food lovers! This guide is your compass through the world of oven-cooked rib roasts, demystifying those cooking times and ensuring a culinary masterpiece that will have everyone singing your praises. We'll dive deep into the different types of rib roasts, explore various cooking methods, uncover the secrets of temperature variations, and, of course, tackle the all-important resting time. We'll even address those pesky little questions you might have about roasting a rib roast, like how to tell if it's cooked perfectly and how to reheat leftovers. So grab a comfy seat, a glass of something delicious, and let's embark on this culinary adventure together.
(Part 1) Understanding the Rib Roast

The Anatomy of a Rib Roast
Before we jump into the oven, let's get acquainted with our star ingredient. A rib roast is essentially a cut of beef taken from the rib section of the animal. Now, within this category, there are a few different options you can choose from, each with its own unique characteristics.
The most common rib roast is the standing rib roast, also known as a prime rib. This is the classic cut, typically containing 7 to 9 ribs, and is often left with the bone in for a more impressive presentation. The bone acts as a conductor, holding in the heat and ensuring a moist, succulent roast. It's the epitome of a celebratory meal, perfect for those special occasions where you want to impress your guests.
For those who prefer a more manageable cut, the rib roast with the bone removed, often referred to as "english cut", is a great alternative. This cut is typically thinner and easier to slice, making it perfect for smaller gatherings or for those who don't want to deal with the hassle of removing the bone.
The baby back rib roast is another popular option, particularly for smaller families or when you want to enjoy a delicious roast without the commitment of a larger cut. This smaller, more tender cut is perfect for weeknight dinners or casual gatherings.
And then there's the rib roast with the cap on. The "cap" refers to the layer of fat that covers the roast. It's a flavorful, luxurious addition that melts during cooking, adding incredible richness and tenderness to the meat. If you want to go all out and experience a truly decadent rib roast, this is the cut for you.
Choosing the Right Rib Roast
Choosing the right rib roast is the first step towards a delicious meal. Consider the following factors when selecting your roast:
- Size: Think about the number of people you'll be serving. A smaller rib roast (e.g., a baby back rib roast) will be perfect for a family dinner, while a larger standing rib roast will be ideal for a crowd. Remember to factor in the amount of leftovers you desire, as a rib roast is often best enjoyed the next day as well.
- Marbling: This refers to the amount of fat within the meat. Rib roasts with higher marbling will be more flavorful and tender. Look for a roast with a good balance of lean meat and marbling. You'll often find a "prime" rib roast, which signifies that it meets a certain standard for marbling.
- Bone-in vs. Boneless: Bone-in roasts tend to be more flavorful and juicy, as the bone helps to hold in moisture. Boneless roasts are easier to carve and may be more convenient for some. The decision ultimately depends on your preference and the level of culinary expertise you possess.
- Grade: The USDA grading system for beef goes from "Select" to "Prime," with "Prime" being the highest grade. This signifies the level of marbling and overall quality of the meat. While "Prime" might be more expensive, it will provide a more tender and flavorful roast.
Don't be afraid to ask your butcher for advice! They're the experts, and they can guide you in choosing the perfect roast for your needs. They can also help you determine the best cooking method for your chosen cut and provide tips for seasoning and preparation.
(Part 2) Preparing the Rib Roast
With your rib roast in hand, it's time to get ready for the roasting process. This step is crucial for achieving that perfect, juicy, and flavorful result.
Seasoning and Salt
Salt is the secret weapon for bringing out the best in your rib roast. Don't just sprinkle it on top – we're going for a salt-cure technique here. Generously salt your roast all over, ensuring each surface is covered. Place it uncovered in your fridge for at least 24 hours, preferably 48. This allows the salt to penetrate the meat, drawing out moisture and enhancing flavor. It's a simple yet effective technique that truly transforms the taste of the roast.
After the salt cure, you can add your favorite seasonings. For a classic flavor, stick with salt, pepper, and garlic. For a more complex profile, experiment with herbs like rosemary, thyme, and sage. You can also add a touch of sweetness with a sprinkle of brown sugar or a pinch of paprika. Remember to season liberally – the roast will shrink during cooking, so don't be afraid to go heavy on the spices.
The Importance of Resting
Once your rib roast is seasoned, it's time for a little rest. This allows the meat to relax and for the flavors to meld together. Rest your roast uncovered in the fridge for at least 30 minutes before roasting. This is especially important if you've salt-cured the roast, as it gives the salt time to work its magic. This resting period also helps to even out the temperature of the roast, ensuring more even cooking.
Before you place the roast in the oven, consider adding a layer of fat to the top of the roast. This will help to keep the meat moist and tender during cooking. You can use a mixture of butter, olive oil, and herbs, or simply use a layer of the fat that has been trimmed from the roast itself.
(Part 3) The Roasting Process
Now for the grand finale! This is where the magic happens, and where your understanding of cooking times comes into play.
Oven Temperatures and Cooking Times
The oven temperature you choose will affect the cooking time and the overall result of your roast. For a juicy and flavorful rib roast, I recommend roasting at a lower temperature, around 325°F (160°C). This allows the meat to cook evenly and slowly, resulting in a tender and flavorful roast.
Here's a general guide for cooking times, but remember that these are just estimations. It's always best to use a meat thermometer to ensure your roast is cooked to perfection.
| Roast Size | Approximate Cooking Time (325°F/160°C) |
|---|---|
| 3-4 lbs | 2-2.5 hours |
| 4-6 lbs | 2.5-3 hours |
| 6-8 lbs | 3-3.5 hours |
| 8-10 lbs | 3.5-4 hours |
Remember to add an additional 15-20 minutes for each pound of roast if you're using a higher temperature, like 400°F (200°C). However, I strongly advise against using a higher temperature unless you're specifically aiming for a crispy crust, as it can lead to a dryer roast.
Monitoring the Roast
While your roast is in the oven, it's important to keep an eye on it and ensure it's cooking evenly. Every 30-45 minutes, check the roast and rotate it 90 degrees. This ensures that all sides are exposed to the heat evenly and helps to prevent the roast from developing an uneven crust.
You can also use a meat thermometer to check the internal temperature of the roast. For medium-rare, the internal temperature should reach 130°F (54°C). For medium, it should be 140°F (60°C), and for medium-well, 150°F (65°C). Don't forget to check the temperature in the thickest part of the roast, avoiding the bone.
Basting for Moisture
Basting your roast with pan drippings or a mixture of butter, herbs, and wine can help to keep it moist and flavorful. Use a spoon or basting brush to coat the roast generously every 30-45 minutes. This helps to create a beautiful, glossy crust and ensures that the roast stays moist throughout the cooking process.
The Final Touches
Once your roast has reached the desired internal temperature, it's time for the final touches. Remove the roast from the oven and let it rest for 15-20 minutes before carving. This allows the juices to redistribute throughout the meat, resulting in a tender and juicy roast.
While the roast is resting, you can make a delicious pan sauce with the drippings left in the roasting pan. Simply add a little bit of wine or broth to the pan, scrape up the browned bits, and simmer until it reduces to a sauce consistency. This pan sauce adds an extra layer of flavor and richness to the dish.
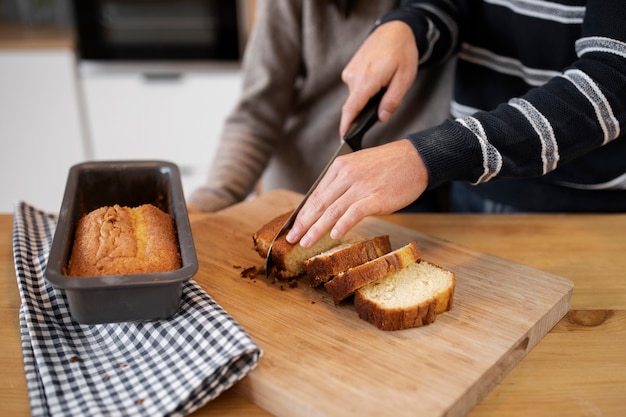
(Part 4) Carving the Rib Roast
With the roast rested and ready, it's time to carve! This is the moment of truth, where all your hard work comes together.
Tools of the Trade
You'll need a sharp carving knife and a carving fork to make the process as smooth as possible. A good carving knife should be long and thin with a sharp, pointed blade. It should also be comfortable to hold and maneuver.
Carving Technique
For a bone-in rib roast, first, slice between the bones, cutting along the length of the roast. Remove the bone from the roast, then slice the meat across the grain into thin, even slices.
For a boneless rib roast, simply slice the meat across the grain into thin, even slices.
When slicing the meat, you'll notice that the grain runs in a long direction along the roast. Cutting across the grain allows you to break down the muscle fibers, resulting in tender, melt-in-your-mouth slices.
If you're having trouble with the carving, don't be afraid to ask for help. A sharp knife and a little practice can make all the difference.
(Part 5) Serving the Rib Roast
The time has come! Serve your perfectly roasted rib roast with your favorite sides. I recommend a medley of roasted vegetables, mashed potatoes, or a simple green salad. Don't forget to drizzle some of that delicious pan sauce over the meat and your sides for an extra touch of flavor.
Remember, presentation is key! Place the sliced rib roast on a beautiful platter, arrange your sides around it, and don't forget to add a splash of color with fresh herbs or a few sprigs of rosemary.
(Part 6) Rib Roast Variations
While the classic rib roast recipe is a winner, there are endless variations to explore. Here are a few ideas to get you started:
Herbed Rib Roast
Elevate your roast with a fragrant blend of herbs. Try rosemary, thyme, and sage for a traditional flavor, or get creative with a combination of your favorites. You can create a herb paste by combining your chosen herbs with a bit of olive oil and garlic. Spread this paste generously over the roast before roasting.
Garlic-Herb Rib Roast
Combine the savory richness of garlic with the aromatic flavors of herbs. Create a paste with garlic, herbs, and a bit of olive oil, and spread it generously over the roast before roasting. You can also roast a few whole garlic cloves alongside the roast for an extra burst of flavor.
Cranberry-Glazed Rib Roast
Add a touch of sweetness and tang to your roast with a cranberry glaze. Simmer cranberries with orange juice, brown sugar, and a dash of cinnamon for a vibrant and delicious topping. Brush the glaze over the roast during the last 30 minutes of cooking.
Dijon-Mustard Rib Roast
For a bolder flavor, slather your roast with a Dijon mustard glaze. The tangy mustard will add a wonderful depth of flavor to the roast. You can create a glaze by combining Dijon mustard with honey, brown sugar, and a splash of red wine vinegar.
Red Wine Rib Roast
For a sophisticated twist, add a bottle of red wine to your roasting pan. The wine will infuse the roast with a rich flavor and create a flavorful sauce. Choose a full-bodied red wine, such as Cabernet Sauvignon or Merlot.
(Part 7) Leftovers and Reheating
Let's be honest, those leftover rib roast slices are just as delicious as the first helping. But reheating them can be tricky, so here's how to do it right:
Oven Reheating
Preheat your oven to 325°F (160°C). Wrap the leftover slices in foil and place them on a baking sheet. Reheat for 15-20 minutes, or until heated through.
slow cooker Reheating
If you have a slow cooker, this is a great option for reheating rib roast leftovers. Place the slices in the slow cooker, add a little bit of broth or water, and cook on low for 2-3 hours, or until heated through.
Pan-Frying
For a quick and easy reheating option, pan-fry the slices in a bit of butter or oil over medium heat. Cook for 2-3 minutes per side, or until heated through.
When reheating leftovers, it's important to avoid overcooking, which can dry out the meat. Reheat slowly and gently, using a low temperature or a slow cooker.
(Part 8) FAQs
Now, let's address those nagging questions you might have about roasting a rib roast.
1. How do I know if my rib roast is cooked to the right temperature?
The best way to determine if your rib roast is cooked to the right temperature is to use a meat thermometer. Insert the thermometer into the thickest part of the roast, avoiding the bone. The internal temperature should be 130°F (54°C) for medium-rare, 140°F (60°C) for medium, and 150°F (65°C) for medium-well.
If you don't have a meat thermometer, there are other ways to gauge the doneness of your rib roast. For example, you can press the meat with your finger. If it springs back, it's rare. If it has a little give, it's medium-rare. If it's firm, it's well-done. However, these methods are not as accurate as using a meat thermometer.
2. What happens if my rib roast is overcooked?
Overcooked rib roast can be dry and tough. If you've accidentally overcooked your roast, try slicing it thinly and serving it with a flavorful sauce to help counteract the dryness. You can also try shredding the meat and using it in a sandwich or a casserole.
3. Can I freeze a rib roast?
Yes, you can freeze a rib roast. Wrap it tightly in plastic wrap and then in foil. It will keep in the freezer for up to 3 months. To thaw, place the roast in the refrigerator for 2-3 days before cooking.
Freezing a rib roast is a great way to save time and money. You can buy a whole roast on sale and freeze it for later use.
4. What sides go well with rib roast?
Rib roast pairs beautifully with a variety of sides. Some popular choices include roasted vegetables, mashed potatoes, Yorkshire pudding, and green salad. You can also get creative with your sides and experiment with different flavors and textures.
For example, you can roast a medley of vegetables, such as carrots, potatoes, and onions, with the rib roast. This will create a flavorful and satisfying meal. You can also serve the roast with a creamy mashed potato side, or a simple green salad to provide a refreshing contrast.
5. Can I cook a rib roast in a slow cooker?
It is possible to cook a rib roast in a slow cooker, but it is not the ideal method for achieving that perfect, crispy crust. If you do choose to cook your roast in a slow cooker, be sure to sear it first in a pan on the stovetop to create a flavorful crust.
Slow-cooking a rib roast can result in a tender and flavorful roast, but it will not have the same crispy crust as a roast cooked in the oven. If you're looking for a moist and flavorful roast without a crispy crust, then a slow cooker is a good option.
And there you have it, my friends! Everything you need to know about cooking the perfect rib roast. Now go forth and conquer the kitchen! Remember, the key is to relax, have fun, and enjoy the process. After all, a delicious rib roast is a testament to your culinary skills and a wonderful way to create lasting memories.
Everyone is watching

Prime Rib Roast Cooking Time Chart: Per Pound Guide
Cooking TipsPrime rib roast. Just the name conjures images of lavish dinners, crackling fires, and hearty laughter. It’s ...

How Long to Bake Potatoes in the Oven (Perfect Every Time)
Cooking TipsBaked potatoes are a staple in my kitchen. They're incredibly versatile, delicious, and surprisingly easy to m...

Perfect Rice Every Time: The Ultimate Guide to Cooking Rice
Cooking TipsAs a self-proclaimed foodie, I've always been a bit obsessed with rice. It's the foundation of countless cuisi...

The Ultimate Guide to Cooking Asparagus: Tips, Techniques, and Recipes
Cooking TipsAsparagus. The mere mention of this spring delicacy conjures up images of vibrant green spears, crisp and burs...

Ultimate Guide to Cooking the Perfect Thanksgiving Turkey
Cooking TipsThanksgiving. Just the word conjures up images of overflowing tables laden with delicious food, the scent of r...