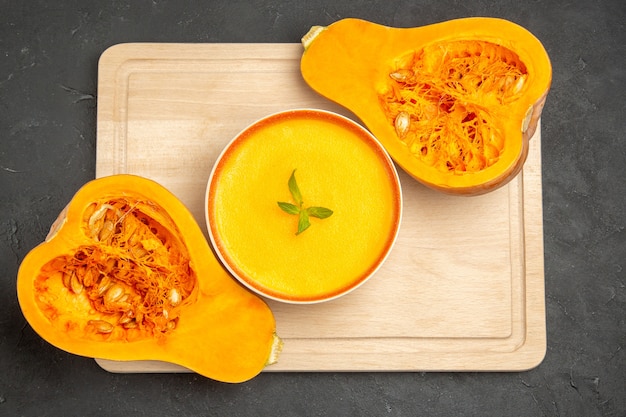
Let's be honest, there's nothing quite like the taste of homemade pumpkin puree. It's so much richer and more flavourful than anything you'll find in a can, and the satisfaction of making it yourself? Well, that's a whole other level of delicious.
From choosing the perfect pumpkin to getting that smooth, velvety texture, this guide will walk you through every step of the process, turning you into a pumpkin puree pro in no time. So, grab your apron, put on some music, and let's get started!
(Part 1) Choosing the Right Pumpkin: The Foundation of Great Puree

The first step in making delicious pumpkin puree is selecting the right pumpkin. Not all pumpkins are created equal, and choosing the wrong one can lead to a less-than-ideal puree.
The Perfect Pumpkin: What to Look For
When you're at the market, keep an eye out for pumpkins with these characteristics:
- Firm and Heavy: A good pumpkin should feel solid and weighty. Avoid pumpkins that feel light or hollow. Give them a little thump—they should sound like a solid drum, not a hollow shell.
- No Blemishes: Look for pumpkins free from any cracks, cuts, or soft spots. These are signs of damage and could affect the flavour and quality of your puree.
- The Right Kind: Sugar pumpkins or pie pumpkins are the best choices for making puree. They have a sweeter flavour and a denser flesh, making them perfect for transforming into a smooth, rich puree.
Don't be shy to ask for help! If you're unsure about a particular pumpkin, ask a friendly staff member at your local market or greengrocer for advice. They're usually happy to point you in the right direction.
(Part 2) Preparing Your Pumpkin: The Pre-Puree Ritual

Now that you've got your perfect pumpkin, it's time to get it ready for cooking. This part is a bit messy, so don your apron, gather your tools, and brace yourself for some pumpkin splatter!
Cutting and Deseeding: The Art of Pumpkin Disassembly
Follow these steps to carefully dismantle your pumpkin:
- Cut the Top Off: Slice off the top of the pumpkin, like you're removing a lid. Remember, you'll be putting this back on later, so try to make a clean cut.
- Scoop Out the Seeds: Use a spoon to scoop out the seeds and stringy bits. These are actually quite tasty roasted, so don't toss them out!
- Cut the Pumpkin into Chunks: Slice the pumpkin flesh into manageable chunks. The size doesn't really matter, but smaller chunks will cook faster.
Remember, if your pumpkin is particularly large, it might be easier to cut it in half before proceeding with the above steps.
(Part 3) Cooking Your Pumpkin: The Transformation Begins

You've got your pumpkin prepped and ready. Now it's time to transform those raw chunks into a velvety puree. There are a few different methods you can use to cook your pumpkin, each with its own pros and cons.
Cooking Methods: Finding Your Perfect Match
Method 1: Baking: The Classic Approach
Baking is my personal favourite. It's a hands-off method that results in a wonderfully sweet and flavorful puree.
- Preheat your oven: Set your oven to 350°F (175°C) and give it a good preheat to ensure even cooking.
- Place the pumpkin on a baking sheet: Line a baking sheet with parchment paper. This will prevent sticking and make cleanup a breeze. Spread your pumpkin chunks in a single layer to ensure even cooking.
- Bake until tender: Pop your pumpkin into the oven and bake for 45-60 minutes, or until it's soft and tender. You should be able to easily pierce it with a fork.
Method 2: Boiling: The Quick and Easy Option
Boiling is a quick and easy way to cook your pumpkin, but it can sometimes result in a slightly less flavorful puree.
- Fill a pot with water: Fill a large pot with enough water to cover the pumpkin chunks.
- Bring the water to a boil: Once the water is boiling, carefully add the pumpkin chunks.
- Simmer until tender: Reduce the heat to a simmer and cook for 20-30 minutes, or until the pumpkin is tender.
Method 3: Microwaving: The Speedy Solution
Microwaving is the fastest way to cook your pumpkin, but it can be a bit messier than the other methods.
- Place the pumpkin in a microwave-safe bowl: Add a tablespoon or two of water to the bowl to prevent the pumpkin from drying out.
- Microwave until tender: Microwave on high for 5-7 minutes, or until the pumpkin is tender. Be careful when removing the bowl from the microwave, as it will be hot.
(Part 4) Pureeing the Pumpkin: The Transformation Culminates
Now that your pumpkin is cooked, it's time for the final step—turning it into that smooth, velvety puree. Here's what you'll need and how to do it.
The Tools of the Trade: Your Puree Arsenal
You'll need a few tools to help you create your pumpkin masterpiece:
- Food Processor: This is the most efficient way to puree your pumpkin. It creates a super-smooth texture with minimal effort.
- Blender: If you don't have a food processor, a blender will work just fine. You might need to pulse it a few times to get the desired consistency.
- Potato Masher: For a slightly chunkier puree, a potato masher is your go-to tool. It's a good option if you prefer a bit of texture in your puree.
Achieving Perfect Texture: From Smooth to Chunky
Once you've chosen your method, follow these steps for a perfect puree:
- Let the pumpkin cool: If you've baked or boiled your pumpkin, let it cool down a bit before pureeing. This makes it easier to handle and prevents splattering.
- Add the pumpkin to your chosen appliance: Whether you're using a food processor, blender, or potato masher, carefully add your pumpkin chunks.
- Puree until smooth: Process or mash until you achieve your desired texture. For a super-smooth puree, you might need to strain it through a fine-mesh sieve after pureeing to remove any small lumps.
(Part 5) Storing Your Pumpkin Puree: Preserving the Goodness
You've done it! You've created a beautiful batch of homemade pumpkin puree. Now, it's time to store it properly so you can enjoy it for weeks to come.
Freezing for Long-Term Storage: A Pumpkin Puree Time Capsule
Freezing is the best way to store pumpkin puree for long-term use, preserving its flavor and texture.
- Cool the puree completely: Let the puree cool down to room temperature before freezing. This prevents ice crystals from forming in the puree, which can affect its texture.
- Pour into freezer-safe containers: Use airtight containers or freezer bags, ensuring they are properly sealed to prevent freezer burn. Label them with the date and contents.
- Freeze for up to 3 months: Pumpkin puree will keep well in the freezer for up to 3 months.
Refrigerating for Short-Term Storage: Pumpkin Puree on Standby
If you're only planning on using the puree within a few days, you can store it in the fridge.
- Pour the puree into an airtight container: Make sure the container is clean and dry.
- Refrigerate for up to 5 days: Store it in the fridge for up to 5 days.
(Part 6) Unlocking Pumpkin Puree Potential: Recipes and Inspirations
You've got your homemade pumpkin puree—now what? The possibilities are endless! From classic pumpkin recipes to innovative uses, get ready to explore the world of pumpkin puree.
Classic Pumpkin Treats: A Taste of Tradition
Here are some timeless recipes that are perfect for showcasing the delightful flavors of homemade pumpkin puree:
- Pumpkin Pie: A true autumn classic! You'll find countless recipes online, each offering its own unique spin on this beloved dessert.
- pumpkin bread: A moist and delicious treat that's perfect for breakfast, brunch, or a midday snack.
- pumpkin soup: Creamy, comforting, and perfect for a chilly day. This is a simple but satisfying recipe that showcases the versatility of pumpkin puree.
- pumpkin spice latte: A warm and comforting drink for those autumnal days.
Beyond the Classics: Pumpkin Puree Adventures
Pumpkin puree isn't just for desserts and drinks. It can add a unique flavor and texture to a wide range of dishes. Here are some unexpected ways to use your homemade puree:
- pasta sauces: For a creamy and slightly sweet twist on traditional pasta dishes.
- Risotto: To add depth of flavour and a touch of sweetness to this classic Italian dish.
- Curries: For a unique and warming flavour profile. Pumpkin puree adds a touch of sweetness and creaminess to curries, creating a well-balanced flavour.
- Smoothies: For a healthy and delicious breakfast or snack. Blend your pumpkin puree with fruit, yoghurt, and spices for a nutritious and flavorful smoothie.
(Part 7) Tips and Tricks: Mastering the Art of Pumpkin Puree
Making your own pumpkin puree is really quite simple, but here are a few tips and tricks to make the process even smoother (pun intended):
Tip 1: Use a Sharp Knife
A sharp knife will make cutting the pumpkin a lot easier. You'll also be less likely to slip and cut yourself.
Tip 2: Don't Overcook
Overcooked pumpkin can become mushy and lose its flavour. Cook it until it's tender but still holds its shape.
Tip 3: Add Spices
Pumpkin puree is a blank canvas for flavour. Experiment with different spices like cinnamon, nutmeg, ginger, and cloves to create your own unique blend.
Tip 4: Save the Seeds
Don't throw away those pumpkin seeds! You can roast them for a delicious and healthy snack. Toss them with olive oil, salt, and pepper, and bake them in a preheated oven until golden brown.
(Part 8) FAQs: Your Pumpkin Puree Questions Answered
Here are some common questions you might have about making pumpkin puree:
1. Can I use canned pumpkin puree?
Yes, you can use canned pumpkin puree, but it won't be as fresh or flavorful as homemade. If you're in a pinch, it will do the trick. However, for the best results, I highly recommend making your own.
2. How long does pumpkin puree last in the freezer?
Pumpkin puree can be stored in the freezer for up to 3 months. It's best to use it within that timeframe to ensure the best quality and flavour.
3. Can I use any type of pumpkin for puree?
It's best to use sugar pumpkins or pie pumpkins, as they have a sweeter flavour and denser flesh. Other types of pumpkins can be used, but they might be less sweet and more watery.
4. What can I do with leftover pumpkin puree?
There are countless ways to use leftover pumpkin puree! You can use it in smoothies, soups, sauces, muffins, breads, and even pancakes. Get creative and experiment with different recipes.
5. What if my pumpkin puree is too thick?
If your pumpkin puree is too thick, you can add a little bit of water or milk to thin it out. Adjust the amount gradually until you reach the desired consistency.
(Part 9) Conclusion: The Pumpkin Puree Journey Awaits
There you have it—your ultimate guide to making your own pumpkin puree. Now, you're equipped with the knowledge and confidence to create your own delicious pumpkin puree, ready for all your culinary adventures. Remember, it's all about finding what works best for you. Experiment with different methods and recipes, and don't be afraid to get creative. Now go forth and make your own pumpkin puree magic!
Everyone is watching

Prime Rib Roast Cooking Time Chart: Per Pound Guide
Cooking TipsPrime rib roast. Just the name conjures images of lavish dinners, crackling fires, and hearty laughter. It’s ...

How Long to Bake Potatoes in the Oven (Perfect Every Time)
Cooking TipsBaked potatoes are a staple in my kitchen. They're incredibly versatile, delicious, and surprisingly easy to m...

Perfect Rice Every Time: The Ultimate Guide to Cooking Rice
Cooking TipsAs a self-proclaimed foodie, I've always been a bit obsessed with rice. It's the foundation of countless cuisi...

The Ultimate Guide to Cooking Asparagus: Tips, Techniques, and Recipes
Cooking TipsAsparagus. The mere mention of this spring delicacy conjures up images of vibrant green spears, crisp and burs...

Ultimate Guide to Cooking the Perfect Thanksgiving Turkey
Cooking TipsThanksgiving. Just the word conjures up images of overflowing tables laden with delicious food, the scent of r...
