There's nothing quite like the aroma of perfectly roasted pork tenderloin wafting through the kitchen. It's a dish that screams "fancy" but is surprisingly easy to master, even for a culinary novice like myself. My first attempt, however, was a bit of a disaster - a dry, sad, little piece of meat. I felt like a complete failure until my neighbour, bless her soul, told me about the 400 degrees F method. She swore by it, claiming it was a game-changer, and honestly, she was right. It was like a whole new world of tender, juicy pork tenderloin opened up before my eyes (and taste buds).
Today, I'm going to share what I've learned about roasting pork tenderloin at 400 degrees F, and hopefully, you can avoid my early, disastrous culinary mishaps.
(Part 1) Understanding the 400 Degrees F Method

The beauty of the 400 degrees F method is its simplicity. It's all about high heat, which creates a lovely, crispy exterior while keeping the inside juicy and tender. Think of it like a golden crust on a bread loaf, but with pork. Before we dive into the cooking process, let's get a few things straight.
1. Why 400 Degrees F?
You might be wondering, why not 350 degrees F or 375 degrees F? It all comes down to the science of cooking. 400 degrees F is the sweet spot for a few reasons. First, it's hot enough to create a nice sear on the outside of the pork tenderloin, giving you that delicious, crispy texture we all love. Second, it allows the internal temperature to rise evenly, ensuring that the inside is cooked through while the outside is perfectly browned. This is key for locking in those precious juices.
2. Don't Forget the Internal Temperature
While the 400 degrees F oven temperature is crucial, don't get too caught up in it and forget about the actual internal temperature of the pork. This is paramount. We're aiming for an internal temperature of 145 degrees F for a safe and delicious tenderloin. The magic of a meat thermometer comes into play here. Use it to check the internal temperature and ensure it's cooked through.
(Part 2) Prepping the Pork Tenderloin: The Foundation of Flavor

Before we even think about turning on the oven, we need to get the pork tenderloin ready. This is where the magic really begins, trust me.
1. Choosing the Right Pork Tenderloin: A Star is Born
Not all pork tenderloins are created equal. When you're at the butcher's or supermarket, look for a tenderloin that's firm to the touch, has a light pink colour, and doesn't have any weird odours. You're looking for a tenderloin that's going to be the star of the show. If you're not sure, just ask the butcher for their recommendation. They're usually happy to help.
2. Pat It Dry: The Key to crispy skin
Before you season your pork tenderloin, it's crucial to pat it dry with paper towels. This helps the seasoning stick and also ensures that the skin gets nice and crispy. You can also trim any excess fat from the tenderloin, but don't go overboard. A little fat helps to keep the meat moist.
3. Seasoning it Up: A Symphony of Flavors
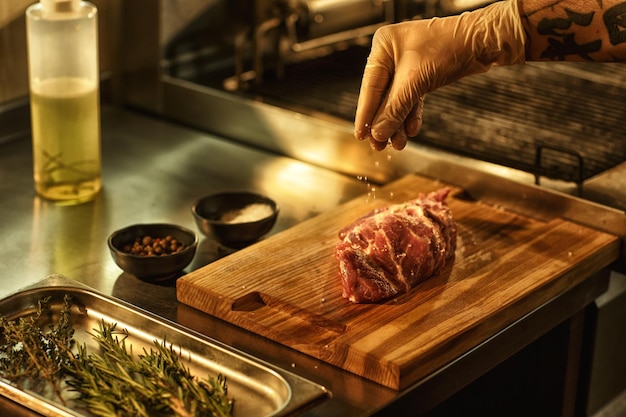
This is the part where you get to be creative! While you can simply use salt and pepper, there's a world of flavour possibilities to explore. You can use a pre-made rub, or create your own mix using spices like paprika, garlic powder, onion powder, cumin, or even a pinch of cayenne pepper for a little kick. Remember, a little goes a long way, so don't go overboard.
I like to create my own rubs, experimenting with different combinations each time. Sometimes, I go for a simple garlic and herb rub, while other times, I might go for something a bit more adventurous, with a blend of smoky paprika and cumin. The world is your oyster!
(Part 3) Cooking the Pork Tenderloin at 400 Degrees F: The Heat is On

Now comes the fun part: actually cooking the pork tenderloin. You've got this!
1. Preheating the Oven: A Crucial First Step
The first step is to preheat your oven to 400 degrees F. This is crucial, as you want to ensure that the oven is at the right temperature before you put the pork tenderloin in. It helps ensure even cooking.
2. Roasting the Pork Tenderloin: The Art of Precision
Once the oven is preheated, place the seasoned pork tenderloin on a roasting rack set over a baking sheet. This helps the air circulate around the tenderloin and ensures that it cooks evenly. If you don't have a roasting rack, you can simply place the tenderloin on a baking sheet. However, I highly recommend using a rack, as it really makes a difference in terms of even cooking.
Now, here's where things get interesting. You can choose to roast the tenderloin until it reaches an internal temperature of 145 degrees F, or you can take the "almost-cooked" approach, where you remove the tenderloin from the oven when it reaches 140 degrees F. Let me explain. If you go with the almost-cooked approach, you'll have to rest the tenderloin for 10 minutes before slicing and serving. The resting time allows the juices to redistribute, resulting in a super tender and juicy piece of meat. If you go for the 145 degrees F route, you can slice and serve it right away.
Here's a table summarizing the two roasting methods:
| Method | Internal Temperature | Resting Time | Serving Time |
|---|---|---|---|
| Fully Cooked | 145 degrees F | None | Immediately after cooking |
| Almost Cooked | 140 degrees F | 10 minutes | After resting |
3. Resting the Pork Tenderloin: Let it Relax
This step is essential. Just like we all need a little "me time" after a workout, the pork tenderloin also needs a chance to relax. Cover the tenderloin loosely with aluminum foil and let it rest for 10 minutes. This time allows the juices to redistribute throughout the meat, resulting in a super moist and tender final product.
(Part 4) Serving Time: A Culinary Symphony
After all that hard work, it's time to enjoy your delicious pork tenderloin. And don't forget, you can always jazz it up with your favourite sides.
1. Slicing the Pork Tenderloin: A Work of Art
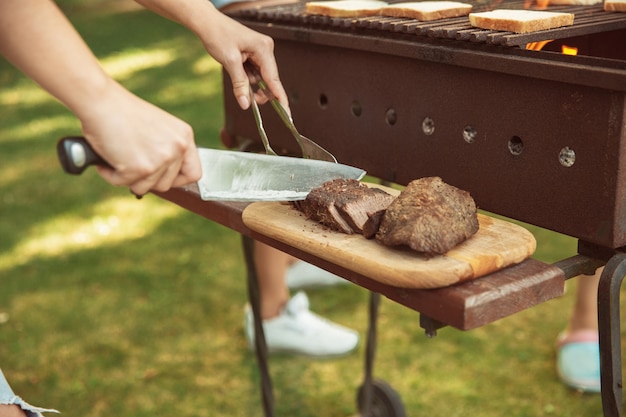
Once the tenderloin has rested, you're ready to slice it. Use a sharp knife to cut the tenderloin into 1/2-inch thick slices. Be careful when slicing, as the tenderloin can be quite delicate.
2. side dishes: A Culinary Companion
The beauty of pork tenderloin is that it pairs well with so many different side dishes. You can go for the classics, like mashed potatoes, roasted vegetables, or a simple green salad. Or, you can get adventurous with something a little different, like quinoa salad, couscous with dried fruit and nuts, or a side of roasted sweet potatoes.
3. Don't Forget the Sauce: Elevate the Flavor
If you want to take your pork tenderloin to the next level, consider making a simple pan sauce. You can deglaze the pan with wine or broth, and then whisk in some butter and herbs. This adds an extra layer of depth and richness to the dish.
(Part 5) FAQs: Answers to Your Burning Questions
1. What if my pork tenderloin is too thin?
If your pork tenderloin is too thin, don't worry! You can still cook it at 400 degrees F, but you'll need to reduce the cooking time. Check the internal temperature using a meat thermometer, and remove it from the oven when it reaches 145 degrees F.
2. Can I cook the pork tenderloin in a different oven temperature?
Absolutely! If you're not comfortable with the high heat of 400 degrees F, you can cook your pork tenderloin at a lower temperature, like 375 degrees F. Just be prepared to increase the cooking time, as it will take longer for the tenderloin to cook through. Always check the internal temperature to ensure it's cooked through.
3. What if I don't have a meat thermometer?
If you don't have a meat thermometer, you can estimate the cooking time based on the size of the tenderloin. For a 1-pound tenderloin, roast it for 20-25 minutes. For a 1.5-pound tenderloin, roast it for 25-30 minutes. Remember to check the internal temperature by cutting into the thickest part of the tenderloin. It should be cooked through and the juices should run clear.
4. Can I freeze pork tenderloin?
Yes, you can freeze pork tenderloin. Simply wrap it tightly in plastic wrap and then place it in a freezer-safe bag. It can be frozen for up to 3 months. To thaw the frozen tenderloin, place it in the refrigerator overnight.
5. How do I know if my pork tenderloin is overcooked?
If your pork tenderloin is overcooked, it will be dry and tough. It's best to check the internal temperature using a meat thermometer to avoid overcooking. You can also look for the telltale signs of overcooked pork, such as a grey or brown colour and a rubbery texture.
(Part 6) Tips for Success: Mastering the Art
Here are a few tips to help you cook the perfect pork tenderloin every time.
1. Don't Overcrowd the Pan: Give it Space to Breathe
If you're cooking more than one pork tenderloin, make sure to give them plenty of space in the pan. Overcrowding the pan will hinder the airflow and prevent the tenderloin from cooking evenly. If you need to, cook the tenderloins in batches.
2. Use a Meat Thermometer: Your Culinary Guardian
Using a meat thermometer is the best way to ensure that your pork tenderloin is cooked through and safe to eat. Insert the thermometer into the thickest part of the tenderloin, avoiding bone, and check the internal temperature.
3. Let it Rest: A Moment of Relaxation
Don't skip the resting period! Allowing the pork tenderloin to rest for 10 minutes after cooking will allow the juices to redistribute throughout the meat, resulting in a super moist and tender final product.
(Part 7) Variations: Expand Your Culinary Horizons
Once you've mastered the basics, you can get creative with your pork tenderloin.
1. Stuffed Pork Tenderloin: A Flavorful Surprise
Stuff your pork tenderloin with your favourite fillings, like spinach and feta, sausage, or even a simple breadcrumb stuffing. You can also try wrapping the tenderloin in bacon for added flavour and texture.
2. Glazed Pork Tenderloin: A Sweet and Savory Delight
Brush your pork tenderloin with a glaze during the last 15 minutes of cooking. You can use a simple honey-soy glaze, a maple-bourbon glaze, or even a fruit-based glaze.
(Part 8) Final Thoughts: A culinary journey Awaits
Honestly, I can't believe how easy it is to make delicious pork tenderloin. The 400 degrees F method is a real game-changer. It's quick, it's simple, and it delivers consistently juicy and tender results. Once you've mastered the basics, you can experiment with different seasonings and glazes to create your own signature dish. So, go ahead, give it a try! You might just surprise yourself.
Everyone is watching

Prime Rib Roast Cooking Time Chart: Per Pound Guide
Cooking TipsPrime rib roast. Just the name conjures images of lavish dinners, crackling fires, and hearty laughter. It’s ...

How Long to Bake Potatoes in the Oven (Perfect Every Time)
Cooking TipsBaked potatoes are a staple in my kitchen. They're incredibly versatile, delicious, and surprisingly easy to m...

Perfect Rice Every Time: The Ultimate Guide to Cooking Rice
Cooking TipsAs a self-proclaimed foodie, I've always been a bit obsessed with rice. It's the foundation of countless cuisi...

The Ultimate Guide to Cooking Asparagus: Tips, Techniques, and Recipes
Cooking TipsAsparagus. The mere mention of this spring delicacy conjures up images of vibrant green spears, crisp and burs...

Ultimate Guide to Cooking the Perfect Thanksgiving Turkey
Cooking TipsThanksgiving. Just the word conjures up images of overflowing tables laden with delicious food, the scent of r...
