Ah, pork tenderloin. It's a real kitchen favourite, isn't it? So versatile, so easy to cook, and always a crowd-pleaser. But, let's face it, figuring out the right oven cooking time can be a bit of a head-scratcher. Especially if you're not the most experienced cook. I've been there, hovering over the oven, thermometer in hand, hoping for the best. Will it be juicy and tender, or dry and disappointing? But worry no more! After countless trials, a good bit of trial and error, and a whole lot of deliciousness, I've got your perfect guide.
This article is your ultimate guide to cooking pork tenderloin to perfection in the oven. We'll go through everything, from choosing the right cut to getting that beautiful pink hue throughout. And, don't worry, I'll keep things simple and straightforward. No culinary jargon, just clear, easy-to-follow instructions for everyone.
Part 1: Picking the perfect pork tenderloin
First things first, let's pick out a great pork tenderloin. You want one that's got a good colour, a nice firm texture, and no funny smells, of course. I’ve found that smaller tenderloins, around 1-1.5 pounds, are perfect for a couple or a small family. But, if you're having a crowd over, don't be afraid to go for a larger one, up to 3 pounds. There's nothing like a good old-fashioned pork feast!
What to look for in your pork tenderloin:
- Colour: Aim for a nice, even pink colour. Avoid any tenderloins that have a dull, grey hue. It usually means it's not as fresh as it could be.
- Texture: Give it a gentle squeeze. It should feel firm and springy, not soft or mushy. You want that nice bounce!
- Smell: Take a whiff, but don’t go burying your nose in it! It should have a mild, pleasant smell. Anything strong or off-putting is a sign to steer clear.
Part 2: Prepping Your Pork Tenderloin for Oven Success
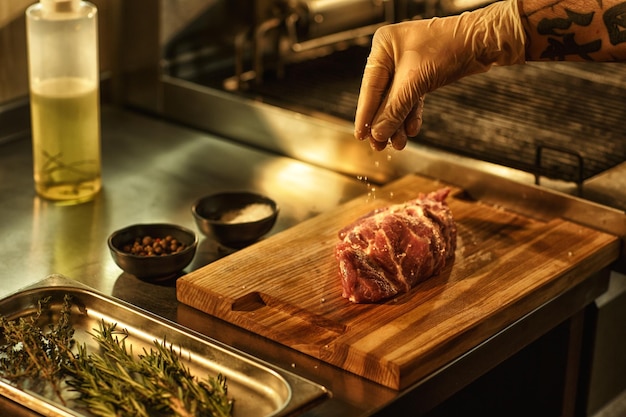
Okay, you've got your gorgeous piece of pork tenderloin. Now, let's give it some love before we put it in the oven. It doesn't take much, just a few quick steps to make it taste amazing.
1. Pat it dry:
Using paper towels, gently pat the tenderloin dry. This helps the skin to get nice and crispy. Imagine that beautiful, golden-brown crust!
2. Season it with love:
This is your chance to let your culinary creativity shine. I love to use a simple salt and pepper rub, but the world is your oyster here. Herbs, spices, garlic powder, onion powder, paprika – you name it! Just remember to be generous with the seasoning. You want that flavour to really penetrate the meat.
3. Add a touch of magic (optional):
Now, this is where I like to have some fun. You can wrap your tenderloin in bacon, which adds a smoky, salty flavour that's hard to resist. Or, you can stuff it with your favourite fillings. Herbs, cheese, or even fruit! My personal favourite is stuffing it with a mix of sage and apple slices - it's absolutely divine!
Part 3: Oven Cooking Time: The Essentials
Okay, now we're getting to the heart of the matter. The oven cooking time for your pork tenderloin depends on how big it is and how you like it cooked. Here's a quick guide to help you out:
Cooking times (based on preheating oven to 375°F or 190°C):
| Tenderloin Weight | Cooking Time | internal temperature |
|---|---|---|
| 1-1.5 lbs | 25-35 minutes | 145°F (63°C) - Medium |
| 1.5-2 lbs | 35-45 minutes | 145°F (63°C) - Medium |
| 2-3 lbs | 45-60 minutes | 145°F (63°C) - Medium |
Remember: These are just estimates. Always check the internal temperature to ensure it's cooked to your liking. You can use a meat thermometer to check the thickest part of the tenderloin.
Now, you might be thinking, "What about that perfect pink hue?". I hear you. It's all about timing and temperature. Here's how to get it just right:
Part 4: Mastering the Perfect Pink Hue
- Resting time: Let your tenderloin rest for 10-15 minutes after removing it from the oven. This allows the juices to redistribute, resulting in a juicy, tender, and perfectly pink centre. I know, it's hard to resist slicing into it right away, but trust me, it's worth the wait!
- Meat thermometer: Use a meat thermometer to ensure your tenderloin is cooked to your desired internal temperature. Aim for 145°F (63°C) for medium. This is the magic number for a juicy and tender centre.
Here’s a little tip: If you want a more well-done piece of tenderloin, simply cook it for a few more minutes. But remember, overcooking can lead to a dry, tough piece of meat. So, it's better to err on the side of caution and undercook slightly. You can always cook it a bit longer if needed.
Part 5: The Art of Roasting
Alright, let's get into the actual roasting process. You can roast your pork tenderloin on a baking sheet, in a roasting pan, or even on a wire rack placed over a baking sheet. It's all about your personal preference. I tend to prefer a wire rack as it allows for even airflow around the tenderloin, resulting in a crispy skin.
How to roast:
- Preheat your oven: Always preheat your oven to the desired temperature, which is usually around 375°F (190°C). It's important for consistent cooking.
- Place tenderloin on baking sheet or roasting pan: If you're using a baking sheet, make sure it's lined with parchment paper or foil for easy clean-up. If you're using a roasting pan, you can add a little bit of water to the bottom of the pan to create steam and prevent the tenderloin from drying out.
- Cook: Roast your tenderloin for the recommended time, keeping an eye on the internal temperature. You'll know it's ready when the internal temperature reaches 145°F (63°C).
Part 6: The Finishing Touches
So, you've roasted your tenderloin to perfection, and now it's time to make it even more delicious. There are a few tricks I use to really elevate the flavour and presentation.
1. Basting:
During the roasting process, you can baste the tenderloin with butter, oil, or even a simple pan sauce. This helps to keep the tenderloin moist and adds a beautiful sheen. I like to use a mixture of butter and herbs. It creates a beautiful aroma and adds a subtle flavour.
2. Resting:
As mentioned earlier, let the tenderloin rest for 10-15 minutes after removing it from the oven. This allows the juices to redistribute, resulting in a juicy, tender, and perfectly pink centre. I know, I know, it's hard to resist slicing into it right away, but trust me, it's worth the wait. It'll make a huge difference in how juicy and tender it is.
3. Slicing and serving:
Once the tenderloin has rested, slice it thinly across the grain. This makes it easier to chew and allows the flavours to really come through. Serve it with your favourite sides, like roasted vegetables, mashed potatoes, or a simple salad.
Part 7: Beyond the Basics: Glazing
Now, if you want to take things up a notch, consider glazing your pork tenderloin. It's a great way to add a burst of flavour and a beautiful sheen. Here's my favourite glaze recipe:
Ingredients:
- 1/4 cup Dijon mustard
- 1/4 cup honey
- 2 tablespoons brown sugar
- 1 tablespoon apple cider vinegar
- 1/2 teaspoon ground ginger
Instructions:
- In a small saucepan, combine all of the ingredients and bring to a simmer over medium heat.
- Stir constantly until the glaze thickens slightly.
- Brush the glaze over the tenderloin during the last 15 minutes of roasting.
This glaze gives the tenderloin a beautiful, sticky, sweet and tangy coating. It’s a real crowd-pleaser!
Part 8: Pork Tenderloin Pairings
The beauty of pork tenderloin is its versatility. It pairs beautifully with a wide range of flavours. Here are some ideas to get your creative juices flowing:
Classic Pairings:
- Roasted vegetables: Think asparagus, Brussels sprouts, carrots, or even sweet potatoes. The sweetness of the vegetables complements the richness of the pork perfectly.
- Mashed potatoes: A classic combination for a reason! The creamy texture of mashed potatoes balances the tenderloin beautifully.
- Applesauce: The sweet and tart flavour of applesauce cuts through the richness of the pork and adds a refreshing touch.
Creative Pairings:
- Mango salsa: The tangy sweetness of mango salsa adds a vibrant flavour to the pork tenderloin.
- Peaches and rosemary: A sweet and savoury combination that's both unexpected and delicious. Roast the peaches and rosemary together and serve alongside the tenderloin.
- Pineapple chutney: The tangy sweetness of pineapple chutney adds a unique touch to the pork tenderloin. It's a great option if you want a bit of a kick!
Don’t be afraid to experiment! You can use fresh herbs, different types of fruit, or even a squeeze of citrus for a refreshing twist. The possibilities are endless.
Part 9: FAQs
Now, let's address some common questions you might have about cooking pork tenderloin:
1. Can I cook pork tenderloin from frozen?
I'd recommend against it. Cooking a frozen pork tenderloin from frozen can result in uneven cooking and a dry, tough texture. Always thaw it in the refrigerator overnight for best results.
2. How do I know if my pork tenderloin is cooked through?
Use a meat thermometer to check the internal temperature of the tenderloin. It should reach 145°F (63°C) for medium. If you don't have a meat thermometer, you can check for doneness by cutting into the tenderloin. The juices should run clear and the meat should be no longer pink in the centre.
3. What should I do if my pork tenderloin is overcooked?
Don't worry! It's not the end of the world. overcooked pork tenderloin can be a bit dry, but it can still be salvaged. Try slicing it thinly and serving it with a sauce, like gravy or pan sauce, to add moisture. You can also add it to a stew or casserole to give it a second life.
4. Can I freeze pork tenderloin?
Absolutely! Freeze it for up to 3 months. Just make sure it's wrapped tightly in plastic wrap or foil before freezing to prevent freezer burn. Thaw it in the refrigerator overnight before cooking.
5. What are some tips for making a crispy pork tenderloin skin?
For a crispy skin, pat the tenderloin dry with paper towels and then roast it on a wire rack placed over a baking sheet. This allows for even airflow around the tenderloin and helps the skin to crisp up. You can also use a high heat setting for the last few minutes of cooking to help the skin get even crispier.
I hope this guide has inspired you to whip up a delicious pork tenderloin dinner. It's a truly satisfying meal that's perfect for any occasion. So, go forth and cook your heart out!
Everyone is watching

Prime Rib Roast Cooking Time Chart: Per Pound Guide
Cooking TipsPrime rib roast. Just the name conjures images of lavish dinners, crackling fires, and hearty laughter. It’s ...

How Long to Bake Potatoes in the Oven (Perfect Every Time)
Cooking TipsBaked potatoes are a staple in my kitchen. They're incredibly versatile, delicious, and surprisingly easy to m...

Perfect Rice Every Time: The Ultimate Guide to Cooking Rice
Cooking TipsAs a self-proclaimed foodie, I've always been a bit obsessed with rice. It's the foundation of countless cuisi...

The Ultimate Guide to Cooking Asparagus: Tips, Techniques, and Recipes
Cooking TipsAsparagus. The mere mention of this spring delicacy conjures up images of vibrant green spears, crisp and burs...

Ultimate Guide to Cooking the Perfect Thanksgiving Turkey
Cooking TipsThanksgiving. Just the word conjures up images of overflowing tables laden with delicious food, the scent of r...