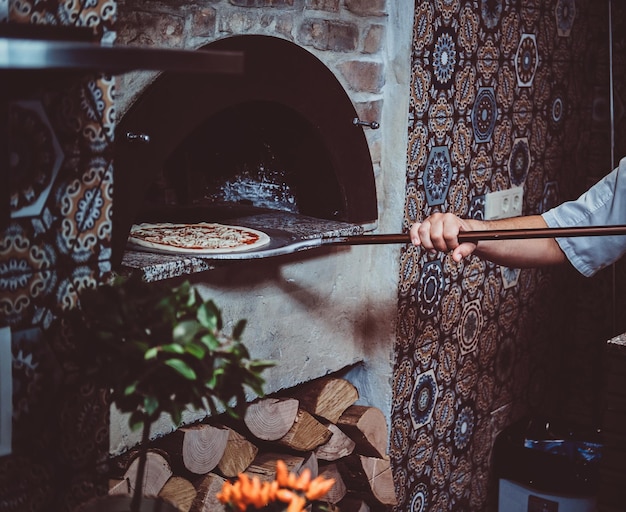
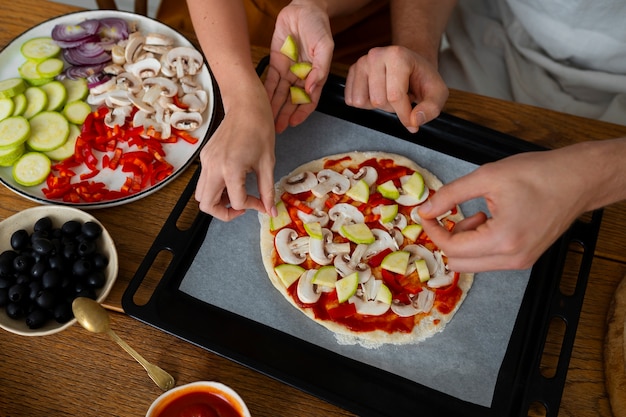
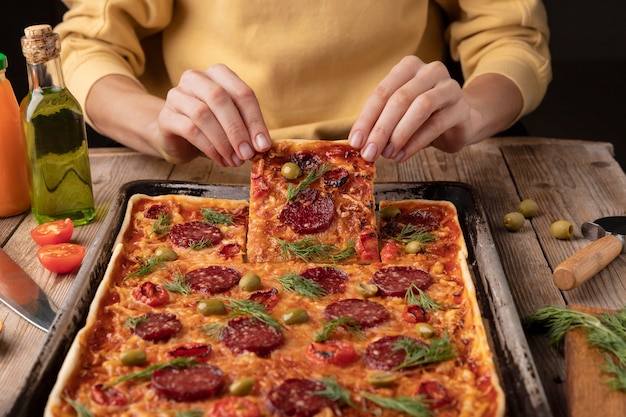
Let’s face it, everyone loves a good pizza. It’s the perfect party food, a comforting meal on a rainy day, and frankly, just plain delicious. But you know what truly elevates a pizza from good to glorious? Cooking it on a stone. Not just any stone, mind you, but a proper, oven-ready stone that radiates heat, crisps the base, and gives it that irresistible char.
I’m not saying you can’t get a decent pizza on a baking sheet. But trust me, once you’ve tasted the magic of a stone-baked pizza, you’ll never go back. That’s where my journey began, a quest for pizza perfection, stone by stone.
(Part 1) The Stone

Choosing Your Stone
You have a few options when it comes to choosing a stone. You can go with a classic pizza stone, a pre-seasoned stone, or even a trusty cast iron skillet. Each has its pros and cons, so let’s delve a bit deeper.
- Pizza Stone: These are the standard bearers, your basic, go-to stones. Usually made from ceramic or cordierite, they’re known for their excellent heat retention and distribution. You’ll find them in most kitchen stores and they're generally affordable. Just remember to preheat them thoroughly and be mindful of those scorching handles!
- Pre-seasoned Stone: These stones come with a layer of oil already applied, which helps prevent sticking and adds a subtle flavour to your pizza. They’re a bit pricier than the classic pizza stones, but the time-saving aspect can be a real bonus. Be sure to check the instructions though, as they might require specific care.
- Cast Iron Skillet: A trusty cast iron skillet can surprise you with its pizza-baking prowess. They heat up incredibly quickly and deliver a deliciously crispy crust. Be prepared though, they’re hefty to handle and require a bit of muscle to maneuver.
My personal preference? I’m a loyal pizza stone fan. They’re versatile, durable, and a breeze to care for. But ultimately, the best stone for you depends on your baking preferences and budget.
Preparing Your Stone
Once you've got your stone, it's time to prep it for pizza action. Now, I’m not talking about a complicated ritual here. Stone care is pretty straightforward, but a little TLC goes a long way.
- Give it a Wash: Before you use it for the first time, give the stone a good scrub with soapy water and rinse it thoroughly. Make sure it’s completely dry before putting it in the oven.
- Pre-heat it Properly: This is crucial, folks. You want the stone piping hot before you lay down your pizza. I usually preheat my oven to 250°C (480°F) for at least 30 minutes.
- Avoid Oil or Butter: Resist the temptation to coat the stone with oil or butter. You don’t want to make it greasy, and it can affect the texture of your pizza. If you're worried about sticking, try dusting the stone lightly with flour or cornmeal before you place the pizza on it.
(Part 2) The Dough

Alright, let’s talk dough. Now, you can absolutely use store-bought dough, and in a pinch, it’ll do the job. But trust me, making your own dough is a whole different ball game. It’s like having a secret weapon in your kitchen arsenal.
Homemade Dough: Your Secret Weapon
I’ll be honest, making your own dough isn’t as intimidating as it seems. It takes a bit of time and patience, but the reward is immeasurable. You have complete control over the ingredients, the flavour, and the texture. It’s a game-changer, I tell you.
Here’s my go-to recipe, a basic yet reliable dough that always delivers:
Basic pizza dough recipe
Ingredients:
- 300g strong white bread flour
- 250ml warm water
- 1 tsp dried yeast
- 1 tsp sugar
- 1 tsp salt
- 2 tbsp olive oil
Instructions:
- In a large bowl, combine the flour and salt.
- In a separate bowl, dissolve the yeast and sugar in the warm water. Let stand for 5 minutes.
- Pour the yeast mixture into the flour mixture and stir with a wooden spoon until combined.
- Add the olive oil and knead the dough for about 10 minutes, or until smooth and elastic.
- Place the dough in a lightly oiled bowl, cover with cling film, and let rise in a warm place for 1-2 hours, or until doubled in size.
- Punch down the dough and shape it into a ball.
- Divide the dough into equal portions, cover, and let rest for 15 minutes.
- Roll out the dough into thin circles and transfer to a baking sheet or pizza stone.
- Top with your favourite toppings and bake in a preheated oven until golden brown and bubbly.
The Art of Shaping
Once you have your dough ready, it's time to get creative with shaping. That perfect thin, crispy crust or a thick, chewy base? It all comes down to how you shape your dough.
Here are some tips to help you sculpt your pizza dough like a pro:
- Start with a Ball: Form your dough into a smooth, tight ball. This helps ensure an even and consistent crust.
- Roll it Out: Use a rolling pin to roll out the dough to your desired thickness. I prefer a thin crust, but that's just me! Make sure the dough is spread evenly across the pizza stone.
- Don't Overwork it: Overworking the dough can make it tough and chewy. If you feel it becoming resistant, let it rest for a few minutes before continuing to shape it.
- Use a Pizza Peel: A pizza peel is a lifesaver for transferring your pizza from the counter to the hot stone. If you don’t have one, a greased baking sheet can work, but make sure it’s well-greased to prevent the dough from sticking.
(Part 3) The Toppings

Now we’re getting to the fun part – toppings! The beauty of pizza is that it’s entirely customizable. Go classic, go adventurous, or simply throw on whatever you have in your fridge. The world is your oyster, or should I say, your pizza stone.
Keeping It Classic
If you’re craving a timeless pizza experience, you can't go wrong with a Margherita. It’s simple, elegant, and utterly delicious. The key to a winning Margherita is using fresh, high-quality ingredients and keeping it light.
- Tomato Sauce: Use a good-quality canned tomato sauce or whip up your own. The flavour of the sauce is front and center in a Margherita, so don’t skimp on it.
- Mozzarella Cheese: Fresh mozzarella is the ultimate choice. It melts beautifully, giving the pizza a creamy, tangy flavour.
- Basil: Fresh basil is a must. It adds a touch of freshness and fragrance that complements the mozzarella perfectly.
Getting Adventurous
Of course, you don’t have to stick with the classics. Experiment! That’s the beauty of pizza. Want to create a spicy masterpiece? Add some hot peppers. Craving something meaty? Throw on some pepperoni or ham. The possibilities are endless.
Here are a few of my favourite non-traditional pizzas that will tickle your taste buds:
- The Mediterranean: A classic Margherita with the addition of kalamata olives, artichoke hearts, and feta cheese.
- The BBQ Chicken: A tangy bbq sauce base, topped with grilled chicken, red onion, and mozzarella cheese.
- The Vegetarian: A colorful and flavorful pizza with a variety of vegetables, such as bell peppers, onions, mushrooms, and spinach.
The Art of Toppings
Here are a few tips to help you master the art of topping your pizza:
- Less is More: Too many toppings can overwhelm the flavour of the crust. Choose a few key ingredients and focus on their quality.
- Don't Overload the Dough: Too many toppings can make the dough soggy. You want a balanced ratio of toppings to crust.
- Spread the Toppings Evenly: This ensures every slice has a good mix of everything.
- Add the Cheese Last: This helps prevent the cheese from burning and ensures it melts perfectly.
(Part 4) Baking the Perfect Pizza
You’ve got your stone, your dough, your toppings. Now it’s time to bake your masterpiece.
Preheating is Key
As I mentioned earlier, preheating your stone is absolutely essential. A hot stone is the secret to a crispy crust and evenly cooked toppings.
Baking Time
The baking time for your pizza depends on the thickness of the crust and the type of oven you're using. A good rule of thumb is to bake it for 5-8 minutes, or until the crust is golden brown and the cheese is melted and bubbly.
Watch Your Pizza
I’ve learned this the hard way: keep an eye on your pizza! You don’t want to overcook it. The last thing you want is a burnt crust or charred toppings. Check on your pizza every few minutes and adjust the baking time as needed.
(Part 5) Serving Time
Your pizza is baked, golden brown and bubbly, and it smells divine. You’re ready to dig in, but hold your horses. There are a few things to consider before you slice and serve.
Let it Rest
This is a crucial step that many people skip. Allow your pizza to rest for a few minutes after baking. This helps the crust firm up and the cheese to set, making it easier to slice and preventing the toppings from sliding off.
Slicing
Now comes the fun part: slicing! There are endless ways to slice a pizza. Use a sharp pizza cutter for clean, even cuts.
My personal preference is to cut the pizza into slices that are about 1 inch wide.
The Ultimate Pizza Feast
You’ve done it! You’ve cooked the perfect pizza on a stone. Now it's time to enjoy it. Serve your pizza hot and fresh with your favourite sides.
(Part 6) Pizza Pairings
A pizza is a beautiful thing on its own, but there’s nothing quite like pairing it with some delicious sides.
Classic Combinations
Here are a few classic pairings that will never let you down:
- Garlic Bread: A simple yet delicious side that goes well with any pizza.
- Salad: A refreshing and healthy option that balances out the richness of the pizza.
- Potato Wedges: Crispy and tasty, potato wedges are a crowd-pleasing side.
- Bruschetta: A light and flavourful appetizer that’s perfect for a pre-pizza snack.
Beyond the Classics
Don't be afraid to experiment with your pairings. You can create amazing flavour combinations. For example, a spicy pizza would pair well with a cooling cucumber salad.
Here are a few more creative pairings to try:
- fruit salad: The sweetness of the fruit complements the savory flavours of the pizza.
- Caprese Skewers: A fresh and flavourful option that’s perfect for a summer pizza feast.
- Hummus and Pita Bread: A healthy and satisfying option that’s perfect for dipping.
(Part 7) The Care and Keeping of Your Stone
You’ve put a lot of love and effort into your stone, now it's time to give it the respect it deserves. Taking care of your stone will ensure that it lasts for years to come, delivering delicious pizzas for many meals to come.
Cleaning Your Stone
It's tempting to soak your stone in water, but it’s not the best idea. You can ruin it if you get it too wet. Here’s the best way to keep it clean and pristine:
- Let it Cool: After baking, let the stone cool down completely before you clean it.
- No Soaking: Never soak your stone in water. It can absorb moisture and crack, ruining your beloved stone.
- Gentle Scrubbing: Use a brush or a sponge to gently scrub off any food particles.
- No Soap: Avoid using soap or detergents on your stone, as they can leave residue and affect the flavour of your pizza.
Storing Your Stone
Where you store your stone is as important as how you clean it. Here’s how to ensure your stone is well-protected:
- Dry Storage: Store your stone in a dry place. Ideally, keep it on a rack or shelf so that air can circulate around it.
- Protect it from Damage: Avoid stacking heavy objects on top of your stone, as it can crack.
(Part 8) FAQs
You’ve got questions, and I’ve got answers. Here are a few of the most common questions about cooking pizza on a stone.
| Question | Answer |
|---|---|
| Can I use my stone for other things besides pizza? | Absolutely! Your stone can be used to bake bread, cookies, pastries, and more. It’s a versatile tool that can enhance any baking experience. |
| How long does a pizza stone last? | With proper care, your pizza stone should last for years. |
| Can I use my stone in a gas oven? | Yes, you can use a stone in a gas oven. Just be sure to preheat it thoroughly before you bake your pizza. |
| Should I oil my stone? | No, you shouldn't oil your stone. Oil can cause it to become greasy, which can affect the texture of your pizza. |
| What if my pizza is sticking to the stone? | If you find your pizza sticking to the stone, try dusting it with a little flour or cornmeal before you bake it. You can also try using a pizza peel that's lightly dusted with flour. |
There you have it! My ultimate guide to cooking pizza on a stone. I hope it has inspired you to take your pizza game to the next level. So, fire up your oven, grab your stone, and get ready to create some pizza perfection.
Everyone is watching

Prime Rib Roast Cooking Time Chart: Per Pound Guide
Cooking TipsPrime rib roast. Just the name conjures images of lavish dinners, crackling fires, and hearty laughter. It’s ...

How Long to Bake Potatoes in the Oven (Perfect Every Time)
Cooking TipsBaked potatoes are a staple in my kitchen. They're incredibly versatile, delicious, and surprisingly easy to m...

Perfect Rice Every Time: The Ultimate Guide to Cooking Rice
Cooking TipsAs a self-proclaimed foodie, I've always been a bit obsessed with rice. It's the foundation of countless cuisi...

The Ultimate Guide to Cooking Asparagus: Tips, Techniques, and Recipes
Cooking TipsAsparagus. The mere mention of this spring delicacy conjures up images of vibrant green spears, crisp and burs...

Ultimate Guide to Cooking the Perfect Thanksgiving Turkey
Cooking TipsThanksgiving. Just the word conjures up images of overflowing tables laden with delicious food, the scent of r...
