(Part 1) The Oven: Your Pizza’s Best Friend

The oven is the heart and soul of any pizza-making operation. It’s the key to transforming a simple dough into a delicious, golden-brown masterpiece. So, it’s essential to understand the different types of ovens and how they affect your pizza's cooking time.
Home Ovens: A Beginner's Haven
Most of us are probably working with a good old-fashioned home oven. They’re readily available and easy to use, making them ideal for the average pizza enthusiast. But home ovens can be a bit tricky when it comes to achieving that perfect crust. They don’t always provide the consistent heat and high temperatures needed for a proper pizza bake. For example, if you’re using a gas oven, the temperature can fluctuate, leading to uneven cooking and a crust that’s not as crispy as you’d like.
Pizza Ovens: The Pro’s Choice
Now, if you’re serious about your pizza game, a dedicated pizza oven is the way to go. These ovens are designed specifically for pizza baking, reaching high temperatures that create that crispy, bubbly crust you crave. You’ll find a variety of pizza ovens on the market, from wood-fired behemoths to smaller countertop models.
Wood-fired ovens, for example, use the intense heat of burning wood to cook pizzas quickly and evenly, resulting in a crust with a smoky flavour. Countertop pizza ovens, on the other hand, are more compact and convenient, but they don’t quite reach the same high temperatures as their larger counterparts. If you’re looking for a serious upgrade, this is definitely worth considering.
(Part 2) Pizza Dough: The Foundation of Your Masterpiece
Let's be real, a good pizza starts with a fantastic dough. It’s the foundation that holds everything together, and it plays a crucial role in the final outcome. You can either buy ready-made dough or make your own. But remember, homemade dough is always the best option. It’s more flavorful, and you can control the ingredients.
Homemade Dough: The Ultimate Pizza Experience
Making your own pizza dough is a rewarding experience and doesn't have to be a complex process. The key is to use high-quality ingredients and let the dough rest properly. You can find countless recipes online, but here's a basic one to get you started:
Ingredients:
- 1 cup warm water (about 105°F/40°C)
- 1 teaspoon active dry yeast
- 1 teaspoon sugar
- 2 tablespoons olive oil
- 2 1/2 cups all-purpose flour, plus more for dusting
- 1 teaspoon salt
Instructions:
- In a large bowl, combine the warm water, yeast, and sugar. Let stand for 5 minutes, until the yeast is foamy. This indicates the yeast is active and ready to work its magic on the dough.
- Add the olive oil, flour, and salt to the yeast mixture. Stir until a dough forms. At first, it might be a bit sticky, but keep kneading and the dough will come together.
- Turn the dough out onto a lightly floured surface and knead for 5-7 minutes, until smooth and elastic. Kneading develops the gluten in the flour, which gives the dough its structure and chewiness.
- Place the dough in a lightly oiled bowl, cover with plastic wrap, and let rise in a warm place for 1 hour, or until doubled in size. This allows the yeast to ferment, creating air pockets in the dough and making it rise.
- Punch down the dough and divide it into 2-3 balls, depending on the size of your pizza. This releases the air trapped in the dough and makes it easier to shape.
- Shape the dough into your desired pizza shape, either round or rectangular. If you’re going for a classic round pizza, you can use your hands to gently stretch and shape the dough. For a rectangular pizza, use a rolling pin to flatten the dough.
Once you’ve got your dough prepped, it’s time to focus on the star of the show: the toppings.
(Part 3) Toppings: The Flavor Explosion

The beauty of pizza lies in its versatility. You can experiment with a wide range of toppings, creating endless flavor combinations. From classic pepperoni to exotic ingredients like pineapple and artichokes, the options are truly limitless.
A Balanced Topping Game
The key to a successful pizza is balance. Too many toppings can overwhelm the flavor of the dough and sauce, while too few can make the pizza feel bland. I generally stick to a few key ingredients for a satisfying pizza experience. For example, a classic pepperoni pizza with just a sprinkle of oregano and a dash of garlic powder keeps it simple but effective. If you’re feeling adventurous, try adding some caramelized onions, roasted peppers, or fresh mushrooms for an extra kick.
The Sauce: The Secret Weapon
The sauce is another crucial component of a good pizza. It adds a layer of flavor and moisture that brings everything together. There are plenty of pre-made sauces available, but making your own is a great way to personalize your pizza. My go-to is a simple tomato sauce made with crushed tomatoes, garlic, and fresh herbs. But you can also experiment with different sauces like pesto, Alfredo, or barbecue sauce.
The type of sauce you use can also influence the overall flavor profile of your pizza. A tomato sauce will give you a classic taste, while pesto will add a more earthy and herbaceous flavor. alfredo sauce will add a creamy and rich flavor, and barbecue sauce will add a smoky and tangy flavor. It all comes down to personal preference.
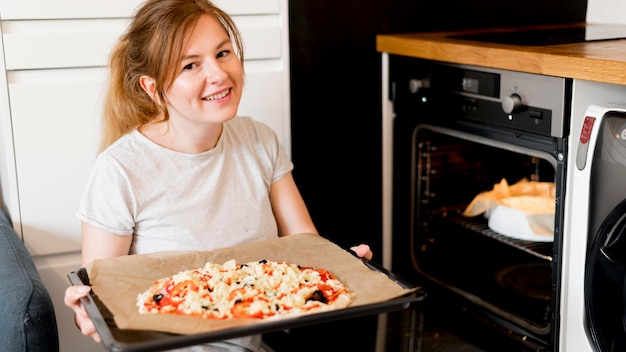
(Part 4) Preheating the Oven: The First Step to Success
Before you even think about putting your pizza in the oven, preheating is crucial. It ensures that your pizza cooks evenly and develops a crispy crust. This applies to both traditional ovens and pizza ovens.
Understanding Oven Temperatures
For a home oven, the ideal temperature is around 450°F (232°C). But if you’re using a pizza oven, you can crank up the heat to even higher temperatures (up to 800°F/427°C). The higher the temperature, the faster your pizza will cook, resulting in a crispier crust.
Let the oven preheat for at least 30 minutes before you start cooking. This allows the oven to reach its optimal temperature and provides a consistent heat source for your pizza. A preheated oven will ensure that your pizza cooks evenly and quickly, without burning the crust.
(Part 5) Pizza Cooking Time: The Art of Timing
Now, this is the tricky part – knowing exactly how long to cook your pizza. Unfortunately, there’s no magic number. Pizza cooking time depends on several factors, including your oven type, the thickness of the dough, and the toppings.
For example, a thin crust pizza will cook faster than a thick crust pizza, and a pizza with lots of toppings will take longer to cook than a pizza with fewer toppings. The key is to keep a close eye on your pizza and adjust the cooking time accordingly.
General Guidelines for Pizza Cooking Time
Here’s a general guideline for pizza cooking time in a home oven:
| Pizza Thickness | Cooking Time |
|---|---|
| Thin Crust | 8-10 minutes |
| Medium Crust | 10-12 minutes |
| Thick Crust | 12-15 minutes |
For pizza ovens, the cooking time is significantly shorter. You might only need 2-3 minutes to achieve a perfectly cooked pizza. But the best way to determine the right cooking time is to keep an eye on your pizza.
Pizza Cooking: The Key to Success
Here are some tips for ensuring your pizza is cooked to perfection:
- Watch the crust: The crust should be golden brown and crispy. You can also check the bottom of the crust to see if it's cooked through. If it's still pale, it needs more time in the oven.
- Check the cheese: The cheese should be melted and bubbly. If the cheese is still runny, the pizza needs more time to cook.
- Rotate the pizza: Rotate the pizza halfway through cooking to ensure it cooks evenly. This will prevent the pizza from getting too brown on one side and undercooked on the other.
(Part 6) Pizza Done Right: Signs of Success
Now, we're getting to the good stuff – the visual cues that tell you your pizza is done. It's not just about the timer; it's about knowing those little signs of a perfect bake.
The Telltale Signs: A Pizza Chef's Secrets
Here’s what to look for when your pizza is in the oven:
- Golden brown crust: The crust should be a beautiful golden brown color. This indicates that it's cooked through and has developed a nice crispy texture. The crust should also be slightly puffed up with air bubbles, which means the yeast has worked its magic and created a light and airy texture.
- Melted and bubbly cheese: The cheese should be fully melted and bubbly. This means it's heated through and ready to enjoy. The cheese should be evenly melted and bubbly, not just in some areas.
- Toppings are heated through: Your toppings should be cooked to your liking. If you’re using meat, it should be cooked through, and vegetables should be softened. The toppings should be heated through, but not overcooked. Overcooked toppings can become dry and rubbery.
(Part 7) Beyond the Basics: Elevating Your Pizza Game
So, you've mastered the basics. Now, let’s spice things up a bit, shall we? It’s time to level up your pizza-making skills and explore some advanced techniques that will take your pizzas from good to absolutely amazing.
The Art of Pizza Dough: Tips for Perfection
Here are some tips for elevating your dough game:
- Use high-quality flour: Using a high-protein flour, like bread flour, will give you a dough with more structure and a better gluten development, resulting in a more flavorful and chewy crust. The higher protein content in bread flour will help the dough hold its shape better during cooking, preventing it from becoming too flat and thin. It will also give the crust a more satisfying chew.
- Cold fermentation: This technique involves letting the dough rise slowly in the refrigerator for several hours or even overnight. This results in a more flavorful and complex dough with a more nuanced flavor profile. Cold fermentation allows the yeast to slowly break down the complex starches in the flour, which results in a more complex flavor profile and a more digestible dough. It also helps to develop a more open crumb structure, making the crust more airy and light.
- Use a pizza stone: A pizza stone absorbs heat and distributes it evenly, creating a crispy crust. It also helps prevent the dough from sticking to the baking surface. A pizza stone helps to create a more even cooking surface, preventing the crust from burning on the bottom while the top is still raw. It also helps to create a more crispy crust, as the stone retains heat and radiates it back onto the pizza.
Toppings: Adding That Extra Touch
Experiment with different topping combinations and explore new flavor profiles.
- Roasted vegetables: Roasting vegetables like peppers, onions, and mushrooms concentrates their flavor and adds a smoky element to your pizza. Roasting vegetables also helps to soften them, making them more palatable and easier to digest.
- Fresh herbs: Add fresh herbs like basil, oregano, and rosemary to your pizza for a burst of flavor. Fresh herbs add a bright and vibrant flavor to your pizza, complementing the other toppings and sauce.
- Gourmet cheeses: Try using cheeses like goat cheese, ricotta cheese, or mozzarella di bufala for a more sophisticated taste. These cheeses have a more nuanced flavor profile and can add a touch of elegance to your pizza. You can also try using different types of mozzarella, like fresh mozzarella or smoked mozzarella, to add a different twist to your pizza.
(Part 8) FAQs: Pizza Cooking Time Mysteries Solved
Got questions? No worries! I’ve got you covered. Here are some frequently asked questions about pizza cooking time.
1. How do I know when my pizza is done if I don’t have a pizza stone?
If you don’t have a pizza stone, you can still achieve a crispy crust by using a baking sheet. Just make sure to preheat the baking sheet in the oven for at least 30 minutes before placing your pizza on it. This will help to heat the baking sheet and create a more even cooking surface for your pizza. You can also use a piece of parchment paper on the baking sheet to prevent the dough from sticking.
2. Can I cook frozen pizza in a pizza oven?
Absolutely! A pizza oven is the perfect way to cook frozen pizza. Just be sure to reduce the cooking time, as frozen pizza will cook faster than fresh pizza. You’ll also want to make sure the frozen pizza is fully thawed before cooking, otherwise, it may not cook evenly.
3. What’s the best way to clean my pizza stone?
You can simply clean your pizza stone with hot water and soap. Avoid using abrasive cleaners or scouring pads, as they can damage the stone. If there’s any stubborn residue on the stone, you can use a little bit of baking soda to help loosen it up. After cleaning, let the stone dry completely before storing it. If you’re using a pizza stone, it’s important to clean it properly after each use to prevent bacteria from growing on it.
4. How do I get my pizza crust to rise properly?
Make sure you use active yeast and let the dough rise in a warm place for at least an hour. This will give the yeast time to activate and create bubbles in the dough. You can also try using a warm water bath to help the dough rise faster. Just fill a bowl with warm water and place the dough on top of the bowl. The warmth of the water will help the yeast to activate and rise more quickly.
5. What can I do if my pizza crust is too thin?
If your pizza crust is too thin, you can try using a thicker dough recipe or adding more flour to the dough. You can also try using a pizza stone to help distribute the heat evenly and prevent the crust from burning. If your pizza crust is too thin, it may become too crispy and difficult to handle. Adding more flour to the dough will make it thicker and more substantial, making it easier to work with and resulting in a less crispy crust. Using a pizza stone will help to distribute the heat evenly and prevent the crust from burning while also helping to create a more crispy crust.
(Part 9) Pizza Perfection: A Journey, Not a Destination
Right, there you have it – a comprehensive guide to pizza cooking time. Remember, making pizza is a journey, not a destination. It’s about exploring different flavors, experimenting with toppings, and learning from your mistakes. So don’t be afraid to get creative and have fun with it.
And who knows? You might just become a pizza-making pro in no time!
Let me know what you think of this refined version. I'm always looking for ways to improve my writing. I hope this provides some valuable information and inspiration for your next pizza-making adventure!
Everyone is watching

Prime Rib Roast Cooking Time Chart: Per Pound Guide
Cooking TipsPrime rib roast. Just the name conjures images of lavish dinners, crackling fires, and hearty laughter. It’s ...

How Long to Bake Potatoes in the Oven (Perfect Every Time)
Cooking TipsBaked potatoes are a staple in my kitchen. They're incredibly versatile, delicious, and surprisingly easy to m...

Perfect Rice Every Time: The Ultimate Guide to Cooking Rice
Cooking TipsAs a self-proclaimed foodie, I've always been a bit obsessed with rice. It's the foundation of countless cuisi...

The Ultimate Guide to Cooking Asparagus: Tips, Techniques, and Recipes
Cooking TipsAsparagus. The mere mention of this spring delicacy conjures up images of vibrant green spears, crisp and burs...

Ultimate Guide to Cooking the Perfect Thanksgiving Turkey
Cooking TipsThanksgiving. Just the word conjures up images of overflowing tables laden with delicious food, the scent of r...