From the bustling markets of Istanbul to the cozy kitchens of my own home, the allure of pita bread has captivated me. There's a magic to this simple flatbread - it's more than just a delicious food, it's a canvas for countless culinary creations. For years, I've been a self-proclaimed bread enthusiast, constantly experimenting with recipes and techniques. But pita bread has always held a special place in my heart. It's a recipe that never fails, always resulting in a soft, fluffy, and slightly chewy masterpiece. Today, I'm sharing my tried and true pita bread recipe, along with all the tips and tricks I've gathered over the years, to help you bake up a batch of these delicious pockets of joy.
(Part 1) The Journey Begins: A Love Story with Pita Bread
My love affair with pita bread began on a whirlwind backpacking adventure through Turkey. I vividly remember being swept away by the vibrant colours and intoxicating aromas of a bustling marketplace. There, nestled amongst a symphony of sights and smells, was a small stall selling freshly baked pita bread. I took a bite, and my taste buds were awakened. It was a revelation: soft, fluffy, slightly chewy, with a hint of sweetness. It was a taste of perfection, a taste of Turkey itself. That day, I knew this wasn't just another bread; it was a culinary treasure.
What Makes Pita Bread So Special?
Pita bread is more than just a simple flatbread. It's a unique culinary creation, a testament to the power of simplicity. Its secret lies in the way it's cooked, which creates a large, airy pocket, begging to be filled with all sorts of delicious treats. It's a culinary chameleon, adapting to every occasion and taste. Here's why I'm so smitten with pita bread:
- It's incredibly versatile: Think sandwiches, wraps, pizzas, even a base for dips and spreads. Pita bread is a culinary chameleon, transforming into whatever you need it to be.
- It's budget-friendly: The ingredients are simple, affordable, and readily available at any grocery store.
- It's quick and easy to make: With a little practice, you can have a batch of fresh pita bread ready in under an hour.
- It's unbelievably delicious: Warm, fluffy, slightly chewy, with a hint of sweetness - freshly baked pita bread is a taste of pure joy.
(Part 2) The Ingredients: A Symphony of Flavour
The beauty of pita bread lies in its simplicity. You don't need a fancy pantry or a Michelin-star chef to create this culinary delight. Just a few humble ingredients are all you need. Here's what I always make sure I have on hand:
Essential Ingredients:
- Flour: For a classic pita bread, plain flour (all-purpose flour) is the way to go. It provides a balanced texture and flavour. If you want a chewier texture, you can experiment with bread flour, which has a higher protein content.
- Yeast: Active dry yeast is the workhorse of bread baking. It's easy to find at most grocery stores and is responsible for that beautiful airy texture.
- Warm water: The water should be warm but not hot, around 105-115 degrees Fahrenheit. This helps activate the yeast, making it come alive and work its magic.
- Salt: Salt is a key ingredient in any bread, enhancing flavour and controlling the yeast. I typically use about 1 teaspoon per cup of flour.
- Olive oil: Olive oil adds richness and a subtle, earthy flavour to the bread. I like to brush the dough with a little olive oil before baking, giving it a golden glow.
Optional Extras:
For a little extra pizzazz, you can add a few optional ingredients to your pita bread recipe. Here are some of my personal favourites:
- Herbs: Dried herbs like oregano, rosemary, or thyme add an aromatic complexity to the bread.
- Garlic: A clove of minced garlic, added to the dough, will fill your kitchen with a wonderful aroma and infuse the bread with a subtle garlic flavour.
- Honey: A touch of honey adds a hint of sweetness, balancing out the savoury flavours.
(Part 3) The Dance of the Dough: Bringing the Bread to Life
Making pita bread dough is a delightful process, a rhythmic dance of ingredients and hands. It's a simple, satisfying journey that requires no fancy techniques, just a little patience and a sprinkle of culinary magic. Follow these steps, and you'll be on your way to creating your own pita bread masterpiece:
Steps for Making Pita Dough:
- Activate the yeast: In a small bowl, combine the warm water and yeast. Let it sit for 5-10 minutes, or until the yeast is foamy. This is your first sign that the yeast is alive and ready to work its magic.
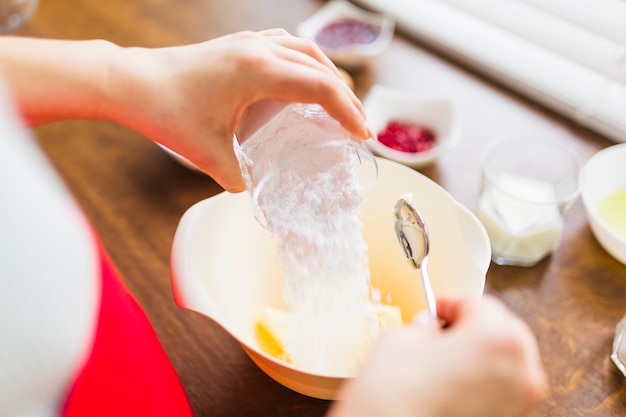
- Mix the dry ingredients: In a large bowl, whisk together the flour and salt. This creates the foundation of your bread, a simple yet essential blend of textures and flavours.
- Combine wet and dry ingredients: Pour the yeast mixture into the flour mixture and stir with a wooden spoon until a shaggy dough forms. The shaggy dough is a good sign; it means the ingredients are coming together, but it's still a bit rough around the edges.
- Knead the dough: Turn the dough out onto a lightly floured surface and knead for 5-7 minutes, or until smooth and elastic. You can also use a stand mixer with a dough hook to knead the dough. This is where the real magic happens; the kneading develops the gluten in the flour, creating a soft, pliable dough.
- Let the dough rise: Place the dough in a lightly greased bowl, cover it with a clean kitchen towel, and let it rise in a warm place for 1-1 1/2 hours, or until doubled in size. This is the crucial resting period; it allows the yeast to work its magic, making the dough rise and become light and airy.
(Part 4) Shaping the Bread: Transforming Dough into Pita
After the dough has risen, it's time to transform it into individual pita breads. This is where you can get creative and experiment with different shapes and sizes. But the basic process remains the same:
Steps for Shaping Pita Bread:
- Divide the dough: Divide the dough into 8-10 equal pieces. This is a good starting point, but you can adjust the number of pita breads depending on your desired size.
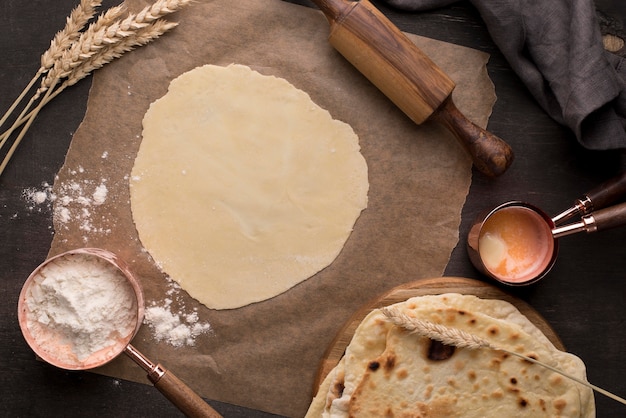
- Roll out the dough: On a lightly floured surface, roll out each piece of dough into a thin circle, about 6-8 inches in diameter. I like to use a rolling pin for this step, but you can also use your hands. The goal is to create a thin, even disc that will cook quickly and evenly.
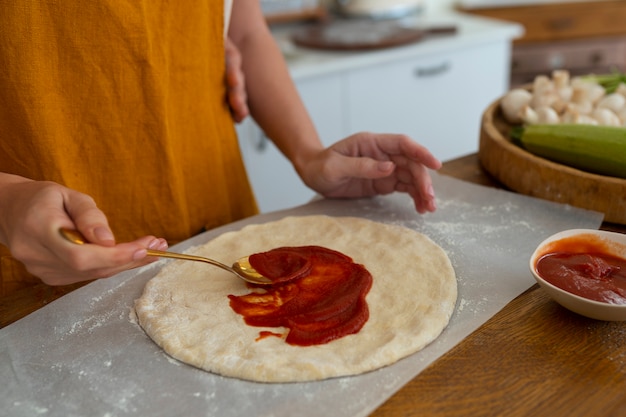
- Brush with olive oil: Brush the surface of each pita with a little olive oil. This helps the bread cook evenly and creates a lovely golden brown colour. It also adds a touch of richness and flavour to the bread.
(Part 5) The Baking Ritual: Transforming Dough into Delight
The final step is the most exciting part: baking your pita bread. You can choose to bake it in a regular oven or on a griddle, both methods work well and produce beautiful results. Choose the method that best suits your kitchen and your preferences.
baking pita bread in the Oven:
- Preheat your oven: Preheat your oven to 450 degrees Fahrenheit (230 degrees Celsius). The high heat helps the bread puff up quickly.
- Bake the pita bread: Place the pita bread directly on the oven rack. Bake for 2-3 minutes per side, or until golden brown and puffed up. I like to rotate the pita bread halfway through baking to ensure even cooking. Keep a close eye on the bread, as it will puff up quickly.
- Wrap the pita bread: Once baked, immediately wrap the pita bread in a clean kitchen towel to keep it soft and pliable. This is a crucial step to prevent the bread from drying out.
Baking Pita Bread on a Griddle:
- Heat the griddle: Heat a large griddle or skillet over medium heat. Make sure the griddle is hot enough to create a nice sear on the bread.
- Cook the pita bread: Place the pita bread on the hot griddle and cook for 1-2 minutes per side, or until golden brown and puffed up. You’ll notice the pita bread will start to puff up, creating a large pocket. The hot griddle will create a beautiful, crispy crust on the bread.
- Wrap the pita bread: Once cooked, wrap the pita bread in a clean kitchen towel to keep it soft and pliable. This will help to retain the moisture in the bread.
(Part 6) Preserving the Magic: Storing Your Pita Bread
Pita bread is best enjoyed fresh, hot out of the oven. But, if you're making a large batch, you can store it for later use. Here's how to keep your pita bread fresh and delicious:
Storage Tips:
- Wrap the pita bread: Wrap the pita bread in a clean kitchen towel or plastic wrap to keep it from drying out. This helps to prevent the bread from becoming dry and hard.
- Store in a cool, dry place: Store the pita bread in a cool, dry place. Avoid storing it in the refrigerator, as this can make the bread dry out. A pantry or a cool cupboard is the ideal storage space.
- Reheat before serving: If you’re storing your pita bread for longer than a day, you can reheat it in the oven or microwave before serving. This will bring back the softness and warmth of the bread.
(Part 7) The Feast Begins: Serving Your Pita Bread
Finally, the moment of truth: serving your delicious homemade pita bread. The possibilities are endless, a symphony of flavours just waiting to be created. I always make sure to have a variety of fillings and dips on hand, so everyone can create their own unique pita masterpiece.
pita bread filling ideas:
- Hummus and vegetables: Classic and delicious, hummus and fresh vegetables are a match made in heaven. I like to use a combination of bell peppers, cucumbers, and carrots.
- Chicken and tahini sauce: A flavourful and satisfying combination. I like to use grilled chicken and a creamy tahini sauce, a perfect blend of savoury and nutty.
- Falafel and tahini sauce: Another classic combination. Falafel, with its crispy exterior and fluffy interior, is a perfect pairing with a creamy tahini sauce.
- Cheese and roasted vegetables: For a vegetarian option, try filling your pita bread with cheese and roasted vegetables. I like to use a combination of eggplant, zucchini, and peppers, roasted until they're tender and smoky.
- Grilled meats and vegetables: For a heartier meal, try filling your pita bread with grilled meats and vegetables. I like to use steak, chicken, or lamb, along with grilled onions, peppers, and mushrooms.
- Pita bread chips: For a fun snack, try cutting the pita bread into triangles and baking them until crispy. Serve them with your favourite dips.
Pita Bread Dip Ideas:
- Hummus: A classic Middle Eastern dip made from chickpeas, tahini, garlic, lemon juice, and olive oil. It's a creamy, flavourful, and versatile dip.
- baba ghanoush: A smoky and delicious dip made from roasted eggplant, tahini, garlic, lemon juice, and olive oil. It's a perfect blend of smoky, nutty, and tangy flavours.
- Tzatziki sauce: A refreshing and tangy Greek dip made from yogurt, cucumber, garlic, and dill. It's a light and refreshing dip that pairs well with grilled meats and vegetables.
- Guacamole: A creamy and flavorful Mexican dip made from avocados, onions, tomatoes, cilantro, and lime juice. It's a rich and creamy dip that's perfect for dipping chips or filling pita bread.
- Spicy salsa: A vibrant and flavorful Mexican salsa made from tomatoes, onions, cilantro, jalapeno peppers, and lime juice. It's a spicy and tangy dip that adds a kick to any dish.
(Part 8) The Art of Experimentation: A World of Flavour
Don't be afraid to experiment with different flavours and combinations. This is the beauty of homemade pita bread: it's a canvas for your creativity. The possibilities are truly endless!
Experimenting with Flavours:
- Spice it up: Add a pinch of cayenne pepper, paprika, or chili powder to the dough for a touch of heat.
- Go cheesy: Add some grated cheese to the dough for a cheesy flavour. I like to use cheddar or mozzarella, but feel free to experiment with your favourite cheeses.
- Sweeten it up: Add a teaspoon of honey or maple syrup to the dough for a hint of sweetness. This creates a beautiful balance of sweet and savoury flavours.
- Get creative with fillings: Try different combinations of vegetables, meats, cheese, and sauces. The possibilities are endless!
(Part 9) Mastering the Technique: Tips for Success
Here are a few tips to help you make the perfect pita bread every time. These are the little secrets I've learned over the years, the tricks of the trade that ensure a beautiful and delicious result.
Tips for Making Pita Bread:
- Use warm water: The water should be warm but not hot, around 105-115 degrees Fahrenheit. This helps activate the yeast, making it come alive and work its magic.
- Don’t overwork the dough: Overworking the dough can make it tough. Knead it for just 5-7 minutes, or until smooth and elastic.
- Let the dough rise in a warm place: A warm place helps the yeast to activate and the dough to rise. You can place the dough in a warm oven (with the light on) or in a sunny spot.
- Use a rolling pin: Using a rolling pin helps to create a thin and even pita bread, which will cook quickly and evenly.
- Brush with olive oil: This helps the bread cook evenly and creates a lovely golden brown colour. It also adds a touch of richness and flavour to the bread.
- Bake the pita bread on a hot surface: This helps the bread puff up and create a large pocket. Whether you're using an oven or a griddle, make sure the surface is hot enough to create a nice sear on the bread.
(Part 10) Navigating the Unexpected: Troubleshooting Pita Bread
Even experienced bakers face challenges sometimes. But don't worry, even if things don't go perfectly, there's a solution for every pita bread problem. Here are some common issues you might encounter and how to solve them:
Troubleshooting Pita Bread Issues:
- Pita bread doesn’t puff up: This could be because the yeast was not activated properly, or because the dough was not rolled out thin enough. Try re-activating the yeast or rolling the dough out thinner.
- Pita bread is too dry: This could be because the dough was over-kneaded or because it was baked for too long. Try kneading the dough for less time, or baking it for a shorter period.
- Pita bread is too tough: This could be because the dough was over-kneaded or because it was not baked properly. Try kneading the dough for less time, or baking it at a lower temperature.
- Pita bread is not cooked through: This could be because the dough was not rolled out thin enough, or because it was not baked for long enough. Try rolling the dough out thinner, or baking it for a longer period.
(Part 11) The Q&A: Your Pita Bread Questions Answered
You have questions, I have answers! Here are some common questions about pita bread and their solutions:
1. Can I make pita bread without yeast?
Yes, you can make pita bread without yeast. However, it will have a different texture and won’t be as fluffy as yeast-based pita bread. There are several recipes for yeast-free pita bread online, so you can try those out. They often use baking powder or baking soda to create a similar effect.
2. Can I freeze pita bread?
Yes, you can freeze pita bread. Just wrap it tightly in plastic wrap or aluminum foil. It should last for up to 3 months in the freezer. To thaw, simply leave it at room temperature for a few hours or reheat it in the oven or microwave.
3. How can I tell if pita bread is done baking?
Pita bread is done baking when it is golden brown and puffy. You’ll also notice that it will start to puff up as it cooks. If you’re unsure, you can always check the bottom of the pita bread with a toothpick. If it comes out clean, the pita bread is done.
4. What can I do with leftover pita bread?
Leftover pita bread can be used for a variety of things. You can crumble it up and use it in salads or soups, or you can toast it and serve it with dips and spreads. You can also use it to make pita chips or pita bread croutons.
5. What’s the best way to reheat pita bread?
The best way to reheat pita bread is to wrap it in a clean kitchen towel and microwave it for 10-15 seconds. You can also reheat it in the oven at 350 degrees fahrenheit (175 degrees Celsius) for 5-10 minutes.
(Part 12) A culinary journey Continues: Final Thoughts
Making your own pita bread is a rewarding and delicious experience. It's a simple recipe that even novice bakers can master. So, gather your ingredients, put on your apron, and get ready to create some delicious homemade pita bread. You won’t regret it! It's a journey of culinary discovery, a celebration of simple ingredients, and a taste of joy that will stay with you long after the last bite.
I hope this recipe has inspired you to try making pita bread at home. It's such a versatile bread that can be used in so many different ways. And the best part is, it’s so easy to make! Once you try it, you’ll never want to buy pita bread from the shop again. Happy baking! And remember, the best way to learn is to experiment, to embrace the unexpected, and to enjoy the journey.
Everyone is watching

Prime Rib Roast Cooking Time Chart: Per Pound Guide
Cooking TipsPrime rib roast. Just the name conjures images of lavish dinners, crackling fires, and hearty laughter. It’s ...

How Long to Bake Potatoes in the Oven (Perfect Every Time)
Cooking TipsBaked potatoes are a staple in my kitchen. They're incredibly versatile, delicious, and surprisingly easy to m...

Perfect Rice Every Time: The Ultimate Guide to Cooking Rice
Cooking TipsAs a self-proclaimed foodie, I've always been a bit obsessed with rice. It's the foundation of countless cuisi...

The Ultimate Guide to Cooking Asparagus: Tips, Techniques, and Recipes
Cooking TipsAsparagus. The mere mention of this spring delicacy conjures up images of vibrant green spears, crisp and burs...

Ultimate Guide to Cooking the Perfect Thanksgiving Turkey
Cooking TipsThanksgiving. Just the word conjures up images of overflowing tables laden with delicious food, the scent of r...