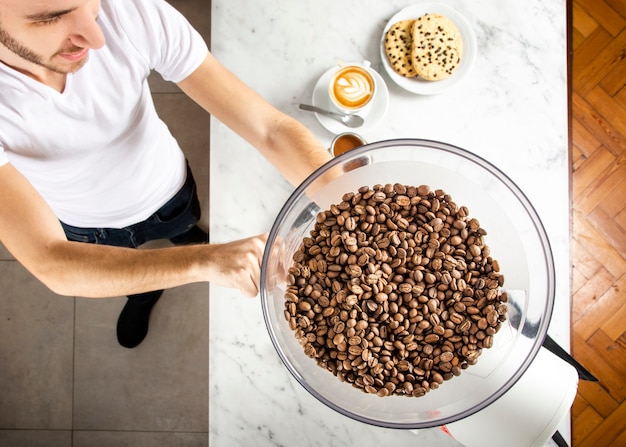
(Part 1) – Getting to Know Your Beans
What’s So Special About Pinto Beans?
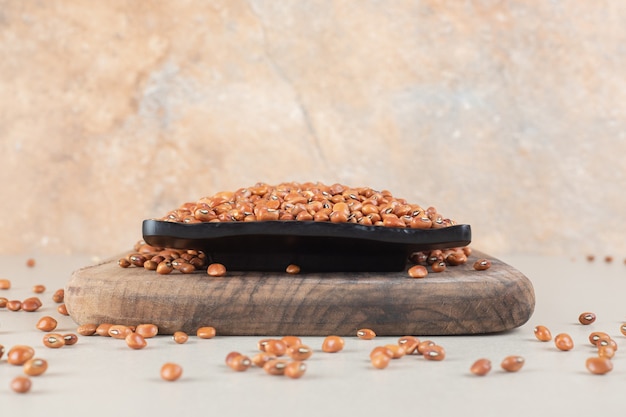
Pinto beans, those speckled beauties, are actually a type of kidney bean. They get their name "pinto" because they look like they’ve been dotted with paint. And trust me, they’re a nutritional powerhouse. They’re packed with protein, fibre, and all sorts of vitamins and minerals, making them a great addition to a balanced diet. Plus, they’re a good source of iron, which is always a bonus, especially for vegetarians. And let’s not forget their affordability – a good bag will set you back a couple of quid in any supermarket.
Why They’re So Popular
Pinto beans are popular for good reason! They add a lovely flavour and texture to all sorts of dishes. They can be enjoyed in a variety of ways, from classic Mexican dishes to hearty stews. They’re also super versatile, working well in both hot and cold dishes.
(Part 2) – The Essential Prep Work: Pinto Bean Spa Day
Before we get into the actual cooking, we need to do some prep work. And this step is crucial – it’s the difference between a mushy mess and perfectly cooked beans. So, pay attention!
Sorting and Cleaning: A Quick Bean Check-up
First things first, grab your beans and give them a good look over. A bowl filled with cold water is the best way to do this. You’ll find a few bits of debris here and there – a bit of a bean spa is always good for them! Just pick out any discoloured beans, small rocks, and anything else that doesn’t belong. And then, give them a good rinse after you’ve sorted them. It’s a small detail, but it makes a difference to the final taste and texture.
Soaking: The Key to Tender Beans
Soaking is absolutely essential. It softens the beans, making them cook faster and reducing the risk of those dreaded gas attacks. Overnight soaking is ideal, but if you’re short on time, at least 4 hours is a good minimum. To soak, just cover your beans with plenty of cold water and pop them in the fridge. Just remember to change the water after 4-6 hours, especially if you’re soaking for longer – it keeps them fresh and prevents any funny odours.
(Part 3) – The Art of Stovetop Cooking
Now, let’s get down to business! The stovetop is where the magic happens. Don’t worry, it’s simpler than you think.
Choosing the Right Pot: Space is Key
You’ll need a pot that’s big enough to hold your beans and plenty of water. They need room to cook evenly, so a heavy-bottomed stockpot is my go-to. They distribute the heat more evenly and help prevent sticking.
Water to Bean Ratio: Keeping Them Submerged
You’ll want to use enough water to cover the beans by at least 2-3 inches. Remember, the water will be absorbed as the beans cook, so don’t be afraid to add more as needed.
Adding Flavour: Seasoning Your Beans
This is where you can get creative! I love adding a bay leaf, a few cloves of garlic, and a bit of salt to my beans. You can even add a pinch of cumin or paprika if you fancy a bit of spice. The possibilities are endless!
Simmering to Perfection: Patience is Key
Bring your pot of beans to a boil, then reduce the heat to a gentle simmer. This is where patience comes in. You’ll need to simmer your beans for about 1-2 hours, or until they’re tender. The exact time will vary depending on the age of the beans and your preferred texture. For me, I like them nice and soft, so I often simmer for 2 hours. Just make sure to stir them every now and then.
(Part 4) – Checking for Doneness: The Finger Test
So, how do you know if they’re done? There’s a simple trick I learned from my grandma. Grab a bean and try to smash it between your fingers. If it crushes easily, you’re good to go. If it’s still a bit firm, simmer it for a bit longer.
(Part 5) – Storing Your Cooked Beans: Ready for Action
Once your beans are cooked, you can store them in the fridge for up to 5 days. I often make a big batch and use them for different recipes throughout the week. Just make sure to keep them submerged in the cooking liquid. This helps keep them moist and prevents them from drying out.
(Part 6) – Pinto Bean Power: A World of Delicious Recipes
So, you've got a pot full of delicious, cooked pinto beans. What’s next? The world is your oyster!
Salads: Adding a Burst of Texture
I love adding pinto beans to salads. They add a bit of protein and a satisfying crunch. They go well with all sorts of veggies, like lettuce, tomatoes, peppers, and onions. Just make sure to dress your salad with a light vinaigrette.
Dips and Spreads: A Delicious Treat
Pinto beans make a fantastic base for dips and spreads. You can blend them with avocado, lime juice, and cilantro for a classic guacamole. Or you can add smoked paprika, cumin, and garlic for a spicy and smoky dip. The possibilities are endless!
Stews and Chilis: Comforting Classics
Pinto beans are a classic ingredient for hearty stews and chilis. They’re perfect for soaking up all the delicious flavours of the broth and vegetables. You can add them to any stew or chili recipe, or you can use them as the base for a vegetarian dish.
Burritos and Tacos: Tex-Mex Delights
Pinto beans are a staple in Mexican cuisine, and they’re often used in burritos and tacos. You can just add them to the filling, or you can mash them with a little bit of chili powder and cumin for a more flavorful filling.
Beyond the Basics: Exploring New Flavours
The possibilities are endless! You can use pinto beans in soups, casseroles, and even pasta dishes. Don’t be afraid to experiment and see what you come up with.
(Part 7) – A Quick Recipe: The Classic Pinto bean salad
Here’s a simple recipe for a delicious and refreshing pinto bean salad. It’s a go-to lunch for me when I’m short on time.
Ingredients:
- 1 cup cooked pinto beans
- 1/2 cup chopped red onion
- 1/2 cup chopped green bell pepper
- 1/4 cup chopped cilantro
- 1 tablespoon olive oil
- 1 tablespoon lime juice
- 1/2 teaspoon salt
- 1/4 teaspoon black pepper
Instructions:
- In a large bowl, combine all of the ingredients.
- Toss to coat evenly.
- Refrigerate for at least 30 minutes before serving.
(Part 8) – Tips for Pinto Bean Perfection
Here are a few more tips that I’ve picked up over the years from my own experience in the kitchen and from talking to other cooks. These little tricks can make a big difference.
Don’t Overcook Your Beans: Finding the Perfect Texture
Overcooked beans can become mushy and lose their texture. The key is to cook them until they’re tender but not falling apart.
Experiment with Flavour: A World of Spices
There’s no right or wrong way to season your beans. Feel free to experiment with different herbs and spices. You can add a bit of smoked paprika, chili powder, or even a splash of Worcestershire sauce for a more complex flavour.
Use the Cooking Liquid: A Delicious Bonus
The liquid that the beans cook in is packed with flavour. You can use it to make a delicious broth or soup.
Don’t Be Afraid to Freeze Them: Stock Up on Beans
If you have leftover cooked beans, you can freeze them for up to 3 months. Just make sure to store them in an airtight container.
(Part 9) – FAQs: Pinto Bean Questions Answered
So, you’ve got your beans, you’re ready to cook, and you’re all set to add some flavour to your meals. But there are bound to be questions – that’s just how it is in the kitchen. So, here are answers to some common queries.
1. What if I forget to soak my beans?
Don’t worry! If you’ve forgotten to soak your beans, you can still cook them, but it will take longer. Just add them to a pot of water and bring to a boil. Then reduce the heat to a simmer and cook for about 3-4 hours, or until they’re tender.
2. How do I know when my beans are done?
The best way to tell if your beans are done is to test them with your fingers. Grab a bean and try to smash it. If it crushes easily, you’re good to go. If it’s still a bit firm, simmer it for a bit longer.
3. What do I do if my beans are too salty?
If your beans are too salty, try adding a bit more water to the pot and simmering them for a few more minutes. This will help to dilute the saltiness. You can also add a tablespoon or two of sugar to help balance out the saltiness.
4. Why are my beans gassy?
Gas is a common side effect of eating beans. This is because they contain a type of sugar that your body can’t easily digest. To reduce gas, try soaking your beans for longer, or even boiling them for a few minutes before cooking. You can also try adding a bit of baking soda to the cooking water.
5. Can I use canned pinto beans instead of cooking them from scratch?
Absolutely! Canned pinto beans are a great convenience option. Just drain and rinse them before using them in your recipes. They’re already cooked, so you can add them directly to soups, salads, or other dishes.
(Part 10) – In Conclusion: Beans, My Friend, Beans
I've been cooking beans for years, and I’ve learned a lot along the way. The most important thing I’ve learned is to have fun with it. Don’t be afraid to experiment and try different things. And remember, there’s no right or wrong way to cook pinto beans. Just relax, enjoy the process, and you’ll be sure to end up with a delicious dish.
So, there you have it – my guide to cooking pinto beans on the stovetop. I hope you’ve enjoyed this little journey into the world of beans. I hope you’ve found it helpful. Now, go forth and cook!
Everyone is watching

Prime Rib Roast Cooking Time Chart: Per Pound Guide
Cooking TipsPrime rib roast. Just the name conjures images of lavish dinners, crackling fires, and hearty laughter. It’s ...

How Long to Bake Potatoes in the Oven (Perfect Every Time)
Cooking TipsBaked potatoes are a staple in my kitchen. They're incredibly versatile, delicious, and surprisingly easy to m...

Perfect Rice Every Time: The Ultimate Guide to Cooking Rice
Cooking TipsAs a self-proclaimed foodie, I've always been a bit obsessed with rice. It's the foundation of countless cuisi...

The Ultimate Guide to Cooking Asparagus: Tips, Techniques, and Recipes
Cooking TipsAsparagus. The mere mention of this spring delicacy conjures up images of vibrant green spears, crisp and burs...

Ultimate Guide to Cooking the Perfect Thanksgiving Turkey
Cooking TipsThanksgiving. Just the word conjures up images of overflowing tables laden with delicious food, the scent of r...