Let's face it, there's something truly satisfying about a perfectly cooked sunny side up egg. That glistening golden yolk, the soft, pillowy white, and that delicate, crispy edge - it's a culinary masterpiece! But achieving this level of perfection can feel like an impossible feat, especially for beginners.
I've been there myself - burnt yolks, watery whites, the whole shebang. But after countless trials and errors, I finally cracked the code to the perfect sunny side up egg. And guess what? It's not as intimidating as you think. With a little practice and the right techniques, anyone can master this simple yet elegant dish.
In this guide, I'll walk you through everything you need to know, from choosing the right pan to understanding the crucial stages of cooking. We'll also delve into some variations, troubleshoot common mistakes, and explore the world of toppings. So, grab your spatula, crack open an egg, and let's embark on this delicious journey together!
Part 1: The Tools of the Trade

The Right Pan: Your Culinary Canvas
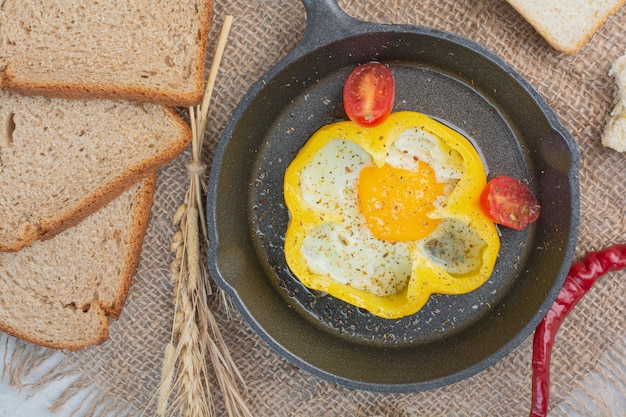
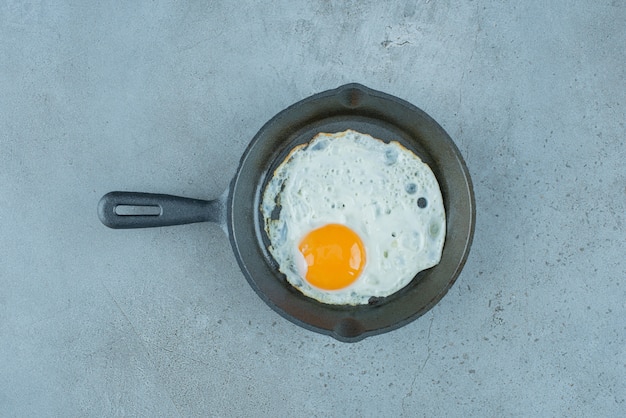
Imagine your pan as the canvas for your culinary masterpiece. You need a surface that conducts heat evenly and provides a smooth, non-stick environment for your eggs. My personal favourite is a trusty cast iron skillet. These beauties are known for their durability, their ability to retain heat like a champion, and their ability to improve with age. They're like those vintage leather jackets - they get better with time. Just remember to season them properly and use wooden or silicone utensils to avoid scratching the surface.
If you're new to cooking or prefer a lighter option, a non-stick pan is a great choice. These are lightweight, easy to handle, and make cleaning a breeze. However, invest in a good quality one - you get what you pay for, and you don't want your eggs sticking to the pan like glue. A thick base and a flat cooking surface are essential for even heat distribution, ensuring your eggs cook consistently.
Fat, Glorious Fat: The Secret Weapon
Now, let's talk about the unsung hero of sunny side up eggs: fat. It's the secret to that glorious golden brown crust and the richness that elevates this simple dish. Butter is my go-to - it imparts a delectable flavour and a beautiful golden hue. You can also use olive oil, coconut oil, or even ghee, but always opt for a fat with a high smoke point to prevent it from burning before your eggs are ready.
Don't be shy with the fat. A generous amount will create a smooth, even layer that your eggs can cook in without sticking. Aim for enough to coat the bottom of the pan but not so much that it drowns your eggs. About a tablespoon or two should do the trick.
Part 2: The Egg-cellent Selection

Fresh is Best: From Farm to Table
The secret to a truly perfect sunny side up egg lies in the freshness of the egg itself. fresh eggs have a thicker white, which holds its shape better during cooking, resulting in that beautiful, firm, and slightly puffy appearance. You can spot a fresh egg by its smooth, clean shell free of cracks or blemishes. It should also feel firm to the touch, and if you gently shake it, there shouldn't be any rattling inside.
Whenever possible, I source my eggs from local farms, where I know the hens are treated well, and the eggs are fresh. But if you're buying from the supermarket, check the sell-by date and always choose the freshest option. This small detail makes a big difference in the texture and flavour of your sunny side up eggs.
Choosing the Right Size: Finding the Perfect Balance
egg sizes vary, and for sunny side up, I find medium-sized eggs are the sweet spot. They provide a good balance of yolk and white, not too big or too small. If you're cooking for yourself, a small egg might suffice, but for a larger meal, a large egg will give you a more satisfying portion.
The Temperature Factor: A Crucial Step
Did you know that the temperature of your eggs can significantly affect how they cook? Cold eggs take longer to cook, and the whites can spread out too much, resulting in a thinner, less desirable texture. If you're aiming for that perfect set yolk, it's best to bring your eggs to room temperature before cooking. Simply leave them out on the counter for about 30 minutes before you start cooking.
Part 3: The Art of the Crack

Cracking Like a Pro: A Gentle Approach
Cracking an egg might seem like a simple skill, but there's a right way and a wrong way to do it. You don't want to end up with shell bits in your eggs, ruining your masterpiece. Here's my tried-and-true method:
- Gently tap the egg on the edge of a flat surface, like a countertop, creating a small crack.
- Don't try to break the shell completely.
- Carefully pull the shell apart, keeping the egg over the pan.
- If any shell fragments end up in the egg, gently remove them with your finger.
Some prefer a special egg cracker, but I find the traditional method works best for me.
The Two-Egg Strategy: Preventing a Messy Situation
Here's a tip I learned from my grandmother, the queen of kitchen wisdom: when you're cooking more than one egg, crack them into a separate bowl first. This prevents a messy situation if the shell breaks and allows you to check for any imperfections before they hit the pan. It's also a less intimidating approach for beginners, allowing you to get comfortable with handling the eggs before transferring them to the hot pan.
Part 4: The Cook-Off
Preheating is Key: Setting the Stage
Before you even think about cracking an egg, make sure your pan is nice and hot. A hot pan ensures that the egg whites set quickly and evenly, preventing them from spreading out too much and creating a more defined and beautiful result. I usually heat my pan over medium-high heat for a few minutes, then add the fat. You'll know it's ready when the fat begins to shimmer and sizzle.
Gentle Placement: A Delicate Touch
Now comes the moment of truth: placing the egg. Gently slide your egg into the pan, making sure it doesn't touch the sides or the bottom. If you're using a cast iron skillet, the heat will be intense, so be careful to avoid direct contact with the hot metal.
The Wait is On: Patience is a Virtue
This is where the art of cooking comes in - you'll need to keep a watchful eye on your eggs. You want them to cook slowly and evenly, without burning. If you're using a non-stick pan, you can probably keep the heat on medium-high. But with a cast iron skillet, I usually lower the heat to medium-low to prevent the eggs from cooking too quickly.
The Flip: A Delicate Dance
Here's where many beginners stumble. They try to flip the egg too early, resulting in a broken yolk and a less-than-perfect presentation. Wait until the whites have set and the yolk is almost fully cooked - about 4-5 minutes. To check for readiness, gently tap the bottom of the pan with your finger. If it feels firm, it's time to flip.
I'll confess: I'm not a huge fan of flipping sunny side up eggs. I love the runny yolk, and flipping just seems to risk overcooking it and making the white tough. But if you're feeling adventurous and want that perfect golden crust on both sides, go for it! Use a thin spatula to gently flip the egg, being careful to keep the yolk intact. If you're a beginner, I'd recommend leaving it as is - it's a safer bet.
Part 5: The Finishing Touches
Seasoning Secrets: Adding Flavor and Depth
Once your sunny side up eggs are cooked to your liking, it's time to add those finishing touches of flavour. Salt and pepper are the classics, but I like to get a little creative with my seasoning. A sprinkle of smoked paprika adds a smoky depth, while a pinch of cayenne pepper gives a bit of a kick. For a fresh touch, try adding herbs like chives, parsley, or dill.
If you're feeling adventurous, try a dollop of sour cream or crème fra??che for a creamy touch. I also love topping my eggs with a few slices of avocado, a drizzle of hot sauce, or a spoonful of salsa for a burst of flavour.
Serving Up Perfection: Presentation Matters
Now that you've created a culinary work of art, it's time to serve it up. You can serve your sunny side up eggs on toast, with a side of bacon or sausage, or even just on their own. If you're serving them on toast, be sure to spread the toast with butter or avocado before adding the eggs. It'll help prevent them from sticking and make for a more enjoyable experience.
Part 6: Sunny Side Up for the Savvy
Now that you've mastered the basics, let's explore some variations and tips for the savvy egg enthusiast.
Egg-cellent Variations: Expanding Your Horizons
- Over Easy: This is similar to sunny side up, but the yolk is cooked slightly longer, giving it a firmer texture. To cook an over-easy egg, simply continue cooking the sunny side up egg for an extra minute or two after the white has set.
- Basted: This classic breakfast dish features an egg white cooked in melted butter. To make a basted egg, gently pour a tablespoon or two of melted butter over the egg white as it cooks. This creates a tender and flaky egg white, adding a luxurious touch.
- Eggs in Purgatory: This simple but delicious dish features eggs poached in a tomato sauce. Simmer your favourite tomato sauce in a saucepan, then crack the eggs directly into the sauce. Cover and cook for about 5-7 minutes, or until the eggs are cooked to your liking.
Tips for Success: Elevating Your Skills
- Use a lid: If you're worried about the yolk cooking too quickly, you can place a lid on the pan for a few minutes. This helps to steam the yolk, giving it a creamy texture.
- Low and Slow: If you want a perfectly set yolk, cook your eggs over low heat. It may take a little longer, but it will ensure that the yolk doesn't overcook and become dry.
- Don't overcook: Remember, eggs are delicate. Overcooked eggs will have tough, rubbery whites and a dry, crumbly yolk. Keep an eye on them and remove them from the heat as soon as they reach your desired level of doneness.
Part 7: Common Mistakes and Solutions
Let's address those pesky problems that can crop up when you're frying eggs.
Table of Common Mistakes and Solutions: Troubleshooting Guide
| Mistake | Solution |
|---|---|
| Eggs sticking to the pan | Use a nonstick pan or make sure your pan is properly seasoned. |
| Eggs spreading out too much | Use cold eggs and cook them over medium-high heat. |
| Yolk cooking too quickly | Cook the eggs over low heat or use a lid to steam the yolk. |
| Burnt edges | Lower the heat or move the eggs to a cooler part of the pan. |
| Broken yolk | Be careful when cracking the eggs and when flipping them. |
Don't worry, even the most seasoned chefs make mistakes. It's all about learning from them and perfecting your technique.
Part 8: FAQs
1. How do I make sure the yolk stays runny?
To ensure a runny yolk, cook your eggs over low heat and don't overcook them. Keep an eye on them and remove them from the heat as soon as the white has set. If you're worried about the yolk cooking too quickly, you can place a lid on the pan for a few minutes.
2. What if my eggs are sticking to the pan?
This is a common problem, but it can be easily avoided. Use a nonstick pan or make sure your pan is properly seasoned. If you're using a cast iron skillet, make sure to heat the pan thoroughly before adding the fat and the eggs. You can also try adding a little more fat to the pan, but don't overdo it.
3. Should I flip my sunny side up eggs?
It's up to you. Some people prefer to flip their eggs to get a golden brown crust on both sides. Others prefer to leave them unflipped for a runny yolk. If you choose to flip them, use a thin spatula and be gentle.
4. What are some good toppings for sunny side up eggs?
The sky's the limit! Some classic toppings include salt, pepper, hot sauce, and chives. You can also add avocado, salsa, sour cream, or even a fried tomato. It's all about personal preference.
5. How do I know when my sunny side up eggs are cooked?
The whites should be set and the yolk should be almost fully cooked. You can check for doneness by gently tapping the bottom of the pan with your finger. If it feels firm, it's ready. You can also use a spatula to gently lift the edge of the egg. If the white is set and the yolk is still runny, it's perfect.
Remember, practice makes perfect. With a little patience and a few tips, you can create perfect sunny side up eggs every time. So, go on, crack open an egg and unleash your inner chef!
Everyone is watching

Prime Rib Roast Cooking Time Chart: Per Pound Guide
Cooking TipsPrime rib roast. Just the name conjures images of lavish dinners, crackling fires, and hearty laughter. It’s ...

How Long to Bake Potatoes in the Oven (Perfect Every Time)
Cooking TipsBaked potatoes are a staple in my kitchen. They're incredibly versatile, delicious, and surprisingly easy to m...

Perfect Rice Every Time: The Ultimate Guide to Cooking Rice
Cooking TipsAs a self-proclaimed foodie, I've always been a bit obsessed with rice. It's the foundation of countless cuisi...

The Ultimate Guide to Cooking Asparagus: Tips, Techniques, and Recipes
Cooking TipsAsparagus. The mere mention of this spring delicacy conjures up images of vibrant green spears, crisp and burs...

Ultimate Guide to Cooking the Perfect Thanksgiving Turkey
Cooking TipsThanksgiving. Just the word conjures up images of overflowing tables laden with delicious food, the scent of r...
