(Part 1) Choosing the Right Cut
The Importance of Marbling
Remember, not all T-bones are created equal. The key is "marbling," those streaks of white fat that run through the meat. More marbling means more flavor and juiciness, making your steak melt in your mouth.Understanding Different Grades of Beef
In the UK, we use a grading system based on marbling. The higher the grade, the more marbling it has.- Standard: The most common, it's a decent steak but lacks the richness of higher grades.
- Select: A step up, with slightly more marbling, it's more flavorful and tender.
- Prime: The top-tier, offering the most marbling, Prime steaks are renowned for their tenderness and intense flavor.
Thickness Matters
For stovetop cooking, you want a steak with some substance. Aim for a thickness of about 1.5-2 inches. This allows for a beautiful sear on the outside while keeping the inside juicy and pink.(Part 2) Preparing Your Steak
Pat It Dry
The first step is to pat your steak dry with paper towels. This ensures a nice sear, preventing steam from forming on the surface and hindering the browning process.Seasoning is Key
Now, we're talking flavor! I'm a minimalist when it comes to seasoning: salt and pepper are all you need. Trust me, less is more. The natural flavors of a good steak are already incredible, and you don't want to drown them out.Don't Over-Season
This is where many fall short. A little salt and pepper go a long way. You want to enhance the flavor, not create a salt lick.Let it Rest
Before hitting the pan, let your seasoned steak rest for about 30 minutes at room temperature. This helps it cook more evenly, ensuring a tender, delicious center.(Part 3) Understanding the Different Levels of Doneness
Rare
The least cooked level, rare steak has a cool, vibrant red center and a soft, yielding texture. It's all about a fresh, juicy bite.Medium-Rare
My personal favorite! This level features a red center transitioning to a lighter pink. It's firmer than rare but still bouncy to the touch, with a wonderful balance of juiciness and tenderness.Medium
Here, the center is mostly pink, with hints of brown starting to appear. It's firm to the touch, with some give, and provides a more substantial bite.Medium-Well
The center is mostly brown, with just a touch of pink remaining. It's firm, with less give than medium, offering a distinct chewiness.Well-Done
This level is for those who prefer a fully cooked steak. The entire steak is brown, with no pink remaining. It's the firmest of all, with very little give.(Part 4) Heating Your Pan
Now, we're getting into the heat of the moment. A good steak deserves a good sear, and that starts with a properly heated pan.The Cast Iron Advantage
I'm a big fan of cast iron pans for this. They hold heat exceptionally well, ensuring a consistent sear across the entire steak.Achieving the Right Heat
You want the pan hot, but not smoking hot. Aim for a medium-high heat. To test if your pan is ready, drop a few drops of water onto the surface. They should sizzle and evaporate quickly. If they just sit there, the pan needs a little more time.(Part 5) Searing the Steak
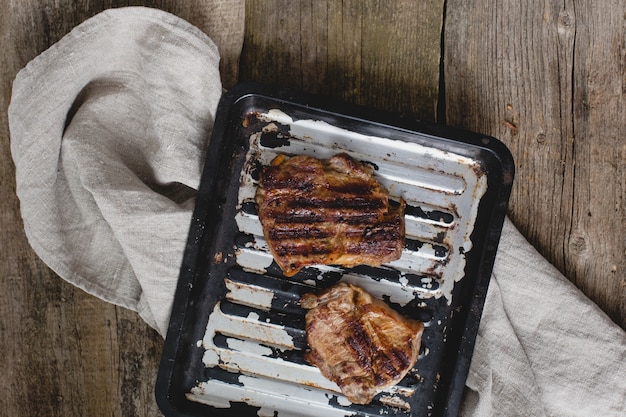
Here we go! The moment of truth – the sear. This is where the magic happens, creating that beautiful crust and locking in the juices.The First Sear
Place your steak in the hot pan, and resist the urge to move it for at least 2 minutes. This allows for a nice crust to form on the bottom, adding texture and flavor.Turning Your Steak
After 2 minutes, carefully flip your steak. Use tongs for control, or if you're feeling confident, a spatula can do the trick.Searing the Edges
Now, it's time to sear the edges. Using tongs, rotate your steak to create a beautiful sear on all sides. This ensures consistent cooking and flavor development.(Part 6) internal temperature
We're nearing the finish line, but it's important to ensure your steak reaches the desired doneness. This is where a meat thermometer comes in handy.Using a Meat Thermometer
Insert the thermometer into the thickest part of the steak, making sure it's not touching any bone. Here's a guide to the ideal temperatures for each level of doneness:| Doneness | Internal Temperature (Fahrenheit) | Internal Temperature (Celsius) ||---|---|---|| Rare | 125°F | 52°C || Medium-Rare | 130°F | 54°C || Medium | 140°F | 60°C || Medium-Well | 150°F | 65°C || Well-Done | 160°F | 71°C |The Importance of Accuracy
Using a thermometer ensures accuracy, preventing overcooking and maintaining that juicy, tender center.(Part 7) Resting Your Steak
The final stage before serving – the rest. This crucial step allows the juices to redistribute throughout the steak, resulting in a more tender, flavorful bite.Why Resting Matters
Think of it like a culinary timeout. When you cook a steak, the juices tend to pool in the center. Resting allows those juices to relax and seep back into the meat, creating a juicy and flavorful result.Resting Time
Give your steak a good 5-10 minutes of rest time before slicing and serving. Cover it loosely with foil to keep it warm and prevent it from drying out.(Part 8) Serving Your Steak
Congratulations, you've made it! It's time to enjoy the fruits of your labor.Slicing and Serving
For optimal tenderness, slice your steak against the grain. This means slicing across the muscle fibers. Serve your steak on a warm plate to prevent it from cooling down too quickly.Accompaniments for the Perfect steak dinner
A great steak deserves stellar accompaniments. Here are some of my favorites: Roasted Vegetables: They provide a vibrant counterpoint to the rich flavor of steak. mashed potatoes: A classic comfort food that pairs perfectly with steak. Green Salad: A refreshing and light element to balance the richness. Creamy Mushroom Sauce: A decadent sauce that elevates the flavor of steak. Tangy Chimichurri: A herby, vibrant sauce with a refreshing kick.(Part 9) FAQs
Here are some of the most common questions I get about cooking the perfect steak:Q: What if my steak is too thick?
If your steak is thicker than 2 inches, consider searing it first, then transferring it to a preheated oven to finish cooking. This allows for even cooking without overcooking the exterior.Q: What if my steak is too thin?
For thinner steaks, cook for a shorter period of time, or use a lower heat setting. You can also consider cooking it in a skillet over medium heat instead of searing it.Q: What if my steak is too tough?
Toughness often indicates overcooking. Next time, try cooking it for a shorter period of time, or use a lower heat setting.Q: What if my steak is too dry?
Dryness can also be a sign of overcooking. For future steak endeavors, try cooking it for a shorter time, or use a lower heat setting.Q: What if my steak is not evenly cooked?
Uneven cooking usually points to insufficient time on each side. Next time, ensure that each side gets adequate time to brown and cook evenly.(Part 10) Conclusion
There you have it, my complete guide to cooking the perfect stovetop T-bone steak. It may seem daunting, but with a little practice and these tips, you'll be turning out restaurant-worthy steaks in no time. Remember, the key is a good sear, the right temperature, and a touch of patience. So, the next time you're craving a juicy, delicious steak, give this guide a try, and let me know how it turns out! Happy grilling, my friends!Everyone is watching

Perfect Rice Every Time: The Ultimate Guide to Cooking Rice
Cooking TipsAs a self-proclaimed foodie, I've always been a bit obsessed with rice. It's the foundation of countless cuisi...

The Ultimate Guide to Cooking Asparagus: Tips, Techniques, and Recipes
Cooking TipsAsparagus. The mere mention of this spring delicacy conjures up images of vibrant green spears, crisp and burs...

Ultimate Guide to Cooking the Perfect Thanksgiving Turkey
Cooking TipsThanksgiving. Just the word conjures up images of overflowing tables laden with delicious food, the scent of r...

Prime Rib Roast Cooking Time Chart: Per Pound Guide
Cooking TipsPrime rib roast. Just the name conjures images of lavish dinners, crackling fires, and hearty laughter. It’s ...

Can You Cook Spaghetti with Gasoline? (The Shocking Truth)
Cooking TipsWe've all seen those crazy internet trends. You know, the ones that make you wonder, "Did someone actually try...