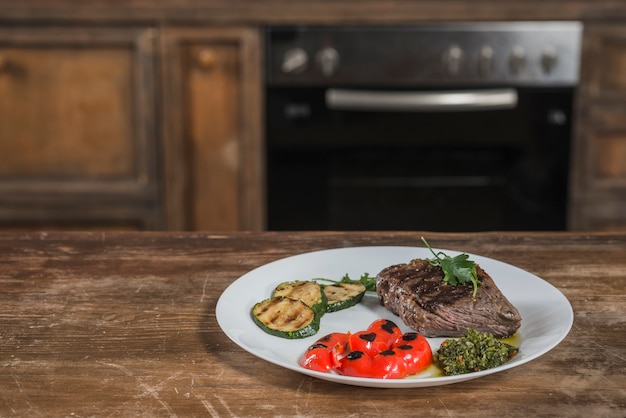
Ah, roast beef. The very name evokes images of golden-brown perfection, succulent slices, and the heartwarming aroma that fills a home. As a seasoned home cook, I've dedicated countless hours to perfecting my roast beef recipe, and let me tell you, there's nothing more satisfying than carving a beautifully browned, juicy roast, the aroma swirling through the air like a symphony of pure comfort.
But for some, the thought of tackling a roast can be daunting. Fear not! I'm here to guide you through the process, demystifying the art of roasting beef and revealing the secrets to achieving those picture-perfect results. Get ready to impress your family and friends with a succulent roast beef that'll have them begging for seconds – and maybe even thirds!
(Part 1) choosing the right cut: The Foundation of Flavor

The first step to a successful roast is selecting the right cut of beef. This is where a little knowledge goes a long way. There's a world of options, but some cuts are better suited for roasting than others. My personal favorite? The rib roast. It's known for its rich marbling, which translates to incredible flavor and tenderness, and it's usually sold as a "standing rib roast" – a beautiful, eye-catching piece of meat that's a showstopper on any table.
A Guide to Roast beef cuts
Let's break down some of the most popular cuts used for roasting:
- Rib Roast: As I mentioned, this is a classic choice for a reason. The marbling in the rib roast ensures a juicy, flavorful roast. It's a splurge, but for a special occasion, it's worth every penny.
- sirloin roast: A leaner option than the rib roast, but still tender and flavorful. It's a good choice if you're looking for a slightly healthier roast.
- chuck roast: This is a tougher cut, but it becomes incredibly tender when slow-roasted. It's perfect for pot roasts or braising, where the long cooking time breaks down the connective tissues and results in melt-in-your-mouth deliciousness.
- top round roast: A versatile cut, excellent for both roasting and slicing. It's a leaner choice, so it's important to keep it moist during cooking. This cut works well for sandwiches or slicing thin for a roast beef dinner.
Size Matters: Feeding the Crowd
Once you've chosen your cut, consider the size. The rule of thumb is to allow about 1 pound of beef per person. So, for a family of four, a 4-pound roast would be perfect. However, if you're looking to have leftovers for sandwiches or another delicious meal, go for a larger roast. You can never have too much roast beef, right?
(Part 2) Preparing the Beef: Setting the Stage for Success

With your chosen cut of beef in hand, it's time to prepare it for roasting. This stage is pretty straightforward, but it's crucial to ensure your beef is thoroughly dried and seasoned. This is where the magic happens – a dry, well-seasoned roast will create a beautiful, crispy crust during roasting, locking in the juices and adding another layer of flavor.
Pat It Dry: The Key to a Crispy Crust
First things first, pat the beef dry with paper towels. Any excess moisture will create steam in the oven, preventing the beef from achieving that beautiful, crispy crust we're aiming for. The dry surface allows the seasoning to adhere better and creates the perfect canvas for browning.
Season to Perfection: A Symphony of Flavors
Now, for the fun part: seasoning! I'm a fan of a simple salt and pepper rub, but feel free to experiment with your own favorite seasonings. It's a chance to add your personal touch and create a unique flavor profile.
Here are some popular options to consider:
- Garlic Powder: Adds a savory, pungent note to the roast.
- Onion Powder: A subtle sweetness and depth of flavor.
- Paprika: Adds a touch of warmth and color to the roast.
- Dried Herbs: Rosemary, thyme, and oregano are all classic choices for roast beef. They add a layer of complexity and earthiness.
- Herbes de Provence: A blend of herbs that adds a delightful, aromatic touch.
Remember, less is more when it comes to seasoning. You can always add more, but you can't take it away. I like to rub the seasoning into the beef evenly, ensuring all surfaces are coated. This allows the flavor to penetrate throughout the roast as it cooks.
(Part 3) The Art of Roasting: Bringing the Beef to Life

This is where the magic really happens – the oven transforms the beef into a masterpiece of flavor and tenderness. Patience is key here, but the end result is worth every minute of waiting. It's a journey of heat, time, and transformation.
Preheat the Oven: Setting the Stage for a Perfect Roast
Preheat your oven to 450°F (232°C). This high initial temperature is crucial for searing the outside of the beef, locking in the juices and creating that beautiful, crispy crust we discussed earlier. While the oven is preheating, let the beef rest at room temperature for about 30 minutes. This allows the beef to cook evenly, ensuring the interior reaches the desired temperature without overcooking the outside.
Sear the Beef: A Crispy Crust of Flavor
Once the oven is preheated, place the beef in a roasting pan. For a truly exceptional crust, I highly recommend searing the beef on all sides before putting it in the oven. You can use a cast iron skillet on the stovetop for this – the heat of the skillet will create a beautiful, caramelized crust. Sear the beef for about 2-3 minutes per side, until it's nicely browned. This step adds a delightful depth of flavor and creates a visual masterpiece.
Roast to Perfection: A Dance of Heat and Time
After searing, transfer the roast to the preheated oven. Now, here comes the tricky part – determining the cooking time. It all depends on the size and thickness of your roast, but here's a general guideline to get you started:
| Doneness | internal temperature (°F) | Internal Temperature (°C) | Approximate Cooking Time per Pound |
|---|---|---|---|
| Rare | 130-135°F | 54-57°C | 15-20 minutes |
| Medium-Rare | 135-140°F | 57-60°C | 20-25 minutes |
| Medium | 140-150°F | 60-65°C | 25-30 minutes |
| Medium-Well | 150-160°F | 65-71°C | 30-35 minutes |
| Well Done | 160°F and above | 71°C and above | 35-40 minutes |
These are just estimates. For the most accurate results, use a meat thermometer to check the internal temperature of the roast. Insert the thermometer into the thickest part of the roast, making sure it doesn't touch any bone. The thermometer is your best friend – it removes any guesswork and ensures you achieve your desired level of doneness.
For the first 15 minutes, roast at the high temperature of 450°F (232°C) to seal in the juices and develop that beautiful crust. After that, reduce the oven temperature to 325°F (163°C) and continue roasting until the desired internal temperature is reached. This lower temperature ensures the roast cooks evenly throughout without drying out the outside.
Resting is Key: The Secret to Juicy Tenderness
Once the roast reaches the desired internal temperature, take it out of the oven and let it rest for 15-20 minutes before carving. This resting period is crucial for allowing the juices to redistribute throughout the meat, resulting in a more tender and juicy roast. The meat will also be easier to slice. While the roast is resting, you can prepare the gravy, using the pan drippings to create a rich, flavorful sauce that will perfectly complement the roast beef.
(Part 4) Perfect Gravy: A Delicious Finishing Touch
No roast beef is complete without a rich, flavorful gravy. It's not just a sauce; it's the finishing touch that elevates the whole meal to a whole new level. Imagine the savory, aromatic gravy drizzled over tender slices of roast beef, creating a symphony of flavors that will have your guests sighing with contentment.
Making the Gravy: A Symphony of Flavors
While the roast is resting, you have a few minutes to make the gravy using the pan drippings. This is where the magic happens. Here's how to create a truly delicious gravy:
- Deglaze the Pan: Pour off any excess fat from the roasting pan, leaving about 2 tablespoons in the pan. This fat will be the foundation of your gravy. Add a tablespoon of flour to the pan and whisk it into the fat. This will create a roux, the base of your gravy.
- Add the Broth: Gradually whisk in 2 cups of beef broth or water, stirring constantly until the gravy thickens. The broth will add flavor and richness to the gravy.
- Simmer and Season: Bring the gravy to a simmer and cook for a few minutes, stirring occasionally, until it reaches the desired consistency. Season the gravy with salt and pepper to taste. You can also add other seasonings, such as garlic powder, onion powder, or dried herbs, to enhance the flavor.
Tips for Perfect Gravy: Achieving That Velvety Smoothness
- High-Quality Broth: Use high-quality beef broth for the best flavor. It will make a huge difference in the overall taste of the gravy.
- Don't Overcook: Don't overcook the gravy. It should be smooth and velvety, not thick and pasty.
- Strain for Perfection: Strain the gravy before serving to remove any bits of food particles. This ensures a smooth, elegant sauce.
(Part 5) Carving the Roast: Unveiling the Culinary Masterpiece
The moment of truth! It's time to carve that beautiful roast and reveal its juicy, tender interior. But before you start slicing, remember to take your time and be careful. It's easy to cut yourself, especially if the roast is still hot. A sharp carving knife is your best friend in this process, ensuring clean, precise slices.
Carving Techniques: A Guide to Precision Slicing
- Against the Grain: Use a sharp carving knife to slice the roast thinly, against the grain. Cutting against the grain helps to tenderize the meat and make it easier to chew.
- Standing Rib Roast: If you're carving a standing rib roast, start by removing the bones from the roast. You can do this by cutting along the bone and then lifting the bone away from the meat. Then, slice the roast into individual portions.
- Presentation Matters: Place the carved roast on a serving platter and arrange the slices in a decorative manner. This adds a touch of elegance to your presentation.
(Part 6) Serving and Enjoying: A Feast for the Senses
The pièce de résistance! Your roast beef is ready to be enjoyed. Serve it hot with your favorite sides, such as mashed potatoes, roasted vegetables, or Yorkshire pudding. And don't forget the gravy! It's the perfect complement to the roast beef, adding a rich, savory touch that will elevate the entire meal.
side dish Suggestions: A Culinary Symphony
Here are some classic and creative side dish ideas to complement your roast beef:
- Mashed Potatoes: A timeless pairing for roast beef, creamy and comforting.
- Roasted Vegetables: A colorful and healthy addition to the plate. Try carrots, broccoli, asparagus, or Brussels sprouts.
- Yorkshire Pudding: A traditional British accompaniment, light and airy, and perfect for soaking up the gravy.
- green beans: A simple but delicious side dish. Steamed or sautéed, green beans add freshness to the plate.
- Garlic Bread: A flavorful and satisfying side that complements the roast beef beautifully.
- Roasted Root Vegetables: A medley of sweet potatoes, parsnips, and carrots, tossed with herbs and roasted to perfection.
(Part 7) Leftover Love: Making the Most of Your Roast
Let's be honest, leftovers are the best part! You can enjoy your roast beef for days to come. There are so many ways to repurpose leftover roast beef, turning it into a culinary adventure.
Leftover Ideas: A Feast of Possibilities
- roast beef sandwiches: A classic leftover option. Simply slice the roast beef and put it in a sandwich with your favorite toppings. Add some cheese, lettuce, tomato, and a bit of horseradish for a flavorful treat.
- Roast Beef Salad: A light and refreshing way to enjoy leftover roast beef. Toss the beef with mixed greens, vegetables, and a vinaigrette dressing.
- Roast Beef Soup: A hearty and comforting soup. Add the leftover roast beef to a base of broth, vegetables, and your favorite seasonings.
- Roast Beef Pizza: Get creative with your leftover roast beef by topping a pizza with it. Add your favorite cheeses, vegetables, and sauces.
- Roast Beef Hash: A classic breakfast or brunch dish. Dice the leftover roast beef and combine it with potatoes, onions, and your favorite seasonings.
- Roast Beef Tacos: Warm up some tortillas and fill them with leftover roast beef, shredded cheese, and your favorite toppings.
(Part 8) FAQ: Answering Your Roast Beef Questions
You've got questions, I've got answers! Let's address some common queries about roasting the perfect beef:
1. What temperature should I roast beef at?
For the first 15 minutes, roast at 450°F (232°C) to sear the outside and create a beautiful crust. Then reduce the oven temperature to 325°F (163°C) and continue roasting until the desired internal temperature is reached. The high initial temperature helps to lock in the juices and develop a flavorful crust, while the lower temperature ensures even cooking throughout.
2. How long should I roast beef?
The roasting time depends on the size and thickness of your roast and your desired level of doneness. As a general guideline, allow about 15-20 minutes per pound for rare, 20-25 minutes per pound for medium-rare, 25-30 minutes per pound for medium, 30-35 minutes per pound for medium-well, and 35-40 minutes per pound for well done. But always use a meat thermometer to ensure the roast reaches the desired internal temperature. The thermometer removes any guesswork and ensures you achieve your desired level of doneness.
3. How do I know when the roast beef is done?
The best way to determine doneness is to use a meat thermometer. Insert the thermometer into the thickest part of the roast, making sure it doesn't touch any bone. The roast is done when the internal temperature reaches your desired level of doneness. You can also check for doneness by pressing the roast gently with your finger. If the meat springs back, it's rare. If it gives slightly, it's medium-rare. If it feels firm, it's medium or well done. Remember, these are just rough guidelines, and the meat thermometer is your most reliable tool.
4. Can I roast a frozen roast?
It's not recommended to roast a frozen roast. The beef will take much longer to cook, and it may not cook evenly. The exterior could become overcooked before the center reaches the desired temperature. It's best to thaw the roast in the refrigerator overnight before roasting. This ensures even cooking and a delicious result.
5. What can I do if the roast is overcooked?
Don't despair! While overcooked roast beef won't be as tender and juicy, there are still ways to make it enjoyable. You can slice it thinly and use it for sandwiches, salads, or soups. The overcooked meat will still be flavorful, just not as tender.
6. What if the roast is a little dry?
This is a common issue when roasting beef. To prevent dryness, ensure the roast is properly seasoned and pat it dry before roasting. You can also use a meat thermometer to ensure the roast doesn't overcook. Finally, let the roast rest for 15-20 minutes before carving, allowing the juices to redistribute throughout the meat.
7. Can I use a different type of broth for the gravy?
While beef broth is the traditional choice for roast beef gravy, you can experiment with other types of broth, such as chicken broth or vegetable broth. Just be aware that the flavor will be slightly different.
8. What are some tips for achieving a crispy crust?
To achieve a crispy crust, ensure the roast is thoroughly dried before searing. Sear the roast on all sides over high heat, creating a caramelized crust. Finally, roast the roast at a high initial temperature (450°F) for the first 15 minutes. This will help to create a flavorful, crispy crust.
Conclusion
Roasting a perfect roast beef may seem daunting, but trust me, it's easier than you think! With a little preparation, patience, and this comprehensive guide, you'll be whipping up delicious, melt-in-your-mouth roast beef in no time. So, gather your ingredients, fire up the oven, and get ready to impress your family and friends with your culinary skills. Happy roasting!
Everyone is watching

Prime Rib Roast Cooking Time Chart: Per Pound Guide
Cooking TipsPrime rib roast. Just the name conjures images of lavish dinners, crackling fires, and hearty laughter. It’s ...

How Long to Bake Potatoes in the Oven (Perfect Every Time)
Cooking TipsBaked potatoes are a staple in my kitchen. They're incredibly versatile, delicious, and surprisingly easy to m...

Perfect Rice Every Time: The Ultimate Guide to Cooking Rice
Cooking TipsAs a self-proclaimed foodie, I've always been a bit obsessed with rice. It's the foundation of countless cuisi...

The Ultimate Guide to Cooking Asparagus: Tips, Techniques, and Recipes
Cooking TipsAsparagus. The mere mention of this spring delicacy conjures up images of vibrant green spears, crisp and burs...

Ultimate Guide to Cooking the Perfect Thanksgiving Turkey
Cooking TipsThanksgiving. Just the word conjures up images of overflowing tables laden with delicious food, the scent of r...
