Right, let's talk about prime rib. It's one of those dishes that just screams "celebration," doesn't it? You know, like Sunday roasts with all the trimmings, or a special occasion dinner with friends. The thing is, though, it can feel a bit intimidating. I mean, it's a big, expensive cut of meat, and you want to get it right, right? You don't want it to be dry or tough. You want that beautiful, juicy, flavorful result that melts in your mouth. Well, fear not! Because I'm going to spill all my secrets, all the tips and tricks I've picked up over the years, so you can nail that prime rib like a pro.
And trust me, I'm no stranger to kitchen disasters! I've had my fair share of dry, overcooked prime ribs. But I've learned from my mistakes, and now, I can confidently say that I've perfected the art of cooking this delicious cut of meat. In fact, I think my prime rib recipe is the best I've ever tried.
So, grab a cuppa, settle in, and let's get started. I'm going to walk you through everything from choosing the right cut to the perfect roasting technique. We’ll cover the best seasonings, the importance of resting, and even how to make the most epic gravy you've ever tasted.
(Part 1) Choosing the perfect prime rib
Let's start with the star of the show: the prime rib. You want to make sure you pick the right cut to ensure a delicious and succulent outcome.
The Perfect Cut: Standing rib roast
Prime rib is essentially the rib roast of a beef. The most common cut used for prime rib is the standing rib roast, which is typically about three to four ribs long. It comes with the bone intact, giving you that classic prime rib look and offering a beautiful visual on the table. The bone also helps to conduct heat, ensuring even cooking and a juicy result.
Understanding Grade and Marbling
You can also find different grades of prime rib. Prime is the highest grade of beef, and it's typically the most tender and flavorful. It boasts abundant marbling, which is the fat that is distributed throughout the meat. This marbling is what gives prime rib its rich flavour and juiciness. You want to look for a prime rib with a good amount of marbling, but not too much.
Choice is a good alternative if you're on a budget. It has a slightly lower marbling content, but it's still a great choice for a delicious prime rib. You can also find Select grade, but it can be a bit tougher and less flavorful due to its lower marbling content.
Size and Weight for Your Crowd
The size and weight of the prime rib you choose will depend on how many people you are serving. A good rule of thumb is to allow about 1 pound of prime rib per person. So, if you're cooking for six people, you'll want a prime rib that weighs about 6 pounds. However, if you're looking for leftovers, it's always best to err on the side of too much rather than not enough.
Now, I’ll let you in on a little secret. I’ve found that a 5 to 6-pound prime rib is the perfect size for a crowd. It’s not too big, but it’s still substantial enough to make everyone feel like they’re getting a good portion.
Inspecting the Meat for Quality
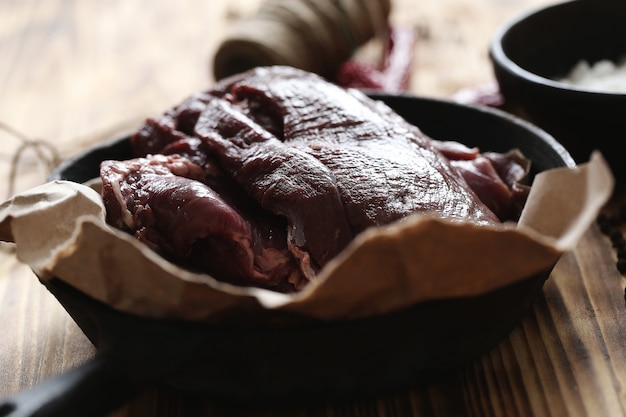
When you're at the butcher, take a moment to inspect the prime rib. The meat should be a bright red color, and it shouldn't have any brown or gray spots. These indicate that the meat hasn’t been stored properly and may not be as fresh as it should be.
(Part 2) The Night Before: Preparing the Prime Rib
The secret to a juicy, flavorful prime rib is all about preparation. You need to give the meat a head start, and the best way to do that is to let it rest overnight in the fridge.
Pat It Dry: Eliminating Excess Moisture
Firstly, when you bring your prime rib home, pat it dry with paper towels. This will help to remove any excess moisture and prevent it from steaming during cooking, which can lead to a soggy, unevenly cooked roast.
Salt Curing: The Secret to Flavor
Now, here's where it gets interesting. This is my favourite part of the whole process. You’re going to season the prime rib with a hefty dose of salt. Yes, you read that right! This is a crucial step. It's called "salt curing," and it helps to draw out excess moisture and create a beautifully seasoned crust. Don't be afraid to go all out. A generous coating of kosher salt will give you the best results. Just remember, don’t add any other seasonings yet. It’s just salt at this stage.
Now, I know it might seem counterintuitive to add salt to the meat the day before you cook it, but trust me, it makes all the difference. It doesn’t make the meat salty, it actually makes it more flavourful. The salt draws out the moisture from the meat, which then redistributes and creates a more tender and flavorful final product.
Refrigeration and Rest: Allowing Time for Transformation
Place your prime rib on a rack in a roasting pan. This will allow air to circulate around the meat, and it will also help to prevent it from sitting in its own juices. Cover the pan with plastic wrap and refrigerate it for at least 12 hours, or even up to 24 hours. This gives the salt time to work its magic, breaking down the proteins and making the meat more tender.
(Part 3) Getting Ready to Roast
Right, now the day has come – time to roast that prime rib! Let's get our kitchen set up and ready.
Room Temperature: Ensuring Even Cooking
First things first, take the prime rib out of the fridge and let it sit at room temperature for about 30 minutes. This will help the meat to cook more evenly. The colder the meat, the longer it takes to cook to the desired internal temperature, and this can lead to uneven cooking. Once it’s at room temperature, pat the prime rib dry with paper towels again to remove any moisture.
Preheat Your Oven: A Foundation for Success
Preheat your oven to 450°F (230°C). This high initial temperature is crucial for creating a beautiful, crispy crust on the prime rib. It also helps to lock in the juices and create a more flavorful roast.
Choosing the Right Pan: The Key to Even Heating
Now, it’s time to choose your roasting pan. A heavy-duty roasting pan is ideal for prime rib because it helps to distribute heat evenly. I recommend using a pan that is large enough to hold the prime rib with at least a couple of inches of space around it. This allows for proper air circulation, which is essential for even cooking. You can also use a roasting rack to elevate the prime rib off the bottom of the pan, which will allow for better air circulation and even cooking.
Now, here's a little trick I use to make cleaning up easier: line the roasting pan with a sheet of aluminum foil. This will make clean-up a breeze, because you can simply lift the foil out of the pan and toss it in the bin. You can also use a nonstick baking spray to coat the foil, but it’s not essential.
(Part 4) Roasting the Prime Rib
We’re getting to the good part now! Time to roast that prime rib and get those delicious aromas filling the kitchen.
Seasoning Time: A Symphony of Flavors
Remember, you already salted the prime rib the night before. Now, it’s time to add some additional seasonings. I’m a big fan of using fresh herbs and spices. I like to use a combination of rosemary, thyme, garlic powder, onion powder, black pepper, and a little bit of paprika. You can adjust the seasonings to your own taste preferences.
Rub the seasoning mixture all over the prime rib, making sure to get it into all the crevices. And don’t forget to season the fat cap! It’s important to get that good and seasoned, as it will melt during cooking and add a lovely flavour to the meat.
Searing: Achieving a Delicious Crust
For a beautiful, crisp crust on the outside, you need to sear the prime rib. It’s worth taking the extra time to do this. The sear gives the prime rib a rich flavour and creates a nice crust that keeps the juices locked inside.
Here’s how to do it:
- Place the prime rib in the preheated roasting pan.
- Sear the prime rib on all sides for about 5 minutes each. Make sure you sear all sides of the roast, including the fat cap.
- This will give it a beautiful brown crust that will add flavour to the meat.
- You can also use a blow torch to sear the prime rib if you like.
The Roast: Bringing Out the Best in Prime Rib
After searing the prime rib, it's time to put it in the oven to roast. Now, here's the thing about roasting prime rib. You want to cook it to the perfect level of doneness. Here are the most common levels of doneness:
| Level of Doneness | Internal Temperature |
|---|---|
| Rare | 125°F (52°C) |
| Medium-Rare | 130°F (54°C) |
| Medium | 140°F (60°C) |
| Medium-Well | 150°F (66°C) |
| Well Done | 160°F (71°C) |
Personally, I prefer my prime rib medium-rare. It has a beautiful pink center and a flavorful, juicy texture. But it's all about personal preference. However, it’s important to remember that if you’re cooking for a crowd, it’s best to err on the side of medium rather than rare. This ensures that the roast is cooked through, even if some people want it well-done.
Now, here's a little trick I've learned: it's best to cook the prime rib for a lower temperature for a longer period of time. This will allow the meat to cook more evenly and stay juicy. The temperature you use will depend on how big your prime rib is, but a good rule of thumb is to start at 450°F (230°C) for 15 minutes, and then reduce the temperature to 325°F (160°C) for the rest of the cooking time.
Here’s how to calculate the cooking time:
- For a 3- to 4-pound roast, cook for 15 to 20 minutes per pound.
- For a 5- to 6-pound roast, cook for 18 to 20 minutes per pound.
- For a 7- to 8-pound roast, cook for 20 to 25 minutes per pound.
Remember, these are just guidelines. You may need to adjust the cooking time based on your oven and the size and thickness of your prime rib. It's always best to use a meat thermometer to ensure the roast is cooked to your liking.
(Part 5) Testing for Doneness
So, how do you know when the prime rib is cooked to your liking? Well, you can use a meat thermometer, of course! You can also use a simple trick I learned from my grandmother: if you gently press on the prime rib, it should feel firm but not rock hard. If it feels jiggly, it’s not cooked enough.
But the best way to determine doneness is to use a meat thermometer. Insert the thermometer into the thickest part of the roast, but make sure you don’t touch the bone. The thermometer should be inserted horizontally and not vertically, so you don’t hit the bone.
When the internal temperature reaches your desired level of doneness, it’s time to take the prime rib out of the oven.
Resting: Allowing the Juices to Redistribute
Once the prime rib has reached your desired internal temperature, take it out of the oven. It’s important to let the prime rib rest for at least 15 minutes before slicing and serving. This will allow the juices to redistribute throughout the meat.
Here’s a tip: tent the prime rib with aluminum foil. This will help to keep the meat warm and moist while it rests.
(Part 6) Carving the Prime Rib
Once the prime rib has rested, it’s time to carve it. This is where the real fun begins!
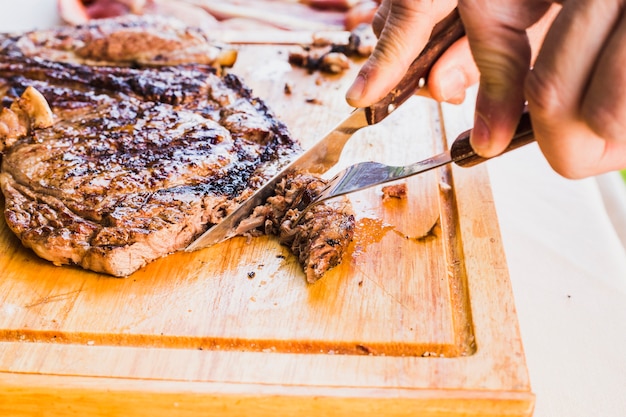
Carving Techniques: Slicing with Precision
Here's the deal. If you’re dealing with a bone-in roast, you need to start by carving the meat off the bone. Use a sharp carving knife to carefully slice the meat off the bone. You want to slice the meat against the grain, which means you want to cut the slices perpendicular to the muscle fibers. This will make the meat more tender. You can then slice the meat into thin, even slices.
If you’re working with a boneless roast, it's a little easier to carve. Just cut the roast in half lengthwise, then slice it into thin, even slices.
Here's a little tip: I like to start carving from the center of the prime rib and work my way outwards. This helps to keep the roast warm and prevents the edges from drying out.
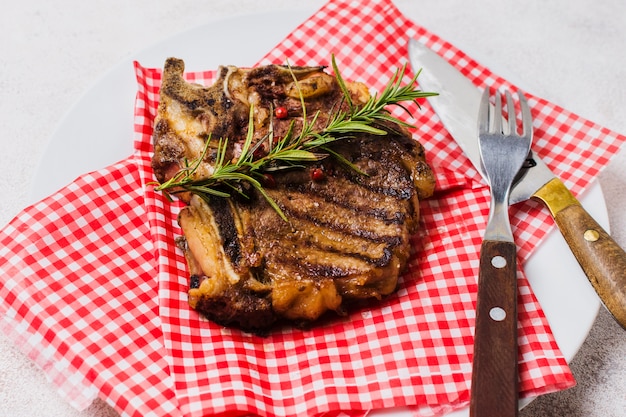
Serving the Prime Rib: A Feast for the Senses
Now that your prime rib is carved, you can serve it with your favourite sides. I love to serve my prime rib with roasted vegetables, mashed potatoes, Yorkshire pudding, and a rich gravy.
(Part 7) Making the Perfect Gravy
Gravy is the perfect accompaniment to prime rib, right? It's a rich, flavorful sauce that adds an extra layer of deliciousness to the dish. You can’t have prime rib without it! And it's surprisingly easy to make.
Gather Your Ingredients: Essential Components for a Delicious Gravy
First, you'll need to gather your ingredients. I like to use a combination of pan drippings, flour, broth, and seasonings to make my gravy.
Making the Gravy: A Simple, Flavorful Process
Now, here’s how to make the gravy:
- Pour the pan drippings into a saucepan and heat over medium heat.
- Whisk in the flour until smooth. You’ll need to use about 2 tablespoons of flour per cup of drippings.
- Gradually whisk in the broth until the gravy is smooth and thickened. I use beef broth, but you can also use chicken broth or vegetable broth, if you prefer.
- Season the gravy with salt, pepper, and any other seasonings you like.
- Simmer the gravy for a few minutes, or until it’s thickened to your liking.
- Strain the gravy through a fine-mesh sieve to remove any lumps.
Using the Gravy: The Finishing Touch
Serve the gravy hot over your prime rib and your sides. The gravy should be a rich, flavorful sauce that adds an extra layer of deliciousness to the dish.
(Part 8) prime rib faqs
You’ve got questions, I’ve got answers! Here are some of the most common questions about making prime rib.
Q: What if I don't have time to let the prime rib rest overnight?
A: You can still make delicious prime rib without resting it overnight. Just pat the prime rib dry and season it with salt and any other desired seasonings about 30 minutes before cooking. You'll want to ensure the meat is at room temperature before cooking. The salt will still have a chance to work its magic, but it won’t be as potent as if you let it rest overnight.
Q: Can I use a different type of meat thermometer?
A: Absolutely! You can use any type of meat thermometer you like. Just make sure it’s accurate and that you use it properly.
Q: What are some other good side dishes to serve with prime rib?
A: There are so many delicious options! You can serve it with roasted vegetables, mashed potatoes, Yorkshire pudding, asparagus, creamed spinach, or even a green salad. Get creative!
Q: How do I store leftover prime rib?
A: Leftover prime rib can be stored in the refrigerator for up to 3 days. Just wrap it tightly in plastic wrap or aluminum foil. You can also freeze leftover prime rib for up to 3 months. To freeze, wrap the prime rib tightly in plastic wrap and then place it in a freezer-safe bag.
Q: How can I make my prime rib more flavorful?
A: There are a few things you can do to make your prime rib more flavorful. You can add a little bit of butter to the top of the roast before cooking. This will help to keep the meat moist and add a richness of flavor. You can also use a flavorful marinade. A simple marinade of olive oil, garlic, rosemary, and thyme will add a delicious depth of flavor to the prime rib.
(Part 9) Final Thoughts
Well, there you have it! My secrets to cooking the perfect prime rib. Remember, it's all about preparation, patience, and a little bit of love. Now go forth and conquer those prime ribs. And if you’re ever feeling a little nervous, just remember my advice: don’t be afraid to experiment and have fun with it! The most important thing is to enjoy the process and the delicious meal at the end.
Everyone is watching

Prime Rib Roast Cooking Time Chart: Per Pound Guide
Cooking TipsPrime rib roast. Just the name conjures images of lavish dinners, crackling fires, and hearty laughter. It’s ...

How Long to Bake Potatoes in the Oven (Perfect Every Time)
Cooking TipsBaked potatoes are a staple in my kitchen. They're incredibly versatile, delicious, and surprisingly easy to m...

Perfect Rice Every Time: The Ultimate Guide to Cooking Rice
Cooking TipsAs a self-proclaimed foodie, I've always been a bit obsessed with rice. It's the foundation of countless cuisi...

The Ultimate Guide to Cooking Asparagus: Tips, Techniques, and Recipes
Cooking TipsAsparagus. The mere mention of this spring delicacy conjures up images of vibrant green spears, crisp and burs...

Ultimate Guide to Cooking the Perfect Thanksgiving Turkey
Cooking TipsThanksgiving. Just the word conjures up images of overflowing tables laden with delicious food, the scent of r...