Let's face it, the mere mention of poached eggs can send shivers down the spines of even the most confident cooks. "How do you get that perfect, silky wobble without the egg turning into a rubbery mess?" you might be thinking. Trust me, it's not as daunting as it seems. Once you master the technique, poached eggs will become your new breakfast (or brunch, or even dinner!) hero.
This guide is for all you beginners out there who are tired of gazing longingly at poached eggs on restaurant menus. We're going to break down the process step-by-step, with plenty of tips and tricks to help you along the way. I'll share my own experiences, the triumphs and the occasional disasters (because let's be honest, everyone makes mistakes in the kitchen!). But that's all part of the fun, right?
(Part 1) The Essential Tools: Your Poaching Arsenal
You don't need a fancy kitchen to make perfect poached eggs. Just a few essential tools will do the trick.
1. The Perfect Pot
First, you'll need a pot. Not just any pot, though. You want a saucepan that's 6-8 inches in diameter. This size will give your egg enough room to swirl gently in the water without getting jostled about. And for goodness sake, avoid those tiny little pots! You need enough space for the water to move around freely.
2. The Water: Simmering Gently
You'll need water, of course. But it needs to be simmering gently, like a gentle dance, not a raging boil. You want to see those tiny bubbles rising to the surface, indicating a controlled, gentle simmer. This creates the perfect environment for your delicate eggs.
3. The Secret Ingredient: Vinegar
Here's where things get interesting. A tablespoon or two of white vinegar is your secret weapon. It acts like a little bit of magic, helping the egg whites coagulate and prevent them from spreading out too much. This leads to a beautifully formed, smooth egg.
4. The Eggs: Fresh and Cold
Now, for the star of the show: the eggs! Choose fresh, cold eggs. The cold temperature helps the whites set quickly, resulting in a smooth, compact egg. And while we're on the subject, let's talk size. medium-sized eggs are your best bet for poaching. Too small, and you'll end up with a miniature egg. Too big, and you might have trouble keeping it all contained.
(Part 2) Preparation: A Few Simple Steps
Now that you've gathered your tools, let's prepare those eggs.
1. The Perfect Crack
Crack those eggs into a small bowl, one at a time. Don't worry about getting a little messy. You want to make sure there's no shell bits lurking around. You can carefully remove any shell bits with your finger or a small spoon. Aim for a perfectly smooth, shell-free egg.
2. The Whirlpool: A Safe Haven
This is where the fun begins. Once your water is simmering gently, you're going to create a little whirlpool in the center of your pot. Use a spoon to stir the water in a circular motion, and watch as it creates a nice, calm vortex. This whirlpool will act as your egg's safe haven, keeping it from sticking to the bottom of the pot.
3. The Vinegar Magic
Remember that vinegar? It's time to add it to the simmering water. That tablespoon or two will work its magic, helping the egg whites coagulate faster and prevent them from spreading out. It's a culinary trick that's worth trying!
(Part 3) The Poaching: Time to Get Cooking

Now, it's time for the grand finale.
1. The Gentle Dip
Carefully slip your prepared egg into the center of the whirlpool. Don't just drop it in! Gently lower it in. Let the whirlpool do its magic, swirling the egg and helping it maintain its shape.
2. cooking time: Perfecting the Texture
You'll want to cook the egg for about 3-4 minutes for a runny yolk. If you prefer a firmer yolk, you can cook it for a bit longer, up to 5 minutes. Keep an eye on the egg. As it cooks, the whites will start to set, and the yolk will become more firm.
3. The Scoop: Removing Your Masterpiece
Once the egg is cooked to your liking, use a slotted spoon to carefully remove it from the water. Let any excess water drain away before serving. Remember, you want a beautiful, poached egg, not a soggy mess!
(Part 4) Serving: Presenting Your Culinary Creation
Now that you have your perfectly poached egg, it's time to showcase it.
1. The Base: A Culinary Canvas
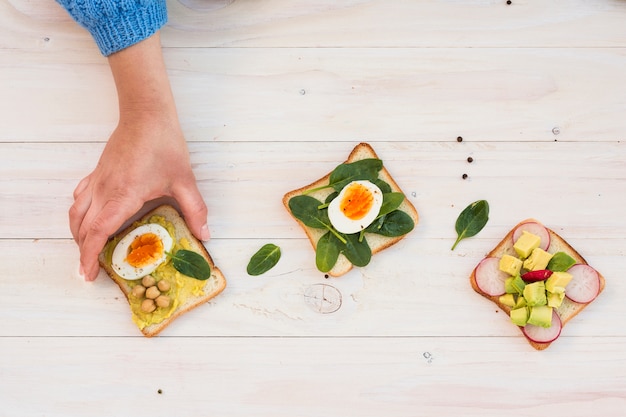
You can serve your poached egg on a bed of greens, a slice of toasted bread, or even just plain. It's all about your personal preference.
2. The Garnish: Adding a Touch of Elegance
For an extra touch of elegance, consider adding some garnishes. Chopped parsley, a sprinkle of paprika, or a drizzle of olive oil can elevate your poached egg to new heights.
3. The Sauce: A Symphony of Flavors
Of course, no poached egg is complete without a delicious sauce. Hollandaise is a classic choice, but you can also experiment with other sauces, like a spicy tomato salsa or a creamy pesto sauce.
(Part 5) Troubleshooting: Handling the Unexpected
Even the most seasoned cooks face challenges in the kitchen. Don't panic if you encounter a few bumps in the road. Here are some common issues and how to fix them:
1. The Egg White Spread: A Matter of Temperature
This is a common problem that usually happens because the water isn't hot enough. Make sure your water is simmering gently, not boiling. You can also try adding a little more vinegar to help the whites coagulate faster.
2. A Cloudy Yolk: A Sign of Freshness
If your yolk isn't as clear as you'd like, it might be because the egg wasn't fresh enough. fresh eggs will have a more vibrant, yellow yolk. You can also try cooking the egg for a shorter time to ensure the yolk stays nice and runny.
3. The Egg Falling Apart: A Gentle Touch is Key
This can happen if you're not gentle enough when removing the egg from the water. Use a slotted spoon and carefully lift the egg out, allowing any excess water to drain away.
(Part 6) Beyond the Basics: Variations and Experiments
Once you've mastered the basic poaching technique, it's time to get creative!
1. Poaching in a Ring: A Perfect Shape
If you're feeling adventurous, you can try poaching your eggs in a ring. This is a great way to ensure a perfectly shaped egg. You can find poaching rings at most kitchen stores.
2. Double Yolk Eggs: A Feast for the Senses
For a truly indulgent treat, try poaching a double-yolk egg. These are a little harder to find, but they're definitely worth the effort. Imagine that double dose of runny yolk goodness!
3. Adding Flavor: Herbs and Spices
You can add a touch of flavor to your poached eggs by incorporating herbs or spices into the poaching water. A sprig of thyme or a pinch of chili flakes can add a subtle flavor to your eggs.
(Part 7) The Poaching Table: A Guide to Times and Temperatures
Here's a quick table to help you understand the relationship between cooking time and yolk texture.
| Time (minutes) | Yolk Texture | Notes |
|---|---|---|
| 2-3 | Very runny | For the ultimate indulgence |
| 3-4 | Runny | Ideal for classic poached eggs |
| 4-5 | Softly set | Perfect for those who prefer a less runny yolk |
| 5-6 | Firmly set | Good for adding to salads or sandwiches |
(Part 8) Beyond Breakfast: Poached Eggs in Other Meals
Who says poached eggs are just for breakfast? Here are a few ideas for incorporating poached eggs into other meals:
1. Lunchtime Delights: A Healthy and Satisfying Option
Forget the boring sandwich! Poach an egg and serve it over a bed of greens, a juicy tomato salad, or even a hearty bowl of lentil soup. It's a quick, healthy, and satisfying lunch option.
2. Dinnertime Elegance: Adding Sophistication to Your Plate
Poached eggs are not just for breakfast! They add a touch of sophistication to dinner, whether you're serving them over pasta, a roasted chicken breast, or a bed of roasted vegetables.
3. Beyond the Plate: Poached Eggs in Recipes
Poached eggs can also be incorporated into other recipes, like quiche, frittata, or even a savory breakfast muffin. Get creative and experiment!
(Part 9) FAQs: Your Burning Questions Answered
Here are some of the most frequently asked questions about poached eggs:
1. What if my egg whites are still cloudy?
This usually means the egg wasn't fresh enough. Try using fresh eggs from a local farmer's market or a reputable grocery store. You can also try adding a little more vinegar to the poaching water.
2. Can I reuse the poaching water?
You can, but it's not recommended. The vinegar can start to break down and make the water taste a bit funky. It's always best to use fresh water for each batch of poached eggs.
3. How do I make sure my eggs don't stick to the bottom of the pot?
You want to make sure your water is simmering gently, not boiling. Boiling water will make the eggs stick to the bottom. You can also try greasing the bottom of the pot with a bit of butter or oil.
4. Can I poach eggs in the microwave?
You can, but it's not recommended. microwave poached eggs tend to be a bit rubbery and lack the delicate texture of stovetop poached eggs.
5. What if my egg is too hard?
No worries, this happens to the best of us! You can try poaching the egg for a shorter time next time. You can also try adding the egg to the water after it's reached a gentle simmer, as this will help prevent overcooking.
Remember, poaching eggs is a skill that takes practice. Don't be afraid to experiment and find what works best for you. And most importantly, have fun!
Everyone is watching

Prime Rib Roast Cooking Time Chart: Per Pound Guide
Cooking TipsPrime rib roast. Just the name conjures images of lavish dinners, crackling fires, and hearty laughter. It’s ...

How Long to Bake Potatoes in the Oven (Perfect Every Time)
Cooking TipsBaked potatoes are a staple in my kitchen. They're incredibly versatile, delicious, and surprisingly easy to m...

Perfect Rice Every Time: The Ultimate Guide to Cooking Rice
Cooking TipsAs a self-proclaimed foodie, I've always been a bit obsessed with rice. It's the foundation of countless cuisi...

The Ultimate Guide to Cooking Asparagus: Tips, Techniques, and Recipes
Cooking TipsAsparagus. The mere mention of this spring delicacy conjures up images of vibrant green spears, crisp and burs...

Ultimate Guide to Cooking the Perfect Thanksgiving Turkey
Cooking TipsThanksgiving. Just the word conjures up images of overflowing tables laden with delicious food, the scent of r...