I'm a bit of a fish fanatic, and there's nothing quite like a perfectly cooked piece of tuna. That crispy, slightly charred exterior giving way to the juicy, pink center? It's pure heaven. And you know what? Pan-searing is the absolute best way to achieve that perfect balance of texture and flavor.
I've tried a few different methods over the years – grilling, baking, you name it. But pan-searing consistently delivers the best results. It's quick, easy, and the results are consistently delicious. So, I thought I'd share my little secret to achieving tuna perfection with you lot. Grab your trusty pan and get ready to dive into the world of pan-seared tuna!
(Part 1) Selecting the Star of the Show: Choosing Your Tuna
The Tuna
First things first, you need the right tuna. It's all about quality. We're talking fresh, high-quality tuna. Think about it – if you start with a good piece of fish, the end result will be phenomenal. Don't be afraid to ask your fishmonger for advice. They're the experts, after all.
Types of Tuna
You've got a few choices when it comes to tuna. I'm partial to yellowfin, but ahi or bigeye work great too. Each has its own unique flavor and texture.
- Yellowfin tuna has a rich, buttery flavor and a firm, meaty texture. It's a versatile choice and works well for pan-searing.
- ahi tuna, also known as "big-eye tuna," is known for its delicate, buttery flavor and a slightly firmer texture than yellowfin.
- Bigeye tuna, as the name suggests, has large eyes and a slightly stronger, more pronounced flavor than yellowfin or ahi.
Just make sure you choose a piece that's thick enough to hold up to the heat. We're aiming for that juicy, perfectly cooked center, remember? A good rule of thumb is to go for a steak that's about 1-2 inches thick.
The Cut
Now, let's talk about the cut. I'm a firm believer that a tuna steak should be cut across the grain. This means the muscle fibers are cut perpendicular to the length of the fish. This not only makes the steak easier to chew, but it also helps to prevent it from drying out during cooking.
You might see some fishmongers cutting tuna steaks the other way. I've tried it, and it just doesn't have the same satisfying bite. But, hey, you do you. Experiment and see what you prefer.
(Part 2) Preparing for the Battle: Prepping Your Tuna

Prepping the Tuna
Alright, so you've got your gorgeous piece of tuna, ready to be transformed into a culinary masterpiece. The next step is to prep it for cooking. This part is all about bringing out the best in your tuna, and it's actually quite simple.
First, give your tuna a good rinse. Don't be shy with the water. Then, pat it dry with some kitchen paper. We want a dry surface so the tuna sears nicely and doesn't steam.
Seasoning and Marinade
Now, here's where things get interesting. You can go all out with elaborate marinades, or keep it simple with a sprinkle of salt and pepper. Personally, I'm a minimalist when it comes to seasoning.
My go-to marinade is a simple mix of olive oil, salt, pepper, and a squeeze of lemon juice. It's subtle but it really elevates the flavor of the tuna. If you fancy a bit of a kick, you could add a pinch of cayenne pepper. But remember, you don't want to drown the delicate tuna flavor, you want to enhance it.
The key here is to be generous with the seasoning. Don't be afraid to really rub it in, right into the surface of the tuna. And let it sit for a few minutes. This will help the flavors to penetrate and develop. Just don't let it sit for too long, or the tuna might start to become "fishy".
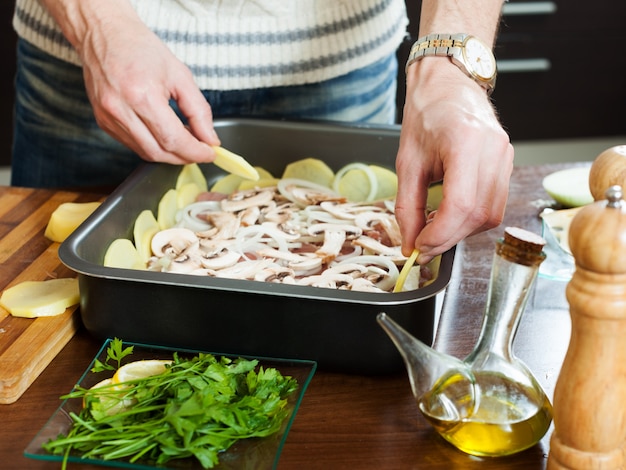
You can also experiment with other seasonings, depending on your taste. A sprinkle of dried herbs, like thyme or rosemary, can add a nice touch. Or, for a more Asian flavor, you could use a combination of soy sauce, ginger, and garlic. The possibilities are endless!
(Part 3) The Art of Pan-Searing: Mastering the Technique
Choosing Your Weapon
Alright, it's time to talk about the most crucial element in this whole process: the pan. You want a good, heavy-bottomed pan. Cast iron or stainless steel are great choices, because they hold the heat well and distribute it evenly. And don't forget to preheat the pan – we want a screaming hot pan to sear the tuna and get that gorgeous crust.
I'm not a fan of non-stick pans for searing. Why? Because they tend to hold onto the heat too well and can easily burn the delicate tuna. Plus, that delicious sear you're after? It's best achieved on a good, old-fashioned cast iron pan.
The Heat is On
Right, the pan is hot. You've got your tuna prepped. It's time to get down to business. The first few minutes are crucial. We want a beautiful, crispy crust on the outside of the tuna without overcooking the inside.
You've got to work fast here. Place the tuna in the hot pan, and let it sear for about 30-45 seconds per side. Don't move it around too much. We want that beautiful sear.
The trick is to listen to your pan. You'll hear a distinct sizzle when the tuna hits the hot pan. That's the sound of a beautiful sear happening. And if you see a light brown crust forming on the tuna, you're on the right track.
Flip It!
Once the tuna has developed a nice sear on one side, it's time to flip it over. Use tongs, not a fork, to make sure you don't break the delicate tuna. And repeat the process on the other side. Another 30-45 seconds, and you're almost there.
Now, here's where it gets a bit tricky. The tuna should be a beautiful golden brown on the outside, but the inside should still be pink and raw. This is what we call "rare" tuna. If you prefer a more cooked tuna, you can sear for a bit longer, but be careful not to overcook it.
The Final Touches
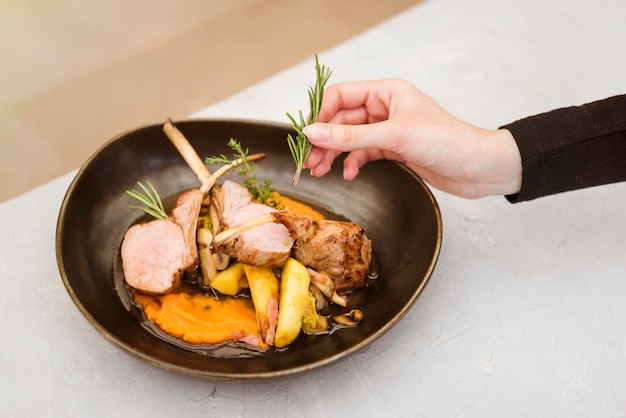
If you're feeling adventurous, you can add a pat of butter to the pan and baste the tuna. This will add a delicious richness and enhance the flavor. And if you're really feeling fancy, you can also add a few sprigs of fresh herbs to the pan, like rosemary or thyme.
(Part 4) Judging the Victory: Checking for Doneness
Don't Overcook it!
The most important thing is to not overcook the tuna. It's all about that balance between a perfectly seared exterior and a juicy, pink interior. Overcooked tuna is dry, tough, and frankly, not very pleasant.
Temperature is Key
To check if your tuna is cooked to your liking, you can use a meat thermometer. The ideal internal temperature for rare tuna is 115-125 degrees Fahrenheit. But remember, these are just guidelines.
Trust Your Intuition
A good way to gauge whether the tuna is cooked is to press on it lightly with your finger. It should spring back, like a well-done piece of steak. If it's soft and mushy, it's overcooked.
The Colour Test
You can also look at the colour of the tuna. When it's cooked to the perfect rare, the centre should be a vibrant, pink colour. If it's starting to turn grey or white, it's overcooked.
(Part 5) The Finishing Touch: Resting and Slicing
Alright, the tuna is cooked. Now it's time to rest. Let the tuna rest for a few minutes before slicing. This will help to evenly distribute the juices and prevent it from becoming too dry.
Now, slicing the tuna is an art form in itself. You want thin, even slices, so the tuna is easy to chew and doesn't fall apart. Use a sharp knife, and slice against the grain.
(Part 6) Serving Your Masterpiece: Presentation and Pairing
Now, the big reveal! The moment of truth. You've got your perfectly pan-seared tuna, looking all glossy and beautiful. It's time to serve it up.
Plate It Up
Presentation is key, folks. Make your tuna the star of the show. Choose a simple plate, so it doesn't compete with the beauty of your tuna.
I like to serve my tuna on a bed of greens, like arugula or spinach. It adds a bit of color and freshness to the plate. You can also add a few slices of avocado or a drizzle of balsamic glaze for extra flavor.
Pairing Perfection
The beauty of tuna is its versatility. It can be paired with a variety of flavors and textures. If you're feeling adventurous, you can try it with a mango salsa or a spicy peanut sauce. But for a more classic pairing, a simple salad with lemon vinaigrette is always a good choice.
And of course, don't forget the wine. A crisp white wine, like Sauvignon Blanc or Pinot Grigio, is a perfect match for the delicate flavors of tuna. You can also try a light-bodied red wine, like Pinot Noir.
(Part 7) Beyond the Basic: Expanding Your Tuna Horizons
You've got the basics down. You can now explore the world of tuna! You can create your own flavor profiles, or experiment with different cooking techniques.
Tuna Beyond the Plate
And hey, tuna doesn't always have to be the main event. It's also a fantastic addition to salads, sandwiches, and even pasta dishes.
Think about a tuna salad sandwich with a twist, using fresh herbs and a touch of lemon zest. Or how about a vibrant pasta dish with grilled tuna, cherry tomatoes, and capers? The possibilities are endless.
(Part 8) A Taste of Success: Embrace the Journey
Look, I'm no culinary genius, but I've learned a few things about cooking tuna over the years. And the best part? It's not about following strict rules or being a master chef. It's about experimenting, having fun, and enjoying the process.
So, go out there, get yourself some fresh tuna, and give it a go. You might be surprised at what you can create. And remember, there's no one right way to cook tuna. It's all about finding what you enjoy. So get in the kitchen, turn up the music, and have a blast!
FAQs
1. How long should I sear tuna?
You want to sear the tuna for about 30-45 seconds per side. It's important to work fast and get a nice, crispy crust on the outside without overcooking the inside. You should see a light brown crust forming on the surface.
2. What is the ideal internal temperature for tuna?
The ideal internal temperature for rare tuna is 115-125 degrees Fahrenheit. You can use a meat thermometer to check the temperature, but it's also good to trust your intuition and check the texture and colour of the tuna. If you prefer a more cooked tuna, aim for an internal temperature of 130-140 degrees Fahrenheit.
3. What happens if I overcook tuna?
If you overcook tuna, it will become dry, tough, and not very pleasant to eat. The texture will be rubbery and the flavour will be bland. It's better to undercook tuna than overcook it.
4. Can I use a non-stick pan to sear tuna?
I wouldn't recommend using a non-stick pan for searing tuna. Non-stick pans tend to hold onto the heat too well and can easily burn the delicate tuna. Plus, you won't get that delicious, crispy crust you're after. A good, heavy-bottomed cast iron pan is the best choice for searing tuna.
5. What kind of wine pairs well with tuna?
A crisp white wine, like Sauvignon Blanc or Pinot Grigio, is a perfect match for the delicate flavors of tuna. You can also try a light-bodied red wine, like Pinot Noir.
6. What are some other cooking methods for tuna?
Besides pan-searing, you can also try grilling, baking, smoking, or even poaching tuna. Each method brings out different flavors and textures, so experiment and see what you like best.
7. How can I store leftover tuna?
Store leftover tuna in an airtight container in the refrigerator for up to 3 days. You can also freeze tuna for up to 3 months. Thaw it in the refrigerator overnight before cooking.
8. How do I know if tuna is fresh?
Fresh tuna should have a bright red color, a firm texture, and a fresh, slightly sweet smell. Avoid tuna that has a strong fishy odor or a slimy texture.
9. What are some good side dishes to serve with tuna?
Some great side dishes for tuna include:
| Side Dish | Description |
|---|---|
Roasted vegetables | Such as asparagus, broccoli, or bell peppers. |
A classic pairing with tuna. | |
A light and fluffy side dish that complements tuna. | |
Salad | A refreshing and healthy option, with various dressings and toppings. |
The possibilities are endless, so get creative and have fun!
Everyone is watching

Prime Rib Roast Cooking Time Chart: Per Pound Guide
Cooking TipsPrime rib roast. Just the name conjures images of lavish dinners, crackling fires, and hearty laughter. It’s ...

How Long to Bake Potatoes in the Oven (Perfect Every Time)
Cooking TipsBaked potatoes are a staple in my kitchen. They're incredibly versatile, delicious, and surprisingly easy to m...

Perfect Rice Every Time: The Ultimate Guide to Cooking Rice
Cooking TipsAs a self-proclaimed foodie, I've always been a bit obsessed with rice. It's the foundation of countless cuisi...

The Ultimate Guide to Cooking Asparagus: Tips, Techniques, and Recipes
Cooking TipsAsparagus. The mere mention of this spring delicacy conjures up images of vibrant green spears, crisp and burs...

Ultimate Guide to Cooking the Perfect Thanksgiving Turkey
Cooking TipsThanksgiving. Just the word conjures up images of overflowing tables laden with delicious food, the scent of r...