Let's talk steak. You know, the kind that makes your mouth water just thinking about it – that glorious, juicy, meaty goodness that makes your tastebuds sing? I’ve been obsessed with cooking the perfect steak for years. I've tried every technique under the sun, experimented with different cuts, and, trust me, I’ve had my fair share of disasters. But through trial and error, I've finally cracked the code.
This guide isn’t just about the basics, though. It’s about taking your steak game to the next level – about getting that beautiful crust, achieving the perfect level of doneness, and making a steak that's not just good, but truly unforgettable. So grab your apron, sharpen your knives, and let's dive in!
(Part 1) choosing the right cut
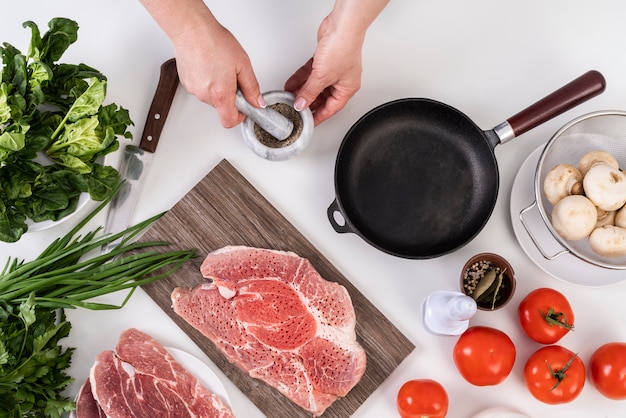
The Art of Cut Selection
Okay, first things first, let's talk about choosing the right cut. There's a whole world of steak cuts out there, each with its own unique flavour and texture, but for a truly perfect pan-seared steak, you want something that's going to give you a nice, even sear and hold up well under high heat. My go-to cuts for pan-searing are:
- Rib-eye: This classic is known for its rich marbling, making it incredibly juicy and flavorful. It's a real crowd-pleaser. You’ll get a beautiful sear and a melt-in-your-mouth experience. I love the marbling because it makes it incredibly tender and juicy. It's like butter in your mouth!
- new york strip: A leaner cut than ribeye, it's got a slightly firmer texture and a slightly more intense beefy flavor. It sears up beautifully, forming a nice crust. Because of its leanness, it's great if you're looking for a slightly healthier option, but it's still incredibly delicious.
- Sirloin: A good value option, sirloin is less marbled than ribeye and New York strip, but still delicious. It’s a great choice for a classic steak dinner. It's a great choice if you're on a budget, but don't want to sacrifice flavour. It's also a good choice for grilling because it holds its shape well.
Thickness Matters
Thickness is key, and you want to aim for about 1-1.5 inches. This gives you enough room for a good sear on the outside while still allowing the center to cook evenly. If your steak is thinner, it might overcook quickly, and if it’s thicker, it might not get that nice char.
Beyond the Basics
For a more adventurous culinary experience, you can also explore some of the lesser-known cuts:
- flank steak: Known for its intense flavour, flank steak is a great option for stir-fries or fajitas. It's also a great choice for marinating because it absorbs flavours well.
- skirt steak: This cut is similar to flank steak, but it's a little thicker and more tender. It's also great for stir-fries, fajitas, or grilling.
- Top Sirloin: This cut is more tender than a regular sirloin and has a slightly stronger flavour. It's great for grilling or pan-searing.
(Part 2) Preparing Your Steak for Battle
Now that you’ve chosen your perfect cut, it’s time to get it ready for the battle.
Pat It Dry
First, pat your steak dry with paper towels. This will help ensure a nice sear and prevent steam from forming as it cooks. You want that surface to be as dry as possible. I've learned this the hard way – if you don't dry it properly, you'll end up with a steamed steak instead of a perfectly seared one.
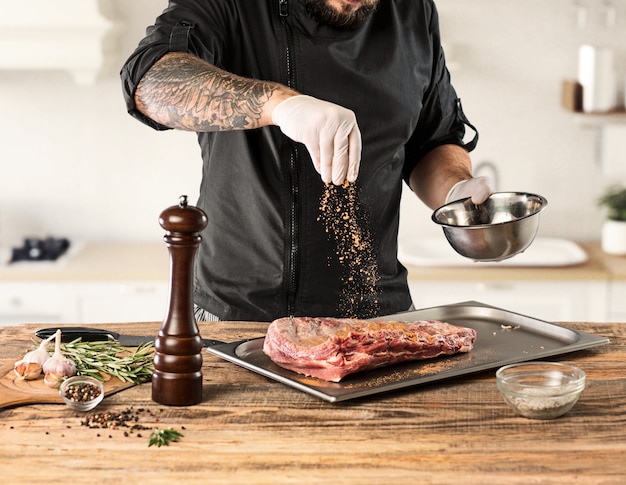
Salt and Pepper: The Magic Duo
Seasoning is essential. About 30 minutes before cooking, generously salt your steak on both sides. Don’t be shy, go for a good layer. You want the salt to start drawing out moisture and then settle back into the meat, creating a tastier, more tender steak. This is a technique called "dry brining," and it's a game-changer. You can add pepper, too, but I usually prefer to season with just salt until the very end, just before cooking.
Let It Rest
Once salted, let your steak rest at room temperature for 30 minutes before cooking. This allows the steak to come up to room temperature, which will ensure even cooking. It might seem like a small detail, but trust me, it makes a difference. It helps the steak cook more evenly and prevents it from getting cold spots.
(Part 3) The Heat is On
The Importance of Heat
Get your pan nice and hot! This is crucial for that perfect sear. You want a cast iron pan or a heavy-bottomed skillet that can handle high heat. Heat it over medium-high heat until it’s smoking hot.
Oil Up: The Foundation of Flavor
Add a generous amount of oil to the pan. You want enough to coat the bottom of the pan and ensure the steak doesn't stick. I usually go with a neutral oil like grapeseed or avocado oil because they have a high smoke point and won't impart any unwanted flavors.
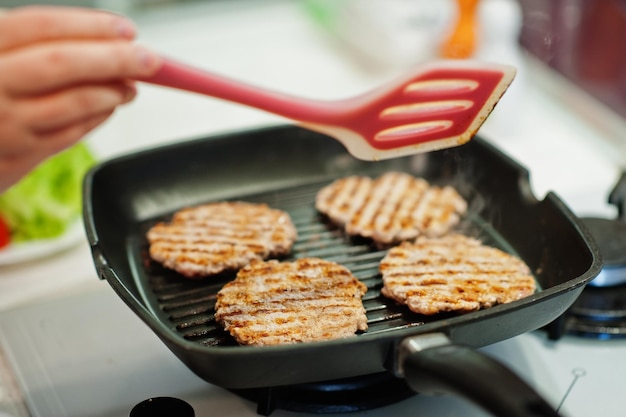
Searing Your Steak: The Art of the Crust
Once the pan is screaming hot and the oil is shimmering, carefully place the steak in the pan. Don't crowd the pan – give the steak space to sear evenly. Now, don’t touch it! Resist the urge to prod or move it around. Just let it sit and sear for about 3-4 minutes on each side. This is where you’ll get that beautiful crust – it's the foundation of a great steak.
(Part 4) Decoding Doneness: Understanding the Levels
The Perfect Doneness: A Matter of Taste
Doneness is a personal preference, but here’s a handy guide for reference:
| Doneness | internal temperature (Fahrenheit) | Steak Characteristics |
|---|---|---|
| Rare | 125-130°F | Center is cool and red, very juicy |
| Medium-Rare | 130-135°F | Center is slightly warm and pink, still very juicy |
| Medium | 135-140°F | Center is warm and pink, less juicy than medium-rare |
| Medium-Well | 140-145°F | Center is warm and mostly brown, less juicy |
| Well-Done | 145-150°F | Center is fully cooked and brown, dry and tough |
Testing for Doneness: The Finger Test and the Thermometer
The Finger Test: It's a bit of a gamble, but you can gently press the center of the steak with your finger to get an idea of its doneness. It should feel firm, similar to your fingertip for rare, a little firmer for medium-rare, and quite firm for medium.
The Thermometer: A meat thermometer is the most reliable method. Insert it into the thickest part of the steak to get an accurate reading. I always use a meat thermometer to make sure my steak is cooked to my liking.
(Part 5) Finishing Touches: Resting and Slicing
Resting Your Steak: A Key to Tenderness
Once your steak is cooked to your liking, take it off the heat and let it rest for 5-10 minutes before slicing. This allows the juices to redistribute throughout the steak, resulting in a more tender and flavorful piece. I've learned that resting is crucial to unlock the full potential of your steak.
Slicing with Skill: Against the Grain for Tenderness
Cut your steak against the grain, which means slicing perpendicular to the muscle fibers. This creates a more tender bite. You'll also notice that slicing against the grain makes the steak look more appealing.
(Part 6) Beyond the Basics: Master the Techniques
reverse searing for Ultimate Tenderness
For an extra-tender steak, try reverse searing. This method involves cooking the steak low and slow in the oven until it’s almost at the desired doneness, and then searing it quickly in a hot pan to create a crispy crust. It's a bit more involved, but the results are worth it.
1. Preheat your oven to 250°F (120°C).
2. Season your steak generously with salt and pepper.
3. Place the steak on a baking sheet and cook in the preheated oven for about 1 hour, or until the internal temperature is about 10 degrees less than your desired doneness.
4. Remove the steak from the oven and let it rest for 10 minutes.
5. While the steak is resting, heat a heavy-bottomed skillet over high heat. Add oil to the hot pan.
6. Once the oil is shimmering, sear the steak for 2-3 minutes per side, or until you have a nice, crispy crust.
7. Let the steak rest again for 5-10 minutes before slicing.
The Power of Butter Basting: A Flavor Boost
For an extra boost of flavor and richness, try butter basting your steak as it sears.
1. After searing for 3-4 minutes on each side, remove the steak from the pan and set it aside.
2. Add a tablespoon of butter to the pan.
3. As the butter melts, add a few sprigs of fresh thyme or rosemary, a garlic clove, and a few cracks of black pepper.
4. Tilt the pan so the butter and herbs are swirling around.
5. Pour the herb-infused butter over the steak as it cooks. This will add a touch of richness and a hint of herbal flavour.
(Part 7) Pairing Steak with Sides: The Perfect Complement
Starchy Companions: Elevating the Texture
- mashed potatoes: A classic, creamy comfort food that pairs perfectly with steak. Go for a creamy mash with a touch of butter and milk for ultimate decadence. It's a classic combination that never disappoints.
- Roasted Potatoes: Crunchy on the outside and fluffy on the inside, roasted potatoes add a satisfying texture to your steak plate. They provide a nice contrast to the tenderness of the steak.
- Asparagus: roasted asparagus with a drizzle of olive oil and a sprinkle of salt is a light and flavorful accompaniment. It's a simple, yet elegant side that complements the steak perfectly.
Green Delights: Adding a Refreshing Note
- spinach salad: A simple spinach salad with a vinaigrette dressing adds a fresh and healthy touch. It's a good way to balance out the richness of the steak.
- green beans: Steamed or sauteed green beans provide a bright, crisp contrast to the rich steak. They also add a nice pop of colour to the plate.
Beyond the Basics: Exploring Other side dish Options
- Roasted Vegetables: Experiment with different roasted vegetables like carrots, Brussels sprouts, or squash.
- Wild rice pilaf: A nutty and flavorful alternative to rice. It's also a good source of fiber and protein.
- Mushroom Risotto: Creamy and flavorful, mushroom risotto adds a touch of elegance to any steak dinner.
(Part 8) FAQs: Your Steak Queries Answered
1. How long should I sear a steak for?
You want to sear the steak for 3-4 minutes per side for a nice, crispy crust. Don't be tempted to rush the process. A good sear takes time.
2. What’s the best way to tell if a steak is cooked to my liking?
Using a meat thermometer is the most reliable method. You can also use the finger test, but it’s not as precise. I always recommend using a meat thermometer for the most accurate results.
3. What should I do if my steak sticks to the pan?
If your steak is sticking, it's probably because the pan isn't hot enough. Heat the pan to a higher temperature and try again. You might also need to add a little more oil. It's important to ensure that the pan is hot enough and that you have enough oil in the pan.
4. How can I prevent my steak from being dry?
Resting the steak after cooking is crucial for allowing the juices to redistribute. Also, don't overcook it! If you're unsure about the doneness, err on the side of undercooking rather than overcooking.
5. What’s the best way to store leftover steak?
Wrap the steak tightly in plastic wrap and store it in the refrigerator for up to 3 days. It's best to use leftover steak in recipes, as it's not as enjoyable as freshly cooked steak.
6. What are some creative ways to add flavour to my steak?
There are endless possibilities for adding flavour to your steak! You can:
Use a marinade: Marinating your steak in a mixture of herbs, spices, and liquids can add a lot of flavour.
Rub with a spice blend: You can make your own spice blend or use a pre-made blend.
Add herbs to the pan: Add fresh herbs like thyme, rosemary, or sage to the pan as you sear the steak for an extra boost of flavour.
Top with a sauce: A good sauce can take your steak to the next level.
There you have it! Now you have the knowledge and the techniques to become a steak master. Go forth and conquer the kitchen, my friends. And remember, a perfect steak is all about practice and a little bit of love. Happy grilling!
Everyone is watching

Prime Rib Roast Cooking Time Chart: Per Pound Guide
Cooking TipsPrime rib roast. Just the name conjures images of lavish dinners, crackling fires, and hearty laughter. It’s ...

How Long to Bake Potatoes in the Oven (Perfect Every Time)
Cooking TipsBaked potatoes are a staple in my kitchen. They're incredibly versatile, delicious, and surprisingly easy to m...

Perfect Rice Every Time: The Ultimate Guide to Cooking Rice
Cooking TipsAs a self-proclaimed foodie, I've always been a bit obsessed with rice. It's the foundation of countless cuisi...

The Ultimate Guide to Cooking Asparagus: Tips, Techniques, and Recipes
Cooking TipsAsparagus. The mere mention of this spring delicacy conjures up images of vibrant green spears, crisp and burs...

Ultimate Guide to Cooking the Perfect Thanksgiving Turkey
Cooking TipsThanksgiving. Just the word conjures up images of overflowing tables laden with delicious food, the scent of r...