Ah, roast beef. The king of Sunday dinners, the hero of holiday feasts, a dish that always brings a sense of warmth and comfort. But let’s be real, mastering a roast can be a bit daunting. We’ve all been there, nervously watching the oven timer, hoping for a juicy, tender masterpiece instead of a dry, disappointing disappointment. Fear not, my friend, because today, we’re going on a journey to roast beef nirvana. Together, we’ll conquer the art of the perfect oven-roasted beef, and you’ll be the envy of every dinner party. So, grab a cuppa, put your feet up, and let’s get started.
Part 1: The Beefy Foundation – Choosing Your Cut

It all starts with the right piece of meat. Think of it as building a house - you need a strong foundation, and for a roast, that foundation is a good quality joint of beef. Personally, I have a soft spot for sirloin. It’s a classic for a reason, with a fantastic balance of leanness and marbling, which gives you juicy, flavorful results. But don’t dismiss a topside if you’re after a leaner cut. It offers a more consistent texture, perfect for larger roasts.
A Beefy Lineup: Picking the Perfect Cut
The world of beef cuts can seem a bit overwhelming, but it’s actually quite exciting! I’ve tried them all, and each has its own personality, so it truly comes down to your preferences.
- Sirloin: The timeless classic. It’s a great all-rounder, with rich flavor and a satisfying balance of fat and lean. Perfect for those who love a good, hearty roast.
- Topside: A more lean choice that’s ideal for larger roasts or those looking for a less fatty option. It’s known for its consistent texture and tender results.
- rib roast: This cut is known for its intense marbling, which translates to rich, robust flavor. Perfect for smaller gatherings where you want to impress with a luxurious, melt-in-your-mouth experience.
- Fore Rib: Often referred to as “chuck roast,” this cut is more budget-friendly and packs a powerful, earthy flavor. It’s a fantastic choice for slow roasting, where the long cook time allows the tougher connective tissues to break down, resulting in incredibly tender meat.
- Rump: A leaner cut with a good flavor that holds up well to long cooking times. It’s often used for pot roasts, where it becomes incredibly tender and succulent.
Remember, the key is to look for a joint with a good amount of fat (at least 1-2 inches thick), and a weight that suits your needs. Are you feeding a family of four or a crowd of twenty? The size of your joint will depend on your guest list. Don’t sweat the bone-in or boneless debate too much – it’s a matter of personal preference.
Part 2: Prepping for Glory – Getting Your Beef Ready

You’ve got your chosen champion, now it’s time to prepare it for the oven. This is where a lot of people go wrong, but trust me, a little extra effort goes a long way. It’s all about setting your beef up for success, so it can shine in the oven.
The Art of Rest: Letting Your Beef Relax
First things first, give your beef a little TLC by letting it rest at room temperature for at least 30 minutes before you start cooking. This allows the meat to come up to temperature, ensuring it cooks more evenly. Think of it as a pre-workout stretch for your beef, so it’s ready to perform at its best. If you’re working with a larger joint, give it a good hour or so to warm up.
Seasoning with Flair – Beyond Salt and Pepper
Now for the fun part: seasoning! Don’t be afraid to ditch the boring old salt and pepper routine. Let your creativity run wild! I love to rub my beef with a blend of fresh herbs – rosemary, thyme, and garlic add a beautiful depth of flavor. And don’t be shy with the salt and pepper, they really help to draw out the natural flavor of the meat.
Want to explore other flavour combinations? Here are a few ideas to get your taste buds tingling:
- Italian: A blend of oregano, basil, garlic powder, and a hint of red pepper flakes. It's a classic for a reason, adding a bright, savory depth to your roast.
- Mediterranean: A mix of lemon zest, garlic, and oregano. It creates a vibrant, refreshing flavour that’s perfect for warm weather dinners.
- Herbs de Provence: This classic French combination of thyme, rosemary, marjoram, savory, and lavender adds a delicate floral touch that complements the beef beautifully.
- Asian: A blend of ginger, garlic, soy sauce, and sesame oil. This combination brings a bold, earthy flavour that’s perfect for those who like a bit of a kick.
Remember, there’s no right or wrong way to season. It’s your roast, so experiment and find what you love best.
The Power of Fat – Keeping Your Roast Juicy
Before the oven gets involved, we need to give our beef a generous layer of fat. Now, I know what you’re thinking – fat? But trust me, fat is flavour! It helps create that delicious, crispy crust, and it keeps the meat moist and succulent. I use a mix of butter and olive oil, but you can use beef dripping, lard, or even a good quality vegetable oil.
If you're working with a bone-in roast, tie it up with kitchen twine to maintain its shape. You want a beautiful, even roast, not a wobbly, floppy mess.
Part 3: The Oven Transformation – Cooking to Perfection

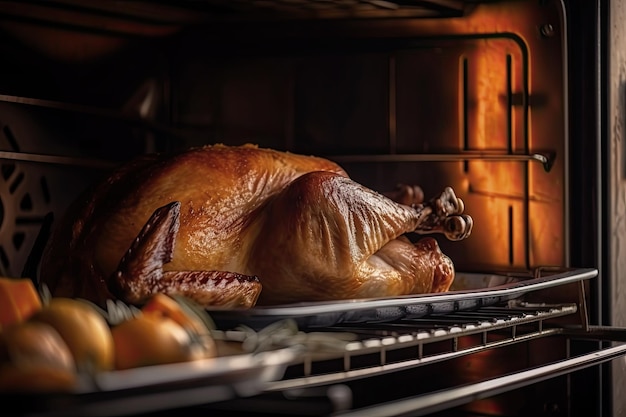
Alright, let’s get this show on the road! Preheat your oven to 400°F (200°C) and get ready to witness a culinary masterpiece unfold.
Two-Stage Cooking – A Secret to Success
The secret to a perfect roast is a two-stage cooking process. It’s all about achieving the perfect balance between a crispy exterior and a juicy, tender interior.
- High Heat for a Golden Crust: Start by cooking your beef on high heat for about 15-20 minutes. This sears the outside, creating a beautiful, golden-brown crust and locking in those delicious juices.
- Lower Heat for Tenderness: Once that gorgeous crust is achieved, turn down the oven heat to 325°F (160°C). Now, the magic of slow cooking takes over, allowing the beef to cook through evenly and reach that tender, juicy state we all crave.
Keep in mind that cooking times will vary depending on the size and thickness of your roast. It's always best to use a meat thermometer to ensure it’s cooked through to your desired doneness.
Doneness: Finding Your Perfect Level
Doneness is a personal preference. Do you like your beef rare, medium-rare, medium, medium-well, or well-done? There’s no right or wrong answer here. It’s all about what your taste buds crave.
Meat Thermometer: Your Trusty Guide
To make sure you get it right every time, grab your trusty meat thermometer. Insert it into the thickest part of the roast, avoiding any bone, and let it tell you the story of your roast's internal temperature. Here's a handy chart to guide you through the world of doneness:
| Doneness | Internal Temperature |
|---|---|
| Rare | 125-130°F (52-54°C) |
| Medium-Rare | 130-135°F (54-57°C) |
| Medium | 140-145°F (60-63°C) |
| Medium-Well | 150-155°F (65-68°C) |
| Well-Done | 160°F (71°C) |
Remember: Once you remove the beef from the oven, it will continue cooking slightly, so aim for a temperature that's about 5°F lower than your desired doneness.
Part 4: The Resting Ritual – Letting Your Roast Settle In
The final stage of the roasting journey is a crucial step: resting. Once your beef is cooked to perfection, resist the urge to carve right away. Let it rest for at least 15-20 minutes before carving. This gives the juices time to redistribute throughout the meat, resulting in a more tender, juicy roast, and a symphony of flavours.
While your roast is enjoying its well-deserved rest, get started on your gravy. Use those delicious pan juices to create a rich and flavorful gravy. Simply deglaze the pan with a little red wine or beef stock, and whisk in some cornstarch or flour to thicken it. The result? A gravy that's bursting with flavour, worthy of your perfectly roasted masterpiece.
Part 5: The Art of Carving – Unveiling Your Roast’s Beauty
The moment of truth has arrived: carving. This is where you get to showcase your culinary prowess. Grab your trusty sharp carving knife and a cutting board, and let's carve like a pro.
Carving with Confidence – Slicing with Precision
Here’s how to carve with confidence:
- Slice Against the Grain: The key to tender roast beef lies in slicing against the grain, which refers to the direction the muscle fibers run. Think of it as cutting across the “lines” of the meat. This ensures the meat is easier to chew and creates a more tender, melt-in-your-mouth texture. You can identify the grain by observing the texture of the meat.
- Even Slices for Equal Enjoyment: Aim for slices that are all about the same thickness. It looks more appealing and ensures that everyone gets a fair share of the roast’s deliciousness.
- Presentation Matters: Arrange the slices on a platter, but don’t overcrowd it. Let the beauty of your roast shine. If you’re working with a bone-in roast, arrange the slices around the bone for a classic presentation.
Don’t be afraid to ask for help if you’re not confident in your carving skills. There’s no shame in admitting you need a second pair of hands! It’s all about enjoying the process and creating a delicious experience.
Part 6: The Grand Finale – Serving Your Feast
Your roast is carved, the gravy is ready, and the anticipation is building. Time to present your culinary triumph to your hungry guests.
side dishes: A Symphony of Flavours
A perfect roast deserves a selection of equally delicious side dishes. I always include a variety of roasted vegetables, like potatoes, carrots, and green beans, alongside a comforting Yorkshire pudding. Some prefer a creamy mashed potato or a refreshing salad. It's all about balancing flavors and textures to create a well-rounded dining experience.
Accompaniments: Adding the Finishing Touches
Don’t forget the finishing touches! A dollop of horseradish sauce, a drizzle of that luscious gravy, and a few sprigs of fresh parsley elevate your presentation to new heights.
Savouring the Moment – Enjoying Your Work
Now, take a deep breath, relax, and bask in the glow of your culinary achievement. A perfect oven-roasted beef is a testament to your skills, a celebration of flavour, and a source of immense satisfaction.
Part 7: Leftover Love – Making the Most of Your Roast
We’ve all been there – a beautifully roasted beef, but inevitably, there are leftovers. And, in my opinion, leftover roast beef is a hidden gem. It's a chance to get creative and explore new culinary adventures.
A Feast of Possibilities – Leftover Roast beef recipes
The possibilities are endless! You can slice it up and add it to a salad, create a hearty sandwich, or use it as the star ingredient in a delicious beef stew.
Here’s a quick recipe for a simple roast beef sandwich:
Roast Beef Sandwich with Horseradish Sauce
Ingredients:
- Leftover roast beef, sliced
- 2 slices of bread
- Horseradish sauce
- Lettuce, sliced
- Tomato, sliced
Instructions:
- Spread a generous layer of horseradish sauce on both slices of bread.
- Layer sliced roast beef, lettuce, and tomato on one slice of bread.
- Top with the other slice of bread and enjoy a taste of culinary heaven.
This is just a starting point. Feel free to add cheese, onion, or other toppings to your sandwich. Get creative and experiment with different flavour combinations!
Part 8: Tips and Tricks – Mastering the Art of Roasting
We’ve covered a lot of ground, but there are always more tips and tricks to refine your roast beef skills. Let’s dive into a few more secrets to ensure your next roast is a masterpiece.
Tips for Roast Beef Perfection
- Spacious Cooking: Make sure there’s enough space around your roast in the pan so it cooks evenly. If needed, use a larger roasting pan to prevent overcrowding.
- The Power of Basting: Basting the roast with pan juices throughout the cooking process helps keep it moist and flavorful. You can also use a little red wine or beef stock for basting, adding depth and richness to the flavor.
- Raising the Roast: A roasting rack elevates the roast above the bottom of the pan, allowing for even cooking and creating a beautiful, crispy crust. It also prevents the roast from sitting in its own juices, ensuring a more consistent texture.
- Don't Overdo It: The secret to a perfect roast is to cook it to the desired doneness and no more. Overcooked beef can be tough and dry, so use that meat thermometer to prevent overcooking.
- Rest is Essential: Remember, resting the roast after cooking is crucial for a juicy, tender result. It allows those delicious juices to redistribute throughout the meat, resulting in a more flavorful and tender roast.
Part 9: FAQs – Answering Your Roast Beef Questions
I get asked a lot of questions about roast beef, so here are some of the most common ones.
1. What temperature should I cook my roast beef at?
The magic happens with a two-stage process. Start by cooking your roast at a high heat, around 400°F (200°C) for 15-20 minutes to get that beautiful crust. Then, turn down the heat to 325°F (160°C) for the rest of the cooking time. Remember, the exact cooking time will depend on the size and thickness of your roast.
2. How do I know when my roast beef is done?
Your trusty meat thermometer is your best friend in this situation. Insert it into the thickest part of the roast, making sure it doesn't touch any bone, and let it tell you the story of your roast’s internal temperature. The internal temperature will vary depending on your desired level of doneness. Check out the table in Part 3 for a guide to internal temperatures for different levels of doneness.
3. How long should I rest my roast beef?
Give your roast a well-deserved rest for at least 15-20 minutes before carving. This allows the juices to redistribute throughout the meat, ensuring a juicy, tender roast that will impress your guests.
4. Can I freeze roast beef?
Absolutely! Wrap your roast beef tightly in plastic wrap or aluminum foil and store it in the freezer for up to 3 months. To thaw, transfer the roast to the refrigerator for 2-3 days. You can also thaw it in the microwave on the defrost setting, but it’s not recommended as it can affect the texture of the meat.
5. What should I serve with roast beef?
Roast beef deserves a grand entourage! Roasted potatoes, carrots, green beans, Yorkshire pudding, mashed potatoes, or a light salad are fantastic choices. Don’t forget the finishing touches – a dollop of horseradish sauce, a drizzle of your homemade gravy, and a few sprigs of fresh parsley.
And there you have it – a comprehensive guide to achieving oven-roasted beef perfection. I hope you found it helpful and inspiring. Now, get out there, grab a good piece of beef, and let’s get cooking! Don’t be afraid to experiment and discover what works best for you. Happy roasting, my friend!
Everyone is watching

Prime Rib Roast Cooking Time Chart: Per Pound Guide
Cooking TipsPrime rib roast. Just the name conjures images of lavish dinners, crackling fires, and hearty laughter. It’s ...

How Long to Bake Potatoes in the Oven (Perfect Every Time)
Cooking TipsBaked potatoes are a staple in my kitchen. They're incredibly versatile, delicious, and surprisingly easy to m...

Perfect Rice Every Time: The Ultimate Guide to Cooking Rice
Cooking TipsAs a self-proclaimed foodie, I've always been a bit obsessed with rice. It's the foundation of countless cuisi...

The Ultimate Guide to Cooking Asparagus: Tips, Techniques, and Recipes
Cooking TipsAsparagus. The mere mention of this spring delicacy conjures up images of vibrant green spears, crisp and burs...

Ultimate Guide to Cooking the Perfect Thanksgiving Turkey
Cooking TipsThanksgiving. Just the word conjures up images of overflowing tables laden with delicious food, the scent of r...
