Ah, the NY strip. The king of steaks, a culinary crown jewel that deserves a grilling ceremony fit for a monarch. It's about more than just throwing a piece of meat on the fire. It's about mastering the art of the sear, achieving that perfect crust, and letting the natural flavors sing. Over the years, I've learned a thing or two about grilling this majestic cut of meat, and I'm excited to share my secrets with you. Grab your apron, fire up the barbie, and let's embark on this culinary adventure together.
(Part 1) The Steak: Choosing Your Weapon
First things first, you need the right weapon. No, not a sword (though that might be fun!), but a perfect NY strip. While they all seem alike at first glance, there are subtle differences that can make or break your grilling experience. A good NY strip needs to be thick enough for a proper sear, marbled with just the right amount of fat for juicy flavor, and, of course, fresh as a daisy.
1. The Thickness: The Foundation of a Great Steak
Imagine building a house without a solid foundation. That's what a thin NY strip is like. It'll cook too fast, drying out before you get that luscious sear. You need at least 1.5 inches of thickness for a steak to hold its own on the grill. Think of it as a canvas, offering enough surface area for that beautiful browning and juicy interior.
2. The Marbling: The Secret Sauce of Flavor
Those veins of fat running through the meat, that's the marbling, and it's the key to a flavorful, juicy steak. It's like the secret ingredient in a delicious sauce, melting as it cooks and infusing the meat with flavor. You want a good amount, but not excessive. Too much marbling can make the steak overly greasy, and you won't be able to taste the steak itself.
3. The Color: A Window into Freshness
A bright red steak with a hint of purple is a good sign of freshness. Avoid any steaks that are dark red or brown. They might be past their prime, and that's never a good sign in the world of grilling.
(Part 2) The Prep: Getting Ready for Battle

Now that you've got your chosen weapon, it's time to prepare it for battle. This is where we'll unlock the secrets to making that NY strip sing.
1. Pat it Dry: The Foundation for a Crisp Sear
Before we even think about seasoning, we need to pat that steak dry. Think of it as the first step in a beauty routine. This helps the seasonings adhere better and prevents the steak from steaming instead of searing. You want that gorgeous crust, not a soggy mess!
2. Seasoning Time: A Symphony of Flavor
The seasoning is your chance to be creative. But let's be honest, sometimes simple is best. Salt and freshly ground pepper are classics for a reason! They let the steak's natural flavor shine.
However, if you're feeling adventurous, a sprinkle of garlic powder, onion powder, or paprika can add a delightful twist. Just remember, don't go overboard. You want to enhance, not overpower the steak's natural beauty.
Here are a few of my go-to seasoning blends:
- Classic Salt and Pepper: A timeless combo, but don't forget to use freshly ground pepper. The difference is remarkable!
- Garlic Herb: Garlic powder, onion powder, parsley, thyme, and oregano. This blend creates a lovely aromatic depth that complements the steak perfectly.
- Spicy Southwest: Paprika, chili powder, cumin, and a touch of cayenne pepper for those who love a little heat. Be warned, it packs a punch!
3. Let it Rest: A Brief Moment of Relaxation
Once seasoned, give your steak a 30-minute timeout at room temperature. This lets it relax and come to room temperature, allowing it to cook more evenly. Imagine your steak as an athlete preparing for a big game. You wouldn't send them out cold, would you?
(Part 3) The Grill: Setting the Stage

Now it's time to set the stage for our culinary performance. This is where the magic happens. You want a hot, roaring grill, ready to embrace your steak with fiery passion.
1. Clean and Prepare Your Grill: A Clean Canvas for Perfection
You wouldn't paint on a dirty canvas, would you? The same goes for grilling. Start by scrubbing the grill grates with a wire brush to remove any lingering debris. If you're using a gas grill, preheat with the lid closed for 10 minutes to ensure even heating. For charcoal grills, distribute the coals evenly to create a consistent heat zone.
2. Grease the Grates: A Little Oil for a Happy Steak
Here's a little secret: grease those grill grates. This prevents your steak from sticking and gives it a delightful, crispy crust. You can use cooking spray, a brush with oil, or even a piece of bacon fat for a truly decadent touch.
(Part 4) The Grill Master: Cooking the Steak
We're ready! The grill is hot, the steak is prepped, and your culinary instincts are tingling. Let's get this party started!
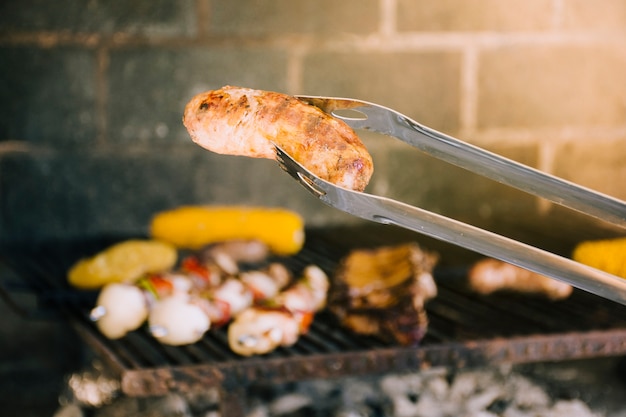
1. Sear It: The Foundation of Flavor
Place your steak directly over the hottest part of the grill. You want a nice, crusty sear on both sides. Cook for 3-4 minutes per side, or until you see that beautiful golden-brown crust forming. This is where the magic happens, where caramelized flavor and juicy tenderness are born.
Resist the urge to poke or prod the steak while it's searing. Let it settle into the heat, develop that crusty exterior, and embrace the warmth of the grill.
2. Rotate for Even Cooking: Creating Those Beautiful Grill Marks
After searing both sides, rotate the steak 90 degrees. This creates those iconic grill marks and ensures that the steak cooks evenly. Cook for another 2-3 minutes per side, depending on the thickness of your steak.
3. Check the internal temperature: A Thermometer is Your Best Friend
The best way to know if your steak is cooked to your liking is to use a meat thermometer. It's the most accurate way to ensure that your steak is cooked through without overcooking it. Here's a chart with the recommended internal temperatures for different levels of doneness:
| Doneness | Internal Temperature (°F) |
|---|---|
| Rare | 125-130 |
| Medium-Rare | 130-135 |
| Medium | 135-140 |
| Medium-Well | 140-145 |
| Well-Done | 145+ |
Remember, these are just guidelines. Your taste buds are the ultimate judge. Personally, I prefer my steak medium-rare, with that delightful pink center.
4. Rest, My Friend, Rest: A Moment for the Juices to Redistribute
Once the steak reaches your desired doneness, it's time for a well-deserved rest. Let it relax on a cutting board for 5-10 minutes before you slice and serve. This allows the juices to redistribute, resulting in a more tender and flavorful steak. Don't be tempted to cut into it right away, or you'll be left with a dry and sad steak.
(Part 5) The Sides: Accompanying Your steak masterpiece
A culinary masterpiece deserves a worthy ensemble cast. You want sides that complement the steak's flavors, adding layers of texture and taste without overpowering the main event. Here are a few side dish ideas that will make your NY strip shine even brighter.
1. grilled vegetables: A Symphony of Smoky Flavors
Asparagus, zucchini, bell peppers, and mushrooms all dance beautifully with the steak on the grill. They pick up a smoky aroma and char-grilled texture, creating a delightful interplay of flavors. I like to toss them with olive oil, salt, and pepper before grilling.
2. Creamy Mash: A Comforting Counterpoint to Richness
mashed potatoes are a classic for a reason. They offer a comforting, creamy counterpoint to the richness of the steak, adding a touch of heartiness to the meal. Don't be afraid to add a bit of garlic or chives for extra flavor.
3. Salad: A Refreshing Interlude
A simple green salad with a vinaigrette dressing is a refreshing interlude that cuts through the richness of the steak, offering a palate-cleansing contrast. You can also add grilled chicken or shrimp to make it a more substantial side.
4. Roasted Garlic: A Subtle but Powerful Accent
A few cloves of roasted garlic on the side are a simple but powerful accent. They add a sweet and savory flavor that complements the steak beautifully, offering a subtle yet satisfying depth of taste.
(Part 6) The Sauce: A Final Touch of Flavor
While a perfectly grilled NY strip is delicious on its own, sometimes a sauce can elevate it to a whole new level. These are a few sauce ideas that will take your steak from amazing to unforgettable.
1. Béarnaise Sauce: A Classic French Elegance
This elegant French sauce is a classic for a reason. Made with egg yolks, butter, vinegar, and herbs, it's rich, creamy, and tangy, with a hint of lemony flavor. It's a bit more elaborate to make, but oh so worth it if you're feeling fancy.
2. chimichurri sauce: A Zesty Argentinian Delight
This vibrant Argentinian sauce is a burst of fresh flavors. Made with parsley, oregano, garlic, olive oil, and red wine vinegar, it's bright, tangy, and herbaceous, with a bit of a kick. It complements the savory steak perfectly, adding a touch of freshness and complexity.
3. Red Wine Sauce: A Rich and Earthy Embrace
A simple red wine sauce made with red wine, shallots, garlic, and herbs is a classic pairing for steak. It adds a rich and earthy embrace to the steak, deepening the flavors and enhancing the overall experience. You can even add a knob of butter at the end for extra richness and creaminess.
(Part 7) The Experience: A culinary journey
Grilling a NY strip is more than just cooking a piece of meat. It's a culinary journey, a symphony of flavors, textures, and aromas. It's about creating a moment, a memory, a shared meal that transcends the ordinary.
When I grill a NY strip, I savor the process, the anticipation, the sizzle of the meat on the grill. I love the aroma of the smoke mingling with the savory scents of the steak and the sides. It's about taking your time, letting the flavors dance on your palate, and appreciating the beauty of a well-cooked steak.
It's also about the people I share it with, the conversations, the laughter, the joy of creating something delicious and seeing them enjoy it. Grilling a NY strip isn't just about the food, it's about the connection, the experience, the memories we make together.
(Part 8) The Aftermath: A Clean Plate and a Happy Heart
You've done it. You've conquered the art of grilling the perfect NY strip. You've served it with delicious sides and a sauce that complements its flavors perfectly. Now, as you sit back and enjoy the fruits of your labor, a sense of satisfaction washes over you.
Take a moment to appreciate the aroma, the tenderness, the juicy flavors, and the compliments from your guests. It's moments like these that make grilling so rewarding. It's not just about the food, it's about the experience, the connection, the memories. Go forth, grill master, and create your own culinary masterpiece. You've got this!
FAQs
1. What if I don't have a grill?
Fear not! You can still create a delicious NY strip using a skillet. Heat the skillet over medium-high heat and sear the steak for 3-4 minutes per side. Then, reduce the heat to medium-low and continue cooking until the steak reaches your desired doneness. You won't get the signature grill marks, but it will still be a delicious and satisfying steak.
2. How do I know when the steak is done?
As I mentioned, a meat thermometer is the most accurate way to check the internal temperature of the steak. But if you don't have one, there's the "finger test." Press the center of the steak with your thumb and index finger. If it feels firm and bouncy, it's rare. If it feels softer and less bouncy, it's medium-rare. If it feels quite firm and doesn't give at all, it's well-done. It's less precise, but can be a helpful guide.
3. Can I cook the steak from frozen?
It's best to avoid cooking a steak from frozen. It will cook unevenly and won't be as tender or juicy. Always thaw your steak in the refrigerator overnight or at room temperature for a few hours before grilling for the best results.
4. What should I do with the leftover steak?
Leftover NY strip is a culinary treasure. Slice it thinly and add it to sandwiches, salads, or stir-fries. You can also make a quick and easy steak salad or even a flavorful steak hash. Just be sure to store it in the refrigerator for up to 3 days.
5. What are some tips for keeping the steak juicy?
Here are a few key tips: - Let it rest: After cooking, let the steak rest for 5-10 minutes. This allows the juices to redistribute, resulting in a more tender and flavorful steak. - Avoid overcooking: Overcooking will dry out your steak. Use a meat thermometer to check the internal temperature and cook it to your desired doneness. - Embrace fat: Don't be afraid to use a little fat. The marbling in the steak, a bit of butter, or a drizzle of oil all add flavor and help keep the steak moist.
Everyone is watching

Prime Rib Roast Cooking Time Chart: Per Pound Guide
Cooking TipsPrime rib roast. Just the name conjures images of lavish dinners, crackling fires, and hearty laughter. It’s ...

How Long to Bake Potatoes in the Oven (Perfect Every Time)
Cooking TipsBaked potatoes are a staple in my kitchen. They're incredibly versatile, delicious, and surprisingly easy to m...

Perfect Rice Every Time: The Ultimate Guide to Cooking Rice
Cooking TipsAs a self-proclaimed foodie, I've always been a bit obsessed with rice. It's the foundation of countless cuisi...

The Ultimate Guide to Cooking Asparagus: Tips, Techniques, and Recipes
Cooking TipsAsparagus. The mere mention of this spring delicacy conjures up images of vibrant green spears, crisp and burs...

Ultimate Guide to Cooking the Perfect Thanksgiving Turkey
Cooking TipsThanksgiving. Just the word conjures up images of overflowing tables laden with delicious food, the scent of r...