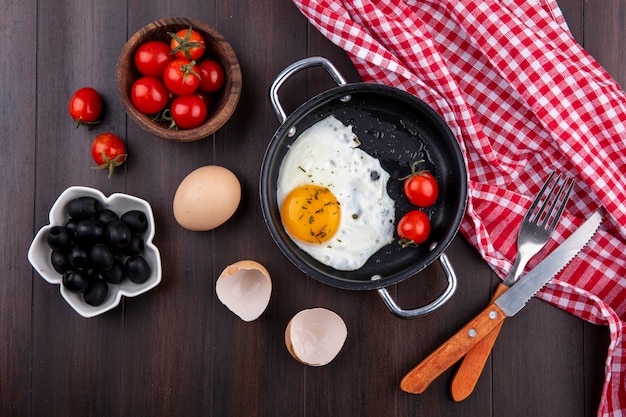
Ah, the hard boiled egg. It's a culinary staple, a humble hero that can transform from a simple breakfast to a star of a sophisticated party platter. But achieving that perfect hard boiled egg, with a creamy yolk and a perfectly set white, can feel like a culinary gamble. You've probably encountered those rubbery horrors, the ones that make you feel like you're chewing on a bouncy ball, or the green-ringed monsters that look like they've been dipped in radioactive goo. But fear not, my fellow egg enthusiasts! I'm about to share the secrets to mastering the art of the perfect hard boiled egg, using the classic stovetop method.
Part 1: The Quest for the Perfect Egg
My love affair with hard boiled eggs began in childhood. Picture this: a warm summer afternoon, sunlight streaming through the kitchen window, and a plate piled high with golden-hued, perfectly cooked eggs. My mum, a culinary wizard, had perfected the art, producing eggs with smooth, creamy yolks, just the right amount of firmness, and whites that were delicately set. From that moment, I was hooked. It wasn't just the taste, it was the sense of accomplishment, the knowing that something so simple could be so satisfying.
Fast forward a few decades, and my obsession hasn't faded. I've embarked on a personal mission to perfect the art of the hard boiled egg, exploring every method imaginable: slow-cooking, pressure cooking, you name it. But through all my experiments, I've returned to the stovetop method. It's simple, reliable, and consistently delivers the results I crave.
What Makes a Perfect Hard Boiled Egg?
For me, the perfect hard boiled egg is a symphony of textures and flavours. The yolk should be a velvety dream, smooth and creamy, never dry or crumbly. The white, firm but not rubbery, should provide a gentle contrast, creating a harmonious balance. And, of course, the level of doneness is key. The egg should be cooked just enough to achieve the desired texture, but not overcooked to the point of rubberiness.
Part 2: choosing the right eggs
The journey to a perfect hard boiled egg begins long before you even turn on the stove. It's all about choosing the right eggs. It's a bit like casting for a play – you need the right actors to make the production a success.
The Freshness Factor
While you might be tempted to reach for the freshest eggs from the farm down the road, when it comes to hard boiled eggs, older eggs are actually easier to peel. This is a little-known culinary secret, and the reason is simple: as eggs age, the air sac inside expands, creating a space between the shell and the white, making the peeling process a breeze. Don't worry, though, the taste remains unchanged. You'll still enjoy that luscious, creamy yolk. So, go ahead and grab those slightly older eggs from the back of your fridge – they're your secret weapons for a stress-free peeling experience.
Size Matters
When choosing eggs, size is a matter of personal preference. I tend to gravitate towards medium-sized eggs. They offer a nice balance of yolk to white, and they cook evenly without being too small or too large. For dishes like egg salad or deviled eggs, where you want a more substantial base, larger eggs are a great option.
Part 3: Preparing the Eggs
Now that you've chosen your eggs, let's prepare them for the cooking process. Remember, it's all about setting the stage for a perfect culinary performance.
The Cold Water Plunge
Start with cold water. It's the foundation for a smooth and crack-free cooking experience. Place your eggs in a saucepan and cover them completely with cold water. The water level should be about an inch above the eggs. This ensures that the eggs are evenly submerged and cook uniformly.
Salt: Friend or Foe?
Adding salt to the water is a matter of personal preference. Some cooks swear by it, claiming it prevents cracking, while others say it makes the shells harder to peel. I've tested both methods and found that the difference is negligible. It's really down to personal preference and what you believe will lead to a more successful peeling experience.
The Gentle Start
Now, bring the water to a rolling boil over medium heat. Once the water is bubbling vigorously, reduce the heat to low and cover the saucepan with a lid. This gentle approach helps ensure that the eggs cook evenly without any sudden temperature changes that could cause them to crack.
And now, the moment of truth...
Part 4: Cooking Time Guide
This is where the real magic happens. The cooking time will determine the level of doneness of your hard boiled egg. There are several different methods for determining the perfect cooking time, each with its own merits.
Method 1: The Traditional Method
This is the method I learned from my mum, a tried-and-true approach passed down through generations. It's simple, reliable, and delivers consistently good results.
| Cooking Time | Doneness |
|---|---|
| 3 minutes | Soft boiled with runny yolk |
| 5 minutes | Soft boiled with slightly firmer yolk |
| 7 minutes | Hard boiled with creamy yolk |
| 10 minutes | Hard boiled with firm yolk |
| 12 minutes | Very hard boiled, yolks become dry and crumbly |
Remember, these are just guidelines. The size of your eggs and your personal preference for doneness can influence the ideal cooking time. Experiment a little to find the perfect balance for your taste buds.
Method 2: The ice bath
After you've cooked your eggs, immediately transfer them to a bowl of ice water. This shock treatment stops the cooking process and prevents further cooking, ensuring a perfectly set white and a beautifully creamy yolk. The ice bath also makes the eggs easier to peel, as the sudden temperature change helps to loosen the shell.
Part 5: Peeling the Eggs
Now comes the moment of truth, the test of your hard boiled egg mastery: peeling. It can be a bit of a challenge, especially if you've encountered those dreaded rubbery eggs. But don't despair! There are a few tricks that can make peeling a breeze.
The Gentle Approach
Start by gently tapping the egg on a hard surface to crack the shell. Don't be aggressive, just a few light taps to create a network of cracks. Then, roll the egg between your palms to further crack the shell. This creates a series of micro-fractures that help to loosen the shell and make peeling easier.
The Water Trick
If the shell is still stubborn, try running the egg under cold water. The water will seep into the cracks and further loosen the shell, making it easier to remove. You can also soak the eggs in cold water for a few minutes before peeling, which can soften the shell even further.
The Peeling Technique
Once you've cracked the shell, start peeling from the larger end of the egg. This is where the air sac is located, and it's usually the easiest point to begin. Peel in small sections, gently lifting the shell away from the egg. Avoid tearing or pulling on the shell, as this can damage the egg white. Be patient and work slowly, and you'll soon be rewarded with a perfectly peeled egg.
Part 6: Storing and Using Your Hard Boiled Eggs
You've mastered the art of cooking and peeling, now it's time to store your precious eggs properly and unlock their culinary potential.
Refrigerate for Freshness
Store your hard boiled eggs in a sealed container in the refrigerator. This will help to keep them fresh and prevent them from drying out. They will last for up to a week in the fridge, ready for their starring roles in your culinary creations.
A World of Possibilities
Hard boiled eggs are incredibly versatile and can be enjoyed in countless ways. They're a perfect protein-packed snack, a delicious addition to salads and sandwiches, or the foundation for classic dishes like egg salad and deviled eggs.
- Egg Salad Sandwiches: A classic for a reason! Mash hard boiled eggs with mayonnaise, mustard, and your favorite herbs and spices for a delightful sandwich filling.
- Deviled Eggs: A party favourite! Cut hard boiled eggs in half, scoop out the yolks, and mash them with mayonnaise, mustard, and your favorite seasonings for a creamy, tangy treat.
- Salads: Chop hard boiled eggs and add them to your favourite salads for a protein boost and a satisfying texture.
- Breakfast Bowls: Dice hard boiled eggs and add them to your breakfast bowls for a hearty and delicious start to the day.
- Snacks: Hard boiled eggs are a great portable snack, providing a healthy dose of protein and nutrients.
The possibilities are truly endless! Get creative, experiment, and let your imagination run wild with the versatility of hard boiled eggs.
Part 7: Avoiding green-ringed eggs
Let's be honest, no one likes a green-ringed egg. It's not just aesthetically unappealing, but it can also have a slightly metallic taste. So, what causes this culinary mishap and how can we avoid it?
The Iron Factor
The green ring is a result of a chemical reaction between the iron in the egg yolk and the sulfur in the egg white. This reaction is more likely to occur when eggs are cooked for longer periods, especially if they are not cooled quickly after cooking.
The Cooling Trick
To prevent the dreaded green ring, cool your hard boiled eggs as quickly as possible. The best way to do this is to transfer them to a bowl of ice water immediately after cooking. This shock treatment halts the cooking process and prevents the iron and sulfur from reacting, ensuring that your eggs remain pristine and free from any unwanted green hues.
Part 8: FAQs
Got some questions about hard boiled eggs? I've got you covered!
1. Can I reuse the same water for cooking multiple batches of eggs?
It's not recommended to reuse the same water for cooking multiple batches of eggs. The water can become cloudy and contaminated with egg particles, potentially affecting the taste and texture of subsequent batches. It's best to use fresh water for each batch to ensure the best results.
2. What if my eggs crack during cooking?
Don't worry if a few eggs crack during the cooking process. It's more likely to happen with older eggs, and it won't affect the taste or texture of the cooked eggs. Just be careful when peeling them, as the cracked shell may be more fragile. A gentle approach is key!
3. How do I make deviled eggs?
Deviled eggs are a classic party appetizer. To make them, simply hard boil eggs, then cut them in half lengthwise and scoop out the yolks. Mash the yolks with mayonnaise, mustard, and seasonings of your choice (paprika, onion powder, garlic powder are all great additions!). Pipe or spoon the yolk mixture back into the egg whites, and sprinkle with paprika for a touch of colour. Deviled eggs are a delightful blend of creamy, tangy, and spicy flavours.
4. What if my hard boiled eggs are too hard?
If your hard boiled eggs are too hard, it's likely that you cooked them for too long. Don't worry, you can still salvage them! Just chop them up and use them in a salad, egg salad, or other dish. The texture might be a bit different, but they'll still be delicious.
5. What's the best way to store leftover hard boiled eggs?
Store leftover hard boiled eggs in a sealed container in the refrigerator. They will last for up to a week. To keep them extra fresh, you can add a layer of cold water to the container. The water will help to keep the eggs moist and prevent them from drying out.
Part 9: Final Thoughts
There you have it, my complete guide to the perfect hard boiled egg. It's a simple recipe, but a few key tips and tricks can transform your culinary experience. So, next time you're craving a delicious, creamy hard boiled egg, give these tips a try. I guarantee, you won't be disappointed. Go forth, my fellow egg enthusiasts, and conquer the world of perfect hard boiled eggs!
Everyone is watching

Prime Rib Roast Cooking Time Chart: Per Pound Guide
Cooking TipsPrime rib roast. Just the name conjures images of lavish dinners, crackling fires, and hearty laughter. It’s ...

How Long to Bake Potatoes in the Oven (Perfect Every Time)
Cooking TipsBaked potatoes are a staple in my kitchen. They're incredibly versatile, delicious, and surprisingly easy to m...

Perfect Rice Every Time: The Ultimate Guide to Cooking Rice
Cooking TipsAs a self-proclaimed foodie, I've always been a bit obsessed with rice. It's the foundation of countless cuisi...

The Ultimate Guide to Cooking Asparagus: Tips, Techniques, and Recipes
Cooking TipsAsparagus. The mere mention of this spring delicacy conjures up images of vibrant green spears, crisp and burs...

Ultimate Guide to Cooking the Perfect Thanksgiving Turkey
Cooking TipsThanksgiving. Just the word conjures up images of overflowing tables laden with delicious food, the scent of r...