There's a certain satisfaction that comes with cracking open a perfectly cooked hard-boiled egg. The smooth, even shell yields to reveal a creamy, velvety yolk and a tender, delicate white. It's a culinary triumph that can be the foundation for countless delicious dishes. But for years, I was a hard-boiled egg disaster. My attempts resulted in greenish rings around the yolks, rubbery whites, or even completely exploded eggs. It was enough to make me give up on hard-boiled eggs altogether.
But then, I discovered a method that transformed my hard-boiled egg experiences. It's a simple, foolproof technique that delivers consistent results every time. Now, I can confidently create perfect hard-boiled eggs, no matter what. It's not just about getting the texture right, though. It's about unlocking the full flavour and richness of a perfectly cooked egg. It's about that creamy, velvety yolk that melts in your mouth, and the delicate, tender white that complements the yolk's intensity. It's about enjoying the simple joy of a perfectly prepared egg, something that, I've discovered, is truly a gift to yourself.
Part 1: Setting the Stage for Success

1. The perfect eggs: Choosing Your Weapon
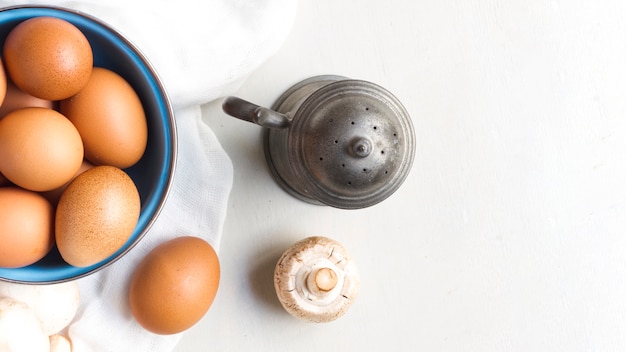
Like any good chef, you need the right ingredients to create a masterpiece. And when it comes to hard-boiled eggs, the quality of your eggs matters. I always go for the freshest eggs I can find, and I look for those with a deep, rich colour. This means avoiding eggs that have been sitting on the shelf for too long, as they'll often have a thinner white and a more watery yolk. These eggs are more prone to cracking and can be more difficult to peel. I also avoid eggs with a cracked shell, as they might leak during cooking and give you a less-than-perfect result.
Here's a quick tip: fresh eggs often have a "bloom" on the shell. This waxy coating helps to protect the egg and keeps it fresh. If you find an egg with a dull, dusty shell, it's probably not as fresh.
2. The Cold Water Plunge: Why It's a Must
Before you even think about turning on the stove, you need to give your eggs a cold water bath. This is crucial for two reasons: 1) It prevents the eggs from cracking during cooking, and 2) It helps create a more even cooking process.
When you put an egg in boiling water, the inside heats up quickly, causing the pressure to build up. This pressure can make the egg expand and crack. By starting with cold water, the eggs warm up gradually, preventing any sudden pressure changes. Think of it like slowly warming up your car engine instead of starting it in the middle of winter. The gradual warming process keeps everything running smoothly.
I always make sure my eggs are completely submerged in cold water for at least 15 minutes. It's a great time to catch up on emails, scroll through social media, or simply relax and enjoy the peace before the cooking frenzy begins. By the time I'm finished, the eggs are fully chilled and ready for their culinary adventure.
Part 2: Mastering the Stovetop Method

1. Boiling Point: The Key to Consistent Results
Now comes the exciting part – the actual cooking! Start by filling a large saucepan with enough water to cover the eggs by at least an inch. You want to make sure there's enough water to ensure the eggs are completely submerged and cook evenly. Bring the water to a rolling boil over high heat. You'll know it's reached the perfect boiling point when tiny bubbles rise rapidly to the surface. This is crucial for ensuring even cooking and preventing the whites from becoming rubbery.
Here's a quick test to make sure your water is boiling properly: Drop a small piece of pasta into the water. If it rises to the surface quickly, your water is boiling.
2. Gentle Descent: Introducing the Eggs
Once the water is boiling, carefully add the eggs to the pot using a spoon or a slotted spoon. Don't drop them in! You want to avoid any sudden temperature changes that could lead to cracking. I find it helpful to use a spoon to gently slide each egg into the water, making sure it's fully submerged. This gentle approach ensures that your eggs remain intact.
Remember, the goal is to cook the eggs evenly and prevent them from cracking. It's all about the gentle, gradual process.
3. Timing is Everything: The Magic Numbers
This is where you need to pay close attention. The cooking time will determine the texture of your yolk. For a firm yolk, you'll need to cook the eggs for around 10-12 minutes. For a slightly softer yolk, try 8-9 minutes. I prefer a slightly softer yolk, so I usually cook mine for 9 minutes. You can adjust the cooking time to your liking, but remember that the longer you cook the eggs, the firmer the yolk will become.
I always set a timer to keep track of the time. It's easy to get distracted in the kitchen, and you don't want to end up with overcooked eggs. Once the timer goes off, remove the pot from the heat and immediately drain the hot water.
Don't be tempted to peek at the eggs while they're cooking. This can disrupt the cooking process and cause the eggs to crack. Just trust the timer and let them cook undisturbed.
Part 3: The ice bath: A Quick Chill for Perfection

Now, here's where the real magic happens. Immediately after draining the hot water, transfer the eggs to a bowl filled with ice water. This is called an ice bath, and it's essential for stopping the cooking process and preventing the yolks from turning green. It also helps to create a smoother, more uniform white.
The sudden temperature change from boiling water to ice water stops the cooking process instantly and prevents the yolks from overcooking. This quick chill helps to create a smooth, creamy yolk and a tender white.
I usually fill a large bowl with ice and cold water, ensuring that the eggs are fully submerged. I let them sit in the ice bath for at least 10 minutes, or until they're completely cool. This is a good time to catch up on other kitchen tasks or simply relax and enjoy the anticipation of the perfect hard-boiled egg.
Part 4: The Reveal: From Shell to Delight
After the ice bath, it's time to reveal your culinary masterpiece. Carefully remove the eggs from the bowl and tap the shells lightly on a hard surface to crack them. I usually use the back of a spoon or a knife to gently crack the shell without breaking it. Once the shell is cracked, you can easily peel it off.
You'll notice that the egg peels perfectly, leaving you with a smooth, even surface. And when you slice it open, you'll be greeted with a beautiful, creamy yolk and a delicate, tender white. No more rubbery whites or green yolks! It's a sight to behold, and a testament to the power of this method.
Part 5: Tips and Tricks for the Perfect Hard-Boiled Egg
1. Old Eggs vs. Fresh Eggs: A Tale of Two Whites
As I mentioned earlier, the freshness of your eggs plays a crucial role in the final outcome. Old eggs have a thinner white, which can make them more challenging to peel. If you find that your eggs are difficult to peel, it's a sign that they might be older. That's why I always recommend using fresh eggs for the best results.
2. The Salt Factor: Is It a Myth?
You might have heard that adding salt to the boiling water helps prevent the eggs from cracking. While this might be a common belief, I've found that it doesn't make a significant difference. I prefer to avoid adding salt to the water, as it can affect the flavour of the eggs. I like to keep the taste of the egg as pure as possible.
3. The Vinegar Myth: Debunking the Claim
Another common myth is that adding vinegar to the boiling water helps prevent cracking. The truth is, vinegar can actually make the eggs tougher. The vinegar reacts with the calcium carbonate in the shell, making it more brittle. So, I always avoid adding vinegar to my boiling water. Stick with the simple method – just water and fresh eggs.
4. The High-Altitude Advantage: Adjusting for Thin Air
If you live at a high altitude, you might need to adjust the cooking time slightly. The lower atmospheric pressure at high altitudes can affect the boiling point of water, which can lead to undercooked eggs. I recommend adding a minute or two to the cooking time to compensate for the difference.
Here's a quick guide to adjusting cooking times for different altitudes:
| Altitude (feet) | Cooking Time Adjustment |
|---|---|
| 2,000-4,000 | Add 1 minute |
| 4,000-6,000 | Add 2 minutes |
| 6,000-8,000 | Add 3 minutes |
Remember, these are just general guidelines, and you may need to adjust the cooking time based on your specific altitude and your preferred level of doneness.
Part 6: Beyond the Basic: Creative Uses for Hard-Boiled Eggs
Once you've mastered the art of making perfect hard-boiled eggs, the possibilities are endless! Here are a few of my favourite ways to use these culinary gems:
1. Deviled Egg Delight: A Classic with a Twist
deviled eggs are a timeless classic for a reason. They're easy to make, incredibly versatile, and always a crowd-pleaser. You can keep things simple with a classic deviled egg recipe, or get creative with different seasonings and toppings. I like to add a touch of smoked paprika for a hint of smokiness, or a sprinkle of fresh herbs for a burst of flavour. You can even add a dollop of mustard, a sprinkle of chives, or a drizzle of hot sauce for a personal touch.
2. egg salad Sandwich: A Delicious Lunchtime Staple
A simple egg salad sandwich is a quick and easy lunch option. I love to add a few chopped celery stalks and a drizzle of mayonnaise for a creamy and satisfying sandwich. You can also get creative with your toppings, adding a dollop of Dijon mustard, a few slices of avocado, or even some crumbled bacon for a gourmet twist.
3. The Egg Salad Bowl: A Hearty and Healthy Lunch
If you're looking for a healthy and satisfying lunch, an egg salad bowl is the perfect solution. You can toss your hard-boiled eggs with chopped lettuce, cucumbers, tomatoes, and a light vinaigrette dressing for a flavourful and refreshing meal. Add some quinoa or brown rice for extra protein and fiber.
4. Egg-cellent Salads: Adding Texture and Protein
Hard-boiled eggs add a wonderful texture and a boost of protein to any salad. I like to chop them into small pieces and sprinkle them on top of my favourite salads, adding a satisfying crunch and a boost of nutrients.
5. Beyond Salads and Sandwiches: A World of Possibilities
Hard-boiled eggs are incredibly versatile and can be used in a variety of dishes beyond salads and sandwiches. Here are a few creative ideas:
- Egg and potato salad: A classic combination that's perfect for picnics or potlucks.
- Egg fried rice: A quick and easy meal that's packed with flavour.
- Egg Salad Croquettes: A delicious and elegant appetizer.
- Egg Drop Soup: A light and comforting soup that's perfect for a cold day.
- Breakfast Burritos: A hearty and satisfying breakfast that's perfect for on-the-go.
The possibilities are endless! Experiment and have fun with your hard-boiled eggs.
Part 7: FAQs: Your Hard-Boiled Egg Questions Answered
1. What if my eggs have a green ring around the yolk?
A green ring around the yolk is a sign of overcooking. The iron in the yolk reacts with hydrogen sulfide in the white, creating a greenish compound. To prevent this, make sure to cool your eggs quickly in an ice bath.
2. Why are my eggs so hard to peel?
There are a few reasons why your eggs might be difficult to peel. Older eggs often have a thinner white, making them more challenging to peel. Also, if you overcook your eggs, the white can become tough and rubbery. To prevent this, make sure to cook your eggs for the correct amount of time and cool them quickly in an ice bath.
3. Can I make hard-boiled eggs in the microwave?
While it is possible to cook eggs in the microwave, it's not the ideal method. Microwave ovens often cook eggs unevenly, which can result in a rubbery white and an overcooked yolk.
4. How long can I store hard-boiled eggs in the fridge?
You can store hard-boiled eggs in the refrigerator for up to one week. I recommend keeping them in a container of cold water to keep them moist and prevent them from drying out.
5. Can I use hard-boiled eggs in baking?
Absolutely! Hard-boiled eggs can be used in various baking recipes, adding moisture and richness to cakes, cookies, and even bread. You can even add chopped hard-boiled eggs to muffins or quick bread for extra protein and a delightful texture.
Part 8: A Final Word: The Joy of a Perfectly Cooked Egg
Making perfect hard-boiled eggs might seem like a simple task, but it's a skill that takes practice and patience. But once you've mastered the stovetop method, you'll be rewarded with a culinary masterpiece.
So, go ahead and give it a try. Embrace the process, experiment with different cooking times, and enjoy the satisfaction of creating a delicious and versatile ingredient. You'll be surprised at how much joy a simple, perfectly cooked egg can bring. And remember, the journey to perfect hard-boiled eggs is a rewarding one, filled with delicious possibilities.
Everyone is watching

Prime Rib Roast Cooking Time Chart: Per Pound Guide
Cooking TipsPrime rib roast. Just the name conjures images of lavish dinners, crackling fires, and hearty laughter. It’s ...

How Long to Bake Potatoes in the Oven (Perfect Every Time)
Cooking TipsBaked potatoes are a staple in my kitchen. They're incredibly versatile, delicious, and surprisingly easy to m...

Perfect Rice Every Time: The Ultimate Guide to Cooking Rice
Cooking TipsAs a self-proclaimed foodie, I've always been a bit obsessed with rice. It's the foundation of countless cuisi...

The Ultimate Guide to Cooking Asparagus: Tips, Techniques, and Recipes
Cooking TipsAsparagus. The mere mention of this spring delicacy conjures up images of vibrant green spears, crisp and burs...

Ultimate Guide to Cooking the Perfect Thanksgiving Turkey
Cooking TipsThanksgiving. Just the word conjures up images of overflowing tables laden with delicious food, the scent of r...
