(Part 1) Choosing the Perfect Corn

You've probably heard it a million times: fresh corn is the best corn. And you know what? It's absolutely true. There's just something magical about that just-picked sweetness, that vibrant crunch, that doesn't quite translate to the supermarket variety. But even if you don't have access to a farmers' market or your own backyard patch, don't fret. There are ways to pick out the best corn even from the grocery store.
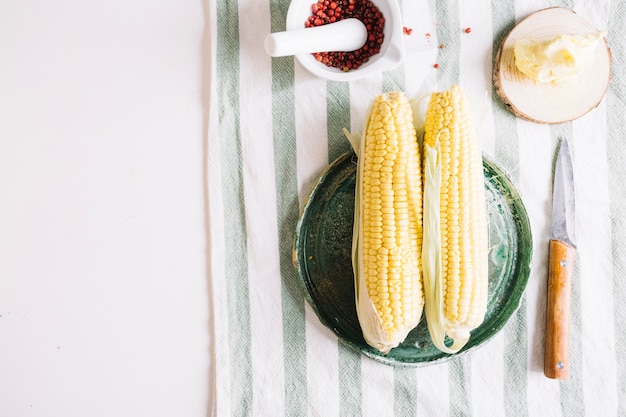
Looking for the Perfect Ear
First, give the corn a good once-over. The husks should be bright, vibrant green, like a fresh spring lawn. No signs of drying, browning, or any other signs of distress. Remember, that husk is like the corn's protective armor, so you want it to be fresh and strong.
Next, peek inside. Gently pull back a bit of the husk, just enough to take a peek at the kernels. They should be plump, firm, and practically bursting with juicy goodness. A bit of a milky appearance is a good sign, indicating that the kernels are full of moisture and flavour. Look for tightly packed kernels, a sign of a well-nourished ear. If the kernels look shriveled or dry, steer clear, my friend.
Feeling the Weight of the Corn
Here's a little trick I learned from my granddad: give the ear a gentle squeeze. A heavy, firm ear is a good sign, meaning those kernels are packed with moisture and flavour. If it feels light and a bit flimsy, it might be a tad on the dry side.
The Importance of Seasonality
Listen, let's be honest. Summer is corn's golden age, when the sun pours its warmth onto fields of sweet goodness. That's when you're most likely to find the absolute best corn. But don't despair if it's not summer. You can still find decent corn throughout the year, especially in warmer climates. Just pay attention to those freshness indicators - bright husks, plump kernels - and you'll be good to go.
(Part 2) Preparing the Corn for Cooking
Okay, you've found your perfect ears. Now it's time to get them ready for the cooking process. Don't underestimate the importance of this step. A little prep goes a long way in unlocking that full corn flavor.
Shucking the Husk
First, you'll need to remove the husk. Gently peel it back, starting from the bottom of the ear, like you're unwrapping a precious gift. You can either remove it completely, or leave a small section attached at the base. I prefer to leave a bit on - it adds a touch of extra flavor and moisture during cooking.
Removing the Silk
Next, it's time to tackle the silk. You can pull it off with your fingers, or use a sharp knife to scrape it away. Be careful not to cut too deeply into the kernels. A quick rinse under cold water helps remove any lingering silk or debris.
Pre-Soaking the Corn
Here's where opinions start to diverge. Some folks swear by pre-soaking their corn, claiming it helps the kernels retain moisture and flavour. You can soak them in cold water for about 30 minutes, or even longer if you're feeling adventurous. Personally, I find a quick soak, just long enough to refresh the kernels, does the trick.
Seasoning the Corn
Finally, we're at the seasoning stage. Now, you can keep it classic with just salt and pepper, or unleash your inner culinary artist. I love a mix of smoked paprika, garlic powder, and a touch of cayenne for a hint of warmth. But experiment, play around, find your own unique corn symphony! Remember, seasoning before cooking is key, allowing the flavours to permeate those kernels and create a truly delectable experience.
(Part 3) grilling corn for Smoky Goodness
Okay, now we're getting to the heart of the matter, the glorious world of grilling. Nothing beats the scent of corn sizzling on the barbecue, does it? It's an intoxicating aroma, a blend of smoky, sweet, and savoury that screams summer.
Choosing the Right Grill
If you're using a gas grill, keep the heat medium-high. A charcoal grill is the ultimate for that smoky flavour, but be sure to let those coals cool down a bit before putting your corn on, otherwise, you risk burning those precious kernels.
Grilling Time and Technique
Place your corn directly on the grill grates and cook for about 10-15 minutes, rotating occasionally. Keep a close eye on it, making sure it doesn't get too charred. You're aiming for a slightly blackened husk and some beautiful grill marks on those kernels. If you're using a gas grill, a grilling basket might be a good idea to prevent the corn from rolling around.
Adding Flavour
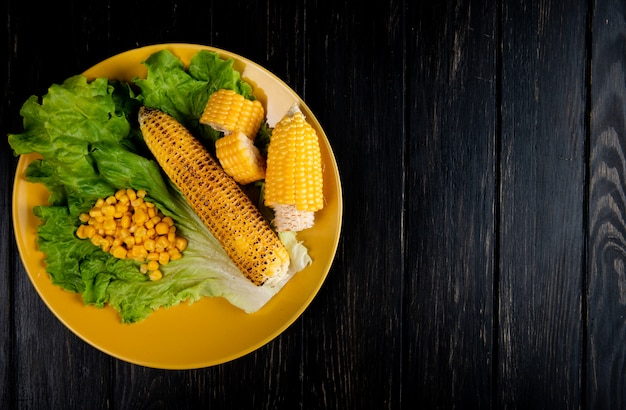
Want to take your grilled corn to the next level? A brush of butter or oil, a drizzle of honey or maple syrup, a sprinkle of chili powder or cayenne pepper - these are all game-changers. Don't be afraid to experiment and find your perfect flavour combination.
(Part 4) roasting corn in the Oven for a Crispy Treat
Not everyone has a grill, right? Fear not! You can still achieve delicious, oven-roasted corn that's full of flavour. It might not have that smoky char, but it's a fantastic alternative, offering a slightly crispy texture.
Preparing the Oven
Preheat your oven to 400°F (200°C). Line a baking sheet with foil for easy clean-up. Then, place your corn directly on the baking sheet.
roasting time and Technique
Roast for about 20-25 minutes, flipping the corn halfway through. You'll know it's done when the kernels are tender and slightly browned. Like with grilling, a little butter or oil before roasting adds extra flavour.
(Part 5) boiling corn for a Classic Approach
Sometimes, the simplest methods are the best. Boiling corn is a classic way to bring out its natural sweetness and tenderness. It's quick, easy, and perfect for those nights when you're short on time.
Bringing the Water to a Boil
Fill a large pot with water and bring it to a rolling boil. Add a pinch of salt to the water, which helps season the corn and prevents it from becoming bland.
Boiling Time and Technique
Add the corn to the boiling water and cook for about 5-7 minutes. You want the kernels to be tender but still slightly firm. Once cooked, drain the corn in a colander.
Adding Flavour to boiled corn
Want to add a touch of elegance to your boiled corn? Toss in a handful of fresh herbs like parsley, dill, or chives while the corn is boiling. Or, use a vegetable broth instead of plain water for a deeper, more complex flavour.
(Part 6) Serving Corn on the Cob: A Celebration of Flavour
Your corn is cooked to perfection. Now it's time to unleash your creativity and transform it into a culinary masterpiece. It's about adding those finishing touches that elevate the simple corn cob to a delightful symphony of flavours.
The Classic Butter and Salt
Let's start with the tried and true: a generous pat of butter melted over the hot corn, followed by a sprinkle of coarse salt. It's simple, but it really brings out the corn's natural sweetness.
Spice It Up
For a little heat, try a dash of chili powder, cayenne pepper, or a sprinkle of paprika. Or, mix a blend of spices like cumin, coriander, and turmeric for a more complex and aromatic experience.
Herbs and Greens
For a touch of freshness, add some chopped fresh herbs like parsley, cilantro, dill, or chives. Or, get adventurous with a sprinkle of arugula for a peppery kick.
Sweet and Savoury
Don't be afraid to mix sweet and savoury flavours. A drizzle of honey, maple syrup, or balsamic glaze adds a touch of sweetness that complements the corn's natural sugar. You can even sprinkle on some crumbled feta or a dollop of sour cream for a tangy finish.
Getting Creative with Presentation
Let's talk presentation. Don't just plonk those corn cobs onto a plate. Think about how you can make them look inviting, appetizing. A bed of fresh greens, a scattering of edible flowers, a few sprigs of herbs - these can all add a touch of elegance.
Using Corn on the Cob in Other Dishes
Corn on the cob isn't just a side dish. It can be incorporated into a variety of other culinary creations. Think corn salads, corn chowders, corn fritters, even a topping for tacos or pizzas. The possibilities are truly endless!
(Part 7) Storing Corn on the Cob
So you've got a surplus of corn. You can't possibly eat it all at once, right? Don't worry, there are ways to store your corn and keep it fresh for a few days.
Refrigerator Storage
For short-term storage, your refrigerator is your best friend. Store uncooked corn in the refrigerator, ideally in the crisper drawer. You can leave the husks on or remove them, whichever you prefer. If you've removed the husks, wrap the corn in plastic wrap or a damp paper towel to prevent drying out.
Freezing Corn on the Cob
For longer storage, you can freeze your corn. First, blanch the corn by boiling it for a few minutes, then plunge it into ice water to stop the cooking process. Once cooled, remove the husks and silk. You can freeze the corn whole or cut the kernels off the cob and freeze them in a freezer-safe bag. frozen corn can be kept for up to 12 months.
(Part 8) FAQs
Now, let's address some common questions about corn on the cob.
Q: How do I know when corn on the cob is done cooking?
A: You can tell if corn on the cob is done by pressing on a kernel. If it yields slightly and releases a milky juice, it's cooked through. You can also check the husk - it should be slightly browned and fragrant.
Q: Can I eat the husk of corn on the cob?
A: It's not recommended. The husk is tough and fibrous, and it doesn't add any flavour to the corn. It's best to remove the husk before eating.
Q: What are some other ways to cook corn on the cob besides grilling, roasting, and boiling?
A: You can also steam corn on the cob or cook it in a microwave. For a quick and easy option, try steaming the corn for about 5-7 minutes or microwaving it for 2-3 minutes.
Q: Can I reheat corn on the cob?
A: Yes, you can reheat corn on the cob. It's best to reheat it in a microwave or oven to avoid drying it out. Just wrap it in a damp paper towel or foil and heat it until warmed through.
Q: What are some creative ways to use corn on the cob?
A: You can use corn on the cob in a variety of dishes, such as salads, soups, chowders, fritters, and even as a topping for tacos or pizzas. Get creative and experiment with different flavours and textures.
(Part 9) Conclusion
So there you have it. You've just become a corn on the cob connoisseur! From choosing the perfect ear to serving it with delicious toppings, you now have all the tools you need to create a truly memorable corn experience. And remember, the best part of corn on the cob is the joy it brings. Whether you're enjoying it with friends and family or simply savouring a sweet, smoky, and satisfying treat, make every bite count. So grab a cob, take a bite, and relish the flavour of summer. Happy corn-ing!
Everyone is watching

Prime Rib Roast Cooking Time Chart: Per Pound Guide
Cooking TipsPrime rib roast. Just the name conjures images of lavish dinners, crackling fires, and hearty laughter. It’s ...

How Long to Bake Potatoes in the Oven (Perfect Every Time)
Cooking TipsBaked potatoes are a staple in my kitchen. They're incredibly versatile, delicious, and surprisingly easy to m...

Perfect Rice Every Time: The Ultimate Guide to Cooking Rice
Cooking TipsAs a self-proclaimed foodie, I've always been a bit obsessed with rice. It's the foundation of countless cuisi...

The Ultimate Guide to Cooking Asparagus: Tips, Techniques, and Recipes
Cooking TipsAsparagus. The mere mention of this spring delicacy conjures up images of vibrant green spears, crisp and burs...

Ultimate Guide to Cooking the Perfect Thanksgiving Turkey
Cooking TipsThanksgiving. Just the word conjures up images of overflowing tables laden with delicious food, the scent of r...