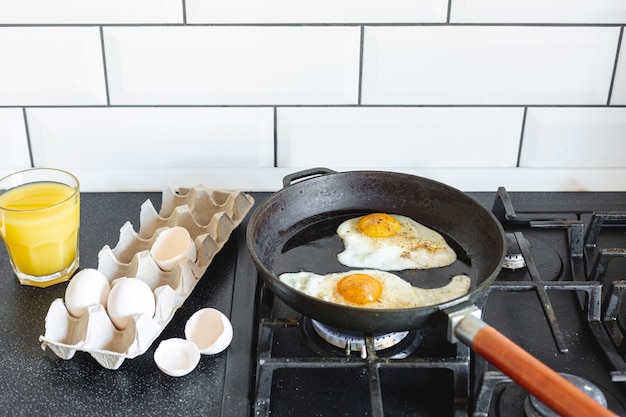
There’s something incredibly satisfying about cracking open a perfectly boiled egg. That velvety yolk, the firm yet yielding white, it's pure culinary bliss! But let's be honest, achieving that perfect texture can be a real challenge. Those rubbery whites, those runny yolks… they can be a real nightmare, especially when you're trying to impress someone with your breakfast skills.
I've been there, trust me. I've had my fair share of egg-boiling mishaps, from those sad, overcooked disasters to those runny, yolk-exploding messes. But after years of trial and error, I've finally cracked the code to consistent egg perfection. And let me tell you, it's all about understanding the science behind the boiling process, which I'm about to share with you.
This isn't just some random recipe you stumbled upon. This is the ultimate guide to mastering the art of the perfect boiled egg. I'll be breaking down everything you need to know, from choosing the right eggs to the most crucial element – timing. We'll even delve into the world of egg variations, like those lovely poached eggs and the wonderfully runny soft-boiled eggs. Ready to become an egg-boiling master? Let's get started!
Part 1: The Science of the Perfect Boiled Egg

1.1. Understanding Egg Structure
To understand how to achieve perfect boiled eggs, we need to understand the egg itself. Think of it like a miniature culinary masterpiece! The yolk, that glorious golden orb, is encased in a thin membrane called the vitelline membrane. This membrane acts like a protective barrier, ensuring the yolk stays intact. Surrounding the yolk, we have the albumen, which is the egg white. It's made up of proteins and water, and it’s responsible for holding that shape.
1.2. The Boiling Process: A Chemical Transformation
When you heat an egg, the proteins in the albumen begin to denature and coagulate, transforming from a liquid state to a solid. This is a fascinating chemical process that plays a crucial role in the final texture of your boiled egg. The whites begin to solidify first, creating that firm outer layer, followed by the yolk. The longer you cook the egg, the more the proteins coagulate, resulting in a firmer texture. It’s all about finding the perfect balance to get that yolk the way you like it.
1.3. The Importance of Timing
Timing is everything in the egg-boiling world. Think of it like a culinary countdown. The longer you cook the egg, the more the proteins solidify, resulting in a firmer texture. It's a delicate dance between heat and time, and mastering it will transform your boiled egg game.
Part 2: Choosing the Right Eggs

2.1. egg size Matters
It might seem trivial, but egg size does influence your boiling time. Large eggs tend to take a bit longer than medium or small eggs to reach that perfect texture. So, pay attention to the label, folks!
2.2. Freshness is Key
fresh eggs are your best bet for a perfect boil. Why? Because older eggs often have air pockets that can cause them to crack during the boiling process. Those cracks lead to a messy situation, and nobody wants that.
Part 3: The Boiling Method: Two Approaches to Egg Perfection

3.1. The Cold Start: My Go-to Method
This is my tried-and-true method, and it's simple, efficient, and guarantees even cooking. Start by placing your eggs in a pot, then cover them with cold water. That’s it! You’re ready to go!
3.2. The Hot Start: A More Advanced Technique
Some people swear by the hot start method, where you start with boiling water. But be warned, it can lead to cracks in the eggs, especially if you're not careful. I'd recommend using this method only if you're a seasoned egg-boiling pro!
Part 4: The Perfect Boil: A Culinary Countdown
4.1. The Soft-Boiled Egg: A Runny Yolk Delight
Let's start with the delicate soft-boiled egg, a runny yolk treasure. This one's best enjoyed with a little toast and a pinch of salt. Here’s how I do it:
- Place the eggs in a saucepan and cover them with cold water.
- Bring the water to a boil over high heat.
- Once boiling, reduce the heat to a gentle simmer.
- Let the eggs simmer for 3-4 minutes for a very runny yolk. This creates a truly decadent experience.
- For a slightly firmer yolk, simmer for 4-6 minutes. This is a great option if you prefer a bit more structure.
- Gently remove the eggs from the water and plunge them into a bowl of ice water to stop the cooking process. This is crucial for achieving the perfect texture and preventing overcooking.
4.2. The Medium-Boiled Egg: The Classic Choice
This is the classic, the golden standard. The yolk is set, but still creamy, perfect for sandwiches or salads.
- Place the eggs in a saucepan and cover them with cold water.
- Bring the water to a boil over high heat.
- Once boiling, reduce the heat to a gentle simmer.
- Let the eggs simmer for 6-8 minutes. This will give you that perfect balance of firmness and creaminess.
- Gently remove the eggs from the water and plunge them into a bowl of ice water to stop the cooking process.
4.3. The Hard-Boiled Egg: The Ultimate Protein Powerhouse
The hard-boiled egg is a true culinary workhorse! Perfect for salads, deviled eggs, or simply as a snack.
- Place the eggs in a saucepan and cover them with cold water.
- Bring the water to a boil over high heat.
- Once boiling, reduce the heat to a gentle simmer.
- Let the eggs simmer for 10-12 minutes. This ensures that both the yolk and white are firm and perfectly cooked.
- Gently remove the eggs from the water and plunge them into a bowl of ice water to stop the cooking process.
Part 5: Mastering the Peel: A Gentle Approach to Shell Removal
5.1. The Art of the Peel
You've boiled your eggs to perfection, and now it's time to peel them. This is where some people get frustrated, but trust me, it's not as difficult as you think. Here's how I approach it:
- Start by tapping the egg gently on a flat surface to crack the shell. A light tap or two is all you need to create those hairline cracks.
- Use your thumb and index finger to gently peel away a small section of the shell. Don’t be afraid to be gentle – you don't want to damage the egg.
- Carefully peel the rest of the shell, working in small sections. Be patient and work your way around the egg, peeling away small pieces of shell at a time.
- If the shell is sticking, try rolling the egg between your hands to loosen it up. This helps to separate the shell from the egg white.
5.2. The Ice Water Trick: A Secret Weapon for Easy Peeling
This is a little trick that works like a charm! After boiling your eggs, immediately transfer them into a bowl of ice water. This will cool them down quickly and help the shell to peel away easily. The cold water creates a slight contraction, making the shell separate from the egg more readily. It's a simple but effective way to avoid those frustrating, stubborn peels.
Part 6: Egg Variations: Expanding Your Culinary Horizons
6.1. The Poached Egg: A Delicate Culinary Treat
Let's talk about the poached egg, a classic culinary treat! I love it on toast, in salads, or even on top of a burger. It's a bit more delicate, but the payoff is worth it.
- Bring a saucepan of water to a simmer. Not a boil, but a gentle simmer.
- Add a splash of vinegar to help the egg white hold together. The vinegar creates a gentle swirl that helps the egg white coagulate around the yolk.
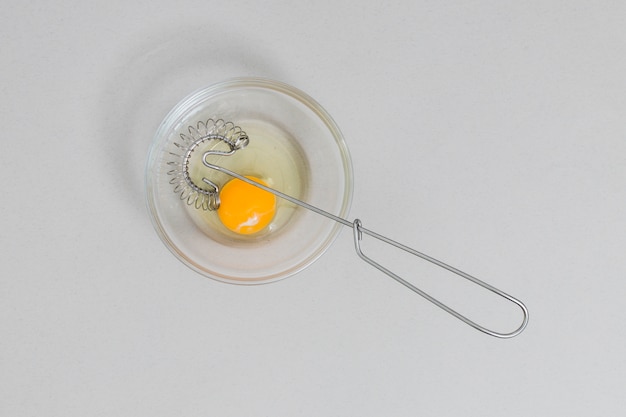
- Crack the egg into a small bowl. Be sure to crack the egg gently so you don't break the yolk.
- Gently pour the egg into the simmering water. Pour the egg in a slow, steady stream to create a beautiful, even shape.
- Cook for 3-4 minutes, or until the whites are set and the yolk is still runny. This is the perfect balance for that classic poached egg texture.
- Remove the egg with a slotted spoon and gently pat it dry. This helps to remove any excess water and keep the egg from becoming soggy.
6.2. The Soft-Boiled Egg: Runny Yolk Perfection
This is a personal favorite! The runny yolk is so satisfying, especially with a crusty bread roll and a little butter.
- Place the eggs in a saucepan and cover them with cold water.
- Bring the water to a boil over high heat.
- Once boiling, reduce the heat to a gentle simmer.
- Let the eggs simmer for 3-4 minutes for a very runny yolk, or 4-6 minutes for a slightly firmer yolk. This gives you control over how runny you want your yolk.
- Gently remove the eggs from the water and plunge them into a bowl of ice water to stop the cooking process.
Part 7: egg storage: Keeping Eggs Fresh and Flavorful
7.1. Keeping Eggs Fresh
Once you've bought your eggs, store them in the refrigerator, preferably in the egg compartment. This keeps them fresh and prevents them from absorbing odors.
Part 8: FAQs: Solving Your Egg-Boiling Dilemmas
8.1. How long can I store boiled eggs in the refrigerator?
Boiled eggs can be stored in the refrigerator for 3-5 days. It's important to note that the longer they are stored, the more likely they are to develop an off-putting sulfurous smell and flavor. So, it's best to eat them within 3 days for the best taste.
8.2. What can I do with leftover egg whites?
Don't throw away those leftover egg whites! They're perfect for making meringues, angel food cake, or even a simple omelet.
8.3. How do I prevent the yolk from turning green?
The greenish tinge on the yolk is actually iron sulfide, which forms when the egg is overcooked. To avoid this, don't boil the eggs for too long and make sure to cool them down quickly in ice water.
8.4. What if my boiled eggs have cracks?
Cracked eggs are a bit more challenging to peel, but they are still safe to eat. If you're planning to eat the eggs whole, it doesn't really matter. But if you're planning to make deviled eggs or salads, it's best to use eggs that are free of cracks.
8.5. Can I use brown eggs instead of white eggs?
Yes, absolutely! Brown eggs and white eggs are essentially the same, the difference is simply in the breed of hen. So, feel free to use either one for your boiling adventures.
Part 9: My Egg-Boiling Journey: A Personal Reflection
As I've shared, it's a journey, a quest for the perfect egg. I've learned a lot along the way, from the importance of those delicate membranes to the magic of the ice water bath. And guess what? It's all about confidence and experimentation.
So, go on, give it a try. Experiment with different boiling times, different methods. And remember, there's no right or wrong way to boil an egg. It's your journey, your personal touch, your perfect egg.
Part 10: Beyond the Basics: Exploring Egg-Boiling Variations
10.1. The "Sous Vide" Method: Precision Cooking for perfect eggs
For those who crave a truly precise cooking experience, consider the sous vide method. This involves submerging eggs in a temperature-controlled water bath. It offers the ultimate control over doneness, allowing you to achieve a perfectly cooked yolk every time.
- Use a sous vide cooker to maintain the water bath at a specific temperature.
- For a soft-boiled egg with a runny yolk, heat the water to 63°C (145°F).
- For a medium-boiled egg with a creamy yolk, heat the water to 68°C (154°F).
- For a hard-boiled egg with a firm yolk, heat the water to 74°C (165°F).
- Submerge the eggs in the water bath and cook for 30-45 minutes, depending on the desired doneness.
- After cooking, plunge the eggs into ice water to stop the cooking process.
10.2. Eggs in a pressure cooker: A Fast and Efficient Approach
For those who value speed and convenience, a pressure cooker is a great option for boiling eggs. It cooks them quickly and evenly, while also helping to prevent cracking.
- Add 1 cup of water to the pressure cooker pot.
- Place the eggs in a steamer basket or a trivet.
- Close the pressure cooker and cook for 2-3 minutes for soft-boiled eggs, 5-6 minutes for medium-boiled eggs, or 8-10 minutes for hard-boiled eggs.
- Let the pressure release naturally for 5 minutes before opening the pressure cooker.
- Transfer the eggs to a bowl of ice water to cool down.
10.3. The "Air Fryer" Method: A Quick and Easy Alternative
If you're looking for a quick and easy way to boil eggs without the hassle of a stovetop, an air fryer is a great alternative. It cooks the eggs quickly and evenly, and it’s a great option if you have limited counter space.
- Place the eggs in the air fryer basket and cook at 160°C (320°F) for 10-12 minutes for hard-boiled eggs.
- For softer boiled eggs, reduce the cooking time to 7-9 minutes.
- Let the eggs cool down in ice water before peeling.
Part 11: A World of Egg Dishes: Beyond the Basic Boil
The perfect boiled egg is a foundation for countless culinary creations. Here are just a few ideas to inspire your egg-based adventures:
11.1. Deviled Eggs: A Classic Party Appetizer
These bite-sized delights are always a hit at parties. They're simple to make and incredibly versatile.
- Hard-boil eggs and peel them.
- Cut the eggs in half lengthwise and scoop out the yolks.
- Mash the yolks with mayonnaise, mustard, chopped gherkins, and seasonings.
- Spoon the yolk mixture back into the egg whites and garnish with paprika.
11.2. Eggs Benedict: A Brunch Staple
Eggs Benedict is a quintessential brunch dish, featuring poached eggs, Canadian bacon, and hollandaise sauce on english muffins.
- poach eggs according to the instructions in Part 6.1.
- Toast English muffins and top with Canadian bacon.
- Spoon hollandaise sauce over the bacon and top with the poached eggs.
11.3. egg salad Sandwiches: A Classic Lunchtime Delight
These sandwiches are a quick and easy lunchtime staple, perfect for a satisfying and protein-packed meal.
- Hard-boil eggs and chop them finely.
- Combine the chopped eggs with mayonnaise, mustard, celery, and seasonings.
- Spread the egg salad mixture on bread and enjoy!
Part 12: Beyond the Kitchen: The History and Culture of Eggs
Eggs have been a staple food for centuries, and their significance in human culture is undeniable. From ancient civilizations to modern-day kitchens, eggs have played a vital role in our diets and traditions.
12.1. Eggs in Ancient Times
Archaeological evidence suggests that humans have been consuming eggs for thousands of years. In ancient Egypt, eggs were considered a symbol of fertility and were often used in religious ceremonies. The ancient Romans enjoyed eggs as a source of protein and used them in various culinary preparations.
12.2. Eggs in Medieval Europe
Eggs were a valuable commodity in medieval Europe and were often used as a form of currency. Eggs were also an important ingredient in many traditional dishes, from omelets to cakes.
12.3. Eggs Around the World
Today, eggs are a global food staple. From the savory eggs of Asia to the sweet egg-based desserts of Europe, eggs are an integral part of cuisines worldwide. They are a symbol of nourishment, and their versatility makes them a beloved ingredient in kitchens around the world.
Conclusion: Mastering the Egg
Whether you're a seasoned cook or a culinary novice, understanding the science behind the perfect boiled egg can transform your kitchen experience. From choosing the right eggs to mastering the art of the peel, this ultimate guide provides a comprehensive framework for egg-boiling success. So, embrace the egg, experiment with different methods, and discover the endless possibilities that this humble, versatile ingredient has to offer.
Everyone is watching

Prime Rib Roast Cooking Time Chart: Per Pound Guide
Cooking TipsPrime rib roast. Just the name conjures images of lavish dinners, crackling fires, and hearty laughter. It’s ...

How Long to Bake Potatoes in the Oven (Perfect Every Time)
Cooking TipsBaked potatoes are a staple in my kitchen. They're incredibly versatile, delicious, and surprisingly easy to m...

Perfect Rice Every Time: The Ultimate Guide to Cooking Rice
Cooking TipsAs a self-proclaimed foodie, I've always been a bit obsessed with rice. It's the foundation of countless cuisi...

The Ultimate Guide to Cooking Asparagus: Tips, Techniques, and Recipes
Cooking TipsAsparagus. The mere mention of this spring delicacy conjures up images of vibrant green spears, crisp and burs...

Ultimate Guide to Cooking the Perfect Thanksgiving Turkey
Cooking TipsThanksgiving. Just the word conjures up images of overflowing tables laden with delicious food, the scent of r...
