Alright, let's talk about pan-seared chicken. It's a classic for a reason, isn't it? Easy, versatile, and absolutely delicious. I've been making pan-seared chicken for years, and it's always a crowd-pleaser. It's one of those dishes that never fails to impress, whether you're serving it up for a casual weeknight dinner or a special occasion.
So, let me share my tried-and-true method with you, along with some insider tips and tricks that I've picked up along the way. You'll be whipping up restaurant-quality chicken at home in no time, and you'll be the envy of all your friends.
(Part 1) The Chicken: Choosing and Prepping
Choosing Your Chicken
When it comes to pan-seared chicken, there's really only one choice in my book: bone-in, skin-on chicken thighs. These bad boys are packed with flavor and stay juicy, unlike those thin, dry chicken breasts. The skin adds a wonderful layer of crispiness and helps to lock in the moisture. But, hey, if you're a chicken breast person, go for it! Just make sure you're not using those flimsy pre-cut breasts. You want a piece of chicken with some heft to it.
Prepping the Chicken
Once you've got your chicken, give it a good wash and pat it dry with kitchen paper. We want to make sure that the surface is nice and dry, so the skin crisps up properly. Now, here's where I like to get a bit fancy. I season the chicken generously with salt and pepper. You want to be generous here, don't hold back. Seasoning the chicken well before cooking helps to develop a flavorful crust. You can also add some other spices if you're feeling adventurous. I'm a big fan of paprika and garlic powder, which add a lovely depth of flavour. But you can really use anything you like. Think about what flavours you love and experiment with different spice combinations.
Getting crispy skin
The key to a good pan-seared chicken is crispy skin. It's that delicious crunch that makes pan-seared chicken so satisfying. To achieve that perfect texture, you need to let the skin dry out a bit. I usually leave the chicken uncovered in the fridge for at least 30 minutes, or even an hour if I've got time. This helps the skin to become more taut and allows for a more even browning. If you're short on time, you can also pat the chicken dry with paper towels and let it sit at room temperature for about 15 minutes.
(Part 2) The Pan: Choosing and Preparing

cast iron pan
You know, I'm a big fan of cast iron pans. They're the workhorses of the kitchen. They get super hot and distribute heat evenly, which is perfect for searing chicken. Plus, they're practically indestructible. You can pass them down to your grandkids! But, if you don't have a cast iron pan, a good quality non-stick pan will do the trick. Just make sure it's a pan that can withstand high heat.
Heating the Pan
Alright, now for the important part: heating the pan. Get it good and hot. I'm talking medium-high heat, and don't be afraid to crank it up a bit. You want the pan to be screaming hot before you add the chicken. You can test the heat by flicking a few drops of water into the pan. If they sizzle and evaporate almost instantly, you're good to go.
Adding Oil
Once the pan is hot, add a good glug of oil. I prefer using a neutral oil with a high smoke point, like sunflower oil or rapeseed oil. These oils can withstand high heat without breaking down and producing unpleasant smoke. You don't want the oil to start smoking, so be careful! Just enough oil to coat the bottom of the pan is all you need.
(Part 3) Searing the Chicken
The First Side
Right, now it's time to sear the chicken. Gently place the chicken in the hot pan, skin-side down. Don't crowd the pan, you want to give the chicken room to cook evenly. Let it cook undisturbed for about 4-5 minutes, or until the skin is nice and golden brown and crispy. Resist the temptation to flip it too soon. Let it get a nice crust on the first side before you move it.
The Second Side
Once the first side is cooked, carefully flip the chicken over. Don't worry if it sticks a little, that's normal. Just use a spatula to loosen it and flip it over. Cook the other side for another 4-5 minutes, or until it's cooked through. The chicken should be golden brown on both sides and the internal temperature should reach 165°F (74°C).
(Part 4) Checking for Doneness
Using a Thermometer
The best way to check if the chicken is cooked through is to use a meat thermometer. You want the internal temperature to reach 165°F (74°C). This ensures that the chicken is cooked through and safe to eat. If you don't have a thermometer, you can check the chicken by poking it with a fork. The juices should run clear, not pink. If you're still unsure, it's always better to err on the side of caution and cook the chicken a little longer.
(Part 5) Resting the Chicken
Why Rest?
Once the chicken is cooked, remove it from the pan and let it rest for about 5 minutes before carving. This allows the juices to redistribute, which makes for a more tender and flavorful chicken. Resting the chicken is a crucial step that's often overlooked. It might seem like a small detail, but it makes a big difference in the final result.
(Part 6) The Sauce: Adding Flavor and Moisture
Using Pan Drippings
Right, now for the sauce. While the chicken is resting, you can make a delicious pan sauce. The pan drippings are full of flavor, so don't throw them away! They're like liquid gold.
Adding Butter and Aromatics
Start by adding a knob of butter to the pan. The butter will melt and add richness and depth to the sauce. Then, you can add some aromatics like garlic, shallots, or herbs. Sauté them for a minute or two, until they're fragrant and softened. This will infuse the sauce with even more flavour.
Deglazing the Pan
Now for the magic trick: deglazing the pan. Add a splash of wine or chicken stock to the pan and scrape up all the delicious bits stuck to the bottom. This process is called deglazing and it releases all the concentrated flavour from the pan.
Simmer and Thicken
Let the sauce simmer for a few minutes, until it's reduced and thickened. The sauce should coat the back of a spoon. Season to taste with salt and pepper. You can also add a squeeze of lemon juice for a bit of brightness. The lemon juice cuts through the richness of the sauce and adds a refreshing element.
(Part 7) Serving the Chicken
Carving and Serving
Now you're ready to serve. Carefully carve the chicken, slicing it into nice, even pieces. Spoon some of the delicious sauce over the chicken and serve it with your favorite sides.
Serving Suggestions
I love serving pan-seared chicken with roasted vegetables, mashed potatoes, or a simple green salad. The crispy chicken pairs beautifully with the creamy mashed potatoes and the vibrant roasted vegetables. You can also use the leftover chicken to make sandwiches, salads, or soup. The possibilities are endless!
(Part 8) Variations and Tips
Spice it Up
You can easily add some spice to your pan-seared chicken. Try adding a pinch of chili flakes, cayenne pepper, or a sprinkle of smoked paprika. These spices add a kick of heat and complexity to the dish.
Other Marinades
Don't be afraid to experiment with different marinades. A simple marinade of soy sauce, garlic, and ginger is always a winner. Or try a citrus marinade with lemon, lime, and herbs. Marinating the chicken for a few hours or even overnight allows the flavours to penetrate the meat and create a more flavorful chicken.
Cook it in the Oven
If you don't want to stand over the stovetop, you can finish cooking the chicken in the oven. Just transfer the chicken to a baking sheet and bake it at 350°F (175°C) for about 10 minutes, or until it's cooked through. This is a great option for those times when you need to multitask.
(Part 9) FAQs
1. What if the skin doesn't get crispy?
If the skin doesn't get crispy, it's probably because the pan wasn't hot enough. Make sure the pan is screaming hot before you add the chicken. You can also pat the chicken dry again before searing. This will help to ensure that the skin is nice and crispy.
2. Can I use frozen chicken?
I wouldn't recommend using frozen chicken. It's best to use fresh chicken for pan-searing. If you're in a pinch, you can thaw the chicken in the fridge overnight and pat it dry before cooking. But, for the best results, always use fresh chicken.
3. What if the chicken sticks to the pan?
If the chicken sticks to the pan, it's probably because the pan wasn't hot enough or the oil wasn't hot enough. Let the pan heat up more before adding the chicken. You can also add a little more oil to the pan. Just make sure to use a neutral oil with a high smoke point.
4. Can I add vegetables to the pan?
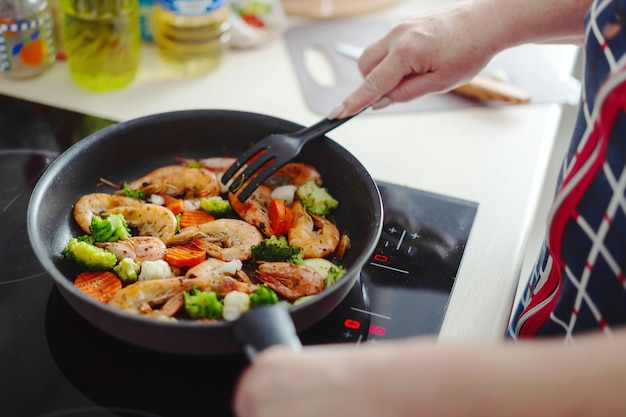
You can definitely add vegetables to the pan! Just make sure the vegetables are cut into bite-sized pieces. Add them to the pan after the chicken is cooked and sear them for a few minutes. This will give the vegetables a nice caramelized crust and create a delicious side dish.
5. How long can I keep leftover chicken?
You can store leftover chicken in the fridge for up to 3-4 days. Make sure to cool it down quickly and store it in an airtight container. You can also freeze leftover chicken for up to 2-3 months. Just defrost it in the fridge overnight before using it.
(Part 10) A Table of Chicken cooking times
Here's a quick table with some approximate cooking times for different cuts of chicken:
| Chicken Cut | Cooking Time (minutes per side) |
|---|---|
| Chicken Breast | 5-7 |
| Chicken Thigh | 7-9 |
| Chicken Leg | 8-10 |
Remember, these are just estimates. Always check the internal temperature of the chicken to make sure it's cooked through.
(Part 11) Conclusion
Well, there you have it! Pan-seared chicken is a really simple dish that anyone can make. Just follow these steps and you'll be enjoying a delicious and satisfying meal in no time. So, go ahead and give it a try. And remember, don't be afraid to experiment and add your own personal touch. Happy cooking!
Everyone is watching

Prime Rib Roast Cooking Time Chart: Per Pound Guide
Cooking TipsPrime rib roast. Just the name conjures images of lavish dinners, crackling fires, and hearty laughter. It’s ...

How Long to Bake Potatoes in the Oven (Perfect Every Time)
Cooking TipsBaked potatoes are a staple in my kitchen. They're incredibly versatile, delicious, and surprisingly easy to m...

Perfect Rice Every Time: The Ultimate Guide to Cooking Rice
Cooking TipsAs a self-proclaimed foodie, I've always been a bit obsessed with rice. It's the foundation of countless cuisi...

The Ultimate Guide to Cooking Asparagus: Tips, Techniques, and Recipes
Cooking TipsAsparagus. The mere mention of this spring delicacy conjures up images of vibrant green spears, crisp and burs...

Ultimate Guide to Cooking the Perfect Thanksgiving Turkey
Cooking TipsThanksgiving. Just the word conjures up images of overflowing tables laden with delicious food, the scent of r...