Let's be honest, chicken is a bit of a culinary chameleon. It can be incredibly bland or utterly delicious, depending on how it's prepared. But when done right, a perfectly pan-seared chicken breast is a revelation. It's juicy, crispy, and bursting with flavour, a dish that can transform from ordinary to extraordinary in just a few minutes. I'm going to share my secrets to achieving this culinary triumph, ensuring your chicken is cooked to absolute perfection.
(Part 1) Choosing Your Champion: The Right Chicken

The journey to pan-seared perfection begins with selecting the right chicken. While I'm a huge advocate for free-range birds, because let's face it, they've had a good life and it shows in the taste, supermarket chicken can still be delicious. The key here is to pick boneless, skin-on chicken breasts. That skin? It's a flavour bomb waiting to be unleashed, adding depth and richness to your dish. It's also crucial for keeping the chicken incredibly moist while cooking.
The Importance of Skin-On
Now, I know what you're thinking, "Skin? Ugh, that sounds gross!" But trust me, those who say that haven't experienced the wonders of cooking skin-on chicken. It's the key to achieving that crispy golden crust and keeping the meat juicy and tender. As the skin cooks, it releases fat, basting the chicken from the inside out, adding incredible depth of flavour. It's truly a game-changer for your chicken game.
chicken breast size Matters
While we're picking our chicken, it's important to choose breasts that are similar in size. Unevenly sized breasts cook at different rates, meaning you'll end up with some dry bits and some raw bits. No one wants that, right? Pick breasts that are roughly the same size to ensure even cooking and a perfectly cooked result.
(Part 2) The Art of Prep: Getting Your Chicken Ready for the Spotlight
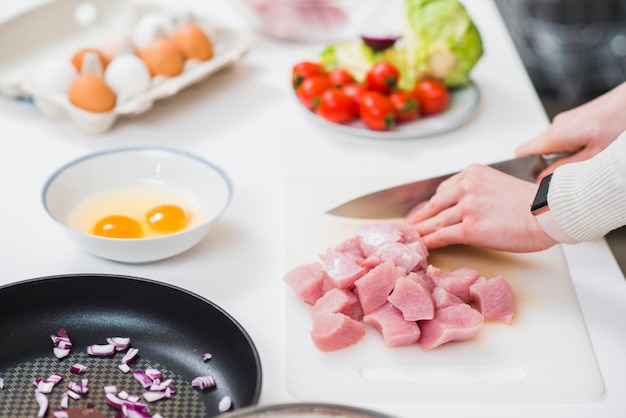
You've got your champion chicken, now it's time to get it ready for its starring role. This is where you can add a touch of extra flavour and ensure your chicken cooks evenly.
The Pat-Down: Dry is the Key to Crispness
First, give your chicken breasts a good pat-down with paper towels. This is essential for achieving that crispy skin we've been talking about. Any excess moisture will steam the chicken instead of browning it, resulting in a soggy, unappealing skin. Patting them dry is a crucial step for a perfect sear.
Salt and Pepper: The Timeless Duo for Flavor
Next, season your chicken generously with salt and freshly ground black pepper. I always use a good quality sea salt and freshly ground peppercorns, because they add a depth of flavour you just can't get with pre-ground stuff. Now, some folks love adding other seasonings at this stage, like paprika, garlic powder, or herbs. But remember, the goal is to let the natural flavour of the chicken shine, so don't go overboard.
The Fridge Factor: Resting for Tenderness and Flavor
Once your chicken is seasoned, pop it in the fridge for at least 30 minutes, and even better, up to an hour. This allows the salt to permeate the meat, tenderising it and creating a more flavorful result. It also helps the chicken retain its shape during cooking, so it won't shrink and dry out.
(Part 3) The Pan-Searing Game: Mastering the Heat
Alright, you're ready to start cooking. Grab your trusty pan – a cast iron pan is ideal, but a heavy-bottomed stainless steel pan will do just fine. The key here is to get the pan piping hot before you add the chicken. This will give you that beautiful, crispy sear we're after.
Heat, Heat, Baby! The Importance of a Scorching Pan
Heat your pan over medium-high heat for about 5 minutes, or until it's hot enough that a drop of water sizzles and evaporates instantly. This will ensure the pan is hot enough to achieve a proper sear, creating that delicious, caramelized crust. Don't be tempted to rush this step. A well-heated pan is crucial for success.
Oil Up: Choosing the Right Oil for a Delicious Sear
Now, add a generous amount of oil to the pan. I prefer a neutral oil like grapeseed or canola oil for high heat cooking. Olive oil can burn at these temperatures, so save that for later when you make your pan sauce. The oil should shimmer beautifully in the hot pan, ready to embrace your chicken.
Don't Crowd the Pan: One Chicken at a Time
Once the oil is shimmering, add your chicken breasts to the pan, skin side down. Don't overcrowd the pan, or the temperature will drop and your chicken won't sear properly. It’s best to cook your chicken breasts in batches if necessary. This ensures each breast gets the attention it needs for a perfect sear.
(Part 4) The Sear: The Art of Patience and Timing
Now, here's where we get to the fun part: creating that stunning, golden-brown crust. It's all about patience and timing. Resist the urge to peek or touch the chicken during the first 5-7 minutes. Let the skin develop that gorgeous crust without disturbing it. This takes patience, my friend, but it's worth it.
Leave It Be: Don't Touch, Just Watch
Resist the urge to poke or move the chicken during the first 5-7 minutes. Let the skin develop that gorgeous crust without disturbing it. This takes patience, my friend, but it's worth it. Let the magic happen, and you'll be rewarded with a beautifully browned and crispy skin.
Flip It: It's Time for the Other Side
After 5-7 minutes, check your chicken. The skin should be nicely browned and crispy. Now, use tongs to carefully flip the chicken and sear the other side for another 3-4 minutes. Again, resist the urge to move it too much. Let the heat work its magic, and you'll have perfectly cooked chicken with a delicious sear on both sides.
(Part 5) The Finish: Bringing It All Home
Your chicken is almost ready! Now it's time to add a touch of extra flavour and ensure it's cooked through.
Temperature Check: It's All About the Core
To ensure your chicken is cooked through, insert a meat thermometer into the thickest part of the chicken. The internal temperature should reach 165°F (74°C). If it's not quite there, keep cooking for another minute or two, flipping occasionally. The meat thermometer is your best friend here, guaranteeing perfectly cooked chicken.
Resting Time: It's Crucial for juicy chicken
Once the chicken is cooked, take it off the heat and let it rest for 5-10 minutes. This allows the juices to redistribute, resulting in a much juicier, more tender piece of chicken. Don't skip this step. It's a small effort that yields a big difference in flavour and texture.
The Finishing Touches: A Pan Sauce for Extra Magic
While the chicken is resting, you can make a simple pan sauce. This adds an extra layer of flavour and richness. Add a knob of butter to the pan, along with some lemon juice or herbs like thyme or rosemary. Let it bubble for a minute or two, then spoon the sauce over your chicken. It's a quick and easy way to elevate your dish.
(Part 6) Variations and Adventures: Beyond the Basics
You've mastered the basics, now let's have some fun. Here are a few ways to add some exciting twists to your pan-seared chicken. These variations will open up a whole new world of flavour and creativity.
Citrus Kick: Lemon and Herbs for Bright Flavour
Add a squeeze of lemon juice and some fresh herbs like thyme, rosemary, or sage to the pan while the chicken is resting. This gives it a bright, citrusy flavour that perfectly complements the richness of the chicken. It's a simple yet elegant addition.
Spicy Heat: Chilli Flakes and Garlic for a Zesty Touch
For a spicy kick, add a pinch of red pepper flakes and a crushed garlic clove to the pan during the last minute of cooking. This adds a touch of heat and depth of flavour, perfect for those who like it spicy. Adjust the amount of chilli flakes to your heat preference.
Creamy Dream: Mushroom and Wine Sauce for Richness
Sauté some sliced mushrooms with a little garlic in the pan after removing the chicken. Deglaze the pan with a splash of white wine, then add a dollop of cream and simmer until thickened. This creamy sauce is rich and decadent, pairing beautifully with the pan-seared chicken.
Sweet and Savoury: Honey and Soy Glaze for a Balanced Flavour
For a sweet and savoury twist, brush the chicken with a mixture of honey and soy sauce during the last few minutes of cooking. This creates a sticky, glazed finish that adds a touch of sweetness and umami to the chicken. It's a delicious way to add a unique flavour profile to your dish.
(Part 7) Sides That Shine: Perfect Partners for Your Chicken
No great dish is complete without the right accompaniments. Here are a few ideas for sides that complement pan-seared chicken beautifully.
Green and Fresh: roasted asparagus or green beans for a Crisp Bite
Roast asparagus or green beans with olive oil, salt, and pepper for a simple and healthy side dish. The roasting process brings out their natural sweetness and adds a nice contrast to the rich chicken.
Starchy and Delicious: Creamy mashed potatoes for Comfort
Mashed potatoes are a classic pairing for chicken, and they add a touch of comfort to the meal. Their creamy texture provides a delightful contrast to the crispy chicken skin.
Grain-Based Goodness: brown rice or Quinoa for a Hearty Side
Brown rice or quinoa is a healthy and hearty option that complements the flavour of chicken perfectly. Their nutty flavour adds depth and complexity to the dish.
A Touch of Colour: Salad with Citrus Dressing for Freshness
A bright and refreshing salad with a citrus dressing adds a touch of acidity and freshness to the dish, balancing the richness of the chicken. It's a perfect way to add a burst of colour and flavour to your meal.
(Part 8) Tips and Tricks: The Secrets to Success
Here are a few more tips and tricks to help you achieve pan-seared chicken perfection every time.
Don’t Overcrowd the Pan: Cook in Batches for Even Cooking
Avoid overcrowding the pan, or the temperature will drop and your chicken won't sear properly. Cook your chicken breasts in batches to ensure they cook evenly. This ensures each breast gets the perfect sear and cooks to perfection.
Use a Meat Thermometer: For Perfectly Cooked Chicken
Use a meat thermometer to ensure the chicken is cooked through. The internal temperature should reach 165°F (74°C). The meat thermometer is an indispensable tool, guaranteeing safe and delicious chicken every time.
Don’t Skip the Resting Time: For Juicy and tender chicken
Let the chicken rest for 5-10 minutes after cooking. This allows the juices to redistribute, resulting in a much juicier, more tender piece of chicken. This simple step makes a big difference in the overall quality of your chicken.
Use a Good Quality Oil: For Flavor and Crispiness
Use a high-heat oil, like grapeseed or canola. Olive oil can burn at high temperatures, so save that for later. The right oil is crucial for a delicious sear and crispy skin. Don't be afraid to use a good amount.
Season Generously: For flavorful chicken
Season your chicken generously with salt and pepper. Don't be shy! A good amount of seasoning is essential for bringing out the flavour of the chicken. Don't be afraid to go a little heavier than you think you need.
(Part 9) Troubleshooting: Fixing Common Mistakes
Okay, let's face it. We all make mistakes in the kitchen. Here's how to fix some common pan-seared chicken blunders. Don't worry, everyone makes mistakes, and with a little knowledge, you can easily fix them.
Dry Chicken: Rest It and Serve With Sauce
If your chicken is dry, it might have been overcooked. Let it rest for a few minutes and serve it with a sauce to add moisture. Sometimes, a little extra rest can help rehydrate the chicken, and a flavorful sauce will add even more moisture and depth of flavour.
Unevenly Cooked Chicken: Cook in Batches
If your chicken is cooked unevenly, it's likely because you overcrowded the pan. Cook your chicken breasts in batches to ensure they cook evenly. This ensures that each breast gets the attention it needs and cooks to perfection.
Burnt Chicken: Watch the Temperature
If your chicken is burnt, you probably cooked it at too high a temperature. Watch the temperature carefully and reduce it if necessary. Keep a close eye on the chicken, and adjust the heat accordingly. It's better to err on the side of caution and cook it a little slower.
(Part 10) FAQs: Your Pan-Seared Chicken Questions Answered
Now for some frequently asked questions about pan-seared chicken.
Q: Can I use boneless, skinless chicken breasts?
A: While you can use boneless, skinless chicken breasts, they will dry out more quickly. The skin helps to keep the chicken moist. If you do use skinless breasts, try searing them for a shorter time and finish them in the oven. If you must use skinless chicken, be sure to keep a close eye on it and cook it at a lower temperature to prevent it from drying out.
Q: What if I don’t have a meat thermometer?
A: If you don't have a meat thermometer, you can use the "finger test." Poke the chicken with your finger. If the meat springs back, it's done. If it feels soft, it needs more cooking. This method is not as accurate as a meat thermometer, but it can be helpful if you don't have one on hand.
Q: How do I make a pan sauce?
A: To make a pan sauce, add a knob of butter to the pan after removing the chicken. Add a splash of lemon juice, white wine, or broth. Let it bubble for a minute or two, then spoon the sauce over your chicken. It's a simple and delicious way to elevate your chicken dish.
Q: Can I use a different type of oil?
A: You can use different types of oil, but choose one with a high smoke point, like grapeseed, canola, or avocado oil. These oils can withstand high temperatures without burning, ensuring a delicious sear. Stay away from oils like olive oil, which have a lower smoke point and can burn easily.
Q: Can I pan-sear chicken thighs?
A: Yes, you can pan-sear chicken thighs. Just be sure to cook them a little longer than chicken breasts, as they are thicker and more dense. Chicken thighs are naturally juicier and have more flavour than chicken breasts, making them a great option for pan-searing.
(Part 11) The Ultimate Pan-Seared Chicken Experience
Now that you've got all the tips and tricks, it's time to put your knowledge into practice. Trust me, once you master the art of pan-searing chicken, you'll never look back. It's a delicious and versatile dish that can be enjoyed any night of the week. So, grab your trusty pan, get your ingredients ready, and get cooking! You'll be amazed at the results and become a pan-searing pro in no time.
Everyone is watching

Prime Rib Roast Cooking Time Chart: Per Pound Guide
Cooking TipsPrime rib roast. Just the name conjures images of lavish dinners, crackling fires, and hearty laughter. It’s ...

How Long to Bake Potatoes in the Oven (Perfect Every Time)
Cooking TipsBaked potatoes are a staple in my kitchen. They're incredibly versatile, delicious, and surprisingly easy to m...

Perfect Rice Every Time: The Ultimate Guide to Cooking Rice
Cooking TipsAs a self-proclaimed foodie, I've always been a bit obsessed with rice. It's the foundation of countless cuisi...

The Ultimate Guide to Cooking Asparagus: Tips, Techniques, and Recipes
Cooking TipsAsparagus. The mere mention of this spring delicacy conjures up images of vibrant green spears, crisp and burs...

Ultimate Guide to Cooking the Perfect Thanksgiving Turkey
Cooking TipsThanksgiving. Just the word conjures up images of overflowing tables laden with delicious food, the scent of r...