Let's face it, beets aren't exactly the most glamorous veggie. They're often relegated to the back of the crisper drawer, overshadowed by their more exciting counterparts. But hold on a minute – give those earthy roots a chance! roasted beets are a total game-changer, transforming them from a somewhat bland, earthy flavour into a sweet, smoky delight that will have you rethinking your whole veggie game. Trust me, once you've tasted a perfectly roasted beet, you'll never go back to those sad, boiled ones.
I've been on a bit of a beet kick lately. I find myself drawn to their vibrant colour, their earthy flavour, and their surprising versatility. They're perfect for salads, roasted veggie platters, or even blended into smoothies for a hidden dose of nutrition. But let's be honest – roasting is the way to go. It intensifies their natural sweetness and adds a depth of flavour that's truly irresistible. Imagine the earthy sweetness of the beet, kissed by the warmth of the oven, with a hint of smokiness from the roasting process – it's culinary magic, I tell you!
So, grab your favourite baking dish and let's get started. This is your one-stop shop for all things roasted beets, from choosing the right ones to perfecting the roast and even exploring some delicious ways to use them. You'll be a beet pro in no time!
(Part 1) Choosing the Perfect Beets

The journey to delicious roasted beets starts with selecting the right ones. Just like picking the perfect avocado, there's a bit of an art to it. You want beets that are firm, unblemished, and have a good weight for their size. Think of it like picking the best apples for baking – you want them to be ready to shine in the oven. You wouldn't want to bake with a bruised apple, would you?
What to Look For
- Firmness: Avoid beets that feel soft or squishy. They should be firm to the touch, indicating they’re fresh and full of flavour. A good beet should feel substantial in your hand, like a well-filled apple.
- No Blemishes: Look for beets that are free of any cracks, bruises, or soft spots. A few minor blemishes are fine, but you want to avoid any that might indicate spoilage. Remember, you want to start with a healthy root to ensure a delicious result.
- Weight: For their size, the beet should feel heavy. This means it’s well-hydrated and packed with flavour. A heavier beet suggests it's full of deliciousness waiting to be unlocked by the oven.
- Colour: While not a crucial factor, the colour of the beet can be a hint. A vibrant red or purple colour often suggests a sweeter flavour.
I’ve definitely learned the hard way – a few times I’ve picked up those limp, soft beets thinking, “Oh, I’ll just roast them and they’ll be fine.” Spoiler alert: they weren’t. The flavour was dull, and the texture was less than desirable. The lesson? Trust me, pick the firm, plump ones.
(Part 2) Prepping the Beets

Once you’ve got your perfect beets, it’s time to get them ready for the oven. This step is all about removing the dirt and tough outer layer, which will help the beets cook evenly and unlock their full flavour potential. And don’t worry, it’s easier than you think.
Scrub and Trim
- Scrub Clean: Start by giving your beets a good scrub under cold running water. Use a vegetable brush to get rid of any clinging dirt. You might be surprised how much dirt can be hiding under that skin! Think of it as giving your beets a little spa treatment before their big oven debut.
- Trim the Tops: Cut off the leafy greens, leaving about an inch of stem attached. The greens are edible and can be used for salads or other dishes, but they’ll draw moisture from the beets during roasting, so it’s best to remove them. It's like removing the cap from a bottle of soda – you want the beets to retain all their flavour and moisture.
- Trim the Roots: Use a sharp knife to trim the root end of the beet. You can just slice it off or, if you’re feeling fancy, use a vegetable peeler to create a neat, pointed tip. This step is more about presentation than necessity, but it adds a touch of elegance to your beet prep.
I like to keep the stems for a little while longer because it makes the beets a bit easier to handle, especially if you’re roasting a batch. But once the beets are cooked, I just cut them off. It’s up to you, though, there’s no right or wrong way!
Optional: Peeling vs. No Peeling
Now comes the decision: to peel or not to peel? This is a matter of personal preference and depends on your desired outcome.
Peeling:
- Gives you a smoother, more refined look.
- Allows for even cooking.
- Might make it easier to slice or dice after roasting.
No Peeling:
- The skin becomes tender during roasting and can be easily eaten.
- It retains more nutrients.
- It’s a little faster and less messy.
Personally, I usually prefer to roast my beets with the skin on. It adds a little extra earthy flavour and the skin is so tender after roasting that I just eat it right off! But there have been times when I wanted a more refined look for a dish, and then I’ll peel them.
(Part 3) Roasting the Beets

Time to get those beets in the oven! This is where the magic happens, where those earthy flavours transform into sweet, smoky deliciousness. You’ll want a hot oven, some foil, and a good dose of patience. The oven is like a culinary alchemist, transforming the humble beet into something extraordinary.
Preparing the Beets for Roasting
- Preheat the Oven: Preheat your oven to 400°F (200°C). A hot oven will help to caramelize the sugars in the beets and develop those rich, roasted flavours. Imagine the sugars in the beets caramelizing, creating a symphony of flavours that will dance on your palate.
- Wrap in Foil: Place the beets in a baking dish. Drizzle them with a little olive oil, sprinkle with salt and pepper, then wrap tightly in foil. This creates a moist environment that allows the beets to steam and cook evenly. Think of the foil as a little cocoon, protecting the beets and allowing them to cook to perfection.
- Roast until Tender: Place the wrapped beets in the preheated oven and roast for 45-60 minutes, or until tender when pierced with a fork. The exact roasting time will depend on the size of the beets, so be sure to check them after 45 minutes.
Tips for Perfectly Roasted Beets
Here are a few extra tips to make sure your beets are roasted to perfection:
- Don’t overcrowd the pan: Give the beets some space to breathe. Overcrowding the pan can prevent them from cooking evenly. If you’re roasting a large batch, it might be necessary to roast them in two separate pans. Like any good party, beets need space to mingle and cook evenly.
- Check for tenderness: After 45 minutes, check for tenderness by piercing a beet with a fork. If it goes in easily, they’re done. If it’s still a bit resistant, roast for another 10-15 minutes and check again. The fork is your beet's personal assistant, letting you know when it's ready.
- Don’t worry about the foil: It’s perfectly fine to leave the beets wrapped in foil after they’re cooked. The steam will help keep them moist and tender. The foil provides a cozy, steamy environment, ensuring the beets stay succulent and flavorful.
I’ve definitely learned from experience here. I once tried roasting beets without wrapping them in foil, thinking it would make them crispier. But what I got were dry, tough beets that were a little sad. The lesson? Don’t skip the foil – it’s a crucial step for achieving those perfectly tender, flavourful beets.
(Part 4) Cooling and Storing
Once your beets are roasted to perfection, take them out of the oven and let them cool slightly. This will make them easier to handle and allows the flavours to settle. Let those roasted beets take a little breather – they deserve it after their oven adventure.
Cooling
You can cool the beets in their foil wrappers. I usually find that a few minutes is enough for them to cool down enough to be handled. If you’re in a hurry, you can also transfer them to a plate or bowl to cool faster.
While they’re cooling, they’ll continue to steam and soften. Just be careful handling them because they’ll be a bit slippery! Be patient, the cooling process will allow the beets to reach their peak of deliciousness.
Storing
Roasted beets can be stored in the refrigerator for up to 3-4 days. Here’s how:
- In the Fridge: Once the beets are cool enough to handle, you can remove the foil and store them in an airtight container in the refrigerator.
- Freezing: You can also freeze roasted beets. To freeze, simply peel and slice the beets into the desired size, then place them in a freezer-safe bag. They’ll stay good for up to 3 months in the freezer.
I usually store my beets whole in the refrigerator, and then peel and slice them when I’m ready to use them. This way, they stay moist and retain their flavour. I’ve also tried freezing beets, and they work great in smoothies or soups.
(Part 5) Peeling and Serving
Now that your beets are cooked and cooled, it’s time to peel and get them ready for serving. Remember, if you roasted them with the skin on, you’ll need to peel them now. The peeling process is the final step in unveiling the beauty of your roasted beets.
Peeling
The skin of roasted beets should slip right off, making it super easy to peel. You can use your fingers, a vegetable peeler, or a sharp knife. If you’re using a knife, just be careful not to cut into the beet.
I find that using a kitchen towel makes the peeling process a bit easier and less messy. Simply wrap the beet in the towel and then use a vegetable peeler to remove the skin. It’s like a little beet spa treatment!
Serving
Roasted beets are incredibly versatile and can be enjoyed in so many ways. Here are a few ideas for serving them:
- Sliced or Diced: Slice or dice the roasted beets and add them to salads, grain bowls, or veggie platters. The versatility of roasted beets allows them to shine in a variety of dishes, adding a vibrant burst of flavour and colour.
- Whole: Serve the roasted beets whole, drizzled with olive oil and balsamic vinegar. This is a simple yet elegant way to enjoy them. Imagine the sweet, smoky flavour of the roasted beets, enhanced by the tangy balsamic vinegar and the richness of the olive oil – a simple yet delicious combination.
- Whipped: Roast the beets, peel and slice them, and then blend them until smooth. This creates a creamy, delicious beet dip or spread. The whipped beets are like a culinary chameleon, transforming into a vibrant dip, a creamy spread, or even a base for a tart.
- As a side dish: Roasted beets make a fantastic side dish for any meal. They pair well with grilled chicken, fish, or even steak. Roasted beets are a versatile side dish, complementing a wide range of main courses.
- In Smoothies: Add a handful of roasted beets to your smoothie for a boost of sweetness, nutrition, and colour.
- As a Burger Topping: Slice or dice roasted beets and add them to your favourite veggie burger. It’s a delicious and healthy alternative to traditional toppings. Imagine the earthy sweetness of the beet adding a unique twist to your favourite veggie burger.
I love roasting beets because they work so well in so many different dishes. They add a vibrant pop of colour and a delightful sweetness that compliments a wide range of flavours.
(Part 6) Adding Flavour
While roasted beets are delicious on their own, you can really amp up the flavour by adding some herbs, spices, or even a little sweetness. A few simple additions can take your roasted beets from good to great.
Herbs and Spices
Here are a few herbs and spices that pair well with roasted beets:
- Thyme: The earthy flavour of thyme complements the sweetness of the beets beautifully. Imagine the earthy aroma of thyme intertwining with the sweet, smoky flavour of the roasted beets.
- Rosemary: Rosemary adds a fragrant, slightly peppery note that works well with the earthiness of the beets. Rosemary’s warmth and subtle pepperiness add a delightful depth of flavour to the beets.
- Oregano: Oregano provides a warm, slightly pungent flavour that balances the sweetness of the beets. Oregano’s warm, slightly pungent notes create a beautiful harmony with the sweetness of the beet.
- Garlic: A few cloves of garlic roasted with the beets will add a pungent, savory note. Garlic, with its characteristic pungency, adds a savory dimension to the beets, enhancing their flavour profile.
- Chili Flakes: For a touch of heat, sprinkle some chili flakes over the beets before roasting. A pinch of chili flakes adds a delightful touch of heat, balancing the sweetness of the beets.
I’ve found that a simple combination of thyme, rosemary, and garlic is a real winner. But feel free to experiment with different combinations and find your favourites.
Sweetness
If you prefer a sweeter flavour, you can add a little honey, maple syrup, or brown sugar to the beets before roasting. Just drizzle a tablespoon or two over the beets and then wrap them in foil.
Be careful not to add too much sweetness, as you want to balance it with the earthy flavours of the beets. A little bit goes a long way.
(Part 7) Playing with Colours
Did you know that there are different varieties of beets, each with its own unique colour and flavour? Here are a few of my favourites:
Red Beets
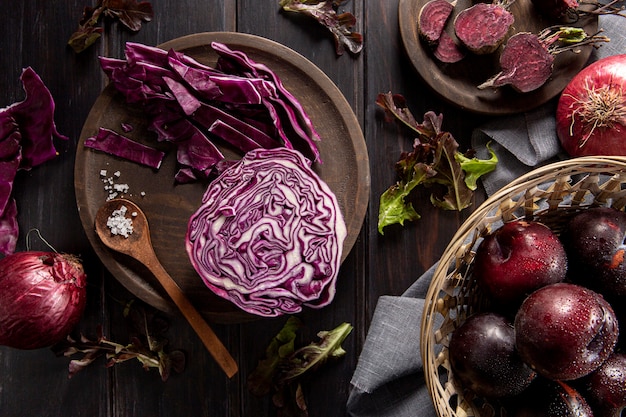
These are the most common type of beet. They have a deep red colour and a sweet, earthy flavour.
golden beets
Golden beets have a bright yellow colour and a slightly milder flavour than red beets. They’re a great option if you’re looking for a less intense beet flavour.
Chioggia Beets
Chioggia beets are also known as “candy cane beets” because of their beautiful, swirling patterns of red and white. They have a sweeter flavour than red beets and are a stunning addition to any dish.
beet greens
Don’t forget about the beet greens! They’re packed with nutrients and can be cooked in a variety of ways. They make a delicious addition to salads, soups, or even stir-fries.
I love experimenting with different types of beets to see how their colours and flavours change the dish. It’s a fun way to add some visual interest and a little bit of variety to your cooking.
(Part 8) Beyond the Basic Roast
Once you’ve mastered the basic roast, you can start experimenting with different techniques to create exciting new flavour combinations. Here are a few ideas:
Roasted beet salad
Roasted beets make a fantastic base for a salad. Slice or dice the roasted beets, toss them with a simple vinaigrette, and add your favourite toppings. Some ideas include:
- Feta cheese
- Walnuts
- Dried cranberries
- Arugula
- Orange segments
This salad is so refreshing and satisfying. The sweetness of the beets, the tang of the vinaigrette, and the crunch of the nuts come together perfectly.
Roasted Beet and Goat Cheese Tart
This is a more sophisticated dish, perfect for a special occasion. Simply spread a layer of goat cheese onto a pie crust, top with roasted beets, and bake until golden brown. The earthy flavour of the beets pairs beautifully with the tangy goat cheese and the flaky crust.
Roasted beet hummus
For a delicious and healthy dip, try roasting beets, then blending them with chickpeas, tahini, lemon juice, and garlic. This hummus is packed with flavour and is perfect for dipping veggies, crackers, or pita bread.
I love how versatile roasted beets are. They can be the star of a simple salad or a more elaborate dish.
FAQs
Here are some frequently asked questions about roasted beets:
| Question | Answer |
|---|---|
| How long should I roast beets? | The roasting time will vary depending on the size of the beets. Smaller beets will cook faster, while larger beets will take longer. Generally, you can expect to roast beets for 45-60 minutes at 400°F (200°C). |
| How do I know when beets are done? | You can tell if beets are done by piercing them with a fork. If the fork goes in easily, they are done. If it’s still resistant, they need to cook a little longer. |
| Can I peel the beets before roasting? | Yes, you can peel the beets before roasting, but it’s not necessary. If you peel them, they will cook a little faster. |
| What can I do with beet greens? | Beet greens are edible and delicious! You can cook them like any other leafy green, sautéing them, adding them to soups, or even making a smoothie. |
| How long can I store roasted beets? | Roasted beets can be stored in the refrigerator for up to 3-4 days. You can also freeze them for up to 3 months. |
I hope this guide has inspired you to embrace the world of roasted beets. They’re a versatile, nutritious, and delicious addition to any meal. So, go forth and roast!
Everyone is watching

Perfect Rice Every Time: The Ultimate Guide to Cooking Rice
Cooking TipsAs a self-proclaimed foodie, I've always been a bit obsessed with rice. It's the foundation of countless cuisi...

Ultimate Guide to Cooking the Perfect Thanksgiving Turkey
Cooking TipsThanksgiving. Just the word conjures up images of overflowing tables laden with delicious food, the scent of r...

The Ultimate Guide to Cooking Asparagus: Tips, Techniques, and Recipes
Cooking TipsAsparagus. The mere mention of this spring delicacy conjures up images of vibrant green spears, crisp and burs...

Can You Cook Spaghetti with Gasoline? (The Shocking Truth)
Cooking TipsWe've all seen those crazy internet trends. You know, the ones that make you wonder, "Did someone actually try...

Chorizo and Eggs Recipe: The Ultimate Guide
Cooking TipsRight, let’s talk about chorizo and eggs. You know, that classic Spanish dish that's always a winner. It's th...
