Ah, the roast dinner. There's something truly magical about it, isn't there? The rich aroma that fills your home, the crispy, golden skin, the succulent meat... It's a symphony of flavours and textures that makes every Sunday feel special. For years, I've been honing my roast-cooking skills, and let me tell you, it's a journey of discovery. I've learned that a perfect roast is more than just chucking a piece of meat in the oven. It's about understanding the nuances of each cut, mastering the art of seasoning and temperature, and embracing the joy of creating a delicious, home-cooked meal. So, grab your apron, and let's dive into the world of roasting a 2lb cut of meat, making it a feast for both the eyes and the stomach!
We'll be covering everything from choosing the perfect cut to mastering the art of resting and serving. This guide is designed to be your go-to resource, whether you're a seasoned cook or just starting your culinary journey. Get ready to elevate your roast game to new heights!
- A World of Roast Options: We'll explore the diverse world of meats suitable for roasting, from classic beef and lamb to chicken and pork.
- Unveiling the Anatomy of a Roast: Understanding the different parts of a roast, like the bone, fat, and meat, is crucial for choosing the right cut and ensuring even cooking.
- Preparing for Perfection: We'll delve into the essential steps for preparing your roast, from patting it dry to seasoning it like a pro.
- Finding the Perfect Temperature: Unlocking the secrets of different roasting temperatures and how they affect the final outcome of your roast.
- Timing is Everything: We'll discuss cooking times and how to check for doneness, ensuring your roast is cooked to your exact liking.
- The Art of Resting: Learn why resting your roast is essential for achieving juicy and flavorful results.
- Serving with Style: We'll explore ways to present your roast dinner like a culinary masterpiece, from carving to garnishing.
- Tips and Tricks for Roast Mastery: Discover insider tips and tricks for achieving perfect results every time.
Ready to embark on this delicious journey? Let's get started!
(Part 1) A World of Roast Options
The first step is choosing your meat. This is like picking your favourite musical instrument - each one has its own unique sound, and it's all about finding the one that resonates with your taste buds and the occasion. There are so many fantastic options, and it's exciting to explore them.
Beef: The Classic Choice
Beef, oh beef! There's just something about a perfectly roasted beef that makes a statement. It’s a true crowd-pleaser, and its versatility is astounding. Whether you prefer the lean and tender sirloin, the rich and flavorful rump, or the impressive rib roast, there's a cut for every preference. Remember, beef can be a bit pricey, so keep your budget in mind.
Lamb: The Springtime Star
Lamb is a delicacy that's perfect for springtime celebrations. Its rich, robust flavour is simply irresistible. A leg of lamb is a classic choice, but don't be afraid to explore other cuts, like a succulent shoulder or a tender rack of lamb. The aroma alone is enough to transport you to a sunny afternoon picnic.
Chicken: The Weeknight Hero
Chicken is a true weeknight hero. It's affordable, cooks relatively quickly, and is incredibly adaptable. Roast a whole chicken for a family feast, try juicy chicken breasts for a quick meal, or go for flavorful chicken thighs. Chicken is a blank canvas for experimentation, allowing you to add your personal touch with herbs, spices, and marinades.
Pork: Versatile and Delightful
Pork is another incredibly versatile meat that shines when roasted. A pork loin is ideal for a crowd, while a pork shoulder is perfect for slow roasting, resulting in melt-in-your-mouth tenderness. And who can resist the crispy, succulent delight of a roasted pork belly? It's a true indulgence.
Venturing Beyond the Ordinary
Don't be afraid to explore beyond the familiar! Roasting venison, goose, or even duck can be a delightful culinary adventure. These meats often have a more seasonal availability, but they offer unique flavours and textures that are worth seeking out.
(Part 2) Understanding the Anatomy of a Roast
Before we get into the actual roasting process, let's take a moment to appreciate the anatomy of a roast. It's like understanding the building blocks of a masterpiece, each part contributing to the final flavour and texture.
Imagine a roast as a symphony of components:
- The Bone: The bone is the backbone of your roast, providing structural integrity and adding a depth of flavour. It's also a fantastic base for making stock or broth later.
- The Fat: This layer acts as a natural insulator, ensuring the meat stays juicy and tender. It also contributes to the beautiful, crispy skin that we all crave.
- The Meat: This is the star of the show! The muscle fibres within the meat determine its tenderness and flavour. Each cut has its unique characteristics, and understanding them is key to choosing the right roast for your needs.
For example, a shoulder roast, with its abundance of bone and fat, will be richer in flavour but require a longer cooking time compared to a leaner loin roast.
(Part 3) Preparing for Perfection: A Roast's Transformation

Now, let's prepare our chosen roast for its transformation into a culinary masterpiece. It's all about attention to detail and a few simple steps that make a huge difference.
Pat Dry: The First Step to Success
Start by patting the meat dry with paper towels. This simple step is essential for ensuring a crispy skin. Moisture inhibits browning, so we want to create a dry surface for a beautiful golden crust.
Seasoning: Unleashing the Flavors
Now comes the fun part! Seasoning your roast is like adding the finishing touches to a painting. It's all about enhancing the natural flavours of the meat and creating a symphony of tastes. Start with salt and pepper, which are essential for bringing out the meat's inherent deliciousness. Then, let your creativity flow!
Consider incorporating herbs, spices, garlic powder, or even a pre-made rub. I personally love adding a touch of smoked paprika for a hint of smoky depth. Remember, the key is to use seasonings judiciously, letting the meat's flavour shine through.
Searing: The Optional Upgrade (But Highly Recommended!)
Searing is an optional step, but it's a game-changer! It creates a gorgeous, crispy crust, locking in the juices and adding a depth of flavour that's hard to resist. Heat a large skillet over high heat and add a bit of oil. Sear the meat on all sides for a few minutes, ensuring a beautiful brown colour. You'll be amazed by the transformation!
Stuffing: A Delicious Option
If you're feeling adventurous, stuffing your roast can elevate it to a whole new level. This is a great way to add extra layers of flavour and texture.
From simple combinations like chopped herbs and garlic to more elaborate sausage stuffings, the possibilities are endless. Just remember to make sure the stuffing is cooked to a safe internal temperature.
Tie the Roast: A Touch of Elegance
For larger roasts, tying the meat with kitchen twine is a great way to ensure a uniform shape and even cooking. It also helps to prevent the meat from drying out. I personally like to tie my roasts, as it not only enhances the presentation but also ensures a more consistent and succulent result.
(Part 4) Choosing the Right Roasting Temperature: Finding the Sweet Spot
The roasting temperature is like the conductor of an orchestra, guiding the cooking process and shaping the final outcome of your roast. A higher temperature will cook the meat faster, resulting in a crispy exterior, while a lower temperature will cook it more slowly, creating a tender, juicy interior. It's a delicate balance, and understanding the nuances is crucial for achieving perfect results.
Here are some general guidelines for different types of meat:
| Meat | Roasting Temperature (°F) |
|---|---|
| Beef | 425°F (220°C) |
| Lamb | 350°F (175°C) |
| Chicken | 400°F (200°C) |
| Pork | 375°F (190°C) |
Keep in mind that these are just starting points. The specific size and thickness of your roast might require some adjustments.
(Part 5) Timing is Everything: Mastering the Art of Cooking Time and Checking for Doneness
Now it's time to get cooking! The cooking time will depend on the type of meat, its size, and the desired level of doneness. Doneness is a matter of personal preference, but there are some general guidelines to follow. Remember, it's better to err on the side of undercooking. You can always cook it a little longer, but you can't uncook it!
Here's a guide for estimated cooking times for a 2lb roast:
| Meat | Cooking Time (Minutes per pound) |
|---|---|
| Beef (rare) | 12-15 |
| Beef (medium) | 15-20 |
| Beef (well-done) | 20-25 |
| Lamb (medium) | 15-20 |
| Chicken (medium) | 15-20 |
| Pork (medium) | 15-20 |
For example, a 2lb beef roast cooked to medium would take approximately 30-40 minutes.
Checking for Doneness: The Quest for Perfection
The final step is to ensure your roast is cooked to your liking. There are a few ways to check for doneness, each with its own level of accuracy.
- meat thermometer: The Gold Standard: This is the most accurate way to check for doneness. Insert the thermometer into the thickest part of the meat, making sure it doesn’t touch any bone.
- The Touch Test: A Handy Tool: This method is less precise but can be helpful. Press the meat with your finger. If it’s springy to the touch, it’s cooked to medium. If it’s firm, it’s well-done.
- Juice Colour: A Visual Cue: The colour of the juices running from the meat can also indicate doneness. Clear juices mean the meat is well-done, while pink juices mean it’s medium.
Remember, different meats have different recommended internal temperatures. For example, beef should be cooked to at least 145°F for medium-rare, while chicken should be cooked to at least 165°F. Always consult a reliable guide for specific temperatures for your chosen meat.
(Part 6) The Art of Resting: Letting the Flavours Bloom
After your roast is cooked, the temptation is to carve into it immediately. But resist! Resting your roast for at least 15 minutes before carving is an essential step for achieving the most flavorful and juicy results.
While the meat is resting, the juices redistribute throughout the meat, creating a tender and succulent texture. This also allows the meat to cool slightly, making it easier to carve.
Use this resting time wisely. While the roast is patiently waiting, you can prepare your delicious side dishes. Imagine a symphony of flavours, with roasted vegetables, creamy mashed potatoes, golden Yorkshire pudding, and rich gravy all waiting to complement the star of the show.
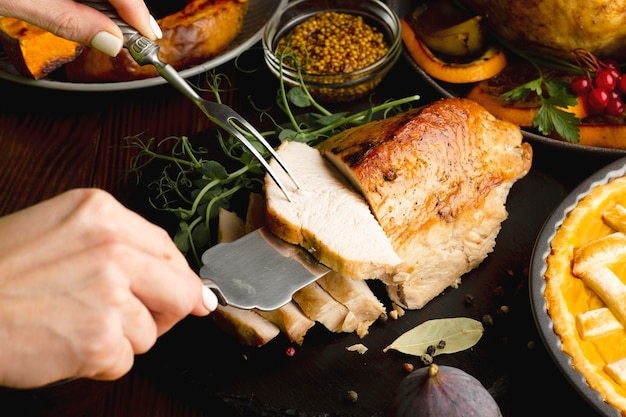
(Part 7) Serving with Style: Presenting Your Culinary Masterpiece
Finally, the moment of truth! It's time to enjoy the fruits of your labour. Carve the meat directly onto a platter or individual plates. Arrange your delicious sides around the meat, creating a visual feast.
Don't be afraid to get creative with your presentation. Think of it as adding the final flourish to a masterpiece. A drizzle of gravy, a sprinkling of fresh herbs, or a touch of artistic flair with your carving can elevate your roast dinner to new heights.
(Part 8) Tips and Tricks for Roast Mastery: Elevating Your Culinary Game
Here are a few more insider tips and tricks to help you consistently achieve perfect roast results.
- Use a Roasting Rack: Unlocking Even Cooking: A roasting rack allows air to circulate freely around the meat, ensuring even cooking and a crispy skin. It's a simple investment that yields incredible results.
- Basting: A Touch of Moisture: Basting your roast with pan juices or melted butter helps to keep it moist and adds a delightful flavour. It's a simple but effective way to enhance the overall taste and texture.
- Don't Overcrowd the Oven: Giving Your Roast Space: Give your roast plenty of space in the oven. If the oven is too crowded, the meat won't cook evenly.
- Deglaze the Pan: Creating a Delicious Gravy: After the roast is done, deglaze the pan with some wine or broth to make a delicious gravy. The caramelized bits stuck to the bottom of the pan hold a burst of flavour, adding a final touch of magic to your meal.
- Let the Meat Rest: A Crucial Step: As mentioned earlier, letting the meat rest for 15 minutes is essential for a juicy, flavorful roast. It's a simple step that yields extraordinary results.
(Part 9) FAQs: Your Roast-Related Questions Answered
1. What if my roast is too big for my oven?
Don't worry! You can always cook a large roast in two batches. Just make sure to cook each batch for the same amount of time. Alternatively, you can use a slow cooker for a larger roast. This will take longer to cook, but it will result in a tender and flavorful roast.
2. How do I know if my roast is done?
The best way to check for doneness is with a meat thermometer. You can also use the touch test or check the colour of the juices. Different meats have different recommended internal temperatures, so make sure you know what you're aiming for.
3. What if my roast is overcooked?
Unfortunately, you can't uncook a roast. However, you can try to salvage it by shredding the meat and using it in other dishes, like tacos or sandwiches. Don't let a little overcooking ruin your day!
4. What are some good side dishes for a roast dinner?
There are endless possibilities for delicious side dishes that complement a roast dinner. Some popular choices include roasted vegetables, mashed potatoes, Yorkshire pudding, and gravy. You can also add a refreshing salad or a side of rice.
5. What's the best way to store leftover roast?
Store leftover roast in an airtight container in the fridge for up to 4 days. You can reheat it in the oven or microwave. Leftover roast is a wonderful base for sandwiches, salads, or even a hearty soup.
Everyone is watching

Prime Rib Roast Cooking Time Chart: Per Pound Guide
Cooking TipsPrime rib roast. Just the name conjures images of lavish dinners, crackling fires, and hearty laughter. It’s ...

How Long to Bake Potatoes in the Oven (Perfect Every Time)
Cooking TipsBaked potatoes are a staple in my kitchen. They're incredibly versatile, delicious, and surprisingly easy to m...

Perfect Rice Every Time: The Ultimate Guide to Cooking Rice
Cooking TipsAs a self-proclaimed foodie, I've always been a bit obsessed with rice. It's the foundation of countless cuisi...

The Ultimate Guide to Cooking Asparagus: Tips, Techniques, and Recipes
Cooking TipsAsparagus. The mere mention of this spring delicacy conjures up images of vibrant green spears, crisp and burs...

Ultimate Guide to Cooking the Perfect Thanksgiving Turkey
Cooking TipsThanksgiving. Just the word conjures up images of overflowing tables laden with delicious food, the scent of r...