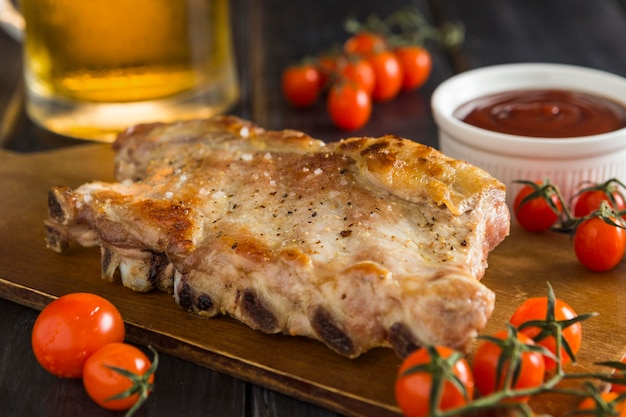
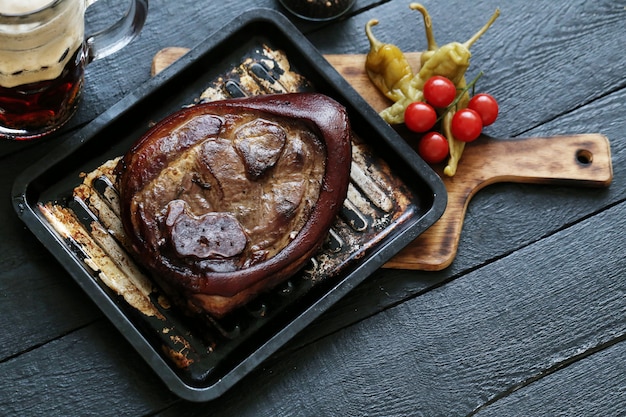
Let's get real, folks. Ribs are a culinary masterpiece – the kind that makes your mouth water just thinking about them. But achieving that melt-in-your-mouth, fall-off-the-bone perfection isn't always a walk in the park. Over the years, I've experimented with countless recipes, tweaked techniques, and learned a thing or two about making oven-baked spare ribs that are truly unforgettable. And trust me, once you've tasted these, you'll be throwing out those store-bought ribs faster than you can say "bbq sauce."
(Part 1) The Meat of the Matter: Choosing Your Ribs
Let's start with the star of the show: the ribs. The quality of your ribs is crucial for a truly delicious outcome. When I'm shopping, I always opt for a rack of spare ribs. Now, you might be thinking, "Wait, what's the difference between spare ribs and baby back ribs?" Let me break it down for you.
Baby Back vs Spare Ribs: A Culinary Showdown
baby back ribs, those little beauties from the upper part of the pig, are known for their tenderness. They have less fat and cook up a bit quicker. Spare ribs, on the other hand, come from the lower part of the pig, and they are the kings and queens of flavour thanks to that extra layer of marbling. Yes, they might take a bit longer to cook, but trust me, the extra time is worth it. They're juicier and more flavourful, making them a true rib connoisseur's delight.
When choosing ribs, look for a rack with a good layer of fat marbling. This fat renders during cooking, adding moisture and flavour. I always ask my butcher for their recommendation. They're usually happy to guide you to the perfect rack.
(Part 2) Prepping Your Ribs: Laying the Foundation for Flavor
Alright, you've got your magnificent rack of ribs. Now, it's time to make them sing. And the first step is the rub. This is the magic potion that infuses the ribs with flavour and creates that irresistible crispy bark. A good rib rub is a symphony of spices, and there are endless combinations to explore.
My Go-To Rib Rub: A Classic Combination
Now, I've tried countless rubs, but my personal favourite is a simple yet effective blend of brown sugar, paprika, garlic powder, onion powder, black pepper, and a touch of cayenne pepper for a subtle kick. The brown sugar adds sweetness and helps to caramelize the bark, while the paprika provides a smoky depth of flavour. The garlic and onion powders add a savoury dimension, and the black pepper and cayenne pepper add a touch of heat. It's a classic combination that never disappoints.
The Art of Rubbing: Getting it Right
The key to a successful rub is to get it into every nook and cranny of the ribs. Don't be afraid to get your hands dirty. The more you rub, the more flavour you infuse. I like to use a light hand, though, to avoid creating a thick layer that could prevent the bark from getting crispy.
(Part 3) The Low and Slow Method: Unveiling Tenderness
Here's the secret to achieving that melt-in-your-mouth texture that makes ribs so heavenly: low and slow cooking. Think of it as a culinary marathon, not a sprint. We're giving the ribs time to truly relax and transform. The low heat allows the collagen in the meat to break down, creating that tender, succulent texture.
Why oven-baked ribs Are King
Now, you might be thinking, "Why oven-baked ribs?" Well, there are several reasons why I prefer this method. It's hands-off, meaning you can set it and forget it. Plus, the oven creates a consistent, even heat that ensures the ribs cook evenly and beautifully.
My Oven-Baked Ritual: Temperature and Time
I usually preheat my oven to 300°F (150°C) and cook the ribs for 3-4 hours. This allows the meat to become incredibly tender and the fat to render out. The result? Juicy, succulent ribs that fall off the bone.
(Part 4) The Secret Weapon: The dutch oven
Alright, here's where things get interesting. For the most tender, succulent ribs, you need a Dutch oven. It's like a magic pot that creates a humid environment, trapping moisture and steam. This helps the ribs cook evenly and prevents them from drying out during the long cooking time.
Why a Dutch Oven Is Your New Best Friend
You might be thinking, "Why not just use a baking dish?" A Dutch oven offers several advantages. The heavy base distributes heat evenly, ensuring consistent cooking. The tight-fitting lid traps the steam, creating that moist environment that's crucial for tenderizing the meat. And let's be honest, it just looks impressive, right?
(Part 5) The Sauce Factor: Adding That Final Touch
Alright, so your ribs have been cooking for a few hours, and your kitchen is filled with the most amazing aroma. Now it's time for the finishing touch: the sauce.
The Sauce Spectrum: Finding Your Flavor
There's a whole universe of flavours to explore when it comes to BBQ sauce. From sweet and smoky to spicy and tangy, there's a sauce for every taste bud. My go-to is a classic BBQ sauce, but don't be afraid to experiment.
Sauce Strategies: Mastering the Timing
Some people like to slather their ribs in sauce during the last hour of cooking, while others prefer to brush it on right before serving. It really depends on your preference. I like to do both. I'll baste the ribs with sauce during the final hour of cooking, letting it caramelize and get nice and sticky. Then, I'll give them an extra coat right before serving for that final burst of flavour.
(Part 6) The Final Flourish: Grilling for that Crispy Bark
Now, here's where we take things to the next level. For that ultimate crispy bark, I like to finish my ribs off on the grill for a few minutes. The heat of the grill intensifies the flavour and creates a beautiful char. It also gives the sauce a chance to caramelize, creating a sweet, sticky glaze.
The Grill Advantage: Why It Makes a Difference
You might be thinking, "Why bother with grilling if they've been in the oven for hours?" Well, grilling adds a whole new dimension to the flavour and texture. The smoky flavour from the grill complements the rich, savory flavour of the ribs. And let's not forget about that irresistible crispy bark. It's a textural contrast that elevates the entire experience.
(Part 7) The Resting Game: Patience is a Virtue
Your ribs are finally done, and they're looking absolutely divine. But before you dig in, you need to let them rest. This might seem like an unnecessary step, but it's essential for keeping the ribs juicy and tender.
Why Resting is Crucial
Resting allows the juices to redistribute throughout the meat. If you slice into them right away, the juices will run out, leaving you with dry ribs.
My Resting Ritual: Foiled and Ready
I usually let my ribs rest for about 15 minutes, wrapped in foil. This helps to keep them warm and prevents them from drying out. The result? Succulent, tender ribs that are ready to be devoured.
(Part 8) Serving Up Perfection: The Ultimate Rib Experience
Finally, the moment of truth: serving time. This is where you get to showcase your culinary prowess and impress your guests with your incredible ribs.
side dish Symphonies: Completing the Feast
I like to serve my ribs with a simple side of coleslaw, baked beans, and a few slices of crusty bread. But feel free to get creative. Mac and cheese, potato salad, corn on the cob – the possibilities are endless.
Napkins at the Ready: A Messy Feast
Just remember to have plenty of napkins on hand. These ribs are guaranteed to get messy, but they are worth every lick.
(Part 9) FAQs: Your Rib-Related Questions Answered
I know you've got questions, and I'm here to answer them. Let's tackle some of the most common rib-related queries.
1. How Do I Know When My Ribs Are Done?
The best way to check is with a meat thermometer. The ribs should be cooked to an internal temperature of 190°F (88°C). At this temperature, they'll be fall-off-the-bone tender.
2. Can I Cook Ribs in a slow cooker?
You certainly can! Slow cookers are great for ribs. Just make sure you cook them on low for at least 6-8 hours. The slow, gentle heat allows the ribs to become incredibly tender.
3. How Can I Prevent My Ribs from Drying Out?
The key is to cook them low and slow, and to use a Dutch oven. The Dutch oven creates a moist environment that helps to prevent the ribs from drying out. You can also use a meat thermometer to ensure that they are not overcooked.
4. What Is the Best Way to Store Leftover Ribs?
Store them in an airtight container in the refrigerator for up to 3 days. You can also freeze them for up to 3 months. Just thaw them in the refrigerator overnight before reheating.
5. What Are Some Different Sauce Options?
The world of BBQ sauce is vast and exciting. You can use store-bought sauces, make your own, or try different flavours. Some popular options include sweet and smoky, spicy, tangy, and even fruity. Get creative and have fun with it!
So there you have it, my friends. The ultimate guide to oven-baked spare ribs. Now you have all the tools and knowledge you need to create a rib feast that will have everyone begging for seconds. Go forth, embrace the low and slow, and enjoy the most tender, delicious ribs you've ever tasted!
Everyone is watching

Prime Rib Roast Cooking Time Chart: Per Pound Guide
Cooking TipsPrime rib roast. Just the name conjures images of lavish dinners, crackling fires, and hearty laughter. It’s ...

How Long to Bake Potatoes in the Oven (Perfect Every Time)
Cooking TipsBaked potatoes are a staple in my kitchen. They're incredibly versatile, delicious, and surprisingly easy to m...

Perfect Rice Every Time: The Ultimate Guide to Cooking Rice
Cooking TipsAs a self-proclaimed foodie, I've always been a bit obsessed with rice. It's the foundation of countless cuisi...

The Ultimate Guide to Cooking Asparagus: Tips, Techniques, and Recipes
Cooking TipsAsparagus. The mere mention of this spring delicacy conjures up images of vibrant green spears, crisp and burs...

Ultimate Guide to Cooking the Perfect Thanksgiving Turkey
Cooking TipsThanksgiving. Just the word conjures up images of overflowing tables laden with delicious food, the scent of r...