There's nothing quite like the satisfaction of biting into a perfectly cooked rack of ribs. The tender, juicy meat, the melt-in-your-mouth texture, and the smoky flavour – it's pure culinary bliss. While grilling is a classic way to cook ribs, I've found that oven-baking at 400°F consistently delivers stunning results.
Now, I'm not a professional chef, but over the years, I've learned a thing or two about achieving those perfect oven-baked riblets. Getting that 400°F cooking time right is key. It's a delicate balance – too low and the meat won't render properly, too high and you'll risk drying them out. But fear not, my friends, because today, I'm sharing my secrets to consistently achieve succulent, fall-off-the-bone riblets every single time. So, grab your apron, fire up the oven, and let's get started on this culinary adventure!
(Part 1) The Ribblets: choosing the right cut
Let's begin with the star ingredient – the ribs. I've experimented with both baby back ribs and spare ribs, and they both have their own unique appeal. For this recipe, I'm going with spare ribs. Why? They tend to be more affordable and offer a wonderful balance of meaty and fatty goodness.
Why Spare Ribs Are My Go-To?
Spare ribs are just heavenly when cooked right. They're incredibly tender and juicy, and the fat content adds a depth of flavour that's hard to beat. Plus, they're generally more forgiving, making them perfect for a beginner like myself. If you're a seasoned rib enthusiast, though, go ahead and experiment with baby backs – you'll probably be happy with either choice.
A Word of Warning: The Membrane
Before we dive into the cooking process, there's one critical step – removing the membrane from spare ribs. This thin, tough membrane on the back side can make your ribs chewy and unpleasant to eat.
You can use a sharp knife to remove it, but I find using a paper towel makes it easier to get a good grip. Just grab a corner, pull it up, and peel it off. It might take a bit of effort, but it's well worth the extra step for a better rib experience.
(Part 2) Preparing the Ribblets: Spice It Up!
Alright, your ribs are prepped, and now it's time for the fun part – seasoning! There's no one-size-fits-all approach when it comes to seasoning ribs. You can go with a simple dry rub, a complex spice blend, or even a sticky sauce. My personal preference is a simple dry rub that combines a few key ingredients for maximum flavour.
My Favourite Dry Rub: It's All About Balance
Here's my tried-and-true dry rub recipe, which I've tweaked over the years. Feel free to adjust it to your own taste, but this is a great starting point:
- Salt: Essential for flavour and helps draw out moisture. I use about 1 tablespoon per rack of ribs.
- Black Pepper: Adds a bit of spice and depth of flavour. I use about 1 teaspoon per rack.
- Paprika: Provides a nice smoky flavour and a bit of sweetness. I use about 1 tablespoon per rack.
- Garlic Powder: Adds a nice garlicky aroma and flavour. I use about 1 teaspoon per rack.
- Onion Powder: Adds a bit of sweetness and complexity. I use about 1 teaspoon per rack.
Rub It In, Baby!
Once your dry rub is ready, rub it generously all over your ribs. Make sure you get it into all the cracks and crevices. Don't be shy! You want a good, thick coating for maximum flavour penetration.
Don't Forget the Foil!
Now, here's where things get even more interesting. I wrap my ribs in foil before baking. This helps to trap in moisture and steam the ribs, resulting in incredibly tender and juicy meat. Think of it as a mini-steam bath for your ribs!
To wrap your ribs, place them in a large piece of foil and fold the edges tightly around the ribs. Ensure it's a good, tight seal to prevent moisture from escaping.
(Part 3) Baking at 400°F: The Perfect Temperature
With your ribs wrapped and ready, it's time for the magic to happen! Preheat your oven to 400°F and place your ribs in the oven. This is where the 400°F temperature reigns supreme. It's the sweet spot for achieving that perfect balance of tenderness and juicy flavour. It's just high enough to render the fat but not so high that it dries out the meat.
Timing is Everything: 2 Hours and Counting...
The cooking time will vary depending on the size of your ribs, but generally, you'll want to bake them for about 2 hours. While it might seem like a long time, trust me, it's well worth the wait. The ribs will cook slowly and evenly, and the fat will render out, leaving you with incredibly tender and juicy meat.
Don't Peek Too Soon!
I know it's tempting to open the oven and peek every few minutes, but resist the urge! Opening the oven too frequently will disrupt the heat and make your ribs cook unevenly. Just set a timer for 2 hours and let your ribs cook undisturbed.
The Unwrapping Ritual
After 2 hours, carefully remove the ribs from the oven. Now, for the exciting part: the unwrap! Be careful, as the steam inside will be hot. Unwrap the foil and take a peek at your ribs. You'll likely see a lot of liquid in the bottom of the foil, which is all the rendered fat and moisture. This is a sign that your ribs are perfectly cooked!
(Part 4) Glaze It Up!
Okay, your ribs are cooked to perfection. But why stop there? It's time to take them to the next level with a delicious glaze. The options are endless, but I tend to keep it simple with a sweet and smoky combination.
My Go-To Glaze: Sweet, Smoky, and Delicious
Here's my recipe, but feel free to experiment with different ingredients and flavours to find your perfect glaze:
- Honey: Provides a natural sweetness and helps create a sticky glaze. I use about 1/2 cup.
- Soy Sauce: Adds a salty and umami flavour. I use about 1/4 cup.
- Worcestershire Sauce: Adds a touch of tanginess and depth of flavour. I use about 2 tablespoons.
- Liquid Smoke: Adds a smoky flavour without having to smoke the ribs. I use about 1 teaspoon.
Glazing Technique: Brush, Bake, and Repeat!
Mix all the ingredients together in a small bowl and brush the glaze liberally over your ribs. Place the ribs back in the oven for another 30 minutes at 400°F, basting them with the glaze every 10 minutes. This will help the glaze caramelize and create a beautiful, sticky finish.
Get That Crispy Edge
For extra crispy ribs, you can remove them from the oven and place them under the broiler for a few minutes. This will help caramelize the glaze and give the ribs a nice, crispy edge. Just watch them closely to prevent burning.
(Part 5) Resting: Let Those Ribs Relax
Your ribs are glazed and ready to go, but before diving in, there's one crucial final step: resting. It may seem like a waste of time, but resting your ribs allows the juices to redistribute throughout the meat, resulting in even more tender and juicy ribs.
The Resting Ritual: 10 Minutes of Peace
Let the ribs rest for about 10 minutes before slicing and serving. You can loosely cover them with foil to help keep them warm. While you're waiting, get your side dishes ready.
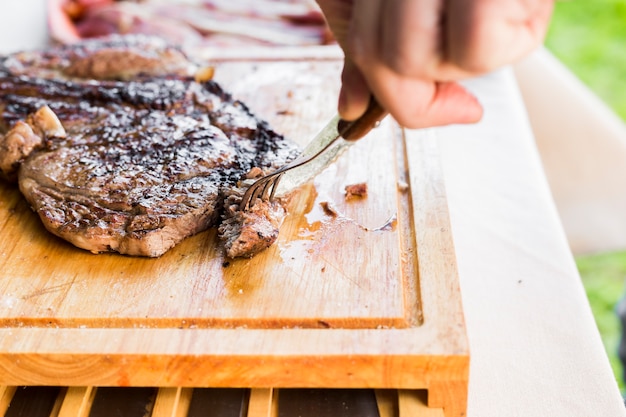
The Big Reveal: Cutting Those Ribblets
Now, the moment of truth. Carefully lift the ribs onto a cutting board and use a sharp knife to cut them into individual ribs. Don't be afraid to use a little force if the ribs are sticking together. The meat should be so tender that it will practically fall apart on its own.
(Part 6) Serving: The Grand Finale
You've got your perfectly cooked, glazed, and rested riblets – now it's time to serve them up! You can be as fancy or as casual as you like. I love to serve them on a platter with a side of coleslaw, baked beans, and cornbread. It's a classic combination that always pleases guests.
Making it a Meal
For a complete meal, add some grilled vegetables, mashed potatoes, or potato salad. The possibilities are endless!
Don't Forget the Drinks!
And of course, no rib feast is complete without a cold drink. I like to pair my ribs with a cold beer, but a glass of wine or a refreshing lemonade also complements the flavours wonderfully.
(Part 7) Leftovers: A Treat for Later
Even with the most delicious ribs, there's often a bit left over. And that's okay! Leftover ribs are just as delicious as the first time around. You can reheat them in the oven, microwave, or even on the grill.
Make a Sandwich!
One of my favourite ways to use leftover ribs is to make a rib sandwich. Just pile some of the leftover ribs onto a bun, add some coleslaw, and you've got a fantastic sandwich!
Rib Salad: A Delicious Twist
If you're looking for something a little lighter, chop up the leftover ribs and toss them with your favourite salad ingredients.
(Part 8) FAQs: Answers to Your Ribblets Questions
You're probably eager to get cooking now, but you might have a few questions about oven-baked riblets. Here are some common ones that I often get:
1. Can I Marinate the Ribs Before Baking?
Yes, marinating your ribs before baking is a great way to add extra flavour and moisture. Just make sure you don't marinate for too long, or the meat could become tough. I recommend marinating for 2-4 hours.
2. Can I Use a Different Oven Temperature?
Yes, you can experiment with different oven temperatures, but remember that 400°F is the ideal temperature for achieving the perfect balance of tenderness and juicy flavour. Going too low will extend the cooking time and might not render the fat properly. Going too high risks drying out the meat.
3. How Do I Know If My Ribs Are Done?
There are a few ways to check if your ribs are done. The most accurate method is to use a meat thermometer. The ribs should be cooked to an internal temperature of 190°F. You can also check the ribs by using a fork. The meat should be so tender that it practically falls off the bone.
4. Can I Smoke Ribs Instead of Baking Them?
Absolutely! smoking ribs is a fantastic way to add a smoky flavour to the meat. If you have a smoker, give it a try! Just be sure to follow the instructions for your smoker and adjust the cooking time accordingly.
5. What Happens If My Ribs Are Too Dry?
If your ribs are too dry, don't fret! There are a few things you can do to salvage them. You can try adding more sauce or glaze to the ribs and reheating them in the oven. Or, you can use them to make a rib sandwich or a rib salad.
(Part 9) Enjoy Your Perfectly Baked Ribblets!
And there you have it! My secrets to perfectly oven-baked riblets. I hope this guide has been helpful. Remember, don't be afraid to experiment and find what works best for you. And most importantly, have fun!
Happy baking, and enjoy those juicy, succulent ribs!
Everyone is watching

Prime Rib Roast Cooking Time Chart: Per Pound Guide
Cooking TipsPrime rib roast. Just the name conjures images of lavish dinners, crackling fires, and hearty laughter. It’s ...

How Long to Bake Potatoes in the Oven (Perfect Every Time)
Cooking TipsBaked potatoes are a staple in my kitchen. They're incredibly versatile, delicious, and surprisingly easy to m...

Perfect Rice Every Time: The Ultimate Guide to Cooking Rice
Cooking TipsAs a self-proclaimed foodie, I've always been a bit obsessed with rice. It's the foundation of countless cuisi...

The Ultimate Guide to Cooking Asparagus: Tips, Techniques, and Recipes
Cooking TipsAsparagus. The mere mention of this spring delicacy conjures up images of vibrant green spears, crisp and burs...

Ultimate Guide to Cooking the Perfect Thanksgiving Turkey
Cooking TipsThanksgiving. Just the word conjures up images of overflowing tables laden with delicious food, the scent of r...