There's just something about bbq ribs that gets me every time. The irresistible combination of smoky flavour, tender meat that practically falls off the bone, and a sticky, tangy sauce – it's a culinary symphony that never fails to impress. For years, I thought achieving this restaurant-worthy experience at home was a culinary feat reserved for BBQ masters. But then, a lightbulb moment struck: why not try replicating that smoky, melt-in-your-mouth goodness using my humble oven?
This revelation sent me down a rabbit hole of recipes, techniques, and tips. After countless experiments, I've finally cracked the code for oven-baked BBQ ribs that are every bit as delicious as their grill-cooked counterparts. The best part? It's surprisingly simple.
In this comprehensive guide, I'll share my tried and true methods, including everything from selecting the perfect rack to mastering the art of the dry rub and sauce. Whether you're a seasoned BBQ enthusiast or a complete newbie, this guide will equip you with the knowledge and confidence to make show-stopping ribs right in your own kitchen. Get ready for a flavour adventure you won't soon forget!
(Part 1) The Foundation: Choosing the Right Ribs
The first step to heavenly ribs is starting with quality ingredients. When it comes to ribs, there are two main types to consider: baby back ribs and spare ribs. Each has its own unique characteristics, and understanding their differences can help you choose the perfect match for your taste and occasion.
baby back ribs: The Classic Choice
Baby back ribs, also known as loin ribs, are a classic choice for a reason. They come from the upper part of the pig's rib cage, resulting in smaller, more tender ribs with a higher meat-to-bone ratio. This translates to a more delicate and flavourful eating experience, as the meat practically melts off the bone. The downside? Baby backs are typically more expensive due to their higher demand and perceived desirability.
Spare Ribs: The Hearty Option
Spare ribs, on the other hand, come from the lower part of the rib cage, making them larger and meatier than their baby back counterparts. They also tend to have a slightly tougher texture, which can be a bit more challenging to bite through. However, with proper cooking techniques, spare ribs can become incredibly tender and flavourful. And let's not forget the budget-friendly aspect: spare ribs are often less expensive than baby backs, making them a great choice for large gatherings or when you're on a tight budget.
My Preference: A Stance on Baby Backs
Personally, I'm a huge fan of baby back ribs. The leaner profile and tenderness make for a more refined eating experience. Plus, I love how the meat practically melts off the bone. But, if you're looking for a more substantial rib, or if you're on a tight budget, spare ribs are a fantastic choice. Ultimately, it comes down to your personal preference and what you're looking for in your rib experience.
(Part 2) The Art of the Dry Rub: Layering Flavour
A good dry rub is the secret weapon of any successful BBQ rib recipe. It's the key to infusing the meat with a deep, smoky flavour and creating that irresistible crust that makes you want to lick your fingers. There are endless possibilities when it comes to dry rubs, but I've found that a combination of sweet, salty, and smoky elements delivers the most satisfying flavour profile.
My Go-To Dry Rub: A Blend of Sweet, Smoky, and Savoury
For my oven-baked ribs, I use a dry rub that's equal parts sweet, smoky, and savoury. I call it my "Triple Threat" dry rub because it hits all the right notes, creating a symphony of flavour that's truly unforgettable:
- Sweet: I use brown sugar for its caramel notes and slight molasses flavour. It adds a touch of sweetness that balances the savoury and smoky elements of the rub.
- Smoky: I add smoked paprika and a touch of chili powder for that classic BBQ smokiness. These spices bring a depth of flavour that truly transports you to a smoky barbecue heaven.
- Savoury: I use salt, pepper, and garlic powder for depth and balance. The salt enhances the natural sweetness of the ribs, while the pepper adds a touch of heat and the garlic powder adds a savoury depth.
This combination creates a dry rub that's both incredibly flavourful and complements the inherent sweetness of the ribs. It's a winning formula that consistently delivers delicious results. But don't be afraid to experiment with your own unique blend! The beauty of BBQ is that there's no right or wrong way to do it. Get creative and see what flavour combinations you can come up with.
Applying the Dry Rub: The Key to Maximum Flavor
The key to applying a dry rub effectively is to ensure that it's evenly distributed across the surface of the ribs. You want to make sure that every nook and cranny is coated with flavour. I find that rubbing the dry rub directly into the meat, using firm, even strokes, delivers the most intense flavour. The rub should be well-incorporated into the meat, not just sitting on top.
Once the ribs are generously coated with the dry rub, I like to wrap them in plastic wrap and refrigerate them for at least 2 hours. This allows the flavours to penetrate the meat, resulting in ribs that are bursting with flavour. The longer you let the ribs marinate in the rub, the more intense the flavour will be.
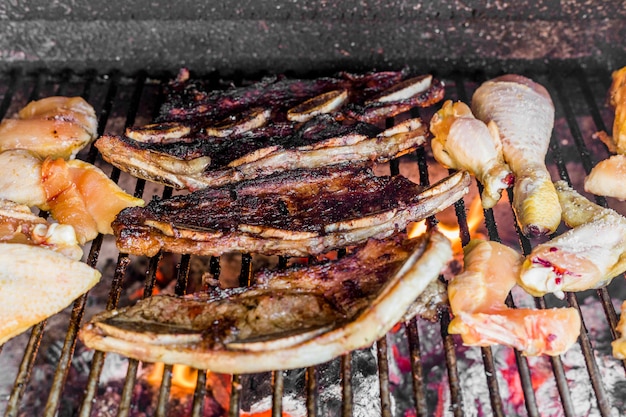
(Part 3) The Oven’s Role: Low and Slow is the Key
Oven-baked ribs are all about low and slow cooking. This gentle approach allows the meat to break down and become unbelievably tender, while the slow cooking process also helps to develop rich, complex flavours. Think of it as a culinary massage for your ribs – a slow, soothing process that transforms them into a symphony of flavour.
Prepping the Oven: Setting the Stage for Success
Before you even think about placing the ribs in the oven, set the stage for a successful cooking experience. The most crucial factor is setting the oven temperature to a low and steady heat. I typically set my oven to around 275°F (135°C). This low temperature ensures that the ribs cook evenly and slowly, without drying out. You want to create a gentle heat that encourages the meat to break down, not a harsh heat that will toughen it.
The Power of Patience: cooking time
Now comes the waiting game. Be warned, oven-baked ribs require patience. The exact cooking time can vary depending on the size and thickness of the ribs, but I generally allow about 3-4 hours for baby back ribs and 4-5 hours for spare ribs. The key is to be patient and trust the process. The longer the ribs cook, the more tender and flavorful they will become.
The Importance of Basting: Adding Moisture and Flavor
To keep the ribs moist and prevent them from drying out, basting is essential. I use a mixture of apple cider vinegar and water to create a flavorful baste that also helps to tenderize the meat. The apple cider vinegar adds a touch of tanginess, while the water helps to keep the ribs moist. I apply the basting liquid every hour or so, ensuring that the ribs stay juicy and flavorful throughout the cooking process. This continuous basting helps to create a beautiful, glossy finish and infuses the ribs with a subtle tanginess that complements the sweet and smoky flavours.
(Part 4) The Glaze: A Final Touch of Sweetness and Shine
The glaze is the icing on the cake when it comes to oven-baked BBQ ribs. It adds a final layer of sweetness and shine, taking the ribs to the next level of deliciousness. It's the finishing touch that transforms a good rib into a show-stopping masterpiece.
Building Your Own Glaze: A Personalized Touch
I prefer to make my own glazes from scratch, allowing me to control the sweetness, tanginess, and overall flavour profile. My go-to glaze features a combination of brown sugar, honey, apple cider vinegar, and Worcestershire sauce. It's a simple yet incredibly flavourful glaze that complements the smoky and savoury flavours of the ribs perfectly. The brown sugar adds a touch of sweetness, the honey adds a depth of flavour, the apple cider vinegar adds a touch of tanginess, and the Worcestershire sauce adds a savoury depth that ties everything together.
But don't be afraid to experiment with your own glaze combinations. Try adding a splash of bourbon or a pinch of cayenne pepper for a kick of heat. The possibilities are endless!
Applying the Glaze: Timing is Key
The key to applying the glaze is to do so in the last 30-45 minutes of cooking. This allows the glaze to caramelize beautifully and create a sticky, glossy finish. Avoid adding the glaze too early as it will burn and become overly caramelized. You want the glaze to caramelize just enough to create a beautiful, shiny finish without burning the ribs.
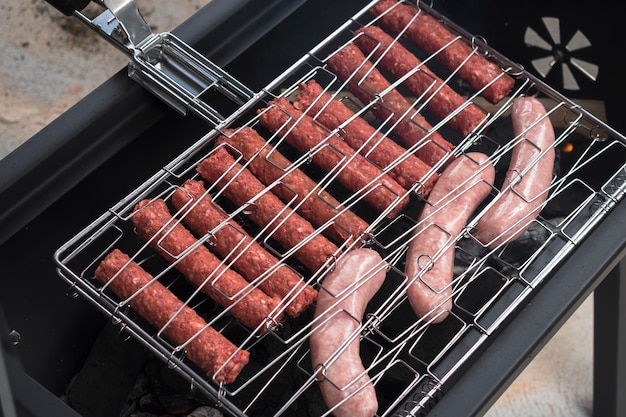
(Part 5) The Magic of Smoke: Achieving that Authentic BBQ Flavor
While oven-baked ribs may not have that classic smoky flavour that comes from grilling over wood, there are ways to achieve that authentic smoky taste at home. You don't need a fancy smoker to enjoy the smoky goodness. With a little creativity and some simple techniques, you can infuse your ribs with that signature smoky flavour.
The Power of Smoked Paprika: A Simple Solution
One easy trick is to incorporate smoked paprika into your dry rub. Smoked paprika adds a deep, smoky flavour to the ribs without requiring any special equipment. It's a simple yet effective way to achieve that smoky flavour without needing to invest in expensive equipment.
The Smoking Gun: An Alternative Approach
For a more intense smoky flavour, consider investing in a smoking gun. These devices create a cold smoke that can infuse your ribs with a rich, smoky aroma. Simply place the smoking gun in your oven and allow it to smoke for a few minutes before placing the ribs in the oven. The cold smoke will gently infuse the ribs with a smoky flavour that will enhance the overall taste.
(Part 6) The "Rest" is Essential: Allowing the Ribs to Relax
Once the ribs are cooked to perfection, don't rush to devour them! Allowing the ribs to rest for at least 15-20 minutes is crucial for a couple of reasons. First, it allows the juices to redistribute throughout the meat, resulting in incredibly tender and juicy ribs. Second, it allows the ribs to cool down slightly, making them easier to handle and cut.
Think of it as a culinary timeout for your ribs. It allows the meat to relax, reabsorb the juices, and become even more tender and flavorful. You'll be glad you waited!
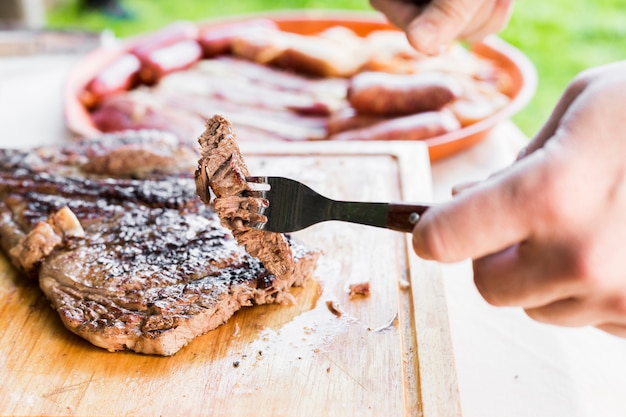
(Part 7) The Cutting Ceremony: The Moment of Truth
The moment of truth has arrived! It's time to cut into those ribs and experience the fruits of your culinary labour. Take a deep breath, savour the moment, and get ready to be amazed by the incredible tenderness and flavour that awaits you.
The "Fall Off the Bone" Test: A Sign of Success
A sure sign that your ribs are perfectly cooked is if the meat easily falls off the bone. If you need to use a knife to separate the meat from the bone, it means they need to cook a bit longer. You want the meat to be so tender that it practically melts off the bone. It's the ultimate test of a perfectly cooked rib.
Cutting Techniques: A Guide for Success
There are two main ways to cut ribs, each with its own advantages:
- Cutting Across the Ribs: This technique creates smaller, more manageable pieces. Simply cut the ribs into individual pieces by slicing across the bone. This is a great technique for serving ribs at a party or buffet, as it makes it easier for guests to manage the ribs.
- Cutting Along the Bone: This technique results in larger, more impressive pieces. Cut along the bone, separating the meat into long, rib-shaped pieces. This technique is perfect for a more elegant presentation, as it allows the ribs to retain their original shape and showcases the beautiful bone-in presentation.
(Part 8) Serving Suggestions: Elevate the Experience
Once your oven-baked BBQ ribs are cooked to perfection and have had a chance to rest, it's time to get creative with serving suggestions. You want to create a meal that's both delicious and visually appealing. After all, you deserve to celebrate your culinary success with a feast for the eyes as well as the palate.
Sides That Complement: Bringing the Flavors Together
To truly elevate your rib experience, choose sides that complement the smoky and savory flavours of the ribs. Think of sides that will enhance the overall taste and create a well-balanced meal.
Here are some of my favourite sides that pair perfectly with oven-baked BBQ ribs:
- Creamy Coleslaw: The tanginess and coolness of coleslaw provides a refreshing contrast to the richness of the ribs. It adds a touch of acidity that balances the sweetness and smokiness of the ribs.
- Baked Beans: Sweet and smoky baked beans are a classic BBQ side that pairs beautifully with ribs. They complement the smoky flavours of the ribs and add a touch of sweetness that enhances the overall taste.
- Cornbread: A warm slice of cornbread adds a touch of sweetness and texture to the meal. It absorbs the juices from the ribs and provides a comforting, slightly sweet element that balances the savory flavours.
- Mac and Cheese: Rich and creamy mac and cheese is a decadent side that elevates any rib dish. The creamy texture and cheesy flavour create a luxurious contrast to the smoky and tender ribs.
Presentation Matters: Creating a Visual Feast
Don't underestimate the power of presentation! Even the most delicious ribs deserve to be served on a beautiful platter. I like to arrange my ribs on a platter lined with parchment paper, and then garnish them with fresh parsley and a drizzle of bbq sauce. This creates a visually appealing presentation that makes the ribs look even more appetizing.
Think of it as a culinary masterpiece. You've put in the time and effort to create a delicious dish, so why not make it look as good as it tastes? A little bit of creativity can go a long way in enhancing the dining experience.
(Part 9) FAQs: Common Questions and Answers
Here are some frequently asked questions about oven-baked BBQ ribs, along with my insider tips and advice:
| Question | Answer |
|---|---|
| How do I know if my ribs are done? | The ribs are done when the meat is tender enough to pull away from the bone with minimal effort. The internal temperature should reach about 190°F (88°C). You can check the temperature using a meat thermometer. If the meat is tender and the temperature is reached, your ribs are ready to enjoy! |
| What if my ribs are too dry? | If your ribs are too dry, you can add a little bit of BBQ sauce during the last 30 minutes of cooking. This will help to rehydrate the ribs and add a touch of moisture and flavour. You can also try wrapping the ribs in foil for the last hour of cooking to help retain moisture. This will create a steamy environment that helps to keep the ribs moist and tender. |
| Can I cook ribs in advance? | Absolutely! You can cook the ribs ahead of time and reheat them later. To reheat, simply wrap the ribs in foil and bake them in a preheated oven at 300°F (150°C) for about 30 minutes. This will allow the ribs to reheat evenly and retain their moisture. |
| How can I make my ribs extra smoky? | To achieve a more intense smoky flavour, use a smoking gun or try adding a few drops of liquid smoke to your BBQ sauce. A smoking gun will infuse the ribs with a cold smoke that will enhance the smoky flavour. Liquid smoke is a concentrated smoke flavouring that can be added to your BBQ sauce to give it a smoky kick. |
| What are some tips for storing leftovers? | Store leftover ribs in an airtight container in the refrigerator for up to 3 days. You can reheat them in the oven or microwave. When reheating, it's best to wrap the ribs in foil to prevent them from drying out. |
Making oven-baked BBQ ribs is an incredibly rewarding experience. It's a delicious and satisfying dish that's sure to impress your guests. So, gather your ingredients, don your apron, and get ready to embark on a culinary adventure that will leave you craving more!
Everyone is watching

Perfect Rice Every Time: The Ultimate Guide to Cooking Rice
Cooking TipsAs a self-proclaimed foodie, I've always been a bit obsessed with rice. It's the foundation of countless cuisi...

Prime Rib Roast Cooking Time Chart: Per Pound Guide
Cooking TipsPrime rib roast. Just the name conjures images of lavish dinners, crackling fires, and hearty laughter. It’s ...

The Ultimate Guide to Cooking Asparagus: Tips, Techniques, and Recipes
Cooking TipsAsparagus. The mere mention of this spring delicacy conjures up images of vibrant green spears, crisp and burs...

Ultimate Guide to Cooking the Perfect Thanksgiving Turkey
Cooking TipsThanksgiving. Just the word conjures up images of overflowing tables laden with delicious food, the scent of r...

How Long to Bake Potatoes in the Oven (Perfect Every Time)
Cooking TipsBaked potatoes are a staple in my kitchen. They're incredibly versatile, delicious, and surprisingly easy to m...