You’ve got your hands on a beautiful piece of ny strip steak, and the grill is calling. It's time to fire it up and create a culinary masterpiece! But before you start flipping, let's delve into the world of grilling NY strip to perfection. From choosing the right cut to mastering the final resting phase, I'm here to guide you through every step of the journey.
(Part 1) Choosing Your Steak - The Foundation of a Great Meal
You know the saying, "you can't make a silk purse out of a sow's ear"? Well, it’s the same with steak. The quality of your steak is the foundation of a truly delicious meal. So, let’s start with the basics of choosing a great NY strip.
The Marbling Factor - Unveiling Flavorful Secrets
When you’re shopping for your NY strip, you’ll often hear the word “marbling” thrown around. It's a fancy way of saying "the white streaks of fat running through the muscle". Now, don’t get scared off by the fat! Marbling is what adds that incredible juiciness and flavor to your steak. Think of it like the sprinkles on a cupcake, they make it extra special! Aim for a steak with good marbling, but avoid those with too much fat, as it can make the steak greasy.
Thickness is King - Even Cooking is Essential
Another important factor to consider is the thickness of your steak. You want a cut that’s at least an inch thick, and preferably a bit more. A thicker steak will cook more evenly and retain its moisture better. Imagine trying to cook a thin piece of paper in a pan, it’d just burn! A thicker steak gives you more room to work with and a greater chance of getting that perfect, juicy bite.
(Part 2) Preparing Your Steak - Getting Ready for the Grill
You’ve found the perfect steak, now it’s time to get it ready for the grill. Think of this as a pre-show warm-up for your culinary star.
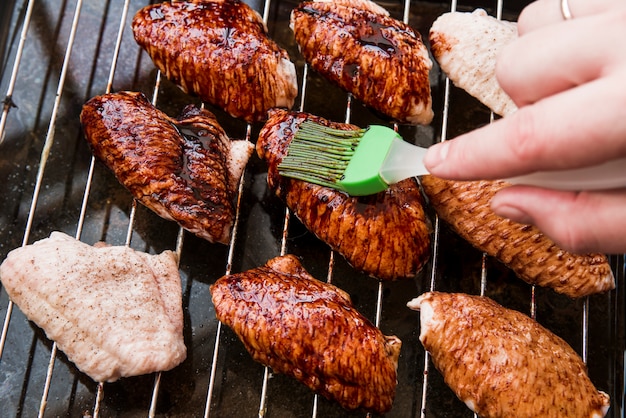
Seasoning is Art - Unleashing the Flavor Potential
Salt and pepper are the classic duo for steak seasoning. My personal preference? Coarse salt, it adds a lovely crunch, and freshly ground black pepper. You can also play around with other spices like garlic powder, onion powder, paprika, or even a blend of rosemary and thyme. Just remember, less is more! You want to enhance the natural flavors of the steak, not mask them with a spice overload.
Let It Rest - The Importance of Temperature
Before you even think about firing up the grill, let your steak rest at room temperature for about 30 minutes. This lets the steak come to a more even temperature, leading to a more consistent cook. Imagine a cold steak going straight onto a hot grill, it’ll be a shock to the system and won't cook evenly. This resting period gives the steak a chance to adjust and become more receptive to the heat.
(Part 3) Prepping Your Grill - The Stage for Your Steak
Now that your steak is ready, it’s time to prepare the stage where it will shine: your grill.
Get That Grill Hot - The Key to perfect sear Marks
You want your grill nice and hot, screaming hot! For a gas grill, aim for medium-high heat, around 450-500°F (230-260°C). For a charcoal grill, you want those coals burning white-hot, those are your best friends for a delicious sear.
Clean Your Grill - A Clean Slate for Your Steak
Before you start cooking, give your grill a quick clean with a wire brush. Remove any debris or food bits that might interfere with your steak's cooking. A clean grill helps prevent sticking and ensures even cooking, resulting in a beautiful char on every side.
(Part 4) Grilling Time - The Show Begins
Here it is, the moment you’ve been waiting for, the moment when your NY strip takes center stage.
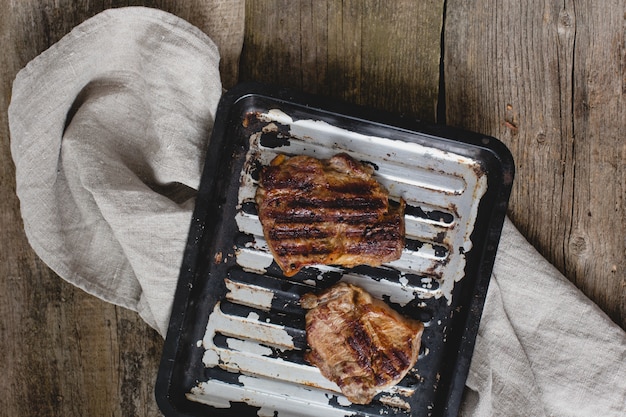
Mark Those Grill Lines - Creating a Culinary Masterpiece
Place your steak on the hot grill and let it cook for about 2-3 minutes per side. This is where you’ll get those beautiful grill marks that tell the story of your culinary adventure. It's not just about aesthetics, it's about flavor! The sear creates a delicious crust that locks in those juicy flavors.
Flip It Over - Time for the Other Side
After those initial sear marks, flip your steak over and cook for another 2-3 minutes per side. Each flip is another step towards perfection.
Check for Doneness - The Art of Knowing When It's Ready
You can check the doneness of your steak by pressing gently on it. A rare steak will feel soft and springy, a medium-rare steak will be slightly firm, and a medium steak will feel more firm. If you’re unsure, grab a meat thermometer, it’s your trusty sidekick in this culinary adventure. Here’s a quick guide:
| Doneness | internal temperature (°F) |
|---|---|
| Rare | 125-130 |
| Medium-Rare | 130-135 |
| Medium | 135-140 |
| Medium-Well | 140-145 |
| Well Done | 145 |
Cook It to Your Liking - Personalizing Your Steak Experience
For a medium-rare steak, you’ll want to cook it for about 8-10 minutes total. For a medium steak, cook it for about 10-12 minutes. Remember, these are just guidelines, adjust the cooking time based on your desired level of doneness.
(Part 5) Resting is Key - Letting the Steak Relax and Rejuvenate
Your steak is cooked to your liking, but the performance isn't over yet. This is where patience pays off.
Resting Time - The Art of Patience
Take your steak off the grill and let it rest for about 5-10 minutes before slicing and serving. This allows the juices to redistribute throughout the steak, resulting in a more tender and juicy bite. Think of it like a post-workout cooldown, giving your steak a chance to recover and reach its full potential.
Cover It Up - Preserving the Heat and Moisture
Place your steak on a cutting board and cover it loosely with foil. This helps keep it warm and prevents it from drying out. The steam trapped inside the foil acts as a mini-sauna, keeping the steak moist and delicious.
(Part 6) Serving Time - Presenting Your Culinary Creation
Finally, the moment of truth! Your steak is cooked, rested, and ready to be enjoyed.
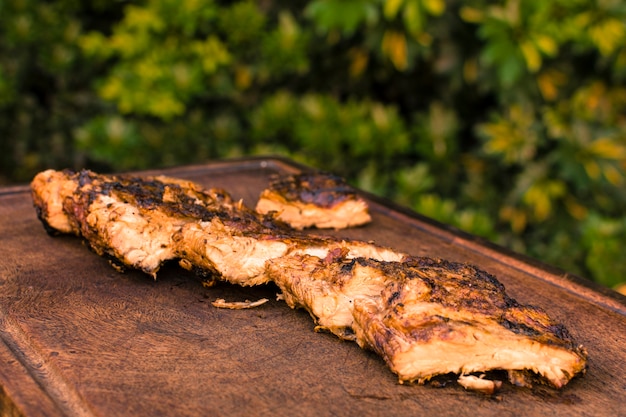
Slicing It Up - The Final Touch
Slice your steak against the grain. This means cutting across the muscle fibers, which will make it easier to chew and will showcase the beautiful marbling. Every bite will be a delicious and effortless experience.
Add Some Sides - Completing the Culinary Ensemble
Serve your steak with your favorite sides. Some classic pairings include mashed potatoes, asparagus, grilled corn on the cob, or a simple salad. These sides will complement the flavors of your steak, creating a harmonious culinary ensemble.
(Part 7) Mistakes to Avoid - Learning from Others’ Experiences
We all make mistakes, especially when it comes to grilling. Here are a few common errors to avoid:
Overcrowding the Grill - Giving Your Steak Room to Breathe
Don't overcrowd your grill. This will make it difficult to cook the steaks evenly and will lower the temperature of the grill. Think of your grill like a concert stage, your steak deserves its own space to shine.
Not Using a Meat Thermometer - Knowing Your Steak's Temperature
If you're unsure about the doneness of your steak, use a meat thermometer. It's the only way to know for sure that your steak is cooked to your liking. It’s like a backstage pass for your steak, giving you a peek into its inner workings.
Not Letting It Rest - The Importance of Patience
Don't forget to let your steak rest before serving. This will ensure that the juices redistribute and the steak stays juicy. The resting period is crucial for the final act of your culinary performance.
(Part 8) Tips and Tricks - Taking Your Skills to the Next Level
Now for some pro-level tips to elevate your NY strip grilling game and take your steak to the next level.
Use a Grill Brush - Keeping Your Grill in Top Shape
A grill brush is a must-have for any grilling enthusiast. It will help you keep your grill clean and prevent your steak from sticking. Think of it as a backstage crew, keeping the stage clean and ready for your next act.
Control the Heat - Finding the Right Temperature
If your grill is too hot, it will burn the outside of the steak before the inside has a chance to cook properly. If your grill is too cool, the steak will cook slowly and unevenly. It's like finding the perfect lighting for your steak, it needs the right amount of heat to shine.
Marinate Your Steak - Adding Depth of Flavor
Marinating your steak can add flavor and tenderness. Use a marinade that you like and let the steak soak for at least 30 minutes, or even overnight. Think of it as a pre-show dressing room, giving your steak a boost of confidence and flavor.
Use a Meat Thermometer - Knowing When It's Ready
Using a meat thermometer is the most reliable way to know that your steak is cooked to your liking. It’s like a backstage manager, giving you a glimpse into the heart of your steak.
(Part 9) FAQs - Addressing Common Concerns
Let's address some common questions about grilling NY strip steak:
1. Can I grill NY strip steak on a gas grill?
Absolutely! A gas grill is a great way to cook NY strip steak. Just make sure to get the grill hot before you put the steak on.
2. What is the best way to prevent my steak from sticking to the grill?
The best way to prevent your steak from sticking to the grill is to make sure that the grill is clean and hot. Also, try lightly oiling the grill grates before you put the steak on.
3. Can I use a meat thermometer to check the doneness of my steak?
Yes! A meat thermometer is the most accurate way to check the doneness of your steak. Just make sure to insert the thermometer into the thickest part of the steak and avoid touching the bone.
4. How long should I let my steak rest before slicing and serving?
You should let your steak rest for about 5-10 minutes before slicing and serving. This allows the juices to redistribute and the steak to become more tender and juicy.
5. What are some good sides to serve with NY strip steak?
Some good sides to serve with NY strip steak include mashed potatoes, asparagus, grilled corn on the cob, or a simple salad.
There you have it! A complete guide to grilling a perfect NY strip steak. It’s all about preparation, practice, and a bit of patience. Don’t be afraid to experiment with different seasonings and marinades to find what you enjoy the most. And remember, even the most experienced grill masters have their moments of burnt steak. So relax, have fun, and enjoy the delicious results!
Everyone is watching

Perfect Rice Every Time: The Ultimate Guide to Cooking Rice
Cooking TipsAs a self-proclaimed foodie, I've always been a bit obsessed with rice. It's the foundation of countless cuisi...

Ultimate Guide to Cooking the Perfect Thanksgiving Turkey
Cooking TipsThanksgiving. Just the word conjures up images of overflowing tables laden with delicious food, the scent of r...

The Ultimate Guide to Cooking Asparagus: Tips, Techniques, and Recipes
Cooking TipsAsparagus. The mere mention of this spring delicacy conjures up images of vibrant green spears, crisp and burs...

Can You Cook Spaghetti with Gasoline? (The Shocking Truth)
Cooking TipsWe've all seen those crazy internet trends. You know, the ones that make you wonder, "Did someone actually try...

Chorizo and Eggs Recipe: The Ultimate Guide
Cooking TipsRight, let’s talk about chorizo and eggs. You know, that classic Spanish dish that's always a winner. It's th...