Let’s talk meatloaf, a dish that evokes warm feelings of home-cooked meals and happy memories. It's a hearty, satisfying classic, but nailing it isn't always a walk in the park. You've got the mixing, the shaping, the baking, and then the crucial part – ensuring it’s cooked perfectly through and through. That's where the cooking temperature comes in, the secret to a truly delicious meatloaf. I've spent years perfecting my meatloaf game, and I'm ready to share all my tips and tricks, including the science behind that perfect internal temperature.
(Part 1) The Science of a Safe and Delicious Meatloaf

Why Temperature Matters: A Safety First Approach
We’re not just aiming for flavor here, folks. When you bake a meatloaf, you’re essentially using heat to eliminate any lurking bacteria within the ground meat. The internal temperature of your meatloaf must reach a specific point to ensure it's safe to eat. That magic number is 160°F (71°C). It's the minimum temperature guaranteed to eliminate any potentially harmful microbes. This isn’t just a guideline – it's a crucial safety measure. You can certainly go higher, but going below 160°F is a big no-no.
The "Goldilocks Zone" of meatloaf temperature
Here's the thing: temperature isn’t just about safety; it’s also about texture and taste. If your meatloaf is undercooked, it’ll be a bit chewy and potentially unsafe. On the flip side, overcooked meatloaf turns into a dry, tough, and frankly, disappointing experience. We want juicy, flavorful meatloaf, not something that resembles a hockey puck! The perfect temperature is that "Goldilocks Zone," where the meat is cooked through but retains its moistness and tenderness.
(Part 2) The Tools of the Trade: Ensuring Accuracy

meat thermometer: Your New Best Friend
Forget those old-school methods of poking the meatloaf with a knife to guess its doneness. It's time to invest in a reliable meat thermometer, a kitchen essential for any meat lover. A digital thermometer is the way to go, providing precise readings and a much faster response time. Keep it close by in your kitchen drawer – you'll be reaching for it often, not just for meatloaf but for chicken, turkey, and any other dish where temperature is key.
Choosing the Right Oven: Setting the Stage for Success
Your oven plays a surprisingly significant role in how your meatloaf cooks. A conventional oven is usually the best choice, delivering even heat distribution for a beautiful golden brown crust and consistently cooked core. You might also consider a fan-forced oven, which can speed up the cooking process and contribute to even cooking. However, be sure to adjust your baking time and temperature accordingly. A fan-forced oven often requires a lower temperature than a conventional oven for the same results.
(Part 3) The Meatloaf Mix: A Foundation of Flavor

Choosing the Right Meat: The Base of Your Loaf
We're talking ground beef, the heart of a classic meatloaf. Ground chuck is the tried-and-true choice, but feel free to experiment with ground sirloin, ground round, or even a blend of different cuts. Just make sure it's fresh and of good quality. Don’t be afraid to chat with your butcher; they’re the experts and can guide you toward the perfect blend for your taste.
The Art of Blending Flavors: Beyond the Basics
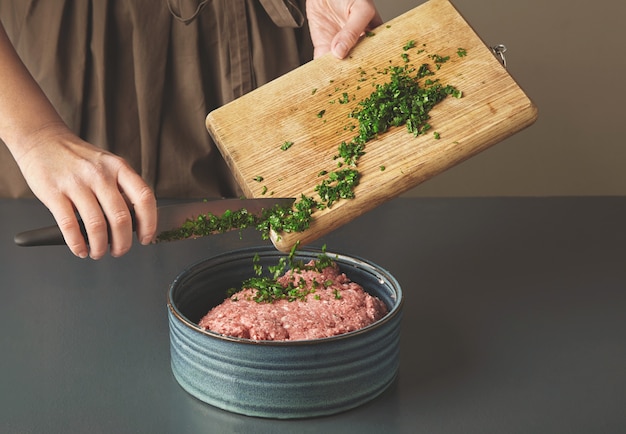
Here's where the fun really begins! The magic of meatloaf lies in its versatility. You can add a whole symphony of flavors to your mix, enhancing both taste and texture. Think chopped onions, grated carrots, breadcrumbs, herbs like thyme and rosemary, spices like garlic powder and paprika, even a splash of Worcestershire sauce for a savory depth. Experiment with different combinations, create your own signature blends.
Just remember to mix everything thoroughly. You want a cohesive mixture that holds its shape when you form it into your loaf. And don't forget to season generously with salt and pepper, the foundation of any good meatloaf.
Shaping Your Meatloaf: A Touch of Creativity
Now, this is where a bit of technique and artistry come into play. You can shape your meatloaf in a couple of classic ways. For a traditional loaf, form it into a long rectangle, about 2 inches thick. You can also mould it into a round shape. Or, if you're feeling adventurous, get creative! Some folks even shape their meatloaf into a crown or a heart.
No matter your chosen shape, make sure it’s a bit wider than your baking dish. This gives the meatloaf room to expand during cooking, preventing it from overflowing. It's all about those finishing touches, right? A visually appealing meatloaf is just as important as a delicious one.
(Part 4) Baking Your Meatloaf: Reaching Peak Flavor
Preheat for Perfection: Setting the Stage
It may sound obvious, but preheating your oven is crucial. This ensures that your meatloaf cooks evenly from the get-go. Most ovens need about 10-15 minutes to preheat, so factor that into your timing.
The Right Baking Dish: A Foundation for Success
Select a baking dish that's a good size for your meatloaf. It shouldn’t be too small, or the meatloaf will bulge over the sides. An 8x4 inch loaf pan or a 9x13 inch baking dish is a good starting point. And don't forget to grease the dish with some butter or cooking spray to prevent the meatloaf from sticking. This little step makes clean-up a breeze and ensures your meatloaf slides out perfectly.
Baking Time: A Guiding Light for Doneness
Baking time for meatloaf varies depending on its size and your oven's temperature. Generally, a 2-inch thick meatloaf will take about 1 hour to cook. However, your trusty meat thermometer is your ultimate guide.
Don't be tempted to rush the process. Patience is key here! When your meat thermometer registers 160°F (71°C) in the thickest part of your meatloaf, it's ready to come out of the oven. Don't rely solely on time; always double-check with that thermometer for perfect results.
(Part 5) The Finishing Touches: Adding Extra Zest
Garnishing for Glory: The Final Flourish
Now for the fun part! You can create a vibrant topping that not only enhances flavor but also adds visual appeal. Ketchup is a classic choice for that glossy, sweet finish, but don't be afraid to get creative. You can also use barbecue sauce, brown sugar, mustard, or even a breadcrumb mixture for a crunchier texture.
I love using a simple mixture of breadcrumbs, chopped onion, and parsley for a touch of freshness and a contrasting texture. Just sprinkle it over the top of your meatloaf before baking. You can also get fancy and add some bacon strips or slices of tomato for an extra burst of flavor. Remember, the possibilities are endless!
Resting Time: Patience Pays Off
It's tempting to dig in right away, but resist the urge! Once the meatloaf is cooked, let it rest for about 10-15 minutes before slicing and serving. This allows the juices to redistribute, preventing the meatloaf from being dry. Just imagine those juicy, succulent slices waiting for you! A little patience ensures a much more flavorful experience.
(Part 6) Troubleshooting: Conquering Common Meatloaf Challenges
The Meatloaf Cracks: Preventing a Culinary Disaster
Ah, the dreaded cracked meatloaf! This usually happens when the meat is overcooked or when the mixture is too dry. To prevent this, ensure you're using a good quality meat mix and avoid overcooking. Also, try to avoid overmixing the meat. Gentle mixing is your best friend here! And remember, a little extra fat in the mix can also help prevent cracking.
The Meatloaf Falls Apart: Ensuring Structural Integrity
This can be a real downer! It usually happens when the meatloaf hasn't been bound well enough. To combat this, use enough binder, like breadcrumbs or oats, to hold everything together. Also, ensure your meat is well-mixed, and don't be afraid to pack it firmly into the baking dish. The more compact the mixture, the less likely it is to fall apart.
The Meatloaf is Dry: Adding Back the Moisture
A dry meatloaf is a sad meatloaf! It can happen if you overcook it or use too little fat. To avoid this, use a lean ground meat but don't overcook it. You can also add extra moisture to the meatloaf mix, such as chopped vegetables, fruit, or even a splash of milk or broth.
(Part 7) Beyond the Classic: Meatloaf Adventures
Spice Up Your Loaf: Herbal and Spicy Variations
Don't be afraid to experiment! Add your favorite herbs and spices to your meatloaf for a unique flavor profile. Some popular options include oregano, basil, thyme, garlic powder, paprika, and cayenne pepper for a touch of heat. For a bolder flavor, add a pinch of chili powder or a few slices of jalapeno pepper.
Vegetable Power: Adding Texture and Nutrients
Get creative with vegetables! You can add chopped onions, carrots, celery, peppers, or even mushrooms to your meatloaf. They'll add flavor, texture, and a boost of nutrients. I love adding a handful of chopped spinach for an extra dose of greens.
Global Flavors: Embracing International Inspiration
Meatloaf isn’t just a Western dish. Explore the world of flavors by incorporating elements from other cuisines. You can add chopped olives, sun-dried tomatoes, or feta cheese for a Mediterranean twist. Or, add a touch of Asian inspiration with soy sauce, ginger, and garlic. The possibilities are endless!
(Part 8) Serving Up Meatloaf Perfection: Accompaniments and Presentation
The Perfect Pairings: Sides for Your Masterpiece
Let's talk sides! You can't go wrong with mashed potatoes, gravy, green beans, or a simple salad. I also love serving my meatloaf with a side of roasted vegetables or a sweet and tangy coleslaw. The beauty of meatloaf is that it pairs well with so many options, allowing you to create a complete and satisfying meal.
Time to Indulge: The Presentation Matters
Now, let's get to the part we've all been waiting for: dig in! Slice your beautifully cooked meatloaf, ensuring each slice has a bit of that golden brown crust. Spoon over a generous helping of gravy, if you're using it, and then arrange your side dishes on the plate. Take a bite and let those delicious flavors burst in your mouth!
(Part 9) FAQs: Your Meatloaf Questions Answered
What is the best way to store leftover meatloaf?
Leftover meatloaf should be stored in an airtight container in the refrigerator. It’s best to consume it within 3-4 days. To reheat, you can microwave it, bake it in the oven, or pan-fry it.
Can I freeze meatloaf?
Absolutely! Wrap your cooked meatloaf tightly in plastic wrap and then place it in a freezer-safe bag. It can be stored in the freezer for up to 3 months. To thaw, place it in the refrigerator overnight. To reheat, you can bake it in the oven or pan-fry it.
What happens if my meatloaf is undercooked?
If your meatloaf is undercooked, it’s important to cook it further until it reaches the safe internal temperature of 160°F (71°C). You can do this by placing it back in the oven or using a skillet on the stovetop.
What can I do with leftover meatloaf?
The possibilities are endless! You can slice it up and serve it on sandwiches or wraps. You can also dice it up and add it to soups, stews, or chili. Get creative!
How do I make sure my meatloaf isn’t too dry?
Here are some tips: use lean ground meat but don't overcook it, add some moisture to the mix with chopped vegetables, fruit, or milk, and use a binder like breadcrumbs or oats.
Remember, practice makes perfect. Get in the kitchen, experiment, and create your own delicious meatloaf masterpiece. You'll be surprised by the incredible range of flavors and textures you can achieve with this versatile dish.
Everyone is watching

Prime Rib Roast Cooking Time Chart: Per Pound Guide
Cooking TipsPrime rib roast. Just the name conjures images of lavish dinners, crackling fires, and hearty laughter. It’s ...

How Long to Bake Potatoes in the Oven (Perfect Every Time)
Cooking TipsBaked potatoes are a staple in my kitchen. They're incredibly versatile, delicious, and surprisingly easy to m...

Perfect Rice Every Time: The Ultimate Guide to Cooking Rice
Cooking TipsAs a self-proclaimed foodie, I've always been a bit obsessed with rice. It's the foundation of countless cuisi...

The Ultimate Guide to Cooking Asparagus: Tips, Techniques, and Recipes
Cooking TipsAsparagus. The mere mention of this spring delicacy conjures up images of vibrant green spears, crisp and burs...

Ultimate Guide to Cooking the Perfect Thanksgiving Turkey
Cooking TipsThanksgiving. Just the word conjures up images of overflowing tables laden with delicious food, the scent of r...
