stainless steel cookware: that gleaming, ubiquitous presence in most kitchens. It holds a certain allure, a promise of culinary prowess, but let's be honest, it can be a bit intimidating. When I first started out, I was convinced that stainless steel was an enemy of perfectly cooked food - everything stuck, heating felt uneven, and I was left wondering if I'd chosen the wrong side in the cookware wars. Thankfully, I discovered that stainless steel is like a good friend: a bit demanding at first, but incredibly rewarding once you get to know it.
This article is my love letter to the art of stainless steel cooking, a culmination of years of experimentation, frustration, and ultimately, triumph. We'll journey together from beginner to confident cook, unraveling its secrets, one pan at a time. Grab your trusty pan, a dash of curiosity, and let's dive in!
(Part 1) Stainless Steel Cookware 101: Choosing Your Culinary Companion

Stainless steel cookware, at its core, is a blend of iron, chromium, and nickel, each ingredient contributing to its impressive strength, durability, and rust resistance. However, these same elements can make it a bit of a culinary puzzle at first. It's not as forgiving as its non-stick or cast iron counterparts, meaning you need to approach it with a little more finesse.
Navigating the World of Stainless Steel
The key to mastering stainless steel cooking is choosing the right pan, the one that will become your culinary partner. It's a bit like picking out a good pair of shoes: you want something that fits right, feels comfortable, and is ready to go the distance. Here's what to look for:
- Gauge: The thickness of the metal is crucial. A heavier gauge, around 16-gauge or heavier, ensures even heat distribution. Think of it as a well-built car: it might take longer to accelerate, but once it gets going, it's smooth and consistent. Lighter-gauge pans can have hot spots, leading to uneven cooking.
- Base: Look for a pan with an aluminum or copper core on the bottom. It acts like a conductor, efficiently distributing heat throughout the pan, preventing hot spots, and ensuring that your food cooks evenly.
- Handles: Securely attached handles are paramount! I personally prefer riveted handles for their longevity. Hollow handles will heat up faster than solid ones, so if you choose hollow, keep a pot holder handy.
- Lid: A well-fitting lid is crucial for trapping heat and steam, creating a controlled environment for cooking. Choose a lid that's heat-resistant and easy to handle.
Remember, you don't need to buy a whole set right away. Start with a few essential pieces like a sauté pan, a stockpot, and a small saucepan. As you progress, you can add more pieces to your collection, expanding your culinary repertoire.
(Part 2) Prepping Your Stainless Steel: Setting the Stage for Success

Just like a seasoned chef carefully prepares their ingredients, your stainless steel pan deserves a little TLC before its first use. This isn't about seasoning like you would with cast iron, but rather prepping it for optimal performance.
A Gentle Touch for a Great Start
Think of this as a mini-spa treatment for your pan:
- Wash with soapy water: Remove any factory oils or residues with mild dish soap and hot water.
- Dry thoroughly: A damp pan is a recipe for uneven heating and potential damage. Make sure it's completely dry before moving on.
- Heat the pan: Place the pan on medium heat for 2-3 minutes. This helps create a thin layer of oil, making it easier for food to release and preventing sticking.
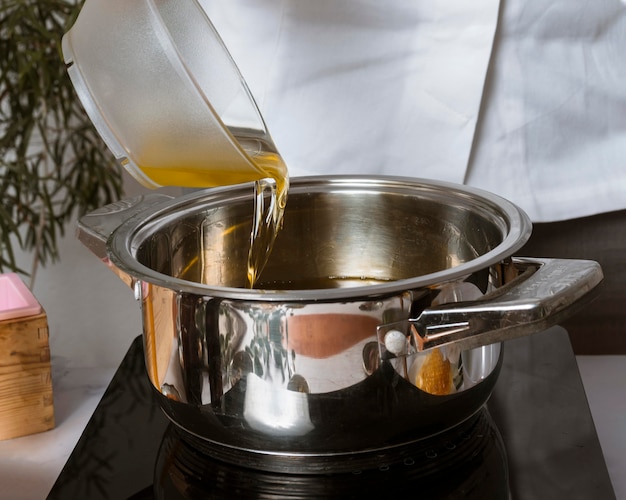
- Apply a thin layer of oil: Use a high-heat oil like canola or vegetable oil. Once the pan is hot, add a teaspoon of oil and swirl it around to coat the entire surface. Let the oil cool before proceeding.
- Wipe off excess oil: Use a paper towel to remove any excess oil. Your pan is now ready to be a star in the kitchen!
Caring for Your Culinary Companion
Once you’ve seasoned your stainless steel cookware, it’s like a good friendship: you need to maintain it to keep it thriving. Here are some tips to ensure its longevity:
- Low to medium heat: While stainless steel can handle high heat, it’s best to avoid extremes. Overheating can warp and damage the pan.
- Gentle cleaning: Stick to mild dish soap and hot water. Avoid abrasive sponges or scouring pads, as they can scratch the surface and lead to sticking.
- Skip the metal utensils: Opt for silicone, nylon, or wooden utensils. Metal utensils can scratch the surface and damage the finish.
- Avoid soaking: Prolonged soaking can cause rust. If you need to soak, use a mild soap solution and dry it immediately.
(Part 3) The Science of Heat and Food: A Culinary Duet

Understanding how heat interacts with stainless steel is like learning a new language: it opens up a world of possibilities. It’s not as simple as turning up the heat; it’s about finding the right rhythm and pace for each dish.
Heat Distribution: A Tale of Two Temperatures
Heat travels from the bottom of the pan up. This means you need to monitor the temperature carefully. Stainless steel can sometimes have "hot spots" where the heat is concentrated, leading to uneven cooking. Choosing a good quality pan with a heavier gauge and a layered base can help mitigate this issue.
Heat Levels: Finding the Right Harmony
Different cooking techniques require different heat levels. Searing a steak needs a high temperature, while simmering a soup requires a gentle, even warmth. It's all about finding the right balance between heat and time.
As you cook, learn to read the subtle cues the pan provides. A quick touch to the bottom of the pan will reveal its temperature. If it's hot to the touch, it's probably ready. You can also learn to decipher the changes in the pan's surface as it heats up. A small droplet of water will sizzle and evaporate quickly on a very hot pan.
Stirring and Flipping: A Choreographed Movement
When cooking in stainless steel, mastering the art of stirring and flipping is like a dance, requiring precision and timing.
- Gentle stirring: Avoid scraping the bottom of the pan aggressively, especially when cooking delicate dishes like sauces or eggs. A gentle, circular motion helps prevent breaking up the food and sticking.
- Flipping with finesse: Lift food with confidence, using a spatula or slotted spoon. Avoid pressing down on the food, as this can cause sticking and break apart.
- Listen to the food: Pay attention to the sounds the food makes. A sizzle or crackle indicates it's cooking. A silent simmering sound usually means it's ready to be flipped.
It takes time to develop this instinct, but with practice, you'll learn to anticipate the needs of your dish and move with ease. It’s a matter of learning to work with the material, not against it.
(Part 4) Conquer the Basics: Sautéing, Frying, and Simmering
Now that we've laid the foundation, it’s time to put these principles into practice. Let's explore three essential cooking techniques, each showcasing the versatility of stainless steel.
Sautéing: A Symphony of Flavor
Sautéing is a technique that cooks food quickly over high heat, resulting in a delicious sear and a tender, flavorful interior. It's like a whirlwind of flavors, and stainless steel is the perfect conductor.
- Preheat the pan: Heat the pan over high heat for 2-3 minutes. The pan should be hot enough to cause a small drop of water to sizzle immediately. This ensures even heat distribution and prevents sticking.
- Add oil: Use a high-heat oil like canola, vegetable, or grapeseed oil. Add just enough to coat the bottom of the pan. The oil should shimmer and flow freely, indicating it's ready.
- Add food: Avoid overcrowding the pan. Cook in batches if needed to ensure each piece has enough space to cook evenly.
- Cook with a gentle touch: Stir or flip the food gently. Avoid scraping the bottom of the pan aggressively, as this can damage the surface and cause sticking.
- Reduce heat if needed: If the food is browning too quickly, reduce the heat to prevent burning. The goal is to achieve a beautiful golden sear while ensuring the food is cooked through.
- Remove food: Once cooked, remove the food from the pan and set it aside. You can use the remaining oil to cook other ingredients or to create a sauce.
Frying: Achieving a Golden, Crispy Perfection
Frying in stainless steel is about achieving a crispy exterior and a juicy interior. It's like a culinary adventure, and with the right tools and technique, you can create restaurant-worthy results.
- Choose the right oil: Use an oil with a high smoke point like peanut oil, vegetable oil, or canola oil. This prevents burning and imparts a pleasant flavor to the food.
- Heat the oil to the right temperature: The ideal temperature for frying is around 350°F to 375°F. Use a kitchen thermometer to check the temperature, or try the "breadcrumb test". If a breadcrumb browns and floats to the surface within seconds, the oil is ready.
- Add food carefully: Avoid overcrowding the pan. Cook food in batches to ensure even cooking and prevent the oil temperature from dropping too much.
- Fry until golden brown: Cook until the food is golden brown and crispy. Be careful not to overcook it, as it can become dry and tough.
- Remove food and drain excess oil: Remove the food from the pan with a slotted spoon or spider strainer and place it on a wire rack to drain excess oil. This prevents the food from becoming soggy.
Simmering: A Slow and Steady culinary journey
Simmering is a gentle, low-temperature cooking method, perfect for delicate dishes like soups, stews, and sauces. Think of it as a slow, deliberate dance, allowing flavors to meld and ingredients to become tender.
- Use a low heat setting: Maintain a low, steady simmer. If using an electric stovetop, try a setting between 1 and 3. If using a gas stovetop, use the lowest flame setting.
- Use a lid: Cover the pan with a lid to trap heat and moisture, ensuring a consistent temperature and preventing the food from drying out.
- Adjust heat as needed: Keep an eye on the temperature and adjust the heat as needed to maintain a gentle simmer. The food should bubble gently, not boil vigorously.
- Stir occasionally: Stir the food occasionally to prevent sticking and ensure even cooking.
- Be patient: Simmering takes time, so don’t rush the process. The longer the food simmers, the more flavorful and tender it will become.
(Part 5) Building a Flavorful Foundation: The Art of Deglazing
Deglazing is a technique that transforms the browned bits of food, called fond, that stick to the bottom of the pan into a flavorful sauce. Think of it as a culinary alchemy, turning remnants into something exquisite.
Here’s how to master the art of deglazing:
- Remove the food: Once you've cooked the food, remove it from the pan and set it aside. Don't wash the pan yet!
- Add the deglazing liquid: Pour in your choice of liquid like wine, broth, or juice. The liquid should be cold or at room temperature to create steam when it hits the hot pan.
- Scrape the fond: Use a wooden spoon or spatula to scrape the fond from the bottom of the pan. It might be a bit stubborn, but with gentle scraping, it should come off easily.
- Simmer and reduce: Simmer the liquid over medium heat for a few minutes to reduce it and thicken the sauce. Add herbs, spices, or butter to customize the sauce.
- Add back the food: Once the sauce is thickened, add back the cooked food and coat it in the sauce.
(Part 6) Beyond the Basics: Mastering the Art of Steaming
Steaming is a healthy and flavorful way to cook food. It involves cooking food over boiling water, using the steam to cook it gently. Stainless steel, while not the first material that comes to mind for steaming, can be a versatile tool for this technique.
To steam in a stainless steel pan, use a steamer basket or a trivet and a lid. Here’s what to do:
- Add water to the pan: Pour about an inch of water into the bottom of the pan. Ensure the water level is below the level of the food you’re steaming.
- Bring the water to a boil: Bring the water to a boil over medium-high heat. Once boiling, reduce the heat to maintain a gentle simmer.
- Add the food: Place the food in the steamer basket or on the trivet. Make sure the food is not touching the water.
- Cover the pan: Cover the pan tightly with a lid to trap the steam. The lid should be heavy enough to prevent steam from escaping.
- Cook the food: Cook the food until it’s tender and cooked through. The cooking time will vary depending on the type and size of the food.
- Serve: Once cooked, remove the food from the steamer basket or trivet and serve.
Pro-tip: Infuse the food with flavor by adding herbs, spices, or lemon slices to the water. I like to add a bay leaf or a sprig of rosemary for a delightful aroma and subtle flavor.
(Part 7) Unlocking the Secrets of Stainless Steel for Specific Dishes
Now that we've explored the fundamentals, let's delve into specific dishes that showcase the versatility of stainless steel.
cooking eggs: A Delicate Balancing Act
Cooking eggs in stainless steel can be a bit challenging, but with practice, it's surprisingly rewarding.
- scrambled eggs: Use a low to medium heat setting. Add a small amount of oil or butter to the pan and let it melt. Once melted, add the eggs and stir constantly until they're cooked to your liking. Don't overcook them, as they will become rubbery.
- Fried Eggs: Heat the pan over medium-high heat. Add a small amount of oil or butter to the pan. Let it heat up, and then crack the eggs into the pan. Use a spatula to create a little well around the egg to keep the yolk runny, or let it cook through completely.
- Omelets: Grease the pan with a small amount of butter or oil. Heat the pan over medium heat. Crack the eggs into a bowl, add a pinch of salt and pepper, and whisk until frothy. Pour the egg mixture into the hot pan and gently cook, tilting the pan back and forth to spread the eggs evenly. Once the bottom is set, add your favorite fillings and fold the omelet in half.
Searing Steaks: A Culinary Masterpiece
Searing a steak in stainless steel is a classic technique that yields a delicious, caramelized crust and a juicy interior. It's all about achieving a high heat to quickly sear the surface of the steak while keeping the inside tender.
- Get the pan screaming hot: Heat the pan over high heat for about 5-7 minutes, or until it’s smoking hot. Use a kitchen thermometer to check the temperature, or use the "water test". If a drop of water sizzles and evaporates within seconds, the pan is ready.
- Pat the steak dry: Pat the steak dry with paper towels to remove excess moisture. This helps the steak develop a good crust.
- Season generously: Season the steak generously with salt and pepper, or your favorite steak seasoning. The salt will draw out moisture from the steak, which will help it caramelize.
- Sear the steak: Place the steak in the hot pan and sear it for about 2-3 minutes per side, or until it’s nicely browned. Don't move the steak around too much while it’s searing, as this can prevent a good crust from forming.
- Finish cooking: Once the steak is seared on all sides, reduce the heat to medium and cook the steak to your desired doneness. Use a meat thermometer to check the internal temperature.
Pancakes and Crepes: A Culinary Delight
Pancakes and crepes are breakfast classics that are surprisingly easy to master in a stainless steel pan. The key is to find the right heat and use a non-stick cooking spray or a small amount of butter or oil.
- Grease the pan: Lightly grease the pan with butter, oil, or non-stick cooking spray.
- Heat the pan: Heat the pan over medium heat. You should be able to feel a little heat from the bottom of the pan, but not so hot that it burns the batter immediately.
- Pour the batter: Pour the batter into the hot pan, using a ladle or a measuring cup. The batter should spread evenly to form a thin circle.
- Cook until golden brown: Cook the pancakes or crepes until golden brown on the bottom. You'll know they're ready to flip when bubbles start to appear on the surface and the edges start to dry out.
- Flip and cook: Flip the pancakes or crepes and cook them for another minute or two until they're golden brown on the other side.
- Serve immediately: Serve the pancakes or crepes immediately with your favorite toppings.
(Part 8) Taking It Up a Notch: Specialized Stainless Steel Cookware
While a basic set of stainless steel pans can handle most cooking tasks, investing in specialized cookware can elevate your culinary game, allowing you to explore a wider range of cooking techniques.
Cast Iron Meets Stainless Steel: A Perfect Union
Cast iron cookware is known for its exceptional heat retention and even heat distribution, while stainless steel offers durability and ease of cleaning. The combination of these two materials creates a remarkable cooking experience.
Here are a few key benefits of using cast iron-clad stainless steel cookware:
- Exceptional heat retention: The cast iron core retains heat extremely well, ensuring that the pan stays hot and even throughout the cooking process. This is particularly beneficial for searing, roasting, and braising.
- Excellent heat distribution: The cast iron core also helps to distribute heat evenly, preventing hot spots and ensuring that the food cooks consistently.
- Durability: The stainless steel exterior is durable and resistant to scratches and dents. It's also easy to clean, making it a practical choice for everyday use.
- Versatility: Cast iron-clad stainless steel cookware can be used on all types of cooktops, including induction. It's also oven-safe, making it perfect for preparing a variety of dishes.
Copper: A Master of Heat Conduction
Copper cookware has long been a favorite among professional chefs due to its exceptional heat conduction. It's known for heating up quickly and evenly, making it ideal for delicate cooking techniques like sautéing and simmering.
However, copper cookware can be expensive and requires special care. A common approach is to look for copper cookware that features a stainless steel lining, which offers the benefits of copper without the hassle.
Here are some benefits of copper cookware:
- Excellent heat conductivity: Copper is an excellent conductor of heat, meaning it heats up quickly and evenly. This helps to prevent hot spots and ensures that food cooks consistently.
- Responsive to temperature changes: Copper is also very responsive to temperature changes, allowing you to adjust the heat quickly and easily. This is a valuable feature for delicate cooking techniques.
- Beautiful and durable: Copper cookware is known for its beautiful appearance and durability. It's also resistant to scratches and dents.
(Part 9) FAQs
Q1: Can I use stainless steel cookware on all types of cooktops?
Yes, most stainless steel cookware is compatible with all types of cooktops, including gas, electric, ceramic, and induction. However, it's essential to check the manufacturer’s recommendations to ensure compatibility.
Q2: How do I prevent food from sticking to stainless steel cookware?
Preventing sticking is all about proper heating, prepping, and cooking techniques. Here are some tips:
- Preheat the pan properly: Heat the pan over medium heat until it’s hot enough to cause a small drop of water to sizzle immediately.
- Use enough oil: Add just enough oil to coat the bottom of the pan. The oil should shimmer and flow freely, indicating it’s ready.
- Don't overcrowd the pan: Ensure each piece of food has enough space to cook evenly.
- Avoid scraping the bottom of the pan: Use a gentle, circular motion to stir the food and prevent sticking.
Q3: How do I clean stainless steel cookware?
Cleaning stainless steel cookware is relatively easy. Here’s what to do:
- Hand-wash it: Stainless steel cookware is best cleaned by hand. It’s more durable and less likely to get damaged from the heat of a dishwasher.
- Use mild dish soap: Use a mild dish soap and hot water to clean the cookware. Avoid harsh cleaning agents and abrasive sponges, as they can scratch the surface.
- Don’t soak it: Soaking stainless steel cookware for extended periods can cause rust. If you need to soak it, use a mild soap solution and dry it immediately.
- Dry it thoroughly: After cleaning, dry the cookware thoroughly to prevent water spots and rust.
Q4: What are some good high-heat oils for stainless steel cookware?
Here are a few good high-heat oils that work well with stainless steel cookware:
- Canola oil: A neutral-flavored oil with a high smoke point (around 400°F). It’s a good all-around choice for various cooking techniques.
- Vegetable oil: A blend of oils with a high smoke point (around 450°F). It’s a common choice for frying and sautéing.
- Grapeseed oil: A light and neutral-flavored oil with a high smoke point (around 420°F). It’s a good choice for searing and sautéing.
- Peanut oil: A flavorful oil with a high smoke point (around 450°F). It’s a good choice for frying and deep-frying.
Q5: What are some tips for cooking with stainless steel cookware on an induction cooktop?
Cooking with stainless steel cookware on an induction cooktop requires a little extra attention. Here are a few tips:
- Use induction-compatible cookware: Ensure your cookware has a magnetic base that’s compatible with induction cooktops.
- Heat the pan slowly: Induction cooktops heat up quickly, so it’s essential to start with a low heat setting and gradually increase the heat as needed.
- Monitor the temperature: Use a kitchen thermometer to monitor the temperature of the pan. This will help you prevent overheating and prevent food from burning.
- Be patient: It might take a little longer to heat up the pan on an induction cooktop compared to gas or electric, so be patient and allow the pan to reach the desired temperature before adding food.
Stainless steel cookware can be a rewarding investment for any kitchen. It’s durable, versatile, and with the right techniques, it can transform you from a culinary novice to a seasoned chef. So, grab your pan, get cooking, and remember, practice makes perfect!
Everyone is watching

Perfect Rice Every Time: The Ultimate Guide to Cooking Rice
Cooking TipsAs a self-proclaimed foodie, I've always been a bit obsessed with rice. It's the foundation of countless cuisi...

The Ultimate Guide to Cooking Asparagus: Tips, Techniques, and Recipes
Cooking TipsAsparagus. The mere mention of this spring delicacy conjures up images of vibrant green spears, crisp and burs...

Ultimate Guide to Cooking the Perfect Thanksgiving Turkey
Cooking TipsThanksgiving. Just the word conjures up images of overflowing tables laden with delicious food, the scent of r...

Can You Cook Spaghetti with Gasoline? (The Shocking Truth)
Cooking TipsWe've all seen those crazy internet trends. You know, the ones that make you wonder, "Did someone actually try...

Chorizo and Eggs Recipe: The Ultimate Guide
Cooking TipsRight, let’s talk about chorizo and eggs. You know, that classic Spanish dish that's always a winner. It's th...
