Ah, the humble egg over easy. A breakfast staple, a brunch icon, a culinary masterpiece in its simplicity. Yet, mastering the perfect over-easy egg can feel like an elusive art form. The runny yolk, the soft, pillowy whites, that satisfying plop as it lands on the plate – it's all about achieving that perfect balance. But, we've all been there – the runny yolk that spills everywhere, the rubbery whites, the frustration of trying to flip the darn thing without breaking it.
Well, fret no more, my fellow egg enthusiasts! I've been on a lifelong quest to conquer the over-easy egg, driven by a passion for breakfast and a stubborn desire to achieve egg-cellence. Through years of trial and error, I've finally cracked the code. And now, I'm sharing my secrets with you. This guide is your roadmap to mastering the over-easy egg, from choosing the right ingredients to perfecting your flipping technique. By the end, you'll be turning out picture-perfect over-easy eggs every single time. Get ready to level up your brunch game!
(Part 1) The Essential Equipment: Your Egg-cellent Arsenal
Before we dive into the actual cooking, let’s talk about the tools of the trade. Imagine trying to run a marathon in flip-flops – not exactly the ideal footwear, right? Same goes for your egg-cellent quest. Let’s make sure you're armed with the right gear for success.
1. The Pan: Your Foundation for a Perfect Egg
First things first, the pan. This is your foundation, your culinary canvas. You need a pan that’s not too big and not too small, ideally a medium-sized nonstick pan. Why nonstick? Because we don’t want our eggs sticking to the pan and turning into a breakfast disaster. A cast-iron pan is also a fantastic option – it heats evenly and retains heat well, leading to a consistently cooked egg. But if you’re just starting out, a good quality nonstick pan will do the trick.
2. The Spatula: Your Trusty Sidekick
Next up, the spatula. This is your trusty sidekick, your partner in crime, ready to help you flip that egg with finesse. You want a thin spatula, preferably one with a flat, flexible blade that’s wide enough to slide under the egg easily. It should be nimble enough to navigate the delicate dance of flipping the egg without breaking it.
3. The Heat: Your Guiding Light
Now, the heat. This is your guiding light, your key to success. You need a medium heat, not too high and not too low. Think of it as Goldilocks and the Three Bears – too hot, and your egg will burn before the whites even set. Too low, and your whites will be rubbery and your yolk will cook unevenly. You want the pan to be hot enough to cook the whites without burning them, but not so hot that the yolk cooks too quickly.
(Part 2) The Egg-ceptional Ingredients: choosing the right eggs
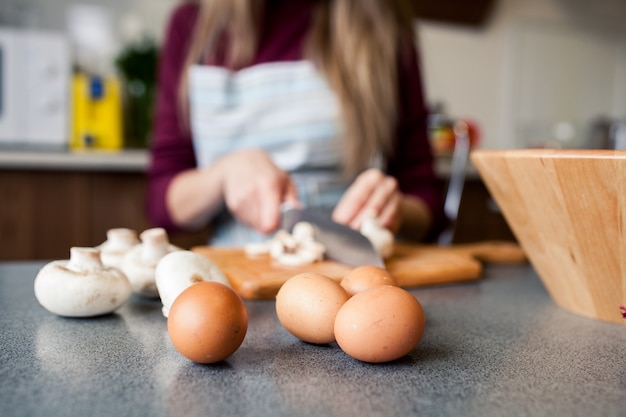
Now that you’ve got your equipment sorted, let’s talk about the stars of the show – the eggs. We're going for fresh, with vibrant, strong yolks that will make your breakfast sing.
1. The Fresh Factor: Getting the Best Eggs
fresh eggs are absolutely key for that perfect runny yolk. The older the egg, the thinner the white and the more likely it is to break when you flip it. You'll end up with a broken yolk, a runny mess, and a shattered breakfast dream.
Here’s a tip: try to buy your eggs from a local farm or a store that has a high turnover. Check the date on the carton, and aim for eggs that are less than a week old.
2. The Size Matters: Finding the Right Fit
Now, let's talk about size. For my over-easy eggs, I prefer medium-sized eggs. They’re just the right size for a satisfying bite, not too big, not too small. You can use large eggs, but they might take a little longer to cook. If you’re feeling adventurous, you can even try small eggs, but they might be a little more challenging to flip.
(Part 3) The Preparation: Getting Ready for Egg-cellence
Alright, you’ve got your tools, you’ve got your eggs, now it’s time to prep for the grand finale. Get ready to unleash your inner egg-pert.
1. The Grease Factor: A Slick Move
To prevent your eggs from sticking to the pan, you’ll need a little grease. This is where the magic happens. I prefer to use a tablespoon of butter – the flavour adds a lovely richness to the eggs. But, you can use a neutral oil like avocado oil or canola oil if you prefer. Just make sure to use a small amount, and spread it evenly over the pan.
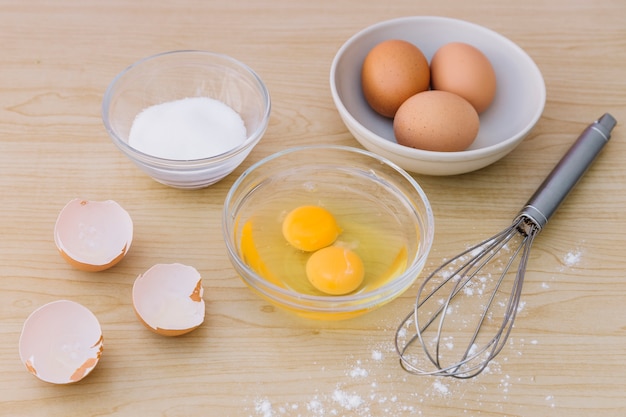
2. The Crack Attack: Cracking Eggs Like a Pro
Now for the cracking. This is where you can really show off your egg-pertise. Instead of cracking the egg directly on the pan, crack it on the edge of a bowl. This helps to prevent shell fragments from ending up in your egg, a culinary faux pas no one wants.
Gently tap the egg on the edge of the bowl until a crack appears. Then, carefully separate the two halves of the shell and gently pour the egg into the bowl. Inspect the egg for any shell fragments and discard them.
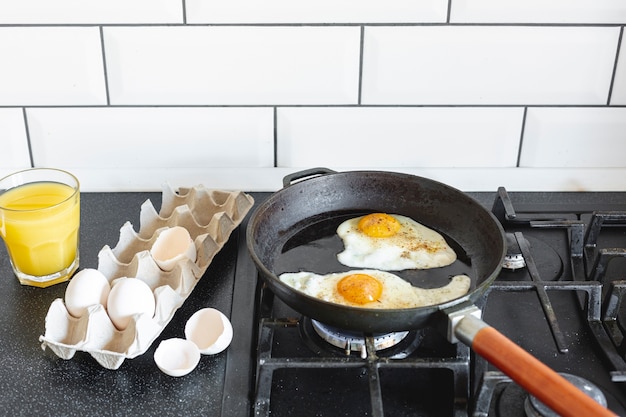
(Part 4) The Cooking: Crafting the perfect over-easy egg
Alright, here we go, the moment of truth. Let’s make this egg shine.
1. The Heat Test: Finding the Sweet Spot
First, you need to check if your pan is hot enough. If it is, the oil or butter will be shimmering slightly. If it’s not, give it a few more minutes to heat up. You want the pan to be hot enough so that the egg cooks quickly, but not so hot that it burns before it’s done.
2. The Egg Drop: Gentle and Precise
Now, gently drop your egg into the pan. Let it sit for a few seconds, undisturbed, to allow the white to set. This is a crucial step, as it allows the white to solidify and prevents it from spreading too thin.
3. The Flip: A Matter of Timing and Finesse
After a few moments, you’ll notice the whites have started to set and the yolk is still runny. Now, it's time for the flip. This is where your spatula becomes your best friend. Gently slide it under the egg, making sure to get underneath the yolk. This takes a little practice, but with a steady hand, you can do it.
Once you’ve got the spatula underneath, with a swift, smooth motion, flip the egg over. Don’t be afraid to use a little force, but don’t be rough either. The key is to be confident and decisive.
4. The Finish: The Golden Touch
Let the egg cook on the other side for another 30-45 seconds, until the yolk is cooked to your liking. Remember, the longer you cook it, the less runny the yolk will be. You can gently tilt the pan to ensure the yolk cooks evenly.
Once it's reached your desired level of doneness, slide your spatula under the egg again and gently lift it onto your plate.
(Part 5) The Presentation: Adding a Touch of Flair
You’ve cooked the perfect egg, but we want it to be a feast for the eyes as well. Let’s give it a bit of flair.
1. The Salt and Pepper: A Classic Touch
Start with a sprinkle of salt and pepper. Now, I know some people are purists and prefer their eggs au naturel, but I find a pinch of seasoning adds a lovely depth of flavour. It’s like adding a final touch of magic to your culinary masterpiece.
2. The Garnish: Adding a Pop of Colour
Want to take your presentation to the next level? Add a garnish! I love a sprig of fresh parsley, but a few slices of avocado or a sprinkle of chives would also look fantastic. It’s like adding a splash of colour to a blank canvas.
Here’s a tip: consider the colours of your other breakfast items. If you’re having a colourful plate of fruit, a simple sprig of parsley might be all you need. If you’re having a more plain breakfast, a sprinkle of chives or a few slices of avocado would add a lovely contrast.
(Part 6) The Variations: Expanding Your Egg-pertise
You’ve mastered the basic over-easy, but let’s explore some variations. Think of these as your egg-pertise level-ups.
1. The Sunny-Side Up: Embrace the Sunshine
This is essentially a simplified over-easy, where you just cook the egg on one side. It’s a bit quicker and offers a more runny yolk. Just remember to keep a watchful eye on it, as it can burn quickly.
2. The Basted Egg: A Touch of Romance
For a more decadent touch, try a basted egg. This involves gently spooning hot melted butter or oil over the egg while it cooks, creating a beautiful, glistening surface. It’s like adding a touch of romance to your breakfast.
Here’s how to do it: While the egg is cooking, use a spoon to carefully pour melted butter or oil over the top of the egg. Be careful not to splash the hot oil or butter on yourself. The gentle steam created by the hot butter or oil will help to cook the egg more evenly and create a beautiful, glistening surface.
3. The Egg-in-a-Hole: A Fun Twist
For something a little different, try an egg-in-a-hole. This involves cutting a hole in a slice of bread, then cooking the egg in the hole. It’s a fun way to add a bit of whimsy to your breakfast and is a great way to use up leftover bread.
Here’s how to do it: Use a cookie cutter to cut a hole in the center of a slice of bread. Place the bread in a pan with a little bit of butter or oil. Cook the bread for a few minutes on each side until it’s lightly toasted. Then, crack an egg into the hole and cook until the white is set and the yolk is runny.
(Part 7) The Troubleshooting: Dealing with Egg-sidents
We’ve all been there – the egg sticks, the yolk breaks, the whole thing turns into a mess. Don’t worry, I’ve got you covered. Here are some common egg-sidents and how to handle them.
1. The Sticking Situation: Preventing Egg-astrophe
If your egg sticks, don’t panic. Use your spatula to gently loosen it from the pan. You might need to use a little more butter or oil next time to prevent this from happening.
Here’s a tip: If you find that your egg is sticking to the pan, you can try using a silicone spatula. Silicone spatulas are less likely to scratch your pan and will help to prevent the egg from sticking.
2. The Broken Yolk: Accepting Imperfection
Sometimes, despite our best efforts, the yolk breaks. It happens. Just try to salvage what you can, and remember, even an imperfect over-easy egg can still be delicious.
Here’s a tip: If the yolk breaks, you can try to gently scoop it back together with a spoon. You can also use a spatula to carefully move the broken yolk to the side of the pan, where it will cook more evenly.
(Part 8) The Serving: Enjoying Your Egg-cellence
You’ve cooked the perfect egg, you’ve presented it beautifully, now it’s time to enjoy it. This is the moment you've been working towards.
1. The Breakfast Buddy: Finding the Perfect Pairing
Over-easy eggs are a versatile breakfast option. They pair well with toast, hash browns, bacon, sausage, you name it! I personally love them with a side of avocado toast.
Here’s a tip: Consider the flavours of your other breakfast items. If you’re having a sweet breakfast, like pancakes or waffles, a savory side of over-easy eggs will balance out the sweetness. If you’re having a savory breakfast, like bacon and hash browns, a side of over-easy eggs will add a touch of richness.
2. The Timing: Enjoying it Fresh
The best part about over-easy eggs? They’re best eaten fresh. Don’t let them sit for too long, or the yolk will start to solidify. The perfect over-easy egg is all about that runny yolk, so enjoy it while it’s at its peak.
(Part 9) The FAQs: Your Egg-sperts Answers
Here are some frequently asked questions about over-easy eggs.
1. How long should I cook an over-easy egg?
The cooking time depends on your preference for the yolk. For a runny yolk, cook for about 2-3 minutes on each side. For a slightly firmer yolk, cook for another minute or so. You’ll know the yolk is cooked to your liking when it’s no longer completely liquid but still has a soft, creamy texture.
2. How can I tell if an egg is fresh?
Place the egg in a bowl of cold water. If it sinks to the bottom and lies flat, it’s very fresh. If it stands on its end, it’s a bit older. If it floats, it’s old and you shouldn’t use it.
3. What should I do if the white doesn't set properly?
If the whites are runny, you might need to increase the heat slightly. Make sure the pan is hot enough before you add the egg. You can also try using a slightly older egg, as the whites will be thinner and more likely to set.
4. Can I cook an over-easy egg in a microwave?
Technically you can, but it won't be the same. The yolk will be cooked through, and the whites will be uneven. You won't get that perfect runny yolk and soft, pillowy whites.
5. Can I use a different cooking method?
You can try cooking your egg in a skillet, but it will be a little trickier to flip. You can also try poaching your egg, but this requires a bit more skill. If you’re looking for a simpler way to cook an egg, sunny-side up is a great option.
There you have it, folks. Your complete guide to mastering the perfect egg over easy. With a little practice, you’ll be turning out egg-cellent results in no time. So, grab your pan, your spatula, and your freshest eggs, and let’s get cooking!
Everyone is watching

Prime Rib Roast Cooking Time Chart: Per Pound Guide
Cooking TipsPrime rib roast. Just the name conjures images of lavish dinners, crackling fires, and hearty laughter. It’s ...

How Long to Bake Potatoes in the Oven (Perfect Every Time)
Cooking TipsBaked potatoes are a staple in my kitchen. They're incredibly versatile, delicious, and surprisingly easy to m...

Perfect Rice Every Time: The Ultimate Guide to Cooking Rice
Cooking TipsAs a self-proclaimed foodie, I've always been a bit obsessed with rice. It's the foundation of countless cuisi...

The Ultimate Guide to Cooking Asparagus: Tips, Techniques, and Recipes
Cooking TipsAsparagus. The mere mention of this spring delicacy conjures up images of vibrant green spears, crisp and burs...

Ultimate Guide to Cooking the Perfect Thanksgiving Turkey
Cooking TipsThanksgiving. Just the word conjures up images of overflowing tables laden with delicious food, the scent of r...