Alright, folks, let's talk clams! Specifically, those little beauties called Little Neck clams. You know, the ones that are just the right size for popping in your mouth, and the ones that bring a taste of the seaside right to your kitchen table.
I've been a bit obsessed with clams for as long as I can remember. There's something about them, isn't there? They're so simple, yet so versatile. Whether you're a seasoned chef or a kitchen newbie, I'm here to guide you through the world of Little Neck clams, from choosing the perfect ones to creating delicious dishes.
This guide is your one-stop shop for all things clam-related. We'll be covering:
(Part 1) Clamming Around: Choosing the Right Clams

1. A Little Neck Primer
Let's start with the basics, shall we? Little Neck clams, for those who haven't encountered these gems before, are a type of hard-shelled clam found along the Atlantic coast of North America. They're known for their delicate flavour and their perfect size for eating.
Now, you might be wondering why "Little Neck" is a thing, right? Well, it's all about the location. These clams, you see, are named after a specific area of Long Island, New York. It's like saying "Scottish salmon" or "French wine" - it's a way of marking their origin and, often, their quality.
2. Finding the Perfect Pearls
Choosing clams is a bit like picking out a good piece of fruit – you want to make sure they're fresh and in good shape.
- Shell Strength: The first thing to look for is a tightly closed shell. If the shell is open, it means the clam is dead, which you definitely don't want. A good clam will have a shell that snaps shut when you tap it gently. You can also give the shell a slight twist - if it doesn't budge, you've got a winner!
- Size Matters: Little Neck clams are typically about 1 to 2 inches in diameter. They're often described as being "cocktail-sized," which makes them perfect for serving as individual bites. You can find different sizes, like Cherrystone and Top Neck, but for this guide, we're focusing on the Little Necks.
- Surface Examination: A good clam will have a smooth, shiny shell without any cracks or chips. If you see any signs of damage, it's best to steer clear.
- Sniff Test: Give the clams a sniff. They should smell fresh and clean, not fishy or rotten. If they have a strong, unpleasant odor, it's a sign that they're not fresh and should be avoided.
3. Storing Clams Like a Pro
You've got your perfect clams, now what? You've got to keep them happy until you're ready to cook.
- The Refrigerator: Clams are best stored in the refrigerator, in a bowl or container with a damp towel or paper towels. This helps to keep them moist and prevents them from drying out.
- Air is the Enemy: Don't seal the container completely. Clams need to breathe. A little bit of air circulation will help to keep them fresh and prevent them from going bad.
- Clean Water: If you're storing them for longer than a day, you can keep them in a bowl of fresh, cold saltwater. Change the water every few hours. This helps to keep the clams alive and ensures that they stay fresh.
- Don’t Freeze: While it’s tempting to freeze clams, it’s not the best idea. Freezing can affect their texture and flavour. Frozen clams tend to become tough and rubbery when cooked.
(Part 2) The Art of Cleaning Clams
1. Cleaning Up: The Big Reveal
Now, before we start cooking, let's get these clams nice and clean. This is a crucial step to make sure you're not biting into any grit or sand.
- Rinse and Repeat: First things first, rinse the clams under cold, running water. Give them a good scrub, too. Use a brush or your hands to remove any visible dirt or debris from the shells.
- The Soaking Method: Next, place the clams in a large bowl of cold, salted water. You'll want to use about 1 teaspoon of salt per quart of water. Let them soak for 30 minutes or so. This helps the clams purge any sand or grit they might have inside. The salt helps to draw out impurities and make the clams cleaner.
- The Final Rinse: After soaking, drain the clams and rinse them again under cold, running water. This removes any remaining salt or debris and ensures that the clams are ready for cooking.
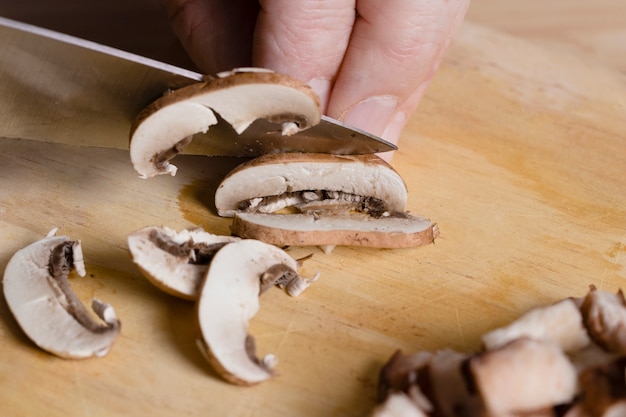
2. Removing the Beardy Bits
The clams might have a “beard” attached to the shell, which is basically a bunch of little tentacles. It’s perfectly edible, but some people find it a bit chewy. If you want to remove the beard, here’s how:
- The Pinch Technique: Hold the clam in one hand with the pointed end facing up. Use the other hand to pinch the beard, pulling it gently away from the clam. If the beard is stubborn, you can use a small knife to carefully cut it off. Just be careful not to puncture the clam.
(Part 3) Cooking Clams: A culinary journey
1. Steaming: The Classic Approach
steaming clams is a simple and delicious way to cook them. It allows the natural flavours of the clams to shine through.
- The Pot Setup: Grab a large pot with a tight-fitting lid. Place about 1 inch of water in the pot. Bring the water to a boil.
- Adding the Clams: Add the cleaned clams to the pot. Make sure the clams are not crowded. If they're too crowded, they won't steam properly and may not open.
- The Steam Treatment: Cover the pot and reduce the heat to medium. Steam the clams for about 5 to 8 minutes, or until the shells open. You'll know they're done when the shells open slightly and the clam meat is cooked through.
- The Discard Rule: Any clams that don't open after steaming should be discarded. This means the clam was already dead before you cooked it.
2. The Magic of Broth
One of the things I love about clams is the broth they release when cooked. It’s like liquid gold! It’s absolutely delicious and can be used for a variety of dishes.
- Broth Extraction: When you steam clams, the broth they create can be strained into a separate container for later use. It’s packed with flavor! Use a fine-mesh sieve to remove any leftover clam shells or debris.
- Flavor Booster: Use the clam broth to make sauces, soups, or even just add it to pasta water for extra flavor. A little bit of clam broth goes a long way in enhancing the taste of your dishes.
3. The Sauteed Sensation
For a quicker and more flavorful approach, try sauteing your clams.
- The Oil and Garlic: Heat some olive oil in a large skillet over medium heat. Add some minced garlic and saute until fragrant.
- The Clam Addition: Add the cleaned clams to the skillet and cook, stirring occasionally, for about 5 to 7 minutes, or until the shells open. Make sure to cook the clams over medium heat to prevent them from overcooking.
- A Touch of Wine: You can deglaze the pan with a splash of white wine to create a delicious sauce. The wine will help to loosen any bits of food stuck to the bottom of the pan and create a flavorful sauce.
(Part 4) The Clam Feast: Serving Up Deliciousness
1. A Simple, Classic Feast
The beauty of clams is that they don't need much to be delicious. A simple serving of steamed clams with a squeeze of lemon and a sprinkle of parsley is all you need for a satisfying and flavorful meal. You can also add a dollop of butter or a drizzle of olive oil for extra richness.
2. The Clam Chowder Craze
Who doesn’t love a good clam chowder? There are all sorts of variations, but the key to a great chowder is fresh clams and a creamy, flavorful base. You can use a variety of ingredients to create your own unique clam chowder, including potatoes, onions, celery, and herbs.
3. Pasta Perfection
Clams are a wonderful addition to pasta dishes. They can be added to a simple tomato sauce, or used to create a more complex, seafood-inspired dish. You can even use clam broth to flavor the pasta water for extra richness. The briny flavor of the clams complements the creamy texture of pasta, creating a perfect balance of flavors.
4. The Clam Bake Bonanza
If you're feeling adventurous, try a clam bake! It's a fun and festive way to enjoy clams with friends and family. A clam bake is traditionally done outdoors, with the clams steamed over a bed of seaweed and wood chips. You can also add other seafood, vegetables, and potatoes to your clam bake for a complete meal.
(Part 5) The Clammy side dishes
1. Sides that Shine
Clams are delicious on their own, but they pair well with a variety of side dishes. Some of my favorites include:
- The Bread Basket: Nothing beats a crusty bread to soak up all that delicious clam broth. A baguette, sourdough, or focaccia are all excellent choices.
- The Green Delight: A simple side salad with mixed greens and a light vinaigrette complements the richness of the clams. Choose greens like spinach, arugula, or romaine lettuce, and dress them with a lemon-based vinaigrette.
- The Potato Powerhouse: mashed potatoes, roasted potatoes, or even french fries add a comforting touch to the meal. Mashed potatoes are a classic pairing with clams, while roasted potatoes or fries add a bit of crunch to the dish.
2. A Little Spice, A Lot of Flavor
If you're looking for something with a bit more zest, try pairing your clams with some spicy sides.
- The Hot Sauce Hustle: A dash of hot sauce is a classic way to add a little kick. Use your favorite hot sauce, whether it's a vinegar-based sauce, a smoky sauce, or a spicy sauce with a kick.
- The Chili Pepper Punch: Sliced jalape??os or a sprinkle of chili flakes add a fiery touch. You can also use other types of chili peppers, such as serrano or habanero, to add more heat to your dish.
(Part 6) The Clammy Drinks
1. Thirst Quencher
What to drink with clams? Well, that depends on how you’re cooking them and what kind of vibe you’re going for.
2. The Classic Pairing: White Wine
A crisp white wine, like Sauvignon Blanc or Pinot Grigio, is a classic pairing for clams. The acidity of the wine cuts through the richness of the clams, and the dryness helps to balance out the salty flavor. You can also choose other light-bodied white wines, such as a dry Riesling or a Chardonnay.
3. The Beer Buzz
For a more casual, laid-back vibe, try pairing your clams with a light beer, such as a Pilsner or a Lager. The crispness of the beer complements the briny flavor of the clams. You can also try a Belgian witbier or a German Hefeweizen, which are known for their refreshing flavors and low bitterness.
4. The Sparkling Touch
If you’re feeling fancy, try a sparkling wine, like Prosecco or Cava. The bubbles add a touch of elegance to the meal. You can also try a sparkling rosé or a French crémant, which offer a more complex flavor profile.
(Part 7) The Clammy Mishaps: Avoiding Disasters
1. The Clammy Blues: Disappointment in the Dish
It happens to the best of us. Sometimes, clams just don’t behave the way we want them to.
- The Tough Clam: If your clams are tough and chewy, it’s likely they weren’t cooked long enough. Make sure to cook your clams until the shells open and the meat is cooked through.
- The Sandy Surprise: If you find sand in your clams, it’s a sign they weren’t properly cleaned. Make sure to thoroughly clean your clams before cooking.
- The Rubbery Result: If your clams are rubbery, it’s likely they were overcooked. Don't overcook your clams. They only need a few minutes to cook through.
2. The Clammy Fails: Avoiding Disaster
With a little bit of knowledge and preparation, you can avoid those clammy mishaps.
- The Right Cleaning: Make sure your clams are thoroughly cleaned before you cook them. This includes rinsing them, soaking them in salted water, and removing the beards.
- The Perfect Cook Time: Don’t overcook your clams. They only need a few minutes to cook through. Check the clams frequently and remove them from the heat as soon as the shells open.
(Part 8) The Clammy FAQs
1. Are all clams the same?
No, not all clams are created equal. There are many different types of clams, each with its own unique flavor and texture. Little Neck clams are just one of many. Other common types of clams include Cherrystone clams, Top Neck clams, and Quahog clams.
2. What does “Little Neck” actually mean?
“Little Neck” refers to the size and origin of the clams. They’re typically about 1 to 2 inches in diameter and come from a specific area of Long Island, New York. The name "Little Neck" comes from a specific area of Long Island, known for its abundance of clams.
3. Are clams safe to eat raw?
It’s not recommended to eat clams raw, as there is a risk of food poisoning. Clams should be cooked thoroughly to kill any harmful bacteria. Clams are filter feeders, which means they can accumulate bacteria and other toxins from their environment.
4. How can I tell if a clam is bad?
A bad clam will have an open shell that doesn’t snap shut when you tap it. It will also have a fishy or rotten smell. If the clam is still alive, it will close its shell when you tap it. You can also check for any signs of discoloration or slime.
5. How long can I store clams in the refrigerator?
You can store clams in the refrigerator for up to 3 days. Keep them in a bowl or container with a damp towel or paper towels, and make sure the container isn’t sealed tightly. It's important to store clams properly to prevent them from drying out or going bad.
Everyone is watching

Prime Rib Roast Cooking Time Chart: Per Pound Guide
Cooking TipsPrime rib roast. Just the name conjures images of lavish dinners, crackling fires, and hearty laughter. It’s ...

How Long to Bake Potatoes in the Oven (Perfect Every Time)
Cooking TipsBaked potatoes are a staple in my kitchen. They're incredibly versatile, delicious, and surprisingly easy to m...

Perfect Rice Every Time: The Ultimate Guide to Cooking Rice
Cooking TipsAs a self-proclaimed foodie, I've always been a bit obsessed with rice. It's the foundation of countless cuisi...

The Ultimate Guide to Cooking Asparagus: Tips, Techniques, and Recipes
Cooking TipsAsparagus. The mere mention of this spring delicacy conjures up images of vibrant green spears, crisp and burs...

Ultimate Guide to Cooking the Perfect Thanksgiving Turkey
Cooking TipsThanksgiving. Just the word conjures up images of overflowing tables laden with delicious food, the scent of r...