Let me tell you, there's something truly special about a rack of lamb ribs. They're not just a meal, they're an experience! The rich, savory flavor, the melt-in-your-mouth tenderness, the satisfying crunch of the bone-in goodness – it all comes together in a symphony of taste that's hard to resist. I've been cooking lamb ribs for years, and I've learned a thing or two about getting them absolutely perfect. So, settle in, grab a cuppa, and let's embark on this culinary journey together.
(Part 1) The Magic of Lamb Ribs: Understanding the Cut
Lamb ribs are a unique and flavorful cut of meat. They're not your everyday roast, they're something truly special. The bone-in element is key, acting as a little heat conductor that ensures even cooking and makes those bits of meat clinging to the bone even more delicious. But before we get to the cooking, let's talk about the cut itself, because choosing the right one is crucial to a great result.
1. Full Rack vs. Single Rack: Choosing the Right Size
A full rack of lamb ribs is a showstopper. It looks stunning on the table, and it's perfect for a crowd. But a single rack is just as delicious and more manageable for two or three people. If you're looking for something smaller and more individual, lamb chops are a fantastic option. They're a little easier to manage and cook quickly, but honestly, there's something truly special about a full rack, especially if you want to impress your guests.
2. French vs. English: Understanding the Cut
You might see "French" lamb ribs or "English" lamb ribs at the butcher's. They're basically the same thing, but the term "French" refers to ribs with the bone exposed, while "English" ribs have the bone intact, closer to the natural rib shape. Personally, I prefer French ribs because they look a little fancier and I love the visual appeal of those exposed bone pieces. They make a statement, don't they? But ultimately, it’s down to personal preference. Both cuts are equally delicious.
3. What to Look for When Buying: Quality Matters
Now, when you're selecting your ribs, here's what to keep in mind. You want a good layer of fat. It's essential for keeping the meat moist and flavorful during cooking. Look for a nice, even marbling of fat, which indicates a rich, delicious flavor. Also, check for any blemishes or discoloration; you want those ribs to look fresh and inviting.
(Part 2) Preparing Your Lamb Ribs: The Foundation of Flavour
Alright, you've got your ribs, now it's time to get creative. Preparation is key. It's a little extra work upfront, but trust me, it pays off big time. Let's talk about how I prep my ribs to unlock their potential.
1. Trimming the Fat: A Balancing Act
While a good layer of fat is a must, too much can lead to a greasy, overwhelming flavor. So, give those ribs a quick trim. Remove any excess fat, especially the thicker bits along the edges, but be careful! You want to leave a nice layer of fat on the ribs. This is what keeps them juicy and tender. It's a balancing act, but you'll get the hang of it.
2. Patting Them Dry: The Secret to crispy skin
Grab a clean paper towel and pat those ribs dry. This helps to ensure a nice, crispy skin and prevents steam pockets from forming during cooking. It might seem like a small detail, but it makes a big difference. Trust me on this one!
3. Seasoning Up: The Flavor Foundation
This is where the fun really begins! There are so many flavour directions you can take with lamb ribs. Here are some of my go-to seasoning techniques, but feel free to experiment and find what works best for you.
a. Salt and Pepper: The Timeless Classic
There's a reason this combo is a classic. It's simple, yet incredibly effective. I use a generous amount of kosher salt and freshly ground black pepper, rubbing them liberally all over the ribs. This is the perfect base for other seasonings you might add later. It's like the building blocks for a delicious flavour profile.
b. Herbs and Spices: Adding Depth and Complexity
This is where you get to truly express your culinary creativity! I love using rosemary, thyme, garlic powder, and a sprinkle of paprika. It creates a wonderfully aromatic blend that complements the rich flavour of the lamb perfectly. Remember to season liberally, but don’t overdo it. You want the herbs and spices to enhance the lamb's natural flavours, not overpower them.
c. dry rubs: Flavour Powerhouses
Dry rubs are like flavour bombs! You can find pre-made rubs in most supermarkets, or get creative and make your own. My personal favorite dry rub includes smoked paprika, brown sugar, garlic powder, onion powder, and a touch of cayenne pepper. It adds a smoky, sweet, and slightly spicy kick that's just irresistible. Make sure to rub the dry rub all over the ribs, getting it into every nook and cranny. The longer the ribs sit with the dry rub, the more flavour they’ll absorb. If you have time, I highly recommend marinating your ribs for a few hours or even overnight. It really makes a difference.
(Part 3) Cooking Your Lamb Ribs: Methods and Techniques

Now we're getting to the good stuff: the cooking! There are a few popular methods you can use to cook your lamb ribs. Let's explore each one and dive into the details.
1. oven roasting: The Classic Approach
Oven roasting is a classic method for a reason. It's simple, easy to control, and produces tender, flavorful ribs. Here's how I do it:
a. Preheat your oven to 350°F (175°C).
b. Place the ribs in a roasting pan and pour about half a cup of water into the bottom. This creates steam, which helps to keep the ribs moist during cooking.
c. Roast the ribs for 1.5 to 2 hours, or until the meat is tender and pulls away easily from the bone. You can check for doneness by inserting a fork into the meat. If it slides in easily, it's ready!
d. For an extra crispy skin, turn on the broiler for the last few minutes to give the ribs a nice golden-brown finish.
2. slow cooker: Low and Slow for tender ribs
Slow cookers are a fantastic way to achieve melt-in-your-mouth tenderness. The low and slow cooking process breaks down the tough connective tissue, resulting in incredibly juicy and flavorful ribs. Here's how I use my slow cooker:
a. Place the ribs in the slow cooker and pour in about a cup of broth or water. This helps to keep the ribs moist and adds flavor to the sauce.
b. Add your favourite dry rub, or a mix of herbs and spices.
c. Cook on low for 6 to 8 hours, or until the ribs are tender. You can check for doneness by gently tugging on the meat. If it pulls away from the bone easily, they're ready!
d. If you want to add more flavour, you can add your favourite sauce during the last hour of cooking.
3. Grill: Smoking and Char
For a smoky, char-grilled flavour, there's nothing quite like grilling. It's a bit more involved, but it's totally worth it if you have the time and equipment. Here's how I do it:
a. Prepare a charcoal grill with a good bed of coals. You can also use a gas grill, but I find that charcoal adds a more robust flavour.
b. Place the ribs on the grill over indirect heat, making sure to keep a good distance from the flames. You don't want them to burn.
c. Grill the ribs for about 2 hours, or until the meat is tender and pulls away easily from the bone. Check for doneness by inserting a meat thermometer; it should reach an internal temperature of 145°F (63°C) for medium-rare.
d. During the last 30 minutes of cooking, you can move the ribs to the direct heat side of the grill to get a nice char on the outside. This adds a delightful smoky aroma and a crispy exterior.
(Part 4) Glazing and Finishing Touches: Taking it to the Next Level
Alright, your ribs are cooked to perfection, but we're not done yet! The finishing touches are what take those ribs from good to exceptional. Let's talk about adding that extra sparkle and flavor.
1. Glazing for a Shiny Finish and Extra Flavor
A good glaze adds a beautiful shine and a burst of flavor. I prefer to use a simple glaze made with honey, mustard, and a little bit of apple cider vinegar. It's a sweet and tangy glaze that complements the lamb beautifully. You can also use commercially available barbecue sauces, but I find that homemade glazes are always better. The flavour is fresher and more intense. Here's how to make my favourite glaze:
a. In a saucepan, combine 1/2 cup of honey, 1/4 cup of Dijon mustard, 2 tablespoons of apple cider vinegar, and a pinch of salt and pepper.
b. Bring the mixture to a simmer over low heat, stirring constantly until the honey is melted and the glaze is slightly thickened.
c. Brush the glaze over the ribs, making sure to coat them evenly.
d. Grill or bake the ribs for an additional 10 to 15 minutes, or until the glaze is caramelized and sticky. You'll know it's ready when it starts to bubble and sizzle.
2. Resting: Letting the Flavours Settle
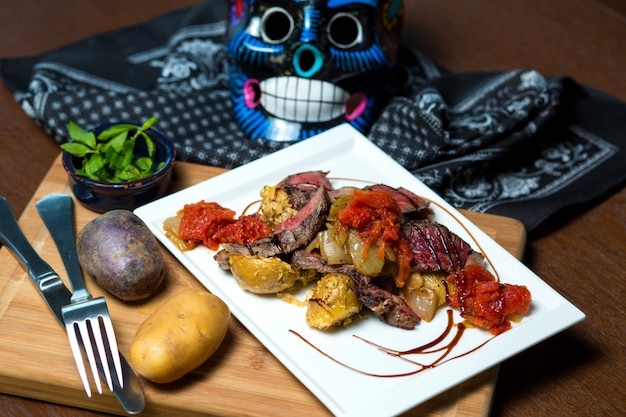
Once your ribs are cooked and glazed, it’s essential to let them rest for 10 to 15 minutes before carving and serving. This allows the juices to redistribute throughout the meat, ensuring that the ribs are tender, juicy, and full of flavour. While the ribs are resting, you can prepare your sides. My favourite side dishes for lamb ribs include roasted vegetables, creamy mashed potatoes, and a simple green salad.
3. Carving: Making it Look Beautiful
Finally, it’s time to carve your masterpiece. This might seem straightforward, but a little finesse can make all the difference. Here's how I do it:
a. Use a sharp carving knife to cut the ribs into individual pieces, cutting between the bones.
b. Arrange the ribs on a serving platter, creating a visually appealing presentation. You can add some fresh herbs, like rosemary or thyme, for a final touch.
c. Serve the ribs with your favourite sides and enjoy!
(Part 5) Tips and Tricks: Elevating Your Lamb Rib Game
I've given you the basics, but let's take your lamb rib skills to the next level! Here are some tips and tricks I've picked up along the way:
1. Don't Overcook: The Key to Tenderness
Lamb ribs, like most meats, can dry out quickly if you overcook them. Keep an eye on the cooking time and check for doneness with a meat thermometer. The internal temperature should reach 145°F (63°C) for medium-rare. If you’re unsure, err on the side of undercooked. It’s always easier to cook them a little longer than to try and bring back a dried-out rib. The bone will also give you an idea of the doneness - if the bone pulls away easily, it's cooked!
2. Use a Marinade: A Flavour Boost
Marinating your ribs before cooking is a fantastic way to add tons of flavor. There are countless marinade recipes out there, but I love to use a simple marinade made with olive oil, lemon juice, garlic, and herbs. Let the ribs marinate for at least 2 hours, or even overnight, for the best results. Marinades not only add flavour, they help to keep the meat tender and juicy during cooking.
3. Experiment with Different Flavours: Find Your Signature Style
Don't be afraid to get creative with your seasonings and glazes! Try adding different herbs and spices, such as cumin, coriander, or chili powder. You can also try using different types of barbecue sauce, or create your own unique flavour combinations. Remember, there's no right or wrong way to cook lamb ribs. It's all about finding what you enjoy the most!
(Part 6) Storing and Reheating: Making the Most of Leftovers
You've cooked up a beautiful rack of lamb ribs, but what if there are leftovers? No worries! Here's how to store and reheat them like a pro.
1. Storing
Let the ribs cool completely to room temperature before storing. Wrap them tightly in plastic wrap and store in an airtight container in the refrigerator for up to 3 days. You can also freeze the ribs for up to 3 months. To freeze, wrap them tightly in plastic wrap and then in aluminium foil. Label and date the package for easy identification.
2. Reheating
You can reheat lamb ribs in the oven, in the microwave, or on the grill. For the best results, I recommend reheating in the oven. Preheat your oven to 350°F (175°C). Place the ribs in a baking dish and cover with foil. Bake for 20 to 30 minutes, or until the ribs are heated through. You can also reheat them on the grill over low heat for 10 to 15 minutes, or until they are heated through. Just be careful not to overcook them.
(Part 7) Lamb Ribs: A Feast for Every Occasion
Lamb ribs are incredibly versatile. They're perfect for any occasion, from casual weeknight dinners to special celebrations. Here are a few ideas for how to serve them:
1. A Casual Weeknight Dinner
Serve the ribs with roasted vegetables, a simple green salad, and a crusty loaf of bread. It's a quick and easy meal that's perfect for a busy weeknight.
2. A Special Occasion Dinner
Go all out with your presentation and serve the ribs with elegant sides, like creamy mashed potatoes, roasted asparagus, and a delicate mushroom risotto. It's a meal that's sure to impress your guests. You can even pair it with a nice bottle of red wine.
3. A Barbecue Party
Lamb ribs are a great addition to any barbecue party. Serve them with a variety of side dishes, like potato salad, coleslaw, and baked beans. Don't forget to have plenty of napkins on hand!
(Part 8) Lamb Ribs: A Culinary Journey
So there you have it, my ultimate guide to mastering lamb ribs! It's a journey that begins with a simple rack of bones and culminates in a feast of flavor. Remember, the key to success is in the preparation, the cooking, and the love you put into it. So, grab your ingredients, fire up your grill, and get ready to enjoy the experience!
FAQs
Let's answer some of your burning questions about lamb ribs:
Q: How long do lamb ribs last in the fridge?
Q: Can I freeze lamb ribs?
Q: What are some good side dishes for lamb ribs?
Q: Can I use lamb chops instead of a rack of ribs?
Q: What kind of wine pairs well with lamb ribs?
A: Properly stored, lamb ribs will last in the fridge for up to 3 days. Make sure to wrap them tightly in plastic wrap and store them in an airtight container.
A: Yes, you can freeze lamb ribs for up to 3 months. Wrap them tightly in plastic wrap and then in aluminium foil. Label and date the package so you know how long they’ve been in the freezer. Before you freeze them, make sure to trim any excess fat, as this can make the ribs greasy.
A: Some classic side dishes for lamb ribs include mashed potatoes, roasted vegetables, green salad, and corn on the cob. You can also pair them with a light and refreshing fruit salad or a crunchy potato salad. Experiment with different flavours and textures to find your perfect combination.
A: Absolutely! Individual lamb chops are a delicious and easy-to-manage option. They cook much faster than ribs, so be sure to adjust your cooking time accordingly. You can use the same seasonings and techniques as you would for a rack of ribs. Just remember to check for doneness with a meat thermometer.
A: A full-bodied red wine, such as Cabernet Sauvignon, Merlot, or Shiraz, pairs well with the rich flavour of lamb ribs. If you prefer a lighter wine, a Pinot Noir or a Zinfandel will also work well. Ultimately, the choice is yours, so experiment with different wines until you find one that you enjoy.
There you have it! Everything you need to make mouthwatering, tender lamb ribs. Now go forth and impress your family and friends with your culinary skills!
Everyone is watching

Prime Rib Roast Cooking Time Chart: Per Pound Guide
Cooking TipsPrime rib roast. Just the name conjures images of lavish dinners, crackling fires, and hearty laughter. It’s ...

How Long to Bake Potatoes in the Oven (Perfect Every Time)
Cooking TipsBaked potatoes are a staple in my kitchen. They're incredibly versatile, delicious, and surprisingly easy to m...

Perfect Rice Every Time: The Ultimate Guide to Cooking Rice
Cooking TipsAs a self-proclaimed foodie, I've always been a bit obsessed with rice. It's the foundation of countless cuisi...

The Ultimate Guide to Cooking Asparagus: Tips, Techniques, and Recipes
Cooking TipsAsparagus. The mere mention of this spring delicacy conjures up images of vibrant green spears, crisp and burs...

Ultimate Guide to Cooking the Perfect Thanksgiving Turkey
Cooking TipsThanksgiving. Just the word conjures up images of overflowing tables laden with delicious food, the scent of r...