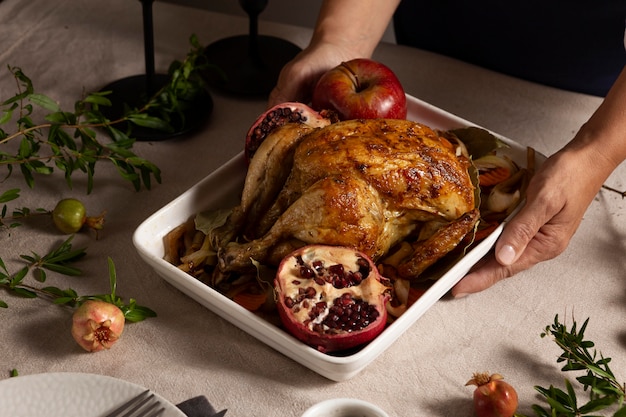
There’s nothing quite like a perfectly cooked chicken. The skin, crispy and golden, with just a hint of char. The meat, succulent and tender, falling apart at the slightest touch. But achieving this culinary nirvana can feel like a gamble sometimes. You know the feeling – the dreaded dry, rubbery chicken that makes you question your cooking skills. Don’t worry, I’ve been there too! Over the years, through countless kitchen experiments and a fair share of burnt offerings, I’ve finally cracked the code to consistently juicy, flavorful chicken. So, grab your apron, and let’s dive into the secrets I've uncovered.
(Part 1) The Chicken Conundrum: Why Does It Dry Out?

Before we delve into the solutions, let’s understand why chicken often ends up dry. It's a delicate protein, and overcooking is its worst enemy. It’s like a delicate flower – too much heat and it wilts. Here are the common culprits that contribute to dry chicken:
Overcooking: The Biggest Mistake
This is the biggest culprit, hands down. Chicken cooks incredibly fast, and a few extra minutes can turn it from moist and succulent to dry and tough. We’ve all been there, caught up in the moment, and a little distracted. But don’t worry, we’ll conquer this together.
High Heat: Too Much of a Good Thing
Just like with any protein, too much heat can lead to the outside cooking faster than the inside. This creates a barrier that traps in moisture, preventing the core from cooking evenly. Think of it as a protective shell around the chicken, keeping the juicy goodness locked inside.
Thin Cuts: A Challenge for Moisture Retention
A thin chicken breast, while great for quick cooking, is more prone to drying out because there’s less surface area to retain moisture. The thinner the cut, the more vulnerable it becomes to losing precious moisture.
The Wrong Cooking Method: Choosing the Right Tool
Sometimes, the problem isn't necessarily the heat, but the cooking method itself. Using a technique that isn’t suited for chicken can lead to inconsistent cooking and dryness. We’ll tackle this in detail later, but it's worth keeping in mind.
(Part 2) The Crucial First Step: Choosing the Right Chicken

The journey to juicy chicken starts with choosing the right bird. Think of it as the foundation of a good building – the quality of the chicken will significantly impact the final result. Here are some factors to consider:
Fresh vs Frozen: A Matter of Flavor
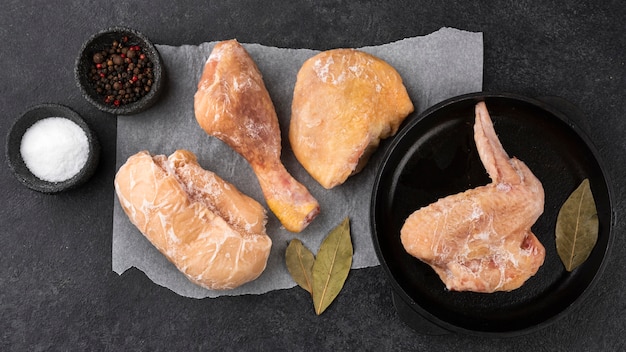
For the most flavor, I always opt for fresh chicken. It’s more tender and has a richer taste. The freshness brings out a delightful depth of flavor that you won’t get from frozen. However, frozen chicken works in a pinch, just make sure to thaw it thoroughly before cooking. Don’t even think about cooking it frozen!
Bone-In vs Boneless: A Debate of Moisture and Flavor
Bone-in chicken holds moisture better because the bone helps to insulate the meat. It also tends to be more flavorful as the bone contributes to the cooking process. Imagine it as a natural flavor enhancer. But if you’re looking for a quicker option, boneless chicken is the way to go. Just remember that it’s more susceptible to dryness.
Size Matters: Adjusting for cooking time
Don’t underestimate the power of size! A larger piece of chicken takes longer to cook, so be sure to adjust your cooking time accordingly. The last thing you want is a burnt exterior and a raw center. Always use a meat thermometer to ensure it’s cooked through.
(Part 3) The Art of Preparation: Getting Your Chicken Ready

Just like a good chef prepares their ingredients, prepping your chicken is crucial to a delicious outcome. Think of it as setting the stage for a culinary masterpiece. Here are some essential steps:
Pat it Dry: Maximizing Crispness
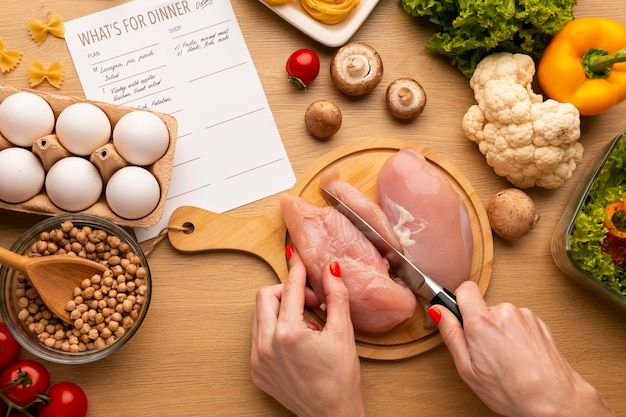
One of my go-to tricks is to pat the chicken dry with paper towels before cooking. This helps to create a crispier skin and prevents excess moisture from steaming the chicken during cooking. It’s like giving the skin a chance to shine!
Brine, Brine, Brine!: A Secret Weapon for Juiciness
Brining is a game-changer! It involves soaking the chicken in a salt solution, which draws moisture into the meat, resulting in a juicy, flavorful final product. It's like giving the chicken a spa treatment, hydrating it from the inside out. Here’s how to do it:
- Combine 1 cup of salt with 4 cups of water. You want a good balance of salt to water.
- Submerge the chicken in the brine solution and refrigerate for at least 30 minutes, or up to 24 hours. The longer you brine, the more flavorful the chicken will be.
- Remove the chicken from the brine and pat dry before cooking. You want to make sure all the excess moisture is gone.
I usually brine chicken thighs and legs, as they tend to be a little drier than breasts. It's a simple yet powerful technique that elevates the overall flavor and tenderness.
(Part 4) cooking techniques: Mastering the Heat
Now, the moment of truth: cooking the chicken. There are various methods, each with its own advantages. I’ll guide you through my favorites. Remember, choose the right tool for the job.
The Oven: Even Heat Distribution for Large Pieces
This method provides even heat distribution, making it perfect for larger pieces of chicken. Here’s what I do:
- Preheat the oven to 375 degrees Fahrenheit (190 degrees Celsius). Make sure your oven is nice and hot before you start.
- Place the chicken on a baking sheet lined with parchment paper. This prevents sticking and makes cleanup a breeze.
- Roast the chicken for about 15-20 minutes per pound, or until the internal temperature reaches 165 degrees Fahrenheit (74 degrees Celsius). Use a meat thermometer for accuracy.
- Let the chicken rest for 10 minutes before carving. This allows the juices to redistribute throughout the meat.
The Pan: crispy skin and Tender Meat
Pan-searing is another excellent way to get a crispy skin and tender meat. Think of it as a combination of flavor and texture. Here's my go-to method:
- Heat a heavy-bottomed pan over medium-high heat. You want the pan nice and hot, so the chicken gets a good sear.
- Season the chicken with salt and pepper. Simple, but effective.
- Sear the chicken for about 3-4 minutes per side, or until golden brown. This creates a delicious crust.
- Reduce the heat to low, cover the pan, and cook for another 5-7 minutes, or until the chicken is cooked through. This ensures the inside is cooked evenly.
The Air Fryer: A Modern Marvel for crispy chicken
Air frying is a game-changer, especially for smaller pieces of chicken. It uses hot air to cook the chicken evenly, resulting in a crispy skin and tender interior. Think of it as a mini-oven that circulates hot air. Here's how I do it:
- Preheat the air fryer to 400 degrees Fahrenheit (200 degrees Celsius). Get that air fryer nice and hot.
- Place the chicken in the air fryer basket. Make sure the chicken is evenly spread out so it cooks evenly.
- Air fry for about 10-12 minutes, or until the chicken is cooked through. Check the internal temperature to make sure it’s reached 165 degrees Fahrenheit.
(Part 5) Beyond the Basics: Elevating Your Chicken Game
Now that you’ve mastered the fundamentals, let’s explore some advanced techniques that take your chicken game to the next level. Think of these as secret ingredients that will elevate your dishes from good to great.
The Power of Marinades: A Flavor Explosion
Marinades not only add flavor but also help to tenderize the chicken. They’re like a flavor bath that infuses the chicken with deliciousness. Here are some of my favorites:
- Lemon-Herb: Combine lemon juice, olive oil, garlic, oregano, and thyme. This is a classic combination that always works.
- Soy-Ginger: Mix soy sauce, ginger, garlic, and honey. This marinade adds a savory sweetness.
- Spicy Chipotle: Combine adobo sauce, chipotle peppers, and lime juice. This marinade has a smoky, spicy kick.
Marinate your chicken for at least 30 minutes, or up to overnight, for the best results. The longer you marinate, the more flavorful your chicken will be. Let those flavors penetrate deeply.
The Magic of Roasting Vegetables: A Culinary Symphony
Roasting vegetables alongside your chicken creates a beautiful harmony of flavors. I love to use root vegetables like potatoes, carrots, and onions. They create a delightful combination of textures and flavors. Here's what I do:
- Preheat the oven to 400 degrees Fahrenheit (200 degrees Celsius). Get your oven nice and hot.
- Toss the vegetables with olive oil, salt, pepper, and your favorite herbs. This adds a touch of flavor and helps to ensure even cooking.
- Place the vegetables around the chicken on a baking sheet. Arrange them so they have some space to roast.
- Roast the chicken and vegetables for about 45 minutes, or until the vegetables are tender and the chicken is cooked through. The vegetables will soak up the delicious chicken juices.
(Part 6) The Importance of Resting: Letting the Chicken Relax
After all that hard work, the last step is crucial: resting the chicken. It might seem like an unnecessary step, but it's essential for achieving juicy, flavorful results. Think of it as a well-deserved break for your culinary masterpiece. Here’s why:
Even Distribution: A Matter of Balance
Resting allows the heat to distribute evenly throughout the meat. This helps to ensure that the chicken is cooked through and prevents it from being dry. It's like allowing the chicken to catch its breath.
Moisture Retention: Keeping it Juicy
As the chicken rests, the muscle fibers relax and absorb the juices released during cooking. This helps to keep the chicken moist and tender. It's like the chicken rehydrating itself.
I always let my chicken rest for at least 10 minutes before carving. This is a small step that makes a big difference in the final taste and texture. It’s like giving the chicken a little TLC.
(Part 7) The Temperature Test: Ensuring chicken safety
The most important part of cooking chicken is making sure it’s cooked to a safe internal temperature. This is crucial for preventing foodborne illnesses. It’s always better to be safe than sorry. Here’s how to do it:
- Use a meat thermometer to check the internal temperature of the thickest part of the chicken. Always check the thickest part, as that’s where the heat takes the longest to reach.
- The chicken is cooked through when it reaches 165 degrees Fahrenheit (74 degrees Celsius). Don’t rely on looks alone, use a thermometer.
- Never rely on visual cues like color or doneness to determine if the chicken is cooked. The only reliable indicator is a meat thermometer. It’s the only way to be sure.
If you’re unsure, it’s always better to err on the side of caution and cook the chicken a little longer. It’s better to be safe than sorry.
(Part 8) Don’t Be Afraid to Experiment: Unleash Your Inner Chef
The best part of cooking is experimenting. Don’t be afraid to try new things and create your own variations. Think of your kitchen as a culinary playground. Here are a few ideas to get you started:
- Add different spices and herbs to your marinades and rubs. Get creative with flavors!
- Try different cooking methods like grilling, smoking, or braising. Explore different techniques.
- Get creative with your sides, pairing chicken with different vegetables, fruits, or grains. The possibilities are endless!
Cooking is a journey of discovery. Enjoy the process and have fun experimenting with different flavors and techniques. Embrace the unexpected and have fun in the kitchen!
(Part 9) The Final Touch: Serving Up Perfection
The moment of truth has arrived – serving the chicken. This is your chance to showcase your culinary masterpiece. It’s like presenting a work of art. Here’s what I do:
- Carve the chicken into even pieces. This makes it easier to eat and looks more appealing.
- Arrange the chicken on a platter with your favorite sides. Create a beautiful and balanced presentation.
- Garnish with fresh herbs or lemon wedges for a touch of elegance. Add a finishing touch.
- Serve immediately and enjoy! The sooner you serve, the better it will taste.
Remember, a beautifully presented meal enhances the dining experience. Take pride in your culinary creation and savor every bite. It's like celebrating your culinary success.
(Part 10) FAQs: Answering Your Chicken Questions
Here are some common questions I receive about cooking chicken, along with my expert answers. I’m here to answer all your chicken-related questions.
| Question | Answer |
|---|---|
| Can I reuse the same marinade for cooking the chicken? | No, it's not safe to reuse marinade that has been in contact with raw chicken. The marinade may contain bacteria that could cause illness. It’s best to reserve some marinade before adding the chicken, and use that for basting or serving. Always prioritize food safety. |
| How do I know if my chicken is cooked through? | The only reliable way to check is by using a meat thermometer. The internal temperature should reach 165 degrees Fahrenheit (74 degrees Celsius). Don’t rely on looks alone. |
| What should I do if my chicken is overcooked? | Unfortunately, there’s not much you can do to salvage overcooked chicken. It’s best to avoid overcooking in the first place by following the tips I’ve shared. Prevent overcooking by following the advice. |
| Can I freeze cooked chicken? | Yes, you can freeze cooked chicken for up to 3 months. Just make sure to wrap it tightly in plastic wrap or aluminum foil before freezing. This keeps the chicken fresh and prevents freezer burn. |
| What are some good side dishes for chicken? | Chicken pairs well with a variety of side dishes, such as roasted vegetables, mashed potatoes, rice pilaf, salads, and pasta. Get creative and experiment! |
I hope these tips have given you the confidence to tackle any chicken recipe with ease. Remember, the key to juicy, flavorful chicken is all about understanding the basics and having a little fun in the kitchen. Happy cooking!
Everyone is watching

Prime Rib Roast Cooking Time Chart: Per Pound Guide
Cooking TipsPrime rib roast. Just the name conjures images of lavish dinners, crackling fires, and hearty laughter. It’s ...

How Long to Bake Potatoes in the Oven (Perfect Every Time)
Cooking TipsBaked potatoes are a staple in my kitchen. They're incredibly versatile, delicious, and surprisingly easy to m...

Perfect Rice Every Time: The Ultimate Guide to Cooking Rice
Cooking TipsAs a self-proclaimed foodie, I've always been a bit obsessed with rice. It's the foundation of countless cuisi...

The Ultimate Guide to Cooking Asparagus: Tips, Techniques, and Recipes
Cooking TipsAsparagus. The mere mention of this spring delicacy conjures up images of vibrant green spears, crisp and burs...

Ultimate Guide to Cooking the Perfect Thanksgiving Turkey
Cooking TipsThanksgiving. Just the word conjures up images of overflowing tables laden with delicious food, the scent of r...
