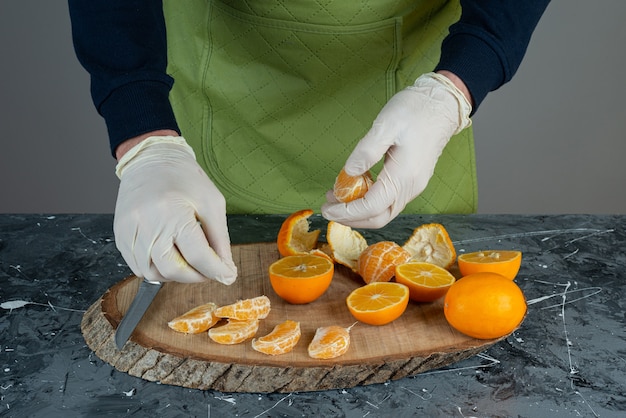
(Part 1) The Pumpkin: Fresh is Best
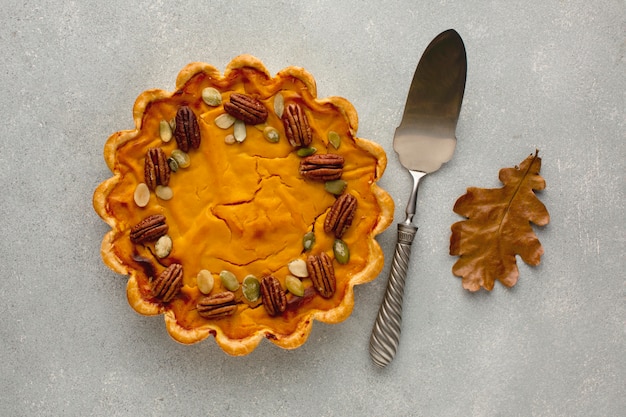
I know some of you might be tempted to grab a can of pumpkin puree from the supermarket. And hey, I get it, sometimes you just don't have the time. But, trust me, there's nothing quite like the flavour of fresh pumpkin. It's so much more intense, rich, and just plain delicious! You'll taste the difference in your pie, I promise.
Choosing the Perfect Pumpkin
Choosing the perfect pumpkin can feel a bit daunting at first, but trust me, it’s easier than you think. Here are a few tips to help you pick the best one for your pie:- Size Matters: For a pie, you'll want a smaller pumpkin. Think of a size you can comfortably hold in your hands. It should be around 5-10 pounds.
- Colour Counts: Choose pumpkins with a deep orange colour. This indicates that they are ripe and will have the best flavour. Avoid pumpkins that are pale or have green patches.
- Give it a Tap: A ripe pumpkin should sound hollow when you tap it. If it sounds dull, it might be overripe.
- Check for Damage: Make sure the pumpkin is free of any cracks, bruises, or soft spots. These could affect the flavour and texture of your pie.
Cleaning and Roasting
Once you've got your pumpkin, it's time to clean and roast it. This is actually a pretty straightforward process:- Wash and Cut: Wash the pumpkin thoroughly and cut it in half. Remove the seeds and stringy bits with a spoon. You can use a sturdy knife or a pumpkin carving kit for this.
- Roast It Up: Place the pumpkin halves cut-side down on a baking sheet lined with parchment paper. Roast in a preheated oven at 350°F (175°C) for about 45 minutes to an hour, or until the flesh is tender. You'll know it's ready when a fork easily pierces the flesh.
- Scoop and Cool: Once the pumpkin is roasted, scoop out the flesh and place it in a bowl. Let it cool completely before using it in your pie. You can use a spoon or a potato masher to help with this.
(Part 2) The Crust: The Foundation of a Great Pie
I remember the first time I successfully made a pie crust from scratch. It was for my dad's birthday, and I was so nervous. But, after following the recipe carefully and paying close attention to the tips, it turned out absolutely perfect! It was flaky, buttery, and had the most beautiful golden brown colour. My dad was so impressed, he even gave me a big hug! From that day on, I knew I could conquer any pie crust, and you can too.
The Secret to a Flaky Crust
The key to a good pie crust is using cold ingredients. This might sound obvious, but you’d be surprised how many people don’t do it. The cold butter helps to create those beautiful flaky layers in the crust. Here are a few tips to make sure your crust stays nice and cold:- Chill the Butter: Cut the butter into small cubes and chill it in the refrigerator for at least 30 minutes before using it. You can even freeze the butter for a few minutes to ensure it's super cold.
- Keep Everything Cold: Use a chilled bowl and a chilled pastry blender to combine the flour and butter. You can also use your fingertips if you prefer, just be sure to work quickly and keep the dough cold.
- Chill the Dough: After you’ve formed the dough, wrap it in plastic wrap and chill it for at least an hour before rolling it out. This allows the gluten in the flour to relax, resulting in a more tender crust.
Preparing the Pie Crust
Now, let's talk about how to actually make the crust. This is where it gets fun, or at least, where you get to get your hands a bit messy!- Combine the Ingredients: In a large bowl, whisk together 2 cups of all-purpose flour, 1 teaspoon of salt, and 1/2 teaspoon of sugar. The salt enhances the flavour of the crust, while the sugar adds a touch of sweetness.
- Cut in the Butter: Add 1 cup of chilled unsalted butter (cut into small cubes) to the flour mixture. Using a pastry blender or your fingers, cut the butter into the flour until the mixture resembles coarse crumbs. This is where the cold butter really shines! The butter pieces will create those little pockets of air that are responsible for a flaky texture.
- Add the Water: Gradually add 1/2 cup of ice-cold water, one tablespoon at a time, mixing with a fork until the dough just comes together. Be careful not to overmix. The water helps to bind the flour and butter together, creating a cohesive dough.
- Form the Dough: Divide the dough in half and form each half into a disc. Wrap each disc in plastic wrap and refrigerate for at least an hour. Chill the dough again to allow the gluten to relax, ensuring a tender crust.
- Roll Out the Dough: On a lightly floured surface, roll out one of the dough discs into a circle that is about 12 inches in diameter. Be sure to use a rolling pin and apply even pressure as you roll.
- Transfer to the Pie Plate: Gently transfer the dough to a 9-inch pie plate. Press the dough into the bottom and sides of the plate, making sure to trim any excess dough. If the dough tears, don't worry! Just gently patch it up with your fingers.
- Prick the Bottom: Prick the bottom of the crust with a fork to prevent air bubbles from forming during baking. This will ensure that the crust bakes evenly and doesn't puff up in the middle.
- Blind Bake the Crust: Preheat the oven to 375°F (190°C). Bake the crust for 15 minutes. Then, remove it from the oven and place a piece of parchment paper or aluminum foil over the bottom of the crust. Fill the parchment paper with pie weights or dry beans. Bake for another 10-15 minutes. This helps to prevent the crust from getting soggy. blind baking is a crucial step, as it ensures that the crust is cooked through before adding the filling.
(Part 3) The Filling: The Heart of the Pie
A Simple and Delicious Pumpkin Pie Filling
Here’s what you’ll need:- Pumpkin Puree: 2 cups of fresh pumpkin puree. This is the star of the show! The fresh pumpkin puree will give your pie a vibrant, rich flavour that you can't get from canned pumpkin.
- Sweetener: 1 cup of granulated sugar or brown sugar. You can adjust the amount of sugar to your taste. I prefer a slightly less sweet pie, so I often use a combination of granulated sugar and brown sugar.
- Spices: 1 teaspoon of ground cinnamon, 1/2 teaspoon of ground nutmeg, 1/4 teaspoon of ground ginger, and a pinch of ground cloves. Feel free to add more or less of your favourite spices. I've even tried adding a pinch of cardamom, which adds a lovely aroma.
- Eggs: 2 large eggs. The eggs add richness and structure to the filling, helping it to set properly.
- Milk or Cream: 1 cup of whole milk or heavy cream. The milk or cream adds moisture and smoothness to the filling. I prefer to use whole milk, but heavy cream will make the filling even richer.
The Secret Ingredient: A Splash of Rum
Now, here’s where my personal touch comes in. I add a tablespoon of rum to my pumpkin pie filling. It adds a beautiful depth of flavour and a subtle hint of warmth that complements the spices perfectly. Don’t worry, the alcohol cooks off during baking, so it’s just there to add a lovely flavour. You can also use bourbon or brandy if you prefer.Mixing It All Together
Now, let's bring it all together:- Combine the Wet Ingredients: In a large bowl, whisk together the pumpkin puree, sugar, spices, eggs, milk, and rum. Be sure to whisk until all the ingredients are well combined and smooth.
- Pour the Filling into the Crust: Pour the pumpkin pie filling into the pre-baked pie crust. You can use a spatula to smooth out the top of the filling.
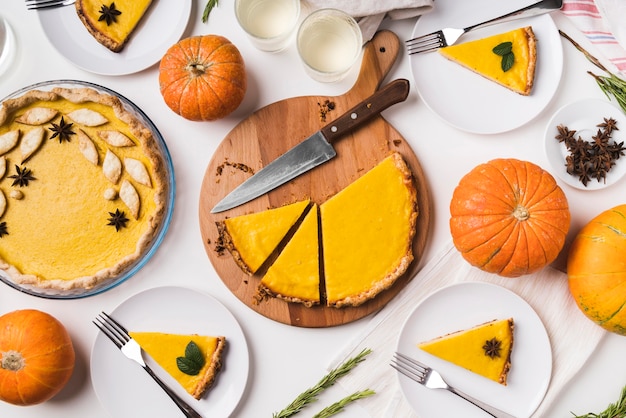
- Bake it to Perfection: Bake the pie at 350°F (175°C) for 50-60 minutes, or until the filling is set and the edges are slightly golden brown. You can check the pie for doneness by inserting a toothpick into the center. If it comes out clean, it's done. Be sure to watch the pie closely during the last 15 minutes of baking to avoid over-browning.
(Part 4) The Baking Process: Patience is Key
Okay, so you’ve got your pie in the oven, and you’re probably feeling excited! But, remember, patience is key when it comes to baking. Don’t be tempted to open the oven door too soon. Let the pie bake undisturbed for at least 50 minutes.I’ve learned this the hard way. Once, I was so impatient to try my pumpkin pie that I opened the oven door after only 30 minutes. The result? A sunken, soggy mess! It was a real disaster. So, I’m telling you, resist the urge to peek! Let the pie bake for the full amount of time, or even a little longer.
Signs of a Well-Baked Pumpkin Pie
Here’s how to tell if your pie is cooked through:- The Filling Should Be Set: When you gently shake the pie, the filling should jiggle slightly but should not be runny.
- The Edges Should Be Golden Brown: The edges of the pie crust should be a beautiful golden brown colour. If they are still pale, you may need to bake the pie for a few more minutes.
Cooling and Serving
Once the pie is baked, let it cool completely in the pie plate before slicing and serving. This helps the filling to set properly and prevents it from being runny.I love to serve my pumpkin pie with a dollop of whipped cream, a sprinkle of cinnamon, and a drizzle of maple syrup. But, really, it’s delicious on its own!
(Part 5) Tips and Tricks for a Perfect Pumpkin Pie
Now, let’s talk about some tips and tricks that I’ve picked up over the years to make sure your pumpkin pie is absolutely perfect:- Use High-Quality Ingredients: A great pumpkin pie starts with high-quality ingredients. Choose a fresh, ripe pumpkin. Use good quality butter, sugar, eggs, and spices. You'll taste the difference.
- Don't Overmix the Dough: When you’re making the crust, be careful not to overmix the dough. Overmixing can make the crust tough. Just mix the dough until it comes together, and then stop.
- Keep the Dough Cold: As I mentioned before, cold butter and cold dough are essential for a flaky crust. If the dough gets too warm, it will become sticky and difficult to work with.
- Don't Overbake the Pie: Overbaking can make the filling dry. Keep a close eye on your pie in the oven and take it out when the filling is set. You can always bake it for a few more minutes if needed.
- Let it Cool Completely: This will help the filling to set and prevent it from being runny. I usually let my pie cool on a wire rack for at least 2 hours before slicing it.
Storing Your Pumpkin Pie
Now, let's talk about how to store your pumpkin pie, because, let’s face it, you’ll probably have leftovers! To keep your pie fresh, store it in an airtight container in the refrigerator for up to 3 days.I’ve also tried freezing pumpkin pie, and you know what, it works pretty well! Wrap the pie tightly in plastic wrap and then in aluminum foil. Freeze it for up to 3 months. When you’re ready to eat it, thaw it in the refrigerator overnight and then reheat it in a preheated oven at 350°F (175°C) for 15 minutes, or until warmed through.
(Part 6) Pumpkin Pie Variations: Get Creative!
So, you’ve got the basics down, but let’s talk about getting creative! Here are a few variations that you can try:- Spiced Pumpkin Pie: Add a touch of ginger, nutmeg, cardamom, and cloves to the filling for a warm and spicy kick. Experiment with different combinations of spices to find your favorite blend.
- Chocolate Pumpkin Pie: Add a tablespoon or two of cocoa powder to the filling for a decadent twist. You can also use chocolate chips or chopped nuts for an extra indulgent treat.
- Salted Caramel Pumpkin Pie: Drizzle a layer of salted caramel sauce over the top of the pie before serving. This is a truly decadent combination of sweet and salty flavours. You can even add a pinch of sea salt to the filling for an extra salty kick.
- Pumpkin Cream Cheese Pie: Mix in a block of cream cheese to the filling for a rich and creamy flavor. The cream cheese will add a tangy counterpoint to the sweetness of the pumpkin.
(Part 7) Pumpkin Pie Serving Ideas: Take It Up a Notch
Now, let's talk about how to really impress your guests with your pumpkin pie. Here are a few serving ideas:- Whipped Cream: A classic topping, but you can get creative. Try adding a bit of vanilla extract, cinnamon, or nutmeg to your whipped cream. Or, for a fun twist, make a simple caramel sauce to drizzle over the whipped cream.
- Fruit Compote: A fresh and fruity topping can really complement the pumpkin pie. Try a simple apple compote, a cranberry sauce, or a blackberry sauce. You can also use a combination of fruits for a more complex flavour.
- Cinnamon Sugar: A simple sprinkle of cinnamon sugar can add a warm and comforting touch to your pumpkin pie. This is a great option for those who prefer a less sweet topping.
- Chocolate Shavings: For a touch of elegance, try shaving some dark chocolate over the top of your pumpkin pie. This is a beautiful and delicious finishing touch. You can use a vegetable peeler or a cheese grater to create chocolate shavings.
(Part 8) FAQs: Your Pumpkin Pie Questions Answered
Now, let’s answer some questions you might have about making the perfect pumpkin pie!
1. Can I use canned pumpkin puree instead of fresh?
You can absolutely use canned pumpkin puree if you don’t have time to roast a fresh pumpkin. However, the flavour will be slightly different. Canned pumpkin puree is often less intense in flavour than fresh pumpkin puree. If you use canned pumpkin puree, make sure to adjust the amount of sugar according to the sweetness of the puree. You may need to add more sugar if the canned pumpkin puree is not very sweet.2. How do I know if my pumpkin pie is done?
You can tell if your pumpkin pie is done by checking the filling. The filling should be set and jiggle slightly when you gently shake the pie. The edges of the crust should be golden brown. If the filling is still jiggling too much, it needs more time in the oven. If the edges are too brown, you can cover the pie with foil to prevent further browning.3. What if my pumpkin pie crust is soggy?
If your pumpkin pie crust is soggy, it’s probably because it wasn’t blind-baked properly. Blind baking helps to prevent the crust from getting soggy by pre-baking it before adding the filling. Make sure that you bake the crust for the full amount of time and that you use pie weights or dry beans to prevent the crust from puffing up.4. Can I make pumpkin pie ahead of time?
Yes, you can make pumpkin pie ahead of time. Simply bake the pie as directed and then let it cool completely. Then, cover the pie tightly with plastic wrap and store it in the refrigerator for up to 3 days. The pie will actually taste even better the next day.5. How long can I store pumpkin pie in the freezer?
You can freeze pumpkin pie for up to 3 months. Wrap the pie tightly in plastic wrap and then in aluminum foil. When you’re ready to eat it, thaw it in the refrigerator overnight and then reheat it in a preheated oven at 350°F (175°C) for 15 minutes, or until warmed through. You can also reheat the pie in the microwave, but be careful not to overheat it.(Part 9) Conclusion: Enjoy Your Pumpkin Pie!
And there you have it! I hope this guide has inspired you to make the best pumpkin pie ever. It’s a truly satisfying experience, from choosing the perfect pumpkin to enjoying the delicious results. So, gather your ingredients, put on your apron, and get baking! Remember, the most important thing is to have fun and enjoy the process. And, if your pie isn’t perfect the first time, don’t worry! Just keep practicing, and you'll be a pumpkin pie pro in no time. Happy baking!Everyone is watching

Prime Rib Roast Cooking Time Chart: Per Pound Guide
Cooking TipsPrime rib roast. Just the name conjures images of lavish dinners, crackling fires, and hearty laughter. It’s ...
How Long to Bake Potatoes in the Oven (Perfect Every Time)
Cooking TipsBaked potatoes are a staple in my kitchen. They're incredibly versatile, delicious, and surprisingly easy to m...
Perfect Rice Every Time: The Ultimate Guide to Cooking Rice
Cooking TipsAs a self-proclaimed foodie, I've always been a bit obsessed with rice. It's the foundation of countless cuisi...
The Ultimate Guide to Cooking Asparagus: Tips, Techniques, and Recipes
Cooking TipsAsparagus. The mere mention of this spring delicacy conjures up images of vibrant green spears, crisp and burs...
Ultimate Guide to Cooking the Perfect Thanksgiving Turkey
Cooking TipsThanksgiving. Just the word conjures up images of overflowing tables laden with delicious food, the scent of r...