Let's be honest, there's something incredibly satisfying about popping your own popcorn. It's not just about the delicious, fluffy treat, it's about the process itself. The gentle sizzle of oil, the rhythmic pops of kernels transforming into airy clouds, and the intoxicating aroma of freshly popped corn filling your kitchen – it's a sensory experience that brings back childhood memories of cozy evenings with loved ones.
I've always felt a bit disappointed by microwave popcorn. It just lacks the charm and control of the stovetop method. I mean, who wants to be limited by pre-portioned packets of butter and salt, unable to customize their popcorn experience? With stovetop popcorn, you're the maestro, orchestrating a symphony of flavors and textures to your heart's content.
So, whether you're a popcorn aficionado or just curious about this "old-fashioned" way of making it, I'm here to guide you through the process step by step. It's incredibly easy, and the results are, in my humble opinion, far superior to anything you'll find in the microwave aisle.
Part 1: The Equipment

Choosing the Right Pot
The first ingredient in a great popcorn adventure is the right pot. This isn't a simple "throw-some-kernels-in-a-pan" situation; we're aiming for a consistent, perfectly popped masterpiece. A large saucepan, preferably with a lid, is your go-to. The key is to pick a pan that's deep enough for the kernels to have some room to move around, preventing them from getting stuck to the bottom and burning. Think of it as a little kernel dance party, and you want to give them enough space to really get those pops going.
A Lid for the Job
Speaking of a dance party, a lid is essential! It's like the dance floor's roof, trapping the heat and steam that's crucial for those fluffy, ethereal pops. Look for a lid that fits snugly but not too tightly, allowing for a little steam release while keeping any rogue kernels from making a daring escape. You want that steam to work its magic, creating those perfect little popcorn puffs.
Other Kitchen Necessities
You'll also need a few basic kitchen tools to make your popcorn dreams come true:
- A wooden spoon or spatula for stirring: This is your trusty companion for ensuring the kernels are distributed evenly in the oil and to prevent any potential sticking.
- A measuring cup for oil and kernels: Precision is key here! You want to avoid overcrowding your pot and using too much oil, so measuring cups are your best friends.
- A bowl for the finished popcorn: You'll need a large, sturdy bowl to catch those fluffy treasures and for showcasing your culinary masterpiece.
- Salt and pepper for seasoning (and any other toppings you fancy): These are the basic building blocks of flavor, but feel free to unleash your creativity and experiment with your favorite seasonings. From paprika to garlic powder, herbs, cheeses, or even a drizzle of melted chocolate, the possibilities are truly endless!
Part 2: The Ingredients

Popcorn Kernels: The Stars of the Show
Now, let's talk about the heart of the matter: the kernels. You can find them in most grocery stores, and it's worth taking your time to choose the right ones. Look for kernels that are plump, firm, and free from any dust or debris. Think of them as tiny, unassuming performers waiting to be transformed into a fluffy, crunchy spectacle.
And please, for the love of popcorn, avoid the pre-popped, microwave-ready stuff. We're going for the authentic, homemade experience here, not a manufactured substitute. The joy of stovetop popcorn lies in the freshness and the control you have over every step of the process.
Oil: The Catalyst for Popping
The oil is the magic ingredient that brings the heat and allows those kernels to burst into life. My personal preference is for neutral oils with a high smoke point like canola or vegetable oil. They provide a clean canvas for your popcorn flavors without adding any unwanted tastes. Olive oil can work in a pinch, but be mindful of its lower smoke point, which could lead to a burnt, bitter taste.
Salt: The Perfect Partner in Flavor
Salt is a must-have, enhancing the natural sweetness and nuttiness of the popcorn. You can use regular table salt or a fancier sea salt, whatever suits your palate. But remember, you can always add more later, so start with a light sprinkle and adjust to your liking. A little salt goes a long way in bringing out the best in your popcorn.
Part 3: The Process

Now for the exciting part: the popcorn popping action!
Step 1: Heating the Oil
Start by adding about 2 tablespoons of oil to your saucepan. Heat it over medium-high heat, ensuring the oil is evenly distributed across the bottom. You'll know it's ready when it shimmers and you see small wisps of smoke rising. This signals that the oil is hot enough to activate those popcorn kernels.
Step 2: Testing the Oil Temperature
Before introducing the kernels, we need to make sure the oil is hot enough. This is a crucial step, so don't skip it! Drop a couple of kernels into the hot oil. If they pop immediately, you're ready to go. If not, give the oil a few more minutes of heating. You want to avoid adding kernels to lukewarm oil, as this will lead to a lot of unpopped kernels and a less than satisfactory popcorn experience.
Step 3: Introducing the Kernels
Once your oil is hot and ready, add about 1/4 cup of popcorn kernels to the pan. It's important not to overcrowd the pan. Give those kernels some breathing room to pop and dance! Overcrowding will lead to uneven popping and lots of unpopped kernels.
Step 4: Covering and Listening to the Symphony of Pops
Immediately cover the pan with the lid and listen closely. You'll hear the delightful symphony of pops, like a miniature orchestra of kernels exploding into fluffy goodness. This is where the magic happens! It's a sound that brings a smile to my face every time.
Step 5: Shaking the Pan for Even Popping
As the kernels start to pop, give the pan a gentle shake every now and then to ensure even heating. It's like a popcorn dance party – a little movement helps everyone join in the fun. Keep shaking until the popping slows down significantly. This usually takes about 2-3 minutes, but it can vary depending on the heat of your stove and the type of kernels you're using.
Step 6: Removing from Heat and Adding Seasoning
When the popping slows down to a few kernels per second, remove the pan from the heat. This is your cue to add your salt, pepper, or any other seasonings you've chosen. I often add a sprinkle of smoked paprika for a delightful smoky flavor, but experiment to find your perfect combination.
Step 7: Time to Enjoy!
Carefully transfer your freshly popped popcorn to a large bowl. It's best to eat it while it's still warm and crunchy, savoring the delicious aroma and satisfying texture.
Part 4: Tips and Tricks for Perfectly Popped Popcorn
Don't Overcrowd the Pan
As mentioned before, overcrowding the pan is a big no-no. Give those kernels some space to move around, pop, and dance! Stick to 1/4 cup of kernels per batch for the best results. If you're aiming for a larger batch, just pop multiple batches, allowing each one to cool slightly before combining them in your bowl.
Listen Closely to the Popping
Pay attention to the popping sound. You want to stop shaking the pan as soon as the popping slows down to just a few kernels per second. This prevents burnt popcorn and wasted kernels. It's like knowing when the party is winding down and stopping the music before things get out of hand.
Don't Forget to Shake
Shaking the pan is a key move. It's essential for even heating and popping, ensuring every kernel has a chance to shine. Think of it as a little popcorn party – keep the music (pops) going and the dance floor (pan) moving to prevent anyone from getting stuck in the corner (unpopped).
Use the Right Amount of Oil
The oil is the magic ingredient that makes it all happen, so don't skimp on it! Two tablespoons is usually the sweet spot, providing enough lubrication for popping without leaving a greasy mess. Too much oil will make your popcorn greasy and less appealing, while too little oil will leave you with unpopped kernels and a disappointing outcome. It's a delicate balance, so follow those measurements carefully.
Add Butter After Popping
For that classic buttery flavor, add your butter after popping. This way, the butter melts evenly and coats the popcorn, creating that perfect buttery goodness. You can use melted butter or even use a butter sprayer for even distribution. It's the final touch that transforms your popcorn from good to glorious.
Get Creative with Toppings
Once you've mastered the basic popping technique, you can unleash your creativity with toppings. Experiment with different seasonings, cheeses, herbs, spices, or even candy. From a sprinkle of chili powder for a spicy kick to a drizzle of melted chocolate for a sweet indulgence, the possibilities are truly endless! The beauty of homemade popcorn is that you're in control, so have fun and explore your culinary imagination.
Part 5: Dealing with Unpopped Kernels
Let's face it: even the most experienced popcorn chefs have a few stubborn kernels that refuse to pop. But don't despair! These aren't lost causes. You can reheat them in a pan or even use them in your next batch of popcorn. Just add a few to the next round of popping, and they'll have their chance to shine. Sometimes, those kernels just need a little more encouragement and a second chance to become fluffy clouds of joy.
Part 6: Storing Popcorn
If you happen to have more popcorn than you can handle, you can store it in an airtight container for later consumption. Store it at room temperature for up to a week. For longer storage, you can freeze it for up to a month, but it might lose some of its crispiness. It's best to enjoy it fresh, but if you have leftovers, freezing them can help you savor that homemade goodness for a little while longer.
Part 7: Variations and Flavors
While the classic salty popcorn is always a winner, there's a whole world of flavors to explore. Here are a few ideas to spark your culinary creativity:
Salty and Sweet
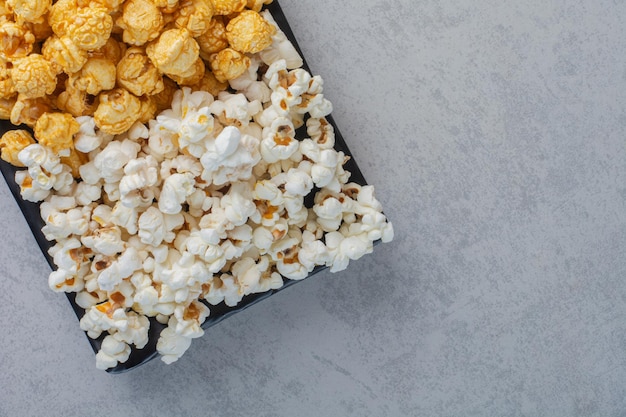
For a delightful combination of salty and sweet, try sprinkling some caramel corn over your freshly popped popcorn. The contrasting flavors create a taste sensation that's irresistible.
Spicy and Savory
If you crave a little heat, add a touch of spice to your popcorn. A sprinkle of chili powder or cayenne pepper can provide a delicious kick. You can also experiment with other spices like cumin, paprika, or garlic powder, for a more complex flavor profile.
Herby and Fresh
For a fresh and herbal twist, try adding herbs like rosemary, thyme, or oregano to your popcorn. You can also add a sprinkle of Parmesan cheese for a savory and cheesy flavor. The combination of herbs and cheese adds a sophisticated touch to your popcorn.
cheesy goodness
For cheese lovers, add a sprinkle of grated Parmesan or cheddar cheese to your popcorn. For a more indulgent treat, melt a block of cheese and drizzle it over your popcorn. The gooey, melted cheese adds a luxurious touch to your popcorn experience.
Sweet and Fruity
If you're seeking a sweet and fruity flavor, try adding some dried cranberries, blueberries, or strawberries to your popcorn. You can also add a drizzle of chocolate syrup for an extra touch of sweetness. This combination is perfect for satisfying that sweet tooth while enjoying the crunchy texture of popcorn.
Part 8: Popcorn Fun Facts
Did You Know?
Popcorn is one of the oldest cultivated crops in the Americas, dating back over 6,000 years! It's been a popular snack for centuries, enjoyed by people from all walks of life. It's a testament to its timeless appeal and ability to bring people together.
The Pop Secret
Did you know that the water inside a popcorn kernel turns into steam when heated, causing the kernel to explode? That steam is what creates the fluffy texture we all know and love. It's a simple yet fascinating scientific phenomenon that makes popcorn such a unique and delightful snack.
Popcorn Power
Popcorn is actually a pretty healthy snack. It's a good source of fiber, whole grains, and antioxidants. Plus, it's low in calories and fat compared to other snacks. So, indulge in a bowl of popcorn without guilt, knowing you're treating yourself to a satisfying and nutritious snack.
Part 9: FAQs
Q1: Why do some kernels not pop?
There are a few reasons why kernels might not pop. One reason could be that they are not fresh. Older kernels tend to be dryer and less likely to pop. Another reason could be that the oil isn't hot enough. Make sure the oil is shimmering and wisps of smoke are visible before adding the kernels. And finally, overcrowding the pan can lead to some kernels not having enough space to pop.
Q2: What should I do with unpopped kernels?
Don't throw those unpopped kernels away! You can reheat them in a pan or add them to your next batch of popcorn. They'll still pop, I promise. Sometimes, those kernels just need a little more encouragement and a second chance to become fluffy clouds of joy.
Q3: Can I use olive oil for popcorn?
You can use olive oil, but it has a lower smoke point than other oils. It can impart a strong flavor and even burn if heated too high. If you're using olive oil, be sure to keep a close eye on the temperature and reduce the heat if needed.
Q4: What are the best toppings for popcorn?
The best toppings for popcorn are really a matter of personal preference. Some popular options include butter, salt, pepper, cheese, herbs, spices, caramel, chocolate, and dried fruits. Don't be afraid to experiment and find your perfect combination.
Q5: How long can I store popcorn?
You can store popcorn in an airtight container at room temperature for up to a week. For longer storage, you can freeze it for up to a month, but it might lose some of its crispiness. It's best to enjoy it fresh, but if you have leftovers, freezing them can help you savor that homemade goodness for a little while longer.
So there you have it! Now you're equipped with the knowledge and skills to create delicious, homemade popcorn right in your own kitchen. Get those kernels popping, and enjoy the delightful experience of making your own popcorn magic!
Everyone is watching

Perfect Rice Every Time: The Ultimate Guide to Cooking Rice
Cooking TipsAs a self-proclaimed foodie, I've always been a bit obsessed with rice. It's the foundation of countless cuisi...

Ultimate Guide to Cooking the Perfect Thanksgiving Turkey
Cooking TipsThanksgiving. Just the word conjures up images of overflowing tables laden with delicious food, the scent of r...

The Ultimate Guide to Cooking Asparagus: Tips, Techniques, and Recipes
Cooking TipsAsparagus. The mere mention of this spring delicacy conjures up images of vibrant green spears, crisp and burs...

Can You Cook Spaghetti with Gasoline? (The Shocking Truth)
Cooking TipsWe've all seen those crazy internet trends. You know, the ones that make you wonder, "Did someone actually try...

Chorizo and Eggs Recipe: The Ultimate Guide
Cooking TipsRight, let’s talk about chorizo and eggs. You know, that classic Spanish dish that's always a winner. It's th...
