I've always had a soft spot for a good steak. There's just something about a perfectly cooked piece of meat, with a beautiful crust and a juicy, tender interior, that makes me happy. But let's be honest, achieving that perfect steak isn't always a walk in the park. For years, I was stuck in the land of overcooked, chewy disasters. I’d almost given up on steak altogether! Then, I discovered the joy of cooking ribeye on the stovetop. It’s a game-changer, I tell you! The secret lies in understanding the process, and with a bit of practice, anyone can master this culinary feat.
So, grab a glass of your favourite red wine (it’s the perfect pairing for ribeye, in my opinion!), and let's embark on this culinary journey together. I'll guide you step-by-step through the process of cooking the perfect ribeye on the stove, from choosing the right cut of meat to achieving that glorious sear and mastering the art of resting. Get ready to impress your friends and family with your newfound steak-cooking skills!
(Part 1) choosing the right ribeye: The Foundation of Flavor

The foundation of any great steak dish is the quality of the meat. You wouldn't use just any bottle of wine for a special dinner, and the same principle applies to your steak. A good ribeye is the key to unlocking an exceptional dining experience. You want a steak that's marbled, meaning it has a good amount of fat running through the muscle. This fat will melt during cooking, adding incredible flavor and keeping the steak incredibly juicy.
How to Spot a Stellar Ribeye
Here's what to look for when you're selecting your ribeye:
- Marbling: A top-notch ribeye should have visible white fat streaks running throughout the muscle. This marbling is the key to a flavorful, tender, and juicy steak. The more marbling, the better!
- Thickness: Aim for a steak that's at least 1 inch thick, ideally closer to 1.5 inches. This thickness allows for even cooking and helps to retain moisture.
- Color: Look for a deep red color that’s not too dark. A purplish hue can indicate the meat is too old. You also want the fat to be white or a pale yellow, not too yellow or grey.
- Texture: A good ribeye should feel firm and springy to the touch. It should bounce back slightly when you press it. Avoid steaks that feel mushy or soft.
Remember, don’t be afraid to ask your butcher for advice. They're the experts and can help you choose the perfect ribeye for your needs.
(Part 2) Preparing the Steak: Setting the Stage for Perfection

Now that you’ve chosen your ribeye, let's prepare it for cooking. These simple steps might seem insignificant, but they make a big difference in the final result. We're aiming for a beautiful sear and a perfectly tender, juicy steak.
1. Room Temperature: Letting the Steak Breathe
Cooking a steak straight from the fridge is a recipe for disaster. Just like you wouldn’t bake a cake from the fridge, a cold steak won’t cook evenly. The best way to ensure your steak cooks evenly is to bring it up to room temperature before cooking. Take the steak out of the fridge at least 30 minutes before you plan to cook it. This allows the steak to warm up evenly and cook more consistently. You’ll also notice a difference in the tenderness.
2. Pat it Dry: Getting Ready for the Sear
Right before you start cooking, use paper towels to pat the steak dry. This helps the steak brown nicely and prevents it from steaming on the pan. A good sear is all about getting that perfect crust, and excess moisture is the enemy of a good sear.
3. Salt and Pepper: The Flavor Foundation
This is where the magic begins. Seasoning your steak is crucial, and it's a step you can be creative with. However, I’m a firm believer in the power of simplicity. I stick with salt and freshly ground black pepper. Just a good sprinkle of each on both sides of the steak. For those who like to experiment, you can try adding other spices or herbs like paprika, garlic powder, or rosemary.
Here’s a little secret I’ve learned over the years: Salt the steak at least an hour before you cook it. This allows the salt to penetrate the meat, enhancing its flavor and tenderness. It’s a game changer, trust me!
(Part 3) The Pan: Your Culinary Canvas

The right pan is essential for creating a delicious steak. You want a pan that's heavy and can get super hot, like a cast iron skillet. These pans distribute heat evenly, creating a fantastic sear.
Cast Iron Skillet: The Hero of the Show
I swear by my cast iron skillet. I've had it for years, and it's seen a lot of steak action. It’s seasoned and ready to create a crispy, delicious crust. If you don't have a cast iron skillet, you can use a heavy-bottomed stainless steel pan. Just make sure it’s oven-safe, because we’re going to use it for both searing and finishing the steak.
Heating It Up: Get That Pan Smoking Hot
Heat the pan over high heat until it’s smoking hot. This is the key to achieving that beautiful, crispy sear. You can test the heat by holding your hand a few inches above the pan. You should feel the heat radiating. Trust me, you want it hot!
(Part 4) Searing the Steak: The Art of the Crust
The next step, searing, is perhaps the most crucial. This is what gives the steak that delicious, crispy crust that every steak lover dreams of.
1. Oil It Up: Creating a Slippery Surface
Add a generous amount of oil to the hot pan. I use a neutral oil with a high smoke point, like grapeseed oil or avocado oil. You can also use butter for a more intense flavor, but be careful not to let it burn.
2. Don’t Crowd the Pan: Giving Each Steak Room to Breathe
Avoid overcrowding the pan. If you have multiple steaks, cook them in batches. This gives each steak enough space to sear properly.
3. Get the Sear on: Creating a Flavorful Barrier
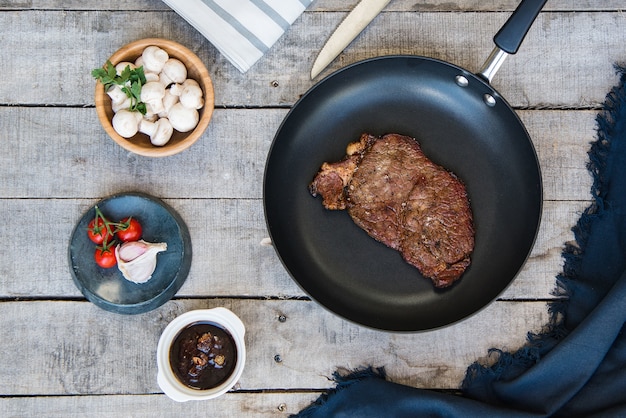
Carefully place the steak in the pan and let it cook undisturbed. Resist the temptation to poke or move it! You're aiming for a nice sear, and that takes time. For a perfect sear, cook the steak for 2-3 minutes on each side. The steak should be beautifully browned, almost charred, but don't worry about the center – it will cook through later.
4. Flip, Flip, Flip: Building a Crust on Both Sides
Once the first side is done, carefully flip the steak and sear the other side for the same amount of time. You’re basically forming a delicious crust on both sides. A well-seared steak is a sight to behold!
(Part 5) Finishing the Steak: Reaching Your Desired Doneness
After searing, you’re going to move the steak to the oven for finishing. This is important, as it ensures the steak cooks evenly and reaches the desired doneness.
1. Time for the Oven: Gentle Heat for Even Cooking
Preheat your oven to 350°F (175°C). This isn’t a high temperature, so don’t worry about burning your steak.
2. The Finishing Touch: Gentle Heat for Perfect Doneness
Carefully transfer the seared steak to the preheated oven. You can put it directly on the oven rack or on a baking sheet. The exact cooking time will depend on how thick your steak is and how well done you want it.
3. Doneness Chart: Know Your Steak
Here’s a guide to cooking times for various degrees of doneness:
| Doneness | internal temperature (°F) | Cooking Time (approx.) |
|---|---|---|
| Rare | 125-130°F | 4-5 minutes |
| Medium Rare | 130-135°F | 5-6 minutes |
| Medium | 140-145°F | 6-7 minutes |
| Medium Well | 150-155°F | 7-8 minutes |
| Well Done | 160°F | 8-9 minutes |
Use a meat thermometer to check the internal temperature of the steak. It’s the most accurate way to ensure it’s cooked to your liking.
(Part 6) Resting the Steak: Unlocking Tenderness and Flavor
Okay, so your steak is seared and finished. But don’t rush into slicing and eating just yet! You need to let the steak rest for at least 5-10 minutes before cutting into it. Resting allows the juices to redistribute throughout the steak, resulting in a much juicier and more tender steak. It’s a crucial step, and well worth the wait.
How to Rest Your Steak: Keeping It Warm and Juicy
Transfer the steak to a cutting board and loosely cover it with aluminum foil. This will help to keep the steak warm and prevent it from drying out.
(Part 7) Slicing and Serving: The Grand Finale
Finally, it’s time for the moment of truth. Slice your steak and get ready to enjoy the fruits of your labor.
1. Slicing: Unlocking Texture and Flavor
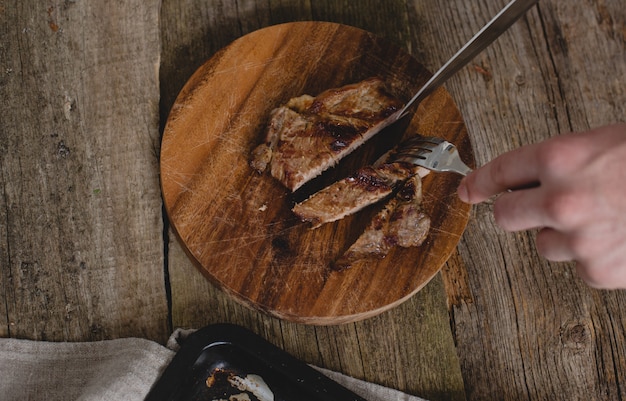
Use a sharp knife to slice the steak against the grain. This will make the steak easier to chew and prevent it from being tough.
2. Serving: Sharing the Deliciousness
Serve the steak immediately. You can add a simple side of mashed potatoes, roasted vegetables, or a salad to complete the meal. But be sure to savor every bite!
(Part 8) A Few Words on Sauces and Toppings: Enhancing the Flavor
While I prefer to keep things simple, some folks like to add sauces and toppings to their steak. It's all about personal preference. But if you're feeling adventurous, here are a few ideas:
- Garlic butter: This is a classic steak topping. Simply melt butter with garlic and herbs like parsley or thyme. Spoon it over the steak before serving.
- Béarnaise sauce: This rich and creamy sauce is a perfect match for ribeye. It’s a bit more involved to make, but well worth the effort.
- Red wine reduction: This is a simple and delicious sauce that adds a touch of acidity to the steak. Simmer red wine with shallots and herbs, and reduce until it thickens.
Ultimately, it’s up to you. Choose what you like best and enjoy!
(Part 9) A Few Tips for Success: Mastering the Art of the Steak
Here are a few extra tips to help you cook the perfect ribeye steak on the stove:
- Don’t be afraid to experiment: Try different seasonings, toppings, and cooking times to find what you like best. This is your culinary journey, so have fun with it!
- Invest in a good meat thermometer: It’s a must-have for any steak lover. It ensures that your steak is cooked to your desired doneness, no matter what.
- Listen to your instincts: The process of cooking a steak is a bit like a conversation. You’re listening to the pan, the steak, and your own senses to create a perfect outcome.
FAQs: Common Steak Questions Answered
1. What if my pan is not cast iron?
Don’t worry! You can absolutely cook a great steak in a regular pan. Choose a heavy-bottomed stainless steel pan that’s oven-safe. It might not heat up quite as quickly as a cast iron, but it will still work great.
2. How do I know if my pan is hot enough?
You can test the heat by holding your hand a few inches above the pan. You should feel the heat radiating. If you can’t feel the heat, the pan isn’t hot enough. If you’re unsure, just wait a few more minutes. You want that pan super hot!
3. Can I use a different cut of steak?
Absolutely! You can use other cuts of steak, like new york strip, filet mignon, or even sirloin. Just adjust the cooking times based on the thickness and fat content of the steak.
4. What should I do if my steak is overcooked?
Unfortunately, there’s no way to undo overcooking. But don’t fret! A slightly overcooked steak is still better than a raw one. You can always try to salvage it by adding a sauce or topping to make it more appealing.
5. Is it okay to cook a steak from frozen?
It’s not ideal. You’ll get better results if you thaw the steak completely before cooking. But if you’re in a pinch, you can cook it from frozen. Just make sure to increase the cooking time by about 50%.
Remember, cooking a great ribeye steak is about more than just following a recipe. It’s about understanding the process, being patient, and having fun in the kitchen. With a little practice, you’ll be a steak master in no time!
Everyone is watching

Perfect Rice Every Time: The Ultimate Guide to Cooking Rice
Cooking TipsAs a self-proclaimed foodie, I've always been a bit obsessed with rice. It's the foundation of countless cuisi...

Prime Rib Roast Cooking Time Chart: Per Pound Guide
Cooking TipsPrime rib roast. Just the name conjures images of lavish dinners, crackling fires, and hearty laughter. It’s ...

The Ultimate Guide to Cooking Asparagus: Tips, Techniques, and Recipes
Cooking TipsAsparagus. The mere mention of this spring delicacy conjures up images of vibrant green spears, crisp and burs...

Ultimate Guide to Cooking the Perfect Thanksgiving Turkey
Cooking TipsThanksgiving. Just the word conjures up images of overflowing tables laden with delicious food, the scent of r...

How Long to Bake Potatoes in the Oven (Perfect Every Time)
Cooking TipsBaked potatoes are a staple in my kitchen. They're incredibly versatile, delicious, and surprisingly easy to m...
