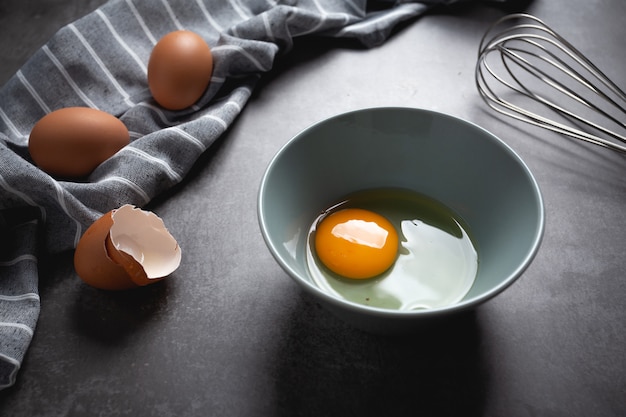
Let's be honest, we've all been there – staring at the clock, desperately needing a quick breakfast, and wondering if we can pull off a microwave-cooked egg. It seems like a simple enough task, but trust me, there's a bit more to it than meets the eye! Microwaving an egg without the proper technique can turn into a bit of a sticky situation – quite literally. But don't fret, because I'm here to guide you through the process, step-by-step, ensuring you end up with a perfectly cooked egg, without the mess or the risk of a mini-explosion.
(Part 1) The Danger Zone: Why Microwaving Eggs Can Go Wrong

So, why is microwaving an egg such a gamble? It all boils down to, well, boiling! Eggs are essentially little pressure cookers, containing a liquid (the egg white and yolk) trapped within a shell. When you pop an egg in the microwave, the liquid absorbs the energy and gets superheated. Now, this isn't necessarily bad, but it's incredibly unstable. Think of it like a bottle of shaken soda – the tiniest bump, or even the heat itself, can trigger a violent release of that pressure, in the form of a steam explosion. Yikes!
The Importance of Piercing
This is where piercing the egg comes in. By creating a tiny hole in the shell, you provide a safe escape route for the steam, releasing pressure before it builds up and causes an explosion. It's a simple yet crucial step that transforms microwaving an egg from a risky experiment to a safe and delicious breakfast hack.
(Part 2) The Equipment: What You Need

You won't need a whole lot to get your microwave egg game on. Here’s your minimal, essential equipment:
- Microwave-safe bowl or container: Make sure it's big enough to accommodate your egg, with a little room to spare. You want the egg to have space to cook evenly and release steam safely.
- Egg: We'll get into choosing the right egg later, but for now, just grab one out of the fridge.
- Toothpick or safety pin: This is your pressure release valve. It'll be our hero in preventing those steam explosions.
- Optional: Paper towel: A little extra protection against spills, especially if you're a bit of a klutz like me.
(Part 3) Preparation: Getting Ready to Microwave

Alright, let’s get this egg prepped and ready for its microwave adventure.
Step 1: Choose Your Egg
Picking the right egg is key to success. fresh eggs are your best bet – they're less likely to explode, since their yolks are still firm and haven't started to break down. Now, don’t panic if you only have a few older eggs in the fridge – they'll still work, just be a bit more cautious!
Step 2: Clean the Egg
Give your egg a quick scrub under cold water. This washes away any dirt or bacteria that might be clinging to the shell. It's a simple step, but it can make a big difference in ensuring your egg is safe and clean to eat.
Step 3: Pierce the Egg
This is the crucial step that separates the seasoned microwave egg chefs from the newbies. Take your toothpick or safety pin and gently poke a tiny hole in the top of the egg. The hole should be small, just enough to release the steam. Avoid piercing too deeply, as this could crack the yolk.
Step 4: Prepare Your Microwave
Grab your microwave-safe bowl and give it a quick rinse. If you're feeling extra cautious, line the bowl with a paper towel to catch any spills. It's not always necessary, but it can give you a little peace of mind.
(Part 4) Cooking: The Microwave Journey of the Egg
With your egg prepped and ready, it’s time to unleash the microwave's power!
Step 1: Time is of the Essence
The amount of time you microwave your egg will determine how runny or firm your yolk will be. For a runny yolk, start with 30-45 seconds. If you prefer a firmer yolk, aim for 45-60 seconds. Remember, these are just starting points, so adjust the cooking time based on your preference and your microwave's power.
Step 2: The Microwave Magic
Place the pierced egg in your prepared bowl and pop it in the microwave. Keep your ears peeled – listen carefully for any hissing or bubbling sounds. If you hear anything, stop the microwave immediately! The egg might be building up pressure, so carefully check it and pierce it again if necessary.
Step 3: Check, Check, Check!
Don't rush to grab the egg after it's done microwaving. Let it sit in the bowl for about a minute, giving it time to finish cooking evenly. Now, carefully check the egg. If you want a firmer yolk, you can microwave it for a few more seconds. But remember, keep a close eye on it, as you don't want to overdo it and end up with a rubbery egg!
(Part 5) Safety Precautions: Making Sure You're Covered
Remember, safety first! Here's a rundown of safety tips that should always be top of mind when you're dealing with a microwave and an egg:
- Always use a microwave-safe container. It's not worth the risk of your bowl shattering in the microwave.
- Never microwave an egg that hasn't been pierced. This is a rule you never want to break!
- Don't leave a microwaved egg unattended. Keep an eye on it throughout the cooking process, and be prepared to stop the microwave if you hear any unusual noises.
- If you see any signs of pressure build-up, stop the microwave immediately and pierce the egg again. It's better to be safe than sorry!
- Always use oven mitts to handle a hot egg. Don't underestimate the heat of a microwaved egg.
- If you're unsure about something, it's best to err on the side of caution. There's no shame in double-checking your steps or asking for help if you need it.
(Part 6) Beyond the Basic: Expanding Your Egg Horizons
Now, you've mastered the basic microwaved egg. But there's a whole world of possibilities beyond the simple, plain egg. Let's get creative!
Spice Things Up with Seasonings
Add a touch of flavor by incorporating seasonings before you microwave. A pinch of salt and pepper is always a good starting point. If you're feeling adventurous, try a sprinkle of paprika, chili powder, or herbs like rosemary, thyme, or chives.
Mix It Up with Other Ingredients
For a richer, creamier texture, whisk a splash of milk or cream into the egg before microwaving. You can also add some shredded cheese, chopped vegetables, or even a dollop of salsa for a bit of spice.
Embrace the Egg-cellent Omelette
Craving an omelette but don't have time to stand at the stove? Try this simple microwave omelette. Whisk together a couple of eggs with milk, salt, and pepper. Microwave for about 30-45 seconds, or until the omelette is set. You can fold it in half and enjoy it as is, or add your favorite fillings for a more substantial meal.
(Part 7) Serving Time: Enjoy Your Microwaved Egg
Now that your egg is perfectly cooked, it's time to enjoy the fruits of your labor. The possibilities are endless, really! You can pop it on a piece of toast for a quick and easy breakfast, throw it in a sandwich, or add it to your favorite salad for a boost of protein. Get creative and let your culinary imagination soar!
(Part 8) Common Mistakes: Avoiding the Microwaved Egg Disaster
We've all made a few microwave egg blunders in our time, right? It's a learning process. Let’s learn from those mistakes and make sure they don’t happen again!
The Unpierced Egg: A Recipe for Disaster
This is the most common mistake, and it's the one that's most likely to lead to a messy explosion. Never, ever microwave an egg without piercing it first. It's the key to a safe and successful microwave egg experience.
Microwave Overload: Keep it Safe
Don’t cram your egg into a tiny container. Give it some room to breathe! The egg needs space to cook evenly and release steam safely.
Overdoing the Time: Avoiding the Rubber Egg
Too much time in the microwave can turn your egg into a rubbery, overcooked mess. Check the egg frequently, and stop cooking it when it reaches your desired consistency.
(Part 9) FAQs: Your Microwaved Egg Questions Answered
1. Can I microwave a raw egg with the shell on?
Absolutely not! The pressure from the steam inside the egg will cause it to explode. Always remove the shell before microwaving an egg.
2. Is it safe to microwave eggs with the yolk intact?
Yes, as long as you pierce the egg. The piercing allows the steam to escape, preventing pressure build-up and potential explosions.
3. How long should I microwave an egg for a runny yolk?
A runny yolk typically takes about 30-45 seconds, but it can vary depending on your microwave and the size of the egg. Start with 30 seconds, and increase the time in increments until your desired consistency is achieved.
4. Can I microwave eggs for breakfast sandwiches?
Yes, absolutely! You can make a quick and easy breakfast sandwich by microwaving an egg, then assembling it with your favorite toppings on a toasted english muffin or bagel.
5. What happens if the egg explodes in the microwave?
If an egg explodes in the microwave, it can make a real mess. The egg white will splatter and create a sticky residue inside the microwave. You can clean the mess with a damp cloth or sponge. However, if the yolk explodes, you’ll be better off cleaning it up with a knife and fork!
Microwaving an egg is a fantastic time-saving hack for busy mornings. It's a versatile and simple way to add a protein boost to your breakfast. But, remember, safety always comes first! Always pierce the egg, use the right equipment, and keep a watchful eye on it throughout the cooking process. If you follow these simple tips, you'll be well on your way to mastering the art of the microwaved egg. Enjoy!
Everyone is watching

Prime Rib Roast Cooking Time Chart: Per Pound Guide
Cooking TipsPrime rib roast. Just the name conjures images of lavish dinners, crackling fires, and hearty laughter. It’s ...

How Long to Bake Potatoes in the Oven (Perfect Every Time)
Cooking TipsBaked potatoes are a staple in my kitchen. They're incredibly versatile, delicious, and surprisingly easy to m...

Perfect Rice Every Time: The Ultimate Guide to Cooking Rice
Cooking TipsAs a self-proclaimed foodie, I've always been a bit obsessed with rice. It's the foundation of countless cuisi...

The Ultimate Guide to Cooking Asparagus: Tips, Techniques, and Recipes
Cooking TipsAsparagus. The mere mention of this spring delicacy conjures up images of vibrant green spears, crisp and burs...

Ultimate Guide to Cooking the Perfect Thanksgiving Turkey
Cooking TipsThanksgiving. Just the word conjures up images of overflowing tables laden with delicious food, the scent of r...
