The aroma of ham baking in the oven is pure magic. It’s that quintessential scent of comfort and celebration, a promise of a delicious meal and happy gatherings. For years, I relied on pre-packaged hams from the supermarket, but something always felt a bit... well, not quite right. Then, I discovered the world of fresh butcher-cut ham. It was like a culinary awakening! The flavour was richer, the texture more succulent, and the sheer satisfaction of cooking something so beautifully crafted was unmatched. So, if you’re ready to level up your ham game, join me on this journey to mastering the art of cooking a fresh butcher-cut ham. This guide will take you from choosing the right ham to carving and serving it with confidence. Get ready to impress your guests with a ham that’s as delicious as it is beautiful!
(Part 1) Choosing the Right Ham
Understanding the Different types of ham
The first step is choosing the right ham, and there’s a whole world of options to explore. It's crucial to understand the differences between the various types of ham so you can pick the perfect one for your needs.
Fresh vs. Cured:
fresh hams are unprocessed, offering a clean canvas for your culinary creativity. You get the pure, natural flavour of the pork, making it perfect for experimenting with different flavour combinations. cured hams, on the other hand, undergo a salting and drying process that results in a distinctive salty flavour and a longer shelf life. The curing process adds a unique depth of flavour and a more intense taste profile. I personally prefer fresh hams, especially when cooked properly, for their more versatile and delicate flavour profile. They allow me to really showcase the natural sweetness of the pork.
Bone-in vs. Boneless:
bone-in hams are traditionally favoured for their rich flavour and juiciness. The bone helps to distribute heat evenly during cooking, resulting in a more evenly cooked and flavorful ham. They also tend to be more flavorful as the bone provides additional flavour. boneless hams, on the other hand, are great for ease of carving and slicing, making them perfect for a busy kitchen. However, they can sometimes lack the same depth of flavour as their bone-in counterparts. I typically opt for a bone-in ham, as it's a little more work but so worth it for the taste. The extra effort is a small price to pay for such a delicious result.
Cut:
The cut of the ham will influence its shape and size, affecting both cooking time and portion size. A whole ham, for instance, will take longer to cook than a ham shank or a ham steak. A whole ham is perfect for a larger gathering, while a ham shank or steak is a fantastic option for a smaller group. I generally buy a whole ham as it’s perfect for a larger gathering. However, if you’re cooking for a smaller group, a ham shank or steak is a fantastic option. It’s all about choosing the right size and cut for your needs.
Size:
The size of the ham will determine how many people it will serve. Consider the number of guests you’re cooking for when making your choice. I usually aim for about 1.5 pounds of ham per person, which allows for generous portions and some leftovers. But it’s all about personal preference. If you know your guests have hearty appetites, you might want to go for 2 pounds per person. It’s always better to have a little extra than not enough!
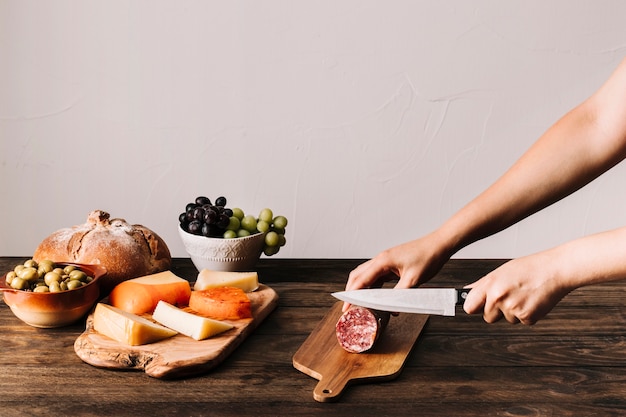
Shopping for Your Ham: Finding the Perfect Piece
Once you’ve decided on the type of ham you want, it’s time to hit the butcher shop. I prefer to buy my hams from local butchers whenever possible. These shops typically offer a wider selection of cuts and sizes, and the butchers themselves can provide invaluable advice and guidance. Plus, you get the added satisfaction of supporting local businesses.
Choosing the Right Butcher
Look for a butcher shop that has a good reputation for quality and freshness. Ask around for recommendations from friends and neighbours, or check online reviews. I always look for a butcher who takes pride in their work and is passionate about providing excellent customer service.
Tips for Choosing the perfect ham
When choosing your ham, consider these tips:
- Ask questions: Don't be afraid to ask the butcher about the different types of hams they have available, their curing process (if applicable), and their recommendations for cooking. They’re the experts, after all. I always like to ask about the origin of the pork and the farm where it was raised. It gives me a sense of the ham’s provenance and helps me feel more connected to the food I’m buying.
- Inspect the ham: Look for a ham that’s evenly coloured and has a good marbling of fat. Avoid any ham that has discolouration, bruising, or a strong odour. The fat should be firm and white, not yellow or rancid. You want a ham that looks and smells fresh, not overly dry or old.
- Ask for it to be trimmed: Many butchers will trim the ham for you, removing excess fat and skin. This makes cooking and carving easier. A well-trimmed ham will cook more evenly and will also be easier to manage during the carving process. If you’re looking for a particularly crispy skin, you can ask the butcher to leave a little extra fat on, but otherwise, trimming is always a good idea.
(Part 2) Preparing the Ham: Getting Ready for Cooking
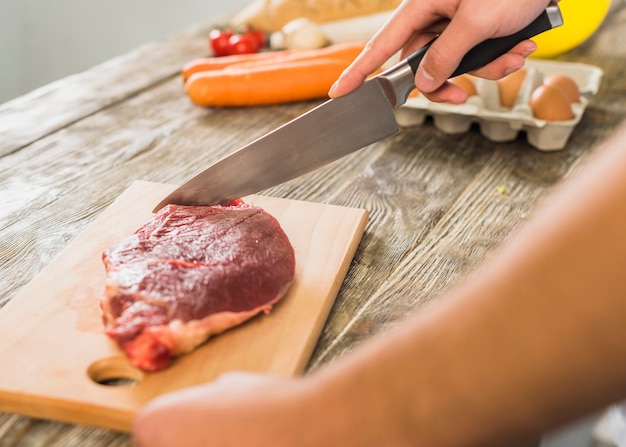
Once you’ve got your beautiful butcher-cut ham home, it’s time to get it ready for cooking. This stage involves a few simple steps that’ll make a big difference in the final outcome. Think of it as getting your ham ready for its culinary transformation.
Preparing Your Ham
Here’s how to prep your ham for cooking:
- Rinse the ham: Rinse the ham thoroughly under cold water to remove any dirt or debris. This is important for hygiene, and it also helps to remove any excess salt from cured hams. You want to start with a clean and fresh ham, ready to absorb the flavours you’ll be adding.
- Pat dry: After rinsing, pat the ham dry with paper towels. This will help to prevent the ham from steaming during cooking, leading to a crispier skin and a more even browning. A dry ham will ensure that the skin gets crispy and the flavours penetrate evenly.
- Score the fat: Scoring the fat helps to render it during cooking, creating a delicious, crispy crackling. Use a sharp knife to make shallow cuts across the fat, about ?? inch apart. You can get creative with the scoring pattern if you like. I often make a diamond pattern, but you can try diagonal lines, cross-hatching, or even a simple criss-cross pattern. Whatever you choose, scoring the fat will ensure a beautifully caramelized and crispy skin.
Adding Flavour: The Art of Rubs and Glazes
Now comes the fun part - adding flavour! The possibilities here are endless, and I love experimenting with different rubs and glazes. You can stick to classic combinations or explore more adventurous options, depending on your taste. Here are some ideas to get you started:
Rubs
A good rub is the foundation of a flavorful ham. It adds a layer of flavour that penetrates the meat during cooking. Here are a few ideas for ham rubs:
- Basic rub: A simple blend of salt, pepper, and garlic powder is a classic for a reason. It enhances the natural flavour of the ham without overpowering it. I like to add a pinch of brown sugar for a hint of sweetness.
- Spicy rub: For those who like a bit of heat, try a rub with paprika, cayenne pepper, and chili powder. This adds a kick to the ham without being overly spicy. You can adjust the amount of cayenne pepper to your desired level of heat.
- Herby rub: For a more delicate flavour profile, try a blend of dried herbs like rosemary, thyme, and sage. A sprinkle of dried onion flakes adds a depth of flavour.
- Citrusy rub: Combine orange zest, lemon zest, and dried thyme for a bright and refreshing rub. You can also add a pinch of cayenne pepper for a little kick.
Glazes
Glazes are applied toward the end of cooking to add a beautiful sheen and extra flavour to the ham. They usually include a combination of sweet, savory, and tangy ingredients. Here are some glaze ideas:
- Brown sugar and mustard glaze: This sweet and tangy glaze is perfect for a traditional ham. Combine brown sugar, Dijon mustard, and a little bit of apple cider vinegar for a rich, caramelized flavour.
- Honey and ginger glaze: A honey and ginger glaze adds a unique combination of sweetness and spice. Combine honey, grated ginger, and a touch of soy sauce for a delicious and fragrant glaze.
- Maple syrup and cinnamon glaze: This glaze combines the sweetness of maple syrup with the warmth of cinnamon for a truly decadent treat. You can also add a pinch of nutmeg or allspice for an extra layer of flavor.
- cherry glaze: For a fruity twist, try a cherry glaze. Combine cherry preserves, balsamic vinegar, and a touch of red wine for a rich and tangy glaze.
You can apply the rub or glaze directly to the ham before cooking, or you can prepare a paste with olive oil or butter to help the flavours adhere. I prefer to make a paste with olive oil, as it helps the rub to cling to the ham and create a beautiful, caramelized crust.
(Part 3) Cooking the Ham: Choosing the Right Method
Now that your ham is prepped and ready to go, it’s time to choose your cooking method. Each method brings its own unique flavour and texture, so it’s about finding the one that best suits your preferences.
Popular Cooking Methods for Ham
Here’s a breakdown of the most popular methods for cooking a ham:
- Oven-baking: This is the classic method for cooking a ham. It’s relatively simple and results in a beautifully cooked ham with a crispy skin. I find oven-baking to be the most consistent and reliable method, which is why I often opt for it. The oven provides a gentle and even heat that allows the ham to cook thoroughly and evenly. You can also easily monitor the temperature and adjust the cooking time as needed.
- Slow-cooking: This method is perfect for tenderizing a ham and creating a super juicy result. It’s also great for adding flavour, as you can simmer the ham in a flavorful broth or sauce. I’ve experimented with slow-cooking my hams a few times, and it always turns out wonderfully moist and delicious. The slow cooker allows the ham to cook in its own juices, creating a wonderfully tender and succulent result. You can also add ingredients like onions, carrots, and celery to the slow cooker to infuse the ham with additional flavour.
- Grilling: For a smoky flavour, consider grilling your ham. This is a great option for outdoor cooking and parties. Be sure to keep a close eye on the ham, as grilling can be a little more unpredictable. The grill provides a smoky flavour that’s hard to replicate with other cooking methods. The high heat also helps to crisp up the skin of the ham. Just make sure to keep a close eye on the grill and adjust the heat as needed to prevent the ham from burning.
- Smoking: For a truly authentic and intensely smoky flavour, smoking is the way to go. It’s a more involved process but well worth the effort for those who love that smoky character. Smoking is the ultimate way to impart a deep, smoky flavour to the ham. It’s a time-consuming process but the results are truly exceptional. You’ll need a smoker and a good understanding of the smoking process to get the best results.
Oven-Baking: A Step-by-Step Guide
Since oven-baking is my personal go-to method, let’s dive into a step-by-step guide for cooking your ham in the oven:
- Preheat the oven: Preheat your oven to 325 degrees Fahrenheit (160 degrees Celsius). This is a good starting point for most hams, but you may need to adjust the temperature depending on the size and type of ham you’re using. For example, if you're cooking a large bone-in ham, you might need to lower the temperature slightly to prevent it from drying out.
- Place the ham in a roasting pan: Place the ham in a large roasting pan. If you have a ham holder, use it to elevate the ham, allowing heat to circulate evenly. This also helps with drainage, which will prevent the ham from becoming soggy. I like to use a roasting pan with a rack to allow the fat to drain and prevent the ham from sitting in its own juices.
- Add liquid: Add about 1 cup of liquid to the bottom of the pan. Water, apple cider, or even a mixture of both is a good choice. The liquid will help to keep the ham moist and prevent it from drying out during cooking. I like to add a splash of apple cider vinegar for a bit of tang, but you can also experiment with other flavours like orange juice, pineapple juice, or even a bit of beer.
- Cover the ham: Cover the ham tightly with aluminium foil. This helps to retain moisture and ensures even cooking. You can use parchment paper instead of foil if you prefer. The foil helps to create a steamy environment that allows the ham to cook evenly and retain its moisture.
- Bake the ham: Bake the ham for about 15-20 minutes per pound, or until a meat thermometer inserted into the thickest part of the ham registers 140 degrees Fahrenheit (60 degrees Celsius). For a ham that’s more well-done, cook it to 145 degrees Fahrenheit (63 degrees Celsius). You can also use the “time-per-pound” rule as a guide, but always check the internal temperature with a meat thermometer to ensure it's cooked through.
- Remove the foil and baste: After the first hour of cooking, remove the foil and baste the ham with its own juices. This helps to keep the ham moist and adds a beautiful glaze. The basting process adds moisture and flavor to the ham, creating a rich and succulent result.
- Continue baking: Continue baking the ham uncovered for another 30-45 minutes, or until the skin is golden brown and crispy. You can continue basting the ham every 15 minutes or so for a richer glaze. The uncovered baking time allows the skin to crisp up and the ham to develop a beautiful golden brown colour.
- Rest the ham: Once the ham is cooked through, remove it from the oven and let it rest for at least 15 minutes before carving. This allows the juices to redistribute, ensuring a moist and flavorful ham. Allowing the ham to rest helps the juices redistribute throughout the meat, resulting in a more tender and flavorful ham.
(Part 4) Carving and Serving: Bringing Your Culinary Creation to the Table
After all that hard work, it’s finally time to enjoy your perfectly cooked ham! Carving a ham can seem intimidating, but with a few simple tips, it’s actually quite easy.
Carving the Ham
Here’s how to carve your ham like a pro:
- Use a sharp knife: A sharp knife makes all the difference when carving a ham. Use a carving knife or a chef’s knife that has a long, thin blade. A dull knife will make it harder to carve and could lead to tearing the ham. A sharp knife will slice through the ham cleanly and efficiently, ensuring beautiful slices.
- Start with the bone: If you’re carving a bone-in ham, start by removing the bone. This will give you more room to work with and make it easier to slice the ham. Use a carving fork to hold the ham steady while you cut around the bone. The bone is a natural barrier, so removing it first makes carving much easier.
- Slice against the grain: To ensure that your slices are tender and not tough, slice against the grain of the ham. This means cutting across the muscle fibres. The grain will be visible on the surface of the ham. Slicing against the grain will result in tender and flavorful slices that will melt in your mouth.
- Cut thin slices: For the most elegant presentation, try to cut thin slices of ham. This will also make it easier for guests to eat. Thin slices of ham are not only visually appealing but also easier to manage and more enjoyable to eat.
- Keep it warm: Place the carved ham in a chafing dish or on a warming tray to keep it warm while you serve it. This will prevent the ham from getting cold too quickly. You want to keep your ham warm so that it stays delicious and juicy until the last slice.
Serving the Ham: Creating a Memorable Meal
There are endless ways to serve a ham. Here are a few ideas to inspire you:
- Classic: Serve the ham sliced with a side of mashed potatoes, green beans, and cranberry sauce. This is a timeless combination that everyone loves. The classic combination is a crowd-pleaser that never fails to impress.
- Fancy: For a more sophisticated touch, serve the ham with a side of roasted asparagus, roasted brussels sprouts, and a Dijon mustard sauce. This combination highlights the richness of the ham and adds a touch of elegance to your meal. This elegant combination is perfect for a special occasion or a dinner party.
- Sandwich: Slice the ham thinly and use it to make delicious sandwiches. Add a layer of cheese, lettuce, tomato, and your favourite condiments for a satisfying meal. ham sandwiches are a quick and easy option that everyone enjoys.
- Salad: Use the ham to add protein and flavour to a salad. Slice the ham thinly and toss it with your favourite greens, vegetables, and dressing. Ham salad is a light and refreshing option that’s perfect for a summer meal.
- Soup: Use the leftover ham to make a hearty soup. Add it to a pot of beans, lentils, or vegetables for a comforting and flavorful meal. ham soup is a comforting and satisfying option that's perfect for a chilly day.
(Part 5) Storage and Leftovers: Making the Most of Your Ham
Once you’ve finished enjoying your ham, it’s important to store it properly to preserve its flavour and texture. Here are some tips for storing cooked ham:
Storing the Ham
Here’s how to store your cooked ham:
- Refrigerate within two hours: After cooking, refrigerate the ham within two hours. This helps to prevent bacterial growth. You can either refrigerate the whole ham or slice it and store it in airtight containers. Refrigerating the ham promptly will ensure its safety and freshness.
- Store in the refrigerator for up to 5 days: Cooked ham can be stored in the refrigerator for up to five days. After that, it’s best to freeze it to preserve its freshness. Storing the ham in the refrigerator for a few days will allow you to enjoy it for a longer period of time.
- Freeze for up to 2 months: You can freeze cooked ham for up to two months. Wrap it tightly in plastic wrap or aluminium foil, then place it in a freezer-safe bag to prevent freezer burn. Freezing the ham will allow you to enjoy it for a longer period of time.
Using Leftover Ham: Delicious Dishes with a Hammy Twist
Leftover ham is a wonderful ingredient for a variety of dishes. Here are a few ideas for using your leftover ham:
- Ham and cheese omelet: Chop the ham into small pieces and add it to an omelet with your favourite cheeses and vegetables. It’s a quick and easy breakfast or lunch. Ham and cheese omelets are a delicious and satisfying breakfast or brunch option.
- Ham and bean soup: Add leftover ham to a pot of beans and vegetables for a hearty and flavorful soup. Ham and bean soup is a comforting and satisfying meal that's perfect for a chilly day.
- Ham salad: Chop the ham into small pieces and combine it with mayonnaise, celery, and onion for a classic ham salad. Serve it on bread, crackers, or lettuce. Ham salad is a classic sandwich filling that's perfect for lunch or a light meal.
- Ham and potato hash: Dice the ham and combine it with diced potatoes and onions. Sauté the mixture in a skillet until golden brown for a tasty breakfast or brunch. Ham and potato hash is a hearty and flavorful breakfast or brunch option.
- Ham and broccoli quiche: Combine diced ham with broccoli florets, cheese, and eggs for a delicious and satisfying quiche. Ham and broccoli quiche is a delicious and versatile dish that can be served for breakfast, lunch, or dinner.
(Part 6) Frequently Asked Questions (FAQs): Addressing Common Ham Questions
Here are some answers to common questions about cooking fresh butcher-cut ham:
1. What's the difference between a fresh ham and a cured ham?
A fresh ham is unprocessed, while a cured ham undergoes a salting and drying process. Fresh hams have a milder flavour and a shorter shelf life. Cured hams have a salty and intense flavour and can last for months. Cured hams are often smoked as part of the curing process, which adds a unique smoky flavour to the meat. Fresh hams, on the other hand, are typically not smoked, which allows their natural pork flavour to shine through.
2. How long should I cook a ham?
The cooking time for a ham varies depending on its size and type. Generally, you should cook a ham for about 15-20 minutes per pound at 325 degrees Fahrenheit (160 degrees Celsius). However, it's always best to check the ham's internal temperature with a meat thermometer to ensure it's cooked through. The internal temperature should reach 140 degrees Fahrenheit (60 degrees Celsius) for a safe and delicious ham. For a ham that’s more well-done, cook it to 145 degrees Fahrenheit (63 degrees Celsius). A meat thermometer is an essential tool for cooking ham, as it allows you to ensure that the ham is cooked to the proper temperature.
3. How do I know if a ham is cooked?
The best way to know if a ham is cooked is to use a meat thermometer. The ham is fully cooked when the internal temperature reaches 140 degrees Fahrenheit (60 degrees Celsius). You can also check for doneness by inserting a fork into the thickest part of the ham. The juices should run clear, not pink. If the juices are still pink, the ham needs to be cooked longer. A meat thermometer is the most accurate way to determine doneness, but you can also use the fork test as a secondary method.
4. Can I cook a ham in the slow cooker?
Yes, you can cook a ham in a slow cooker. This is a great way to tenderize the ham and create a super juicy result. Simply place the ham in the slow cooker, add some liquid, and cook on low for 6-8 hours or on high for 3-4 hours. You can also add flavourings like spices, herbs, or fruits to your slow cooker recipe. The slow cooker allows the ham to cook in its own juices, creating a wonderfully tender and succulent result. The long cooking time also allows the flavours to develop and meld together. Just make sure to choose a slow cooker that is large enough to accommodate the size of your ham.
5. How do I make a crispy ham skin?
To achieve a crispy ham skin, score the fat before cooking. This helps to render the fat and create that delicious crackling. You can also remove the ham from the oven in the last 30-45 minutes of cooking and bake it uncovered for a crispier skin. Be sure to baste the ham regularly to keep it moist and add a beautiful glaze. Scoring the fat allows the heat to penetrate and render the fat, resulting in a crispy and flavorful skin. Baking the ham uncovered for the last portion of the cooking time allows the skin to crisp up further. Basting the ham regularly keeps it moist and adds a beautiful glaze. A crispy ham skin adds a delicious element to the dish and makes for a beautiful presentation.
Everyone is watching

Perfect Rice Every Time: The Ultimate Guide to Cooking Rice
Cooking TipsAs a self-proclaimed foodie, I've always been a bit obsessed with rice. It's the foundation of countless cuisi...

Prime Rib Roast Cooking Time Chart: Per Pound Guide
Cooking TipsPrime rib roast. Just the name conjures images of lavish dinners, crackling fires, and hearty laughter. It’s ...

How Long to Bake Potatoes in the Oven (Perfect Every Time)
Cooking TipsBaked potatoes are a staple in my kitchen. They're incredibly versatile, delicious, and surprisingly easy to m...

The Ultimate Guide to Cooking Asparagus: Tips, Techniques, and Recipes
Cooking TipsAsparagus. The mere mention of this spring delicacy conjures up images of vibrant green spears, crisp and burs...

Ultimate Guide to Cooking the Perfect Thanksgiving Turkey
Cooking TipsThanksgiving. Just the word conjures up images of overflowing tables laden with delicious food, the scent of r...