Let's be honest, a perfectly roasted bone-in prime rib is the kind of dish that makes you feel like a culinary rockstar. It's the ultimate centerpiece for special occasions, a dish that whispers "I know how to cook" and makes your guests swoon. But, I'll admit, for a while, I was a bit intimidated by the whole prime rib thing.
I used to think it was a dish reserved for seasoned chefs, but then I discovered the magic of low and slow cooking. It was a revelation! Now, I tackle prime rib with confidence, knowing I can consistently achieve melt-in-your-mouth tenderness and a flavor that's simply divine.
So, if you're ready to conquer your prime rib fears and impress even the most discerning palate, come on this culinary journey with me. We'll dive into selecting the perfect cut, mastering the art of seasoning, and achieving that coveted "medium-rare" doneness. And I'll share some personal tips and stories along the way that'll make you feel like a pro in no time.
Part 1: Choosing Your Prime Rib – The Heart of the Matter

The Cut: More Than Just a Piece of Meat
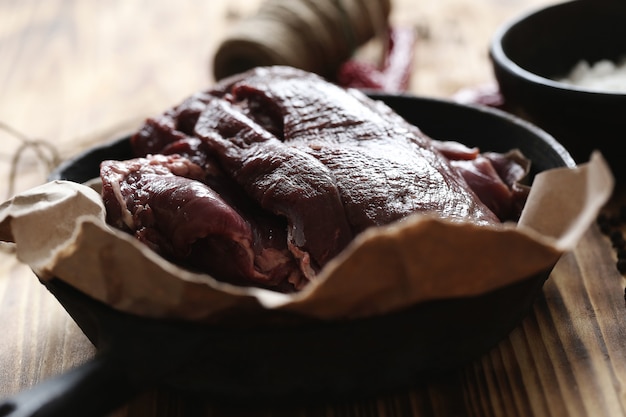
When choosing your prime rib, don't just grab the biggest one you can find! It's all about the quality, not just the quantity. You want a prime rib that's evenly fat-marbled, meaning there are streaks of fat running throughout the meat. This fat is essential for creating a tender, juicy, and flavorful roast.
I usually go for a "Standing rib roast," which is a three-rib section. It's a perfect size for a smaller gathering, but if you're feeding a crowd, you can easily scale up to a four or even five-rib roast. Just remember, the bigger the roast, the longer the cooking time.
The Bone: Not Just for Show
Now, some people think the bone is just there for decoration, but I'm here to tell you that's wrong! That bone adds a lot of flavor to your roast, helping to keep the meat moist and imparting a beautiful depth of flavor. It's a key ingredient in the symphony of flavors we're aiming for.
The Fat: Your Secret Weapon
You want a roast with a good layer of fat covering it. That fat is crucial! It melts during cooking, creating a flavorful basting sauce that keeps the meat juicy and tender. Don't even think about trimming off that fat! It's your secret weapon for an unforgettable prime rib experience.
Part 2: Prepping Your Prime Rib – The Art of Seasoning

Pat It Dry: The First Step to Success
Once your beautiful prime rib is ready to go, the first step is to pat it dry with paper towels. This removes any excess moisture, which can hinder browning and lead to steam-cooking instead of roasting.
Seasoning: The Flavor Symphony
This is where the fun begins! I love keeping my seasonings simple but effective. I usually start with a generous coating of kosher salt and freshly ground black pepper. It's a classic combination that lets the natural flavor of the prime rib shine through.
I also add a sprinkle of garlic powder and onion powder to add another layer of depth and warmth. Don't be afraid to experiment with other herbs and spices, though. Rosemary, thyme, and even a touch of paprika can really enhance your roast's flavor profile.
The "reverse sear" Method: Unveiling the Magic
Here's the game-changer: the reverse sear method. It's the secret to unlocking that perfect prime rib experience, a technique that involves cooking the roast at a low temperature for a long time, followed by a quick sear at high heat. This approach produces a perfectly cooked roast with a beautiful, crispy crust.
Part 3: Roasting Your Prime Rib – The Patience Pays Off

Low and Slow: A Culinary Masterpiece in the Making
Preheat your oven to 250°F (120°C). Place your seasoned prime rib on a roasting rack set in a rimmed baking sheet. The rack allows air to circulate around the roast for even cooking, ensuring every inch of that prime rib is cooked to perfection.
Now, here's the patience part: Cook the roast for 2-3 hours, or even longer for larger roasts. It's all about letting the heat work its magic slowly and gently.
Monitoring the Temperature: Your Prime Rib's Guide
Use a meat thermometer to check the internal temperature of your roast. Aim for an internal temperature of around 120°F (49°C) for medium-rare. But, remember, every oven is different, so it's important to monitor the temperature closely.
Rest Time: The Final Act
Once your prime rib reaches the desired temperature, remove it from the oven and let it rest for at least 30 minutes, covered with foil. This resting time is crucial. It allows the juices to redistribute throughout the meat, resulting in a tender, succulent, and incredibly flavorful roast.
Part 4: The Sear – The Grand Finale
The Big Finish: Crispy Crust Perfection
After your roast has rested, it's time for the dramatic finale: the sear! Crank up your oven to 450°F (230°C) and place the roast back in the oven for about 15-20 minutes. This high-heat sear gives your prime rib that magnificent, crispy crust that elevates it from delicious to extraordinary.
Part 5: Carving and Serving – The Feast Begins
The Carving: A Culinary Ballet
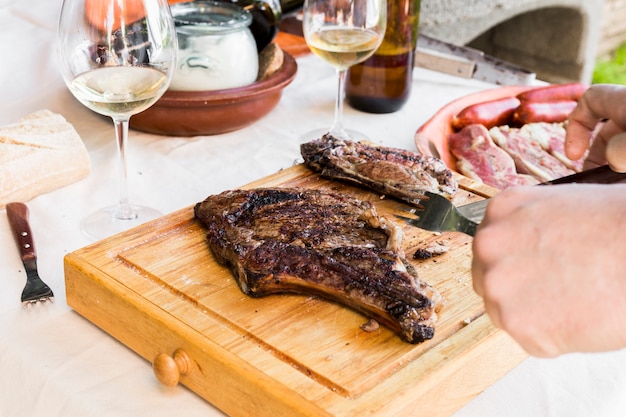
Now for the big reveal! Use a sharp carving knife to slice the meat across the grain, removing thin slices from the roast. This slicing technique ensures that each bite is tender and melts in your mouth. Arrange your slices on a platter, and prepare for the oohs and ahhs.
The Sides: Completing the Culinary Masterpiece
No prime rib feast is complete without the perfect sides. I love serving my prime rib with roasted potatoes, creamy mashed potatoes, asparagus, or a simple green salad. But feel free to choose whatever complements your taste.
Part 6: FAQs – Unlocking the Secrets of prime rib mastery
1. How Do I Know When the Roast Is Done?
The best way to know if your prime rib is done is to use a meat thermometer. Insert the thermometer into the thickest part of the roast, making sure it's not touching the bone. The internal temperature should be 120°F (49°C) for medium-rare, 130°F (54°C) for medium, and 140°F (60°C) for medium-well.
2. Can I Cook Prime Rib in a slow cooker?
While you can technically cook prime rib in a slow cooker, I don't recommend it. The low temperature of a slow cooker doesn't allow for that beautiful, crispy crust, which is a major part of the prime rib experience.
3. Can I Cook Prime Rib on the Grill?
Absolutely! Grilling prime rib can be a fantastic option, especially if you have a gas grill with a side burner for indirect heat. Cook the prime rib over indirect medium heat for about 2 hours, or until it reaches the desired internal temperature. Then, sear it over high heat for a few minutes to achieve that perfect crispy crust.
4. How Do I Store Leftover Prime Rib?
Leftover prime rib can be stored in an airtight container in the refrigerator for up to 4 days. You can also freeze it for up to 3 months.
5. What's the Best Way to Reheat Leftover Prime Rib?
The best way to reheat leftover prime rib is in a slow oven. Preheat your oven to 250°F (120°C) and place the leftover roast in a baking dish. Heat for about 30 minutes, or until heated through. This method will ensure that your prime rib stays juicy and flavorful.
Part 7: My Personal prime rib tips – A Master's Guide to Success
1. Don't Overcrowd the Oven
Make sure there's enough space in your oven for the roast to cook evenly. If you're cooking a large roast, you may need to use a second oven or adjust the cooking time to ensure it cooks evenly.
2. Don't Be Afraid to Experiment
I love to experiment with different seasoning blends. Try a rub with smoked paprika, garlic powder, onion powder, and a pinch of cayenne pepper for a bit of heat. Or, go for a more herb-forward rub with rosemary, thyme, and sage. The possibilities are endless!
3. Use a Meat Thermometer
Don't rely on visual cues to determine doneness. A meat thermometer is the most accurate way to ensure your roast is cooked to perfection.
4. Let the Roast Rest
Resting the roast is crucial for a tender and juicy result. It allows the juices to redistribute throughout the meat, making every bite absolutely delicious.
5. Enjoy the Process
Cooking a prime rib is a journey, not a race. Take your time, savor the process, and enjoy the beautiful results!
Part 8: My Prime Rib Journey – From Disaster to Masterpiece
My first attempt at prime rib was, let's just say, a bit of a disaster. I overcooked it, resulting in a dry and tough roast that I couldn't even cut through with a knife. I was mortified! But, I wasn't going to give up.
I did some research and discovered the reverse sear method, which I've been using ever since. It's transformed my prime rib game completely. Now, I can consistently achieve that beautiful, medium-rare doneness with a perfectly crispy crust. It's become my signature dish, and it always impresses my guests.
Remember, cooking is a journey. Don't be afraid to experiment, learn from your mistakes, and enjoy the process. And most importantly, don't be afraid to tackle that bone-in prime rib! You can do it!
Everyone is watching

Prime Rib Roast Cooking Time Chart: Per Pound Guide
Cooking TipsPrime rib roast. Just the name conjures images of lavish dinners, crackling fires, and hearty laughter. It’s ...

How Long to Bake Potatoes in the Oven (Perfect Every Time)
Cooking TipsBaked potatoes are a staple in my kitchen. They're incredibly versatile, delicious, and surprisingly easy to m...

Perfect Rice Every Time: The Ultimate Guide to Cooking Rice
Cooking TipsAs a self-proclaimed foodie, I've always been a bit obsessed with rice. It's the foundation of countless cuisi...

The Ultimate Guide to Cooking Asparagus: Tips, Techniques, and Recipes
Cooking TipsAsparagus. The mere mention of this spring delicacy conjures up images of vibrant green spears, crisp and burs...

Ultimate Guide to Cooking the Perfect Thanksgiving Turkey
Cooking TipsThanksgiving. Just the word conjures up images of overflowing tables laden with delicious food, the scent of r...
