There's something truly satisfying about digging into a rack of ribs that's been slow-cooked to perfection. That tender, juicy meat, falling off the bone with each bite, accompanied by a sweet and smoky glaze – pure bliss! But let's be honest, cooking ribs can feel a little daunting. It's about getting that perfect balance of a crispy bark, melt-in-your-mouth tenderness, and avoiding dryness. But fear not, my fellow rib enthusiasts! I'm here to guide you through the process, sharing tips and tricks I've learned over years of experimenting and perfecting my oven-baked ribs.
This isn't just a recipe; it's a journey we'll embark on together, from choosing the perfect cut to achieving that irresistible tenderness. I'll sprinkle in my personal anecdotes and insights, so you'll feel like you're right there in the kitchen with me. So, grab your apron, gather your ingredients, and let's dive into the world of oven-baked ribs!
Part 1: The Perfect Cut
Choosing Your Weapon: Baby Back vs. spare ribs
The first decision you'll face is choosing your cut: baby back ribs or spare ribs. Both have their loyal following, and it really boils down to personal preference.
baby back ribs, as the name suggests, come from the upper part of the pig's back. They are smaller and generally considered to have a more delicate flavour. They tend to be more tender, especially if you're not a fan of chewing for hours. However, they can be a bit pricey. Spare ribs, on the other hand, come from the lower part of the ribs and are larger and meatier. They often have a more robust flavor, and they're a fantastic value for the amount of meat you get.
I've got a soft spot for baby back ribs. The delicate flavour and tenderness just win me over every time. But don't dismiss spare ribs. They're a great option if you're serving a crowd or just want a good amount of meat to go around.
The Meat Inspection: Picking Quality Ribs
Once you've chosen your preferred cut, it's time to examine those ribs for quality. Look for ribs that are evenly coloured, with a good amount of marbling. This marbling is important for flavour and tenderness. Avoid ribs that are excessively fatty or have any signs of discoloration. If you're at a butcher shop, don't hesitate to ask about their source and how the ribs were prepared.
I've learned the hard way that freshness makes a world of difference. Those beautiful, bright red ribs from a reliable source are a surefire way to ensure delicious results.
Part 2: The Prep Work: Getting Those Ribs Ready
Cleaning and Trimming: A Ritual of Preparation
Before you even think about seasoning, give those ribs a good scrub under cold running water. Remove any excess membrane. This membrane, known as the silverskin, is tough and can prevent the ribs from getting tender. You can use a sharp knife or a paper towel to help you peel it off. I've found that using a paper towel provides a good grip, making it easier to remove the membrane.
Next, trim away any excess fat. You don't want to remove all of the fat, as it adds flavour and keeps the ribs moist, but too much fat can make the ribs greasy. A little trimming goes a long way.
Seasoning for Success: Creating a Flavorful Base
This is where the real fun begins! Seasoning your ribs is all about letting your creativity run wild. While there's no one-size-fits-all recipe, I always start with a dry rub.
My go-to dry rub consists of:
- Salt: The foundation of flavour; enhances the natural sweetness of the meat.
- Black pepper: Adds a touch of heat and depth.
- Paprika: Brings a warm, slightly sweet flavour and a vibrant red colour.
- Garlic powder: A punch of savory flavour that complements the sweetness of the ribs.
- Onion powder: Another layer of savoury goodness, adding depth and complexity.
- Brown sugar: Balances the savoury flavours with a touch of sweetness, creating a caramelized crust when the ribs cook.
I often add a pinch of cayenne pepper or chili powder for a bit of heat. Experiment with different herbs and spices depending on your taste. I've even used smoked paprika for a deeper, smokier flavour. The key is to be generous; coat those ribs thoroughly in the dry rub so that every inch is seasoned.
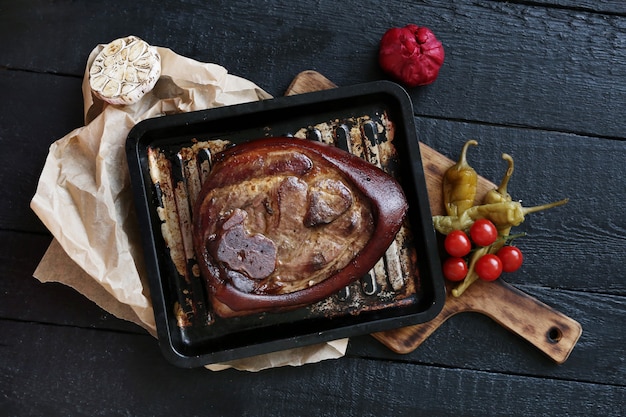
Part 3: Time for the Oven: Bringing the Ribs to Life
Getting Ready: Setting the Stage for Rib Perfection
Preheat your oven to 300 degrees Fahrenheit (150 degrees Celsius). This low and slow cooking method is the key to achieving that succulent tenderness.
While the oven preheats, prepare your baking dish. I prefer a roasting pan with a rack, but any large baking dish will work. Line the bottom of the dish with aluminum foil for easy cleanup.
Now, place your ribs on the rack in the baking dish, bone-side down. This helps create even cooking and allows the fat to drip away, resulting in a crispier bark.
The First Bake: A Journey to Tenderness
Pour about a cup of water into the bottom of the baking dish. This creates steam, keeping the ribs moist and preventing them from drying out.
Now, cover the entire dish tightly with aluminum foil. This creates a steamy environment, helping to tenderize the meat and develop those luscious juices. Place the dish in the preheated oven and cook for 2-3 hours, or until the meat is almost tender.
I usually start checking the ribs around the 2-hour mark. You can gently tug on the meat to see if it starts to pull away from the bone. If it does, you're on the right track.
The Second Bake (Optional): Adding a Glaze
After the first bake, remove the ribs from the oven and let them cool slightly. Carefully remove the aluminum foil and pat the ribs dry with paper towels. At this point, you can add a sauce if you wish.
I love a simple sauce made from ketchup, brown sugar, and Worcestershire sauce. But feel free to experiment with your favorite barbecue sauce or even create your own blend. Brush a generous amount of sauce onto the ribs, making sure to coat all sides.
Return the ribs to the oven, uncovered, and continue to cook for another 30-45 minutes, or until the sauce is thickened and the ribs are nice and sticky. This second bake allows the sauce to caramelize and develop a delicious, glossy finish.
Part 4: The Wait is Over: The Moment of Truth
Time to Rest: Letting the Ribs Settle In
After you take the ribs out of the oven, resist the urge to dive in right away. Let them rest for at least 15 minutes before serving. This crucial step allows the juices to redistribute throughout the meat, resulting in even more tender and flavorful ribs.
While the ribs are resting, it's the perfect time to prepare your side dishes. I love to pair my ribs with baked beans, potato salad, or coleslaw – a classic barbecue feast!
Serving Up the Feast: Time to Enjoy!
Finally, it's time to dig in! I like to cut the ribs into individual servings and serve them with a side of sauce for dipping.
But here's a little secret I've learned over the years: don't be afraid to get your hands dirty! Some of the best moments are when you're pulling the meat off the bone and savoring that juicy, tender goodness.
Part 5: Tips and Tricks: Elevating Your Rib Game
Here are a few extra tips and tricks I've picked up over the years to make your rib-cooking journey even more enjoyable:
Using a meat thermometer: A Tool for Precision
A meat thermometer isn't strictly necessary, but it's a great way to ensure your ribs are cooked to perfection. Aim for an internal temperature of 190 degrees Fahrenheit (90 degrees Celsius). This temperature ensures that the meat is tender and juicy.
Adding Smoke: Infusing a Smoky Flavor
If you're after that extra smoky flavor, you can add wood chips to your oven. Soak the wood chips in water for about 30 minutes, then drain them and place them on a small piece of aluminum foil.
Make a small hole in the foil and place the wood chips near the ribs. As the wood chips heat up, they will release smoke, infusing your ribs with a wonderful smoky flavor.
Experimenting with Flavors: Unlocking Culinary Creativity
Don't be afraid to get creative with your seasonings and sauces. Experiment with different spice blends, herbs, and even fruits to add unique flavor profiles to your ribs.
One of my favorite combinations is a blend of brown sugar, maple syrup, and a dash of cayenne pepper. It's sweet, smoky, and slightly spicy – a true crowd-pleaser.
Part 6: FAQs: Answering Your Rib-Related Questions
Here are some frequently asked questions about cooking ribs in the oven:
1. Can I Cook Ribs in a slow cooker?
Absolutely! Slow cookers are fantastic for ribs. Simply follow the same seasoning and cooking instructions as above, but cook the ribs on low heat for 6-8 hours. The slow cooker will do all the work, allowing you to relax and enjoy the aroma of cooking ribs filling your home.
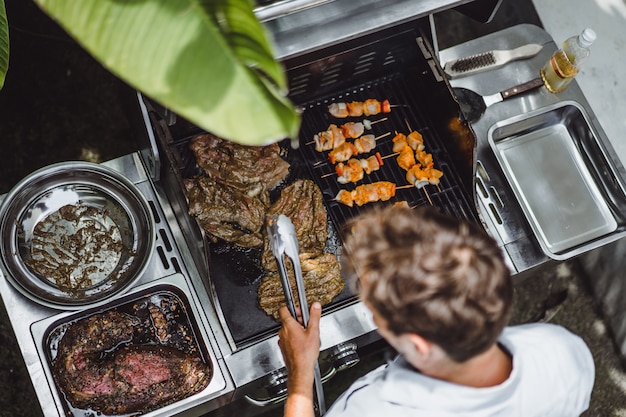
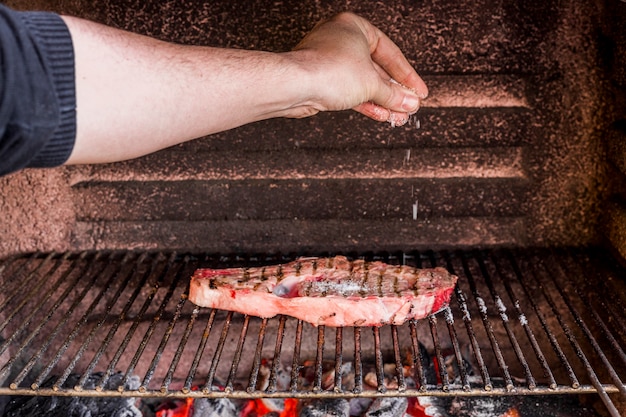
2. Can I Use a Grill for My Ribs?
Yes! grilling ribs is a classic barbecue method. You can achieve that smoky flavor and crispy bark with a grill. Just be sure to use indirect heat and control the temperature carefully to avoid burning the ribs.
3. Can I Freeze Ribs?
You can freeze ribs for up to 3 months. Wrap them tightly in plastic wrap and then in aluminum foil for best results. Allow the ribs to thaw in the refrigerator overnight before cooking.
4. What Are Some Side Dishes to Serve With Ribs?
As I mentioned before, my go-to side dishes include baked beans, potato salad, and coleslaw. But you can also get creative with options like cornbread, mac and cheese, or even grilled vegetables.
5. How Do I Know If My Ribs Are Done?
The best way to know if your ribs are done is to check for tenderness. The meat should be so tender that it falls off the bone. You can also use a meat thermometer, as mentioned earlier, to ensure the internal temperature reaches 190 degrees Fahrenheit (90 degrees Celsius).
Part 7: Conclusion: A culinary journey Complete
Cooking ribs in the oven might seem daunting at first, but with a little patience and the right techniques, you can create a culinary masterpiece. Remember, it's all about taking your time and using low and slow cooking methods to achieve that melt-in-your-mouth tenderness. And don't be afraid to experiment with different flavors and seasonings to find what you like best.
I hope this guide has been helpful and inspired you to try your hand at cooking ribs. Happy cooking, and enjoy those ribs!
Everyone is watching

Prime Rib Roast Cooking Time Chart: Per Pound Guide
Cooking TipsPrime rib roast. Just the name conjures images of lavish dinners, crackling fires, and hearty laughter. It’s ...

How Long to Bake Potatoes in the Oven (Perfect Every Time)
Cooking TipsBaked potatoes are a staple in my kitchen. They're incredibly versatile, delicious, and surprisingly easy to m...

Perfect Rice Every Time: The Ultimate Guide to Cooking Rice
Cooking TipsAs a self-proclaimed foodie, I've always been a bit obsessed with rice. It's the foundation of countless cuisi...

The Ultimate Guide to Cooking Asparagus: Tips, Techniques, and Recipes
Cooking TipsAsparagus. The mere mention of this spring delicacy conjures up images of vibrant green spears, crisp and burs...

Ultimate Guide to Cooking the Perfect Thanksgiving Turkey
Cooking TipsThanksgiving. Just the word conjures up images of overflowing tables laden with delicious food, the scent of r...