Let's be honest, ham is a classic. But it's one of those things we often buy pre-cooked, ready to slice and serve. There's nothing wrong with that, of course, but there's something truly special about cooking raw ham from scratch. It’s a journey from a humble slab of meat to a centerpiece that will leave everyone at the table saying, "Wow, this is amazing!" And trust me, the effort is totally worth it.
Now, you might be thinking, "Raw ham? That sounds complicated!" And it can be a bit intimidating at first. There’s the whole brining thing, the roasting, the temperature checks... But don't worry, I'm here to break it down for you. I've been cooking ham for years, and I've learned a few things along the way. I've had my fair share of mishaps, like that time I forgot to check the oven temperature and ended up with a slightly overdone ham. (Not a good look!) But through trial and error, I've developed a method that works like a charm, and I'm excited to share it with you.
So grab a comfy seat, maybe a cuppa, and let's dive into the art of cooking raw ham.
(Part 1) Choosing the Right Ham - It's a Ham-tastic Adventure

The first step is picking the right ham. And believe me, it's a bit of an adventure. There are so many different types out there, each with its own unique character. You've got bone-in, boneless, whole, and half hams, and then you've got different curing methods: dry-cured, wet-cured, smoked. It can be overwhelming, but don't worry, we'll navigate this ham-tastic jungle together.
types of ham - The Ham Family Tree
- bone-in ham: These hams are the traditional, classic choice. They have the bone still attached, which adds a richer, deeper flavour and makes carving a bit more of an experience. You've got that satisfying "crack" when you hit the bone.
- boneless ham: These are the convenience champions. They're easy to slice and serve, and they're great for sandwiches, salads, and those impromptu ham-and-cheese cravings. However, they do tend to be a bit less flavourful than their bone-in counterparts.
- whole ham: This is a hefty beast, typically weighing around 15-20 pounds. Perfect for a big family gathering or a feast fit for a king! (Or queen, of course.)
- Half Ham: This is a more manageable size, great for smaller gatherings or families who don't want to go overboard with ham. (Although, who can resist a good ham?)
Curing Methods - The Ham's Secret Sauce
- dry-cured ham: These hams are cured with salt, sugar, and sometimes other spices, and then hung to dry for months. They have a seriously intense flavour – salty, slightly sweet, and often a bit funky. Think prosciutto, Serrano ham, and Jamón Ibérico. These are real connoisseur hams.
- wet-cured ham: These hams are cured in a brine, which is basically a salty water bath with sugar and other seasonings. They're cured for a shorter time than dry-cured hams and have a more mellow flavour. Most hams you find in the supermarket are wet-cured.
- smoked ham: These hams are usually cured with brine, then smoked over wood chips. That smoky flavour is what makes these hams so irresistible. They can be either dry-cured or wet-cured, giving you a lot of options.
My Personal Pick - The Ham That Gets Me Excited
For my taste, I'm a sucker for a bone-in, wet-cured ham, smoked over hickory wood. It's got that classic smoky flavour, but it's not overpowering, and the bone adds a lovely depth. But remember, taste is subjective! Experiment, find what you love, and don't be afraid to get adventurous with your ham choices.
(Part 2) Brining the Ham - The Secret to Juicy, Tender Goodness

Okay, so you've got your ham. Now, here comes the magic: brining. Some folks might say it's optional, but I'm here to tell you – don't skip it! Brining is the secret ingredient that transforms a good ham into a truly magnificent one. It rehydrates the ham, making it ridiculously juicy and tender. Plus, it helps distribute the flavour evenly, so every bite is a symphony of deliciousness.
The Brining Process - A Simple, Yet Powerful Transformation
Brining is basically soaking your ham in a salt-based solution called a brine. The salt draws moisture out of the ham, then pulls it back in, infused with the brine's flavour. This keeps the ham juicy and tender, and it helps enhance that salty, savoury flavour we love in ham.
Making the Brine - It's Easier Than You Think
You'll find tons of brine recipes, but here's a simple one that's a classic for a reason:
- 1 gallon of water: The base of your brine, so make sure it's fresh and clean.
- 1 cup of kosher salt: Don't be shy with the salt! This is what does the magic.
- 1 cup of brown sugar: This adds a touch of sweetness, balancing out the saltiness.
- 1/2 cup of black peppercorns: A little punch of pepper to complement the saltiness.
- 1/4 cup of bay leaves: A touch of earthy flavour that elevates the whole thing.
- 1/4 cup of garlic cloves: Garlic adds a pungent, savoury dimension.
Brining Time - Patience is Key
How long you brine your ham depends on its size. A good rule of thumb is to brine for 1-2 days per pound. So, a 10-pound ham gets 10-20 days of brining love. You do this in the fridge, so it's a pretty hands-off process. Just set it and forget it (almost)!
Remember, you can always adjust the brine to your taste. Add different spices, use honey instead of brown sugar, get creative! The goal is to create a ham that's perfect for your palate.
(Part 3) Preparing the Ham - Getting It Ready for the Roast

Okay, your ham is brined to perfection. Now, it's time to get it ready for roasting. First, give it a thorough rinse with cold water to remove any excess salt and spices. Then, pat it dry with paper towels. You want it dry so that the skin gets nice and crispy.
Scoring the Skin - A Crucial Step for Crispy Goodness
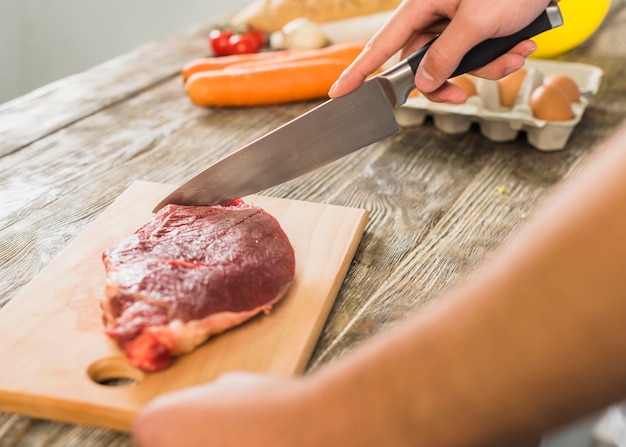
Now comes scoring the skin. This is essential for that beautiful, crispy skin we all crave. Scoring helps the fat to render, creating that golden-brown, crackling texture. I'm not a fancy chef, so I keep it simple. I use a sharp knife to make diagonal cuts about 1/2 inch apart, not cutting too deep – just scoring the skin.
Adding a Glaze - A Touch of Sweetness and Flavor
This part is optional, but it's a game-changer. A glaze adds a lovely touch of sweetness and flavour, and it gives your ham that irresistible glossy finish. There are endless glaze options, but I'm a big fan of a simple honey mustard glaze.
Here's a quick recipe:
- 1/2 cup of honey: Adds sweetness and that beautiful golden color.
- 1/4 cup of Dijon mustard: Tangy flavour and helps bind the glaze.
- 1 tablespoon of apple cider vinegar: A touch of acidity to balance out the sweetness.
Combine these in a saucepan and simmer over low heat until it thickens. It shouldn't take long, just a few minutes. Once it's thick, you're ready to coat your ham!
(Part 4) Roasting the Ham - Slow and Steady Wins the Race
Time to put that ham in the oven! You're going for a low and slow roast, about 325°F (165°C). This ensures even cooking and keeps the ham juicy.
roasting time - A General Guide
The roasting time depends on your ham's size. A good rule is 15-20 minutes per pound. So, a 10-pound ham will take about 2-3 hours. But remember, every oven is different, so you might need to adjust the time. It's all about that perfect ham!
Monitoring the Ham - Basting and Temperature Checks
While the ham is roasting, check in every 30 minutes or so. Baste it with the glaze, coating the whole thing. The glaze keeps the ham moist and adds that glorious golden colour. And don't forget the most crucial step: check the internal temperature. Use a meat thermometer inserted into the thickest part of the ham, avoiding the bone. The USDA recommends an internal temperature of 145°F (63°C) for safety.
(Part 5) Resting the Ham - Let the Juices Redistribute
The ham is cooked, but don't jump right into slicing. Let it rest for at least 15 minutes. This allows the juices to redistribute throughout the ham, creating a more tender and juicy experience. It's a small step, but a big difference in flavor.
Covering the Ham - Keeping it Warm and Moist
While it's resting, cover the ham with foil. This keeps it warm and prevents it from drying out. It's like a cozy blanket for your delicious ham.
(Part 6) Carving the Ham - A Little Knife Work Magic
Now, for the grand finale: carving the ham. Don't worry, it's not as intimidating as it sounds. If you're using a bone-in ham, use the bone as a handle, making carving easier. Use a sharp carving knife to slice the ham into thin, even slices. Carve against the grain to prevent the meat from being tough. It's a little culinary artistry that makes all the difference.
(Part 7) Serving the Ham - A Feast for the Senses
Alright, your ham is carved and ready for its starring role. I'm a fan of serving mine with mashed potatoes, green beans, and cranberry sauce – a classic combo that never fails. But the possibilities are endless! Add some roasted vegetables, a salad, a bread pudding… Let your creativity run wild.
Leftovers - Ham Heaven
leftover ham? Don't even think about throwing it away! It's a gift that keeps on giving. Sandwiches, salads, omelets, even ham and bean soup – you name it, leftover ham can make it better. It's also great frozen for future use. Just wrap it tightly in plastic wrap and foil, then place it in a freezer-safe bag.
(Part 8) Tips for Cooking Raw Ham - Some Extra Wisdom
Here are a few more nuggets of wisdom to help you achieve ham perfection:
- Don't overcook it: Overcooked ham is a tragedy! Dry, tough, and a sad sight. Always check the internal temperature and remove it from the oven at 145°F (63°C).
- Glaze it up: Don't be afraid to get adventurous with glazes. Honey, maple, brown sugar, fruit preserves – the options are endless. Find your favourite flavour combination and let your ham shine.
- Trust the thermometer: It's the only way to ensure your ham is cooked through and safe to eat. No guesswork allowed!
FAQs - Your Ham-Related Questions Answered
1. What if I don't have time to brine the ham?
Life happens, and sometimes you just don't have the luxury of a long brine. You can skip it, but your ham will be a bit drier. To compensate, use a glaze that's heavy on moisture, like a honey glaze or a maple glaze, and baste frequently during cooking.
2. Can I cook a raw ham in the slow cooker?
It's not ideal, but you can. The oven is better for ensuring a more evenly cooked ham. If you're set on the slow cooker, use a cured and smoked ham. It'll still be delicious, just not as perfect as oven-roasted.
3. How long can I store leftover ham in the refrigerator?
Up to 4 days. Wrap it tightly in plastic wrap and store it in a container or in the fridge. You can also freeze it for longer storage.
4. Can I freeze raw ham?
Not recommended. Freezing raw ham can affect the texture and flavour. It's best to freeze ham after it's been cooked.
5. What are some other ways to use leftover ham?
The possibilities are endless! Use it in casseroles, soups, stews, ham and bean soup, ham and potato soup, even a ham and cheese quiche. The world is your ham-inspired oyster!
There you have it! My complete guide to cooking raw ham. It's a dish that's both impressive and delicious, and it's sure to become a family favourite. So go on, give it a try, and discover the joy of a perfectly cooked ham. You won't regret it!
Everyone is watching

Prime Rib Roast Cooking Time Chart: Per Pound Guide
Cooking TipsPrime rib roast. Just the name conjures images of lavish dinners, crackling fires, and hearty laughter. It’s ...

How Long to Bake Potatoes in the Oven (Perfect Every Time)
Cooking TipsBaked potatoes are a staple in my kitchen. They're incredibly versatile, delicious, and surprisingly easy to m...

Perfect Rice Every Time: The Ultimate Guide to Cooking Rice
Cooking TipsAs a self-proclaimed foodie, I've always been a bit obsessed with rice. It's the foundation of countless cuisi...

The Ultimate Guide to Cooking Asparagus: Tips, Techniques, and Recipes
Cooking TipsAsparagus. The mere mention of this spring delicacy conjures up images of vibrant green spears, crisp and burs...

Ultimate Guide to Cooking the Perfect Thanksgiving Turkey
Cooking TipsThanksgiving. Just the word conjures up images of overflowing tables laden with delicious food, the scent of r...
