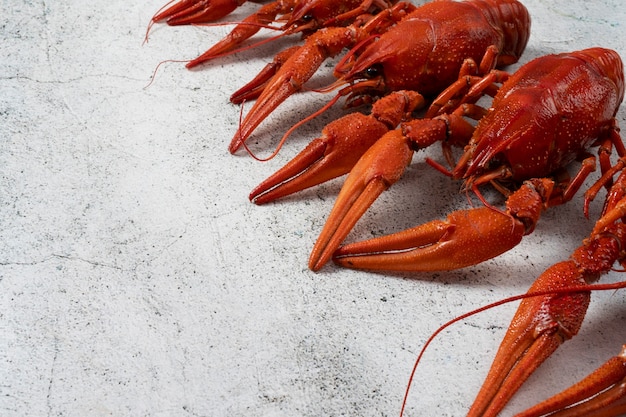
Oh, the joys of king crab legs! Those majestic, meaty, and utterly delicious crustaceans are a true seafood delight. As a self-proclaimed seafood enthusiast, I can tell you there's nothing quite as satisfying as cracking open a juicy king crab leg and savouring that sweet, succulent meat. But let's be real, cooking king crab legs perfectly can be a bit of a culinary adventure. Getting the timing right, the temperature just so, and avoiding overcooked, rubbery legs is a challenge even experienced cooks face. Trust me, I've been there! So, I'm here to share my hard-earned wisdom and guide you through the entire process, from selecting the freshest crab to achieving that perfect, tender, and flavour-packed result. You'll be a king crab cooking master in no time!
Part 1: choosing the right crab

Before we even think about boiling, steaming, or grilling, we need to choose the right king crab legs. And that, my friends, is a crucial first step. I've learned that fresh is always best, so look for legs that are a vibrant red or orange, with a firm texture. The legs should smell fresh, with a hint of the sea, and never have any fishy odour. If you're buying frozen, make sure they are frozen solid, free of ice crystals, and look for legs that haven't been sitting around for ages. You want those legs to be as fresh as the day they were caught!
1.1: Fresh vs. Frozen:
Personally, I always go for fresh king crab legs whenever possible, but I understand frozen can be more convenient. If you're opting for frozen, I recommend checking the expiration date and buying them from a reputable source. Remember, frozen crab legs can be a little bit more challenging to cook evenly, so be prepared for a slightly longer cooking time to ensure the meat is perfectly cooked through.
1.2: Size Matters:
When it comes to size, it’s really a matter of personal preference. I enjoy the variety and tend to go for a mix of sizes. Larger legs usually have more meat, which is great for sharing, but they can be a bit more challenging to cook evenly. Smaller legs cook faster and are perfect for individual servings. The choice is yours!
Part 2: The Essential Gear

Alright, so you've got your king crab legs. Now, we need to talk about the tools that will make this cooking adventure a success. I'm talking about the equipment that will help you conquer those crustaceans and unleash their delicious potential. No need for fancy gadgets, just the essentials.
2.1: The Pot:
A large, sturdy pot is essential for cooking your crab legs. You need something that can accommodate all those legs without them overcrowding and potentially getting stuck together, making it difficult to cook evenly. I prefer a stockpot or a large dutch oven. Make sure it's big enough to hold at least twice the volume of the crab legs. You need ample space for the water to circulate freely and cook the legs evenly. Don't worry about the size, you can always adjust the amount of water you use.
2.2: The Tools:
You'll need a few other tools to make your life easier and your crab-cracking experience enjoyable. I always have a pair of heavy-duty kitchen shears on hand, along with a crab cracker. The shears are excellent for cracking open the leg joints and accessing the meat, while the crab cracker can help with those tough, smaller joints. A good quality crab fork is also a great investment, making it easier to extract the meat from the legs. These tools are your secret weapons in your battle against those crab legs!
Part 3: Preparing the Crab

Right, now we're getting down to the nitty-gritty. Before you even think about boiling, steaming, or grilling those crab legs, you need to get them prepped. It’s a crucial step, you know, like putting on your apron before you start baking a cake.
3.1: Thawing Frozen Crab:
If you're working with frozen crab legs, it's essential to thaw them thoroughly before cooking. I recommend thawing them in the refrigerator overnight. It's the gentlest way to ensure even thawing and prevents the crab legs from getting soggy. You can also thaw them in cold water, but make sure you change the water every 30 minutes to keep it cold and prevent bacterial growth. Whatever method you choose, make sure those legs are completely thawed before you start cooking.
3.2: Cleaning the Crab:
Alright, let’s get those crab legs ready for their culinary transformation. First, we need to clean them. Now, I’m not talking about a full-blown spa day. We’re just removing any unwanted bits and bobs. Start by rinsing the crab legs under cold water. Then, use a brush or a damp cloth to scrub away any dirt or debris. I like to use a vegetable brush – it’s gentle enough for the delicate crab legs.
3.3: The Optional Rinse:
Now, you’ve got a choice to make. Some chefs recommend giving the crab legs a quick rinse in saltwater before cooking, but I find it’s not necessary. However, if you’re feeling adventurous, you can add a pinch of salt to your water and give the crab legs a good soak. It can add a subtle, salty flavour to the meat. But, if you're like me and prefer a simpler approach, feel free to skip this step. Your taste buds will thank you either way!
Part 4: Boiling the King Crab Legs
Now, we're getting to the heart of the matter. Boiling is a classic way to cook king crab legs, and it’s a method I’ve used for years. It’s simple, straightforward, and yields delicious results.
4.1: Getting the Water Ready:
Fill a large pot with enough water to cover the crab legs by at least an inch. I always add a couple of inches of water to be on the safe side. Add salt to the water. Don’t be shy with the salt – it’s crucial to bring out the flavour of the crab meat. I use about a tablespoon of salt for every gallon of water. You can also add other flavourings, like lemon juice, bay leaves, or black peppercorns, but I prefer a simple, classic flavour. Let's keep things simple and let those crab legs shine!
4.2: The Boiling Point:
Bring the water to a rolling boil. You want to make sure the water is bubbling vigorously before you add the crab legs. That way, they’ll cook evenly and quickly. Just imagine those bubbles enveloping the legs, creating a symphony of flavour.
4.3: Add the Crab:
Carefully add the crab legs to the boiling water. You need to do this gently, so you don’t splash hot water all over yourself. Make sure the legs are completely submerged in the water. If you’ve got a lot of legs, you might need to add them in batches to prevent overcrowding. Give those legs a gentle bath in the boiling water.
4.4: The Timing is Crucial:
Here’s where it gets a bit tricky. The cooking time for king crab legs depends on their size and thickness. Smaller legs typically take about 8-10 minutes, while larger legs might need 15-20 minutes. The best way to check if the legs are cooked is to insert a skewer or a sharp knife into the thickest part of the leg. If the meat is opaque and flakes easily, it's ready.
4.5: Don’t Overcook!
One of my biggest mistakes with crab legs was overcooking them. You know, when they become tough and rubbery? Not good. Overcooked crab legs are a culinary crime. So, be vigilant and check those legs regularly. Once they’re cooked, immediately remove them from the water using tongs and place them in a colander to drain. Don't let those legs linger in the boiling water - they'll turn into rubbery nightmares!
Part 5: Steaming the King Crab Legs
Okay, let’s talk about steaming. It’s a healthier option than boiling, and it delivers a delicate flavour. I’ve found that steaming can be a little bit more challenging to get right than boiling, but with some practice, you’ll become a steaming pro.
5.1: The Steamer:
For steaming, you’ll need a steamer basket that fits comfortably in a large pot. You can use a bamboo steamer basket, a stainless steel one, or even a simple colander. Make sure it's a good quality steamer that won't collapse under the weight of the crab legs.
5.2: The Water:
Fill the pot with about an inch of water and bring it to a boil. You want enough water to create a good amount of steam but not so much that it drowns your crab legs. Add salt and any flavourings you desire to the water. I find that a simple pinch of salt and a few bay leaves do the trick. Allow those flavourings to infuse the steam and infuse your crab legs with a beautiful aroma.
5.3: Add the Crab:
Carefully place the crab legs in the steamer basket and lower it into the pot, ensuring the crab legs are above the waterline. Cover the pot with a tight-fitting lid and let the steam do its magic. Let those steamy vapours work their wonders on your crab legs.
5.4: The Steaming Time:
The steaming time will vary depending on the size of the crab legs. Smaller legs generally take about 10-12 minutes, while larger legs might need 15-20 minutes. The best way to check for doneness is to insert a skewer or a sharp knife into the thickest part of the leg. If the meat is opaque and flakes easily, you’re good to go. Don't forget to check the meat's texture and colour - those are your tell-tale signs of perfectly steamed crab legs!
Part 6: Grilling the King Crab Legs
Now, for those adventurous souls who want to grill their crab legs, I’m here to help you conquer the grill. Grilling adds a smoky flavour and char to the crab legs, which elevates the overall taste. It's a fantastic way to add a smoky twist to your crab legs!
6.1: The Prep:
Preheat your grill to medium heat. You want the grill to be nice and hot to sear the crab legs and create those beautiful grill marks. A hot grill is essential for achieving that delicious char.
6.2: The Sauce:
Before you place those crab legs on the grill, I recommend giving them a good brush with a flavourful sauce. I like to use a simple butter mixture with a touch of garlic, lemon juice, and fresh herbs. You can also experiment with other sauces, like a spicy chili glaze or a tangy citrus marinade. Let your creativity flow and find a sauce that perfectly complements your grilling style.
6.3: Grilling Time:
Place the crab legs on the grill and cook them for about 4-5 minutes per side, or until the shell is slightly charred and the meat is opaque. Again, you can check for doneness by inserting a skewer or a knife into the thickest part of the leg. Don't let those crab legs burn! Keep a close eye on them, flipping them regularly to ensure even cooking.
6.4: Don’t Forget to Flip:
Remember to flip those crab legs to ensure even cooking. The grilling time will vary depending on the size of the legs and the heat of the grill. Keep an eye on them and adjust the grilling time accordingly. The perfect grill marks and smoky flavour will be worth the effort.
Part 7: Serving and Enjoying the King Crab Legs
You've made it! Your king crab legs are cooked to perfection. Now, it’s time to serve them up and enjoy the fruits of your labour. Get ready to savour that delicious, juicy crab meat!
7.1: Serving Suggestions:
King crab legs are best served hot. I like to present them on a platter with melted butter, lemon wedges, and a side of cocktail sauce. You can also add other accompaniments, like a salad, steamed vegetables, or a simple side of rice. I’m partial to a green salad with a light vinaigrette dressing. It’s a nice contrast to the rich flavour of the crab. Let your creativity shine with your serving arrangements and create a feast that will delight your taste buds!
7.2: Cracking Those Legs:
Here comes the fun part. You’ve got your crab legs, your butter, and your sauces. Now, it’s time to crack into those beauties. Start by breaking off the smaller joints using your hands or a crab cracker. Then, use your kitchen shears to cut through the larger joints. You should be able to pull the meat out with a fork or your fingers. If you’re feeling adventurous, try using a crab fork – it’s designed specifically for extracting that sweet, juicy meat.
Part 8: Leftovers?
Okay, so you’ve enjoyed your delicious king crab feast, but you’ve got some leftovers. Don’t worry, I’ve got you covered. leftover crab legs are a culinary treasure. You can store them in the refrigerator for up to 3 days. When you’re ready to reheat them, you can use the same methods as you did initially – boil, steam, or grill them. Just remember to reheat them thoroughly before serving.
8.1: Leftover Ideas:
Leftover king crab legs are a versatile ingredient. You can use them in salads, pasta dishes, soups, or even sandwiches. Get creative and enjoy those delicious crab legs to the fullest. I love to make a crab salad sandwich with mayo, celery, and a touch of lemon juice. It’s a quick and satisfying meal. Let those leftovers inspire you to create some culinary masterpieces!
FAQs
Let’s address some common questions about king crab legs.
| Question | Answer |
|---|---|
| How long does it take to cook king crab legs? | The cooking time for king crab legs depends on their size and the cooking method. Smaller legs usually take 8-10 minutes to boil, 10-12 minutes to steam, or 4-5 minutes per side to grill. Larger legs may need 15-20 minutes for each method. Always check for doneness to ensure the meat is cooked through. |
| How do I know if king crab legs are cooked? | The best way to check for doneness is to insert a skewer or a sharp knife into the thickest part of the leg. If the meat is opaque and flakes easily, it's cooked. You can also use the colour of the meat as an indicator - it should be opaque and not translucent. |
| What can I do with leftover king crab legs? | Leftover king crab legs can be used in salads, pasta dishes, soups, or even sandwiches. You can also reheat them and enjoy them as is. Get creative and experiment with different flavours! |
| What is the best way to store king crab legs? | fresh king crab legs should be kept refrigerated for up to 3 days. frozen king crab legs can be stored in the freezer for several months. Make sure they are properly wrapped to prevent freezer burn. |
| What is the difference between king crab legs and snow crab legs? | King crab legs are larger and meatier than snow crab legs. They also have a sweeter and more delicate flavour. Both are delicious options, but each offers a unique taste and texture experience. |
There you have it, my friends. A complete guide to cooking king crab legs perfectly. Follow these tips and techniques, and you’ll be enjoying some of the most delicious seafood around. Just remember to be patient, have fun, and don’t be afraid to experiment. And, most importantly, enjoy that sweet, juicy crab meat!
Everyone is watching

Prime Rib Roast Cooking Time Chart: Per Pound Guide
Cooking TipsPrime rib roast. Just the name conjures images of lavish dinners, crackling fires, and hearty laughter. It’s ...

How Long to Bake Potatoes in the Oven (Perfect Every Time)
Cooking TipsBaked potatoes are a staple in my kitchen. They're incredibly versatile, delicious, and surprisingly easy to m...

Perfect Rice Every Time: The Ultimate Guide to Cooking Rice
Cooking TipsAs a self-proclaimed foodie, I've always been a bit obsessed with rice. It's the foundation of countless cuisi...

The Ultimate Guide to Cooking Asparagus: Tips, Techniques, and Recipes
Cooking TipsAsparagus. The mere mention of this spring delicacy conjures up images of vibrant green spears, crisp and burs...

Ultimate Guide to Cooking the Perfect Thanksgiving Turkey
Cooking TipsThanksgiving. Just the word conjures up images of overflowing tables laden with delicious food, the scent of r...
